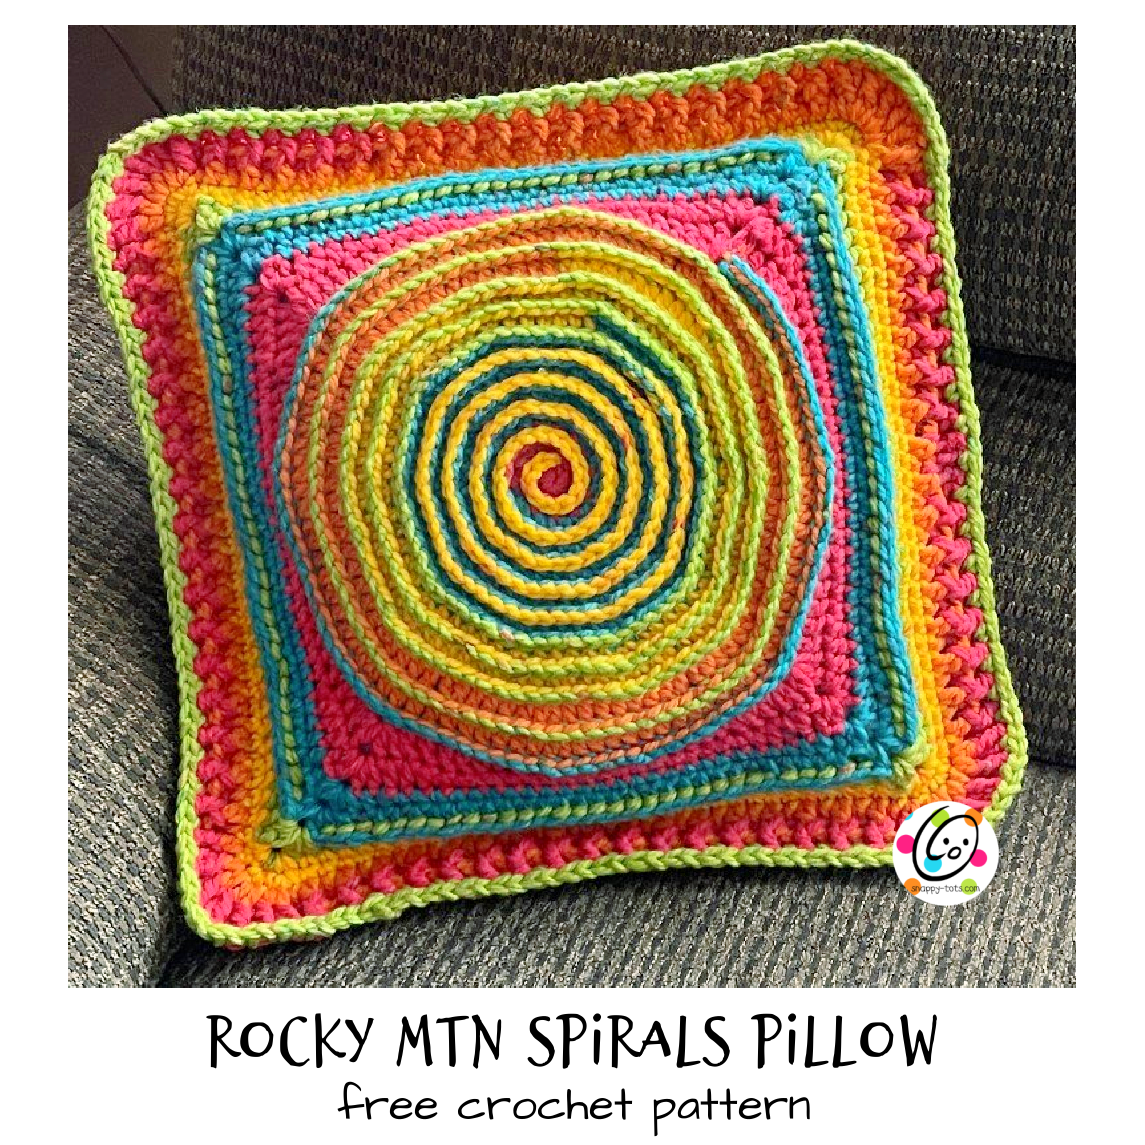
Free Pattern: Rocky Mtn Spirals Pillow
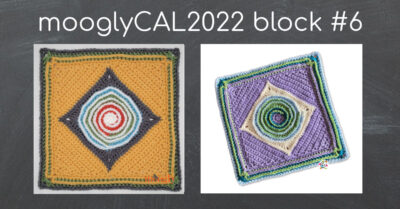
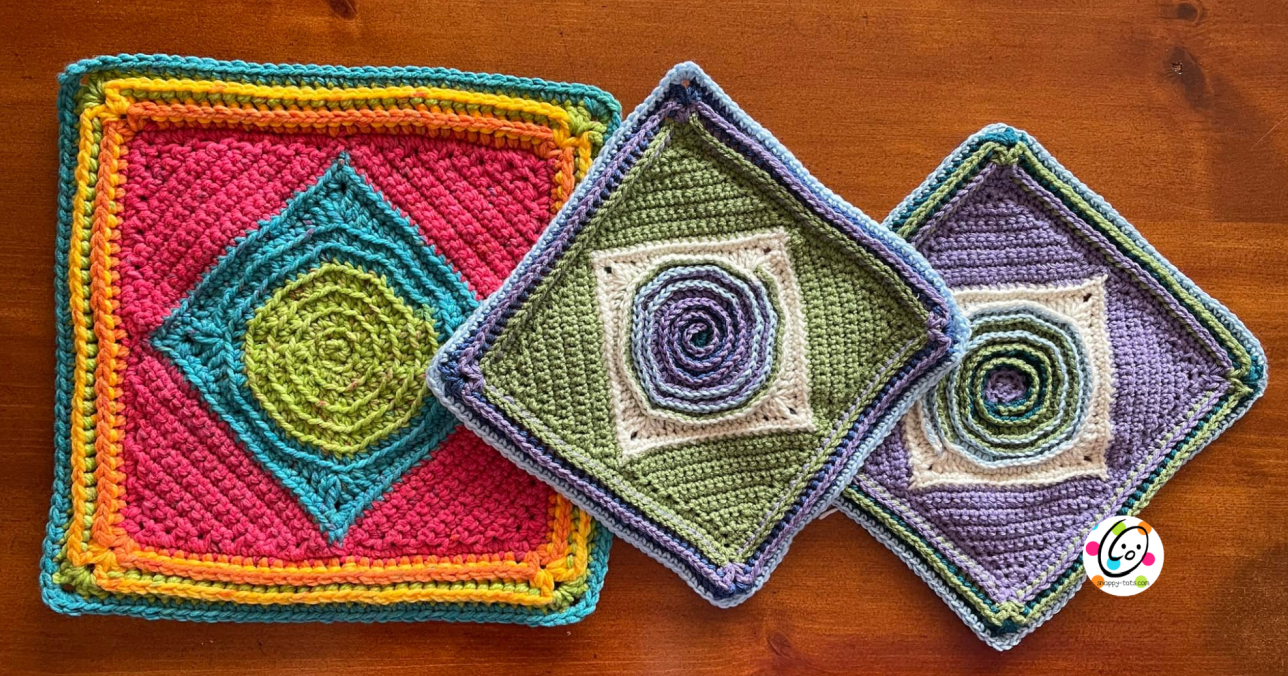
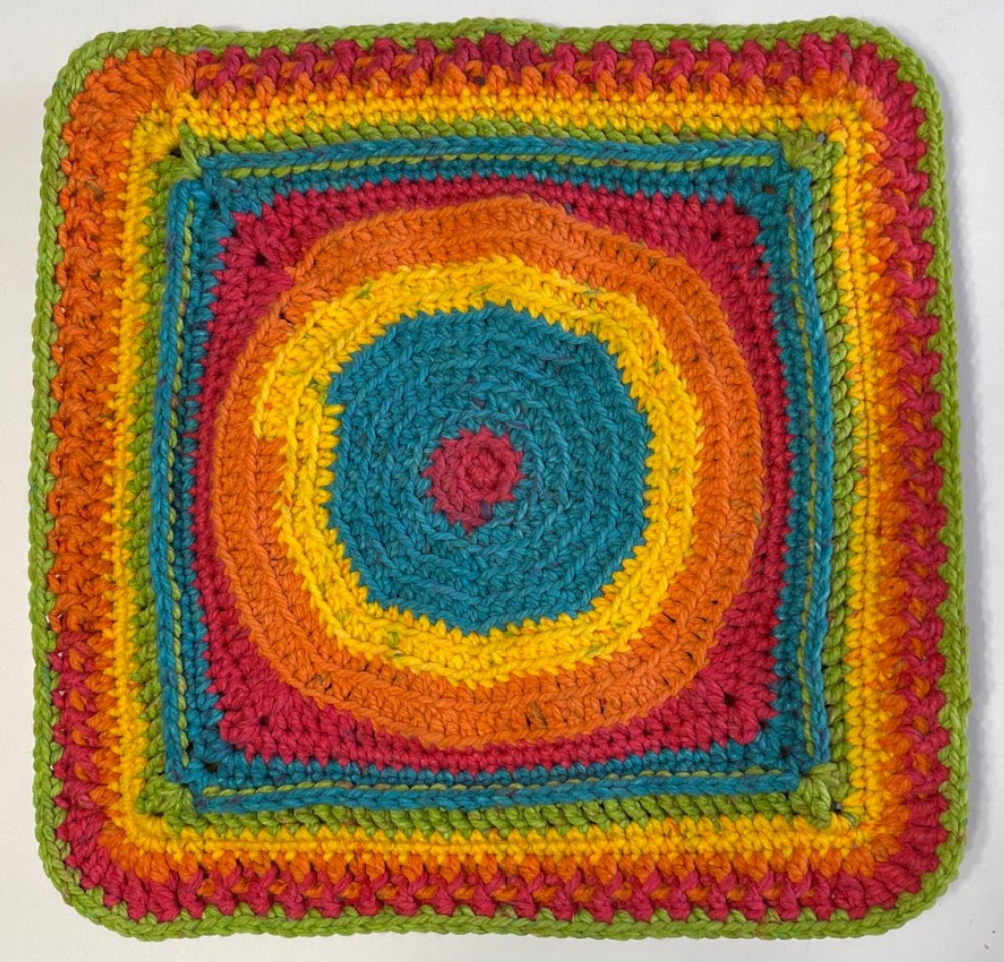
Earlier this year I designed a pattern for a 12″ crocheted block for the 2022 Moogly’s annual crocheted afghan. I was VERY HAPPY to see tons of people made and enjoyed my square, “Rocky Mtn. Spiral Square“. WHEW! I am NOT a block designer so I get a little stressed about it, but I do LOVE being part of that project and I like how the design came together.
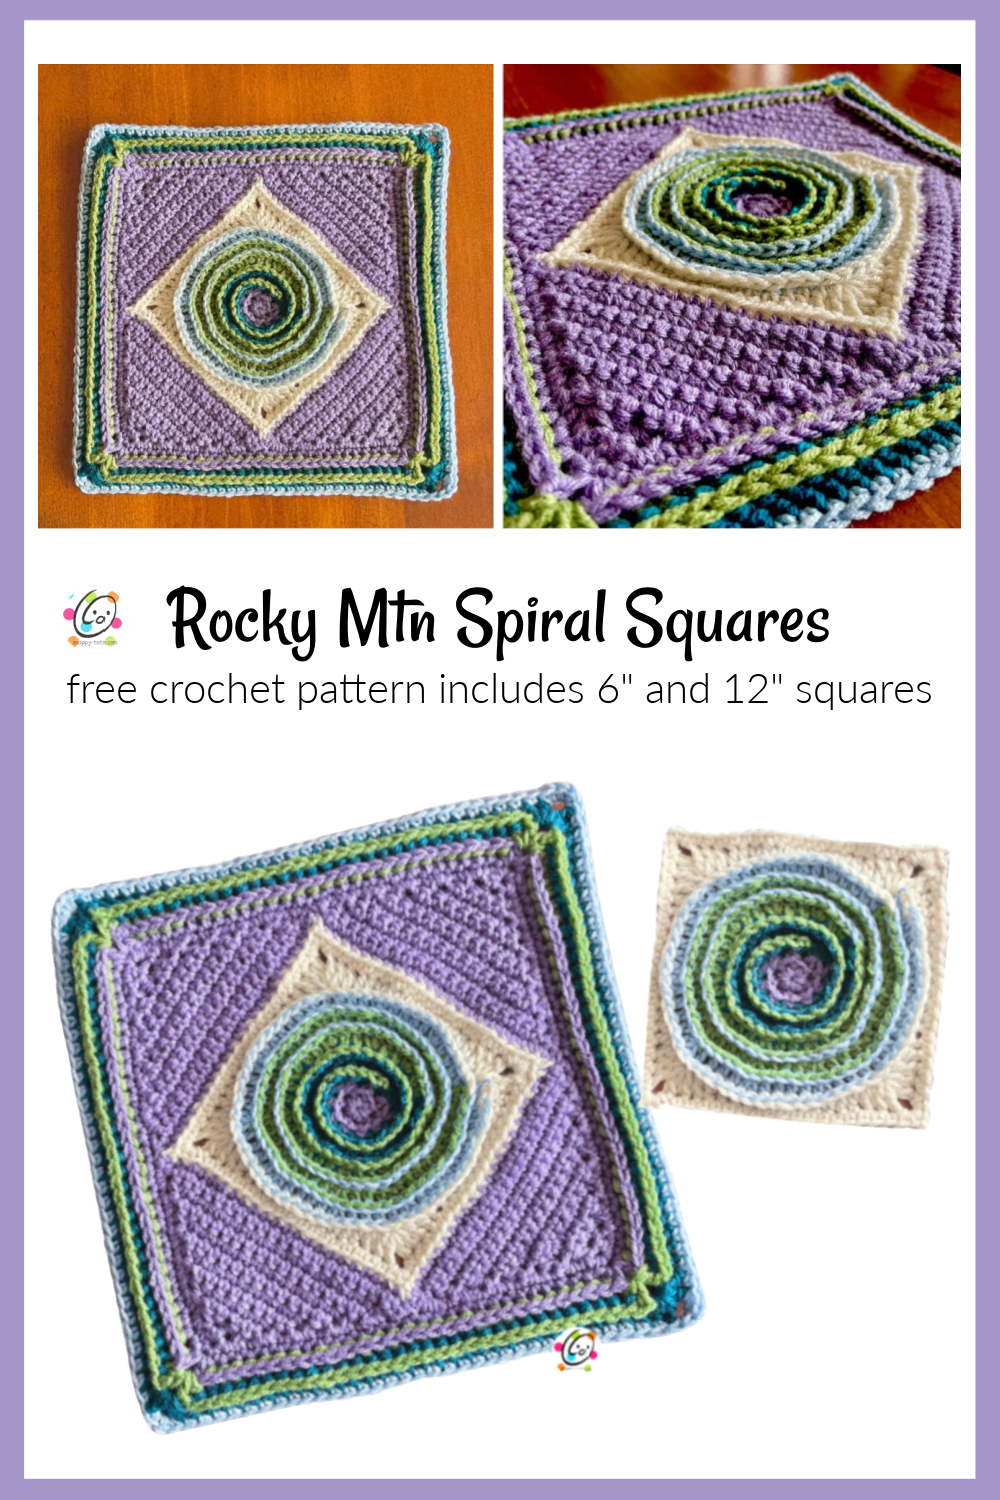
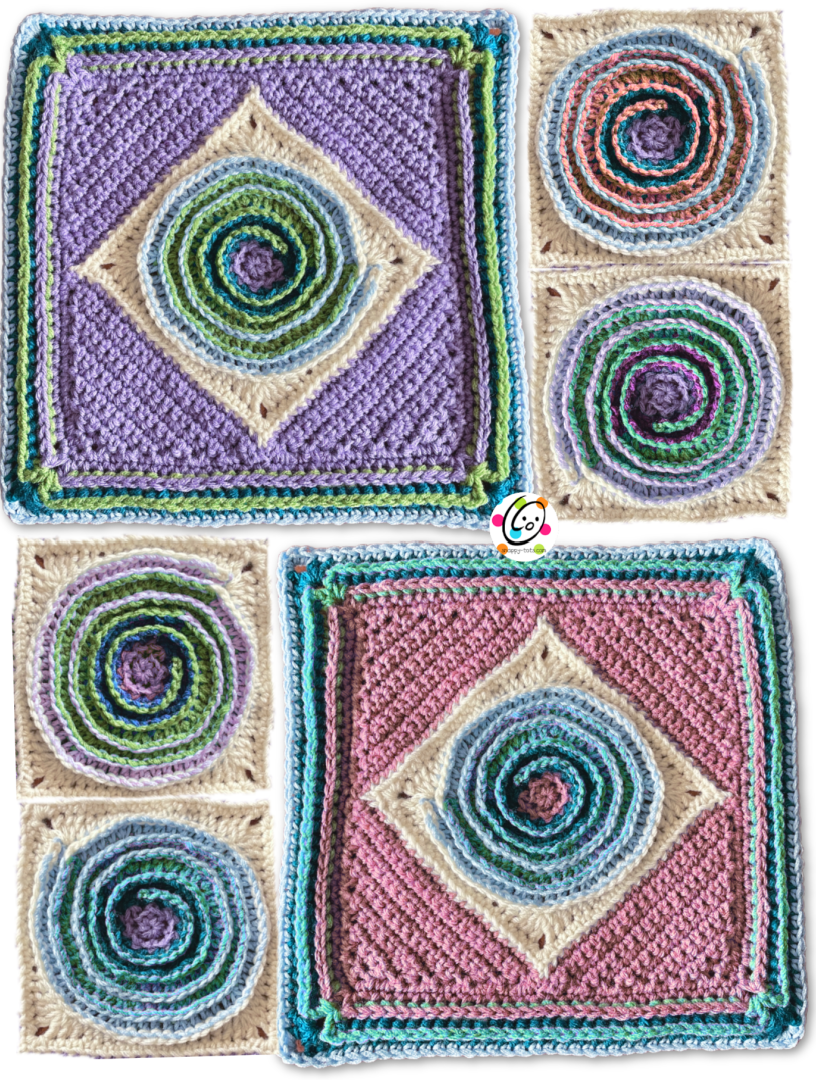
The center ended up being a 6″ square (totally a miracle) and works really nicely with the 12″. These are cute together for a blanket or pillow. There are a lot of color possibilities with these. Check out Moogly’s version.
That Was Fun So Let’s Make More
I had some Caron Chunky Cakes that I wanted to use for a pillow for my sister. I decided to try this design. I LOVE it!
… and then I got playing with it and tried a block with a spiral for the full middle section… and that became this pillow! I LOVE it and it now happily lives in Delaware with my sis.
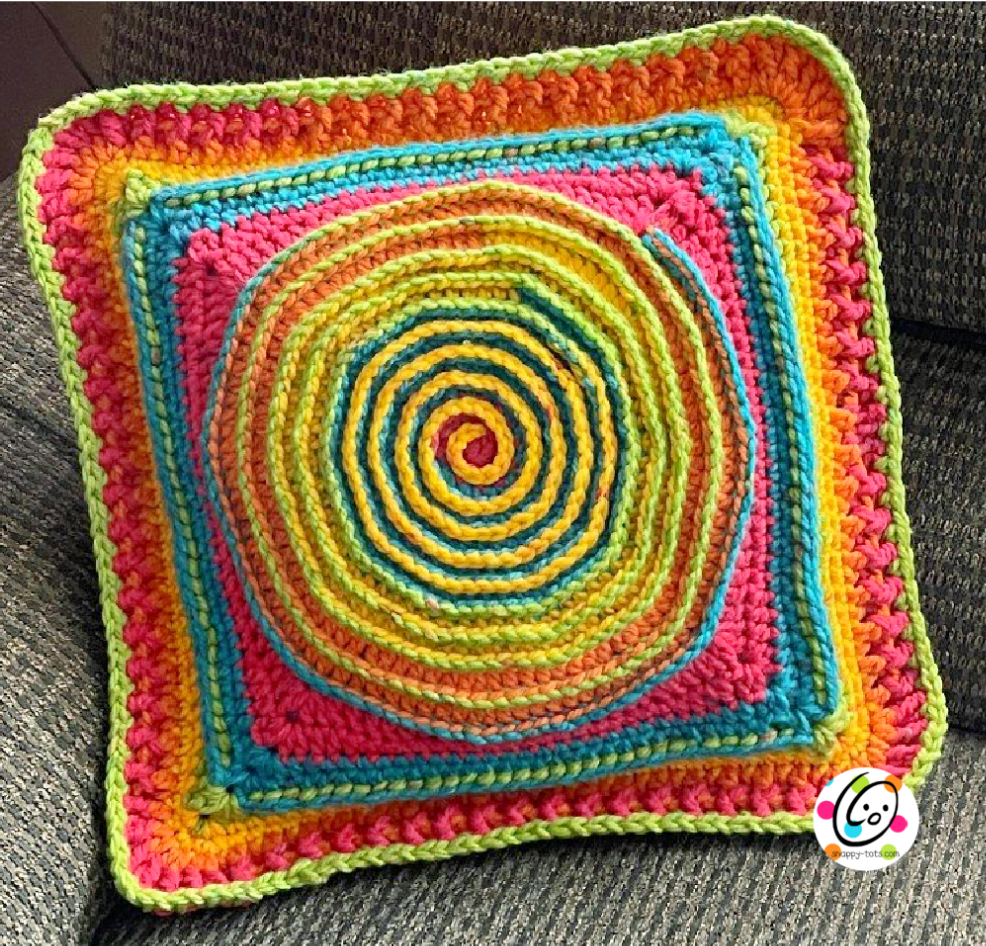
Rocky Mtn Spirals Pillow
The instructions for the pillow are available below. A downloadable ad-free pdf is available to purchase from my Ravelry shop.
New pattern sale: Get this pattern for just $1 until 8/22/22. No coupon needed. The discount will be applied in the cart. This is designed to match my “Rocky Mtn. Spirals Square”. That pattern is also $1 for a limited time.
Materials and Details for chunky weight version
- Yarn: per 18” square – 160 yards chunky yarn; Pillow Ruffle – 100 yards Yarn colors used in sample: Caron Chunky Cakes Rainbow Jellys
- Crochet Hook: J (6mm)
- Notions: Yarn needle for weaving in ends, stuffing or pillow form
- Measurements: 18” squares
Materials and Details for worsted weight version
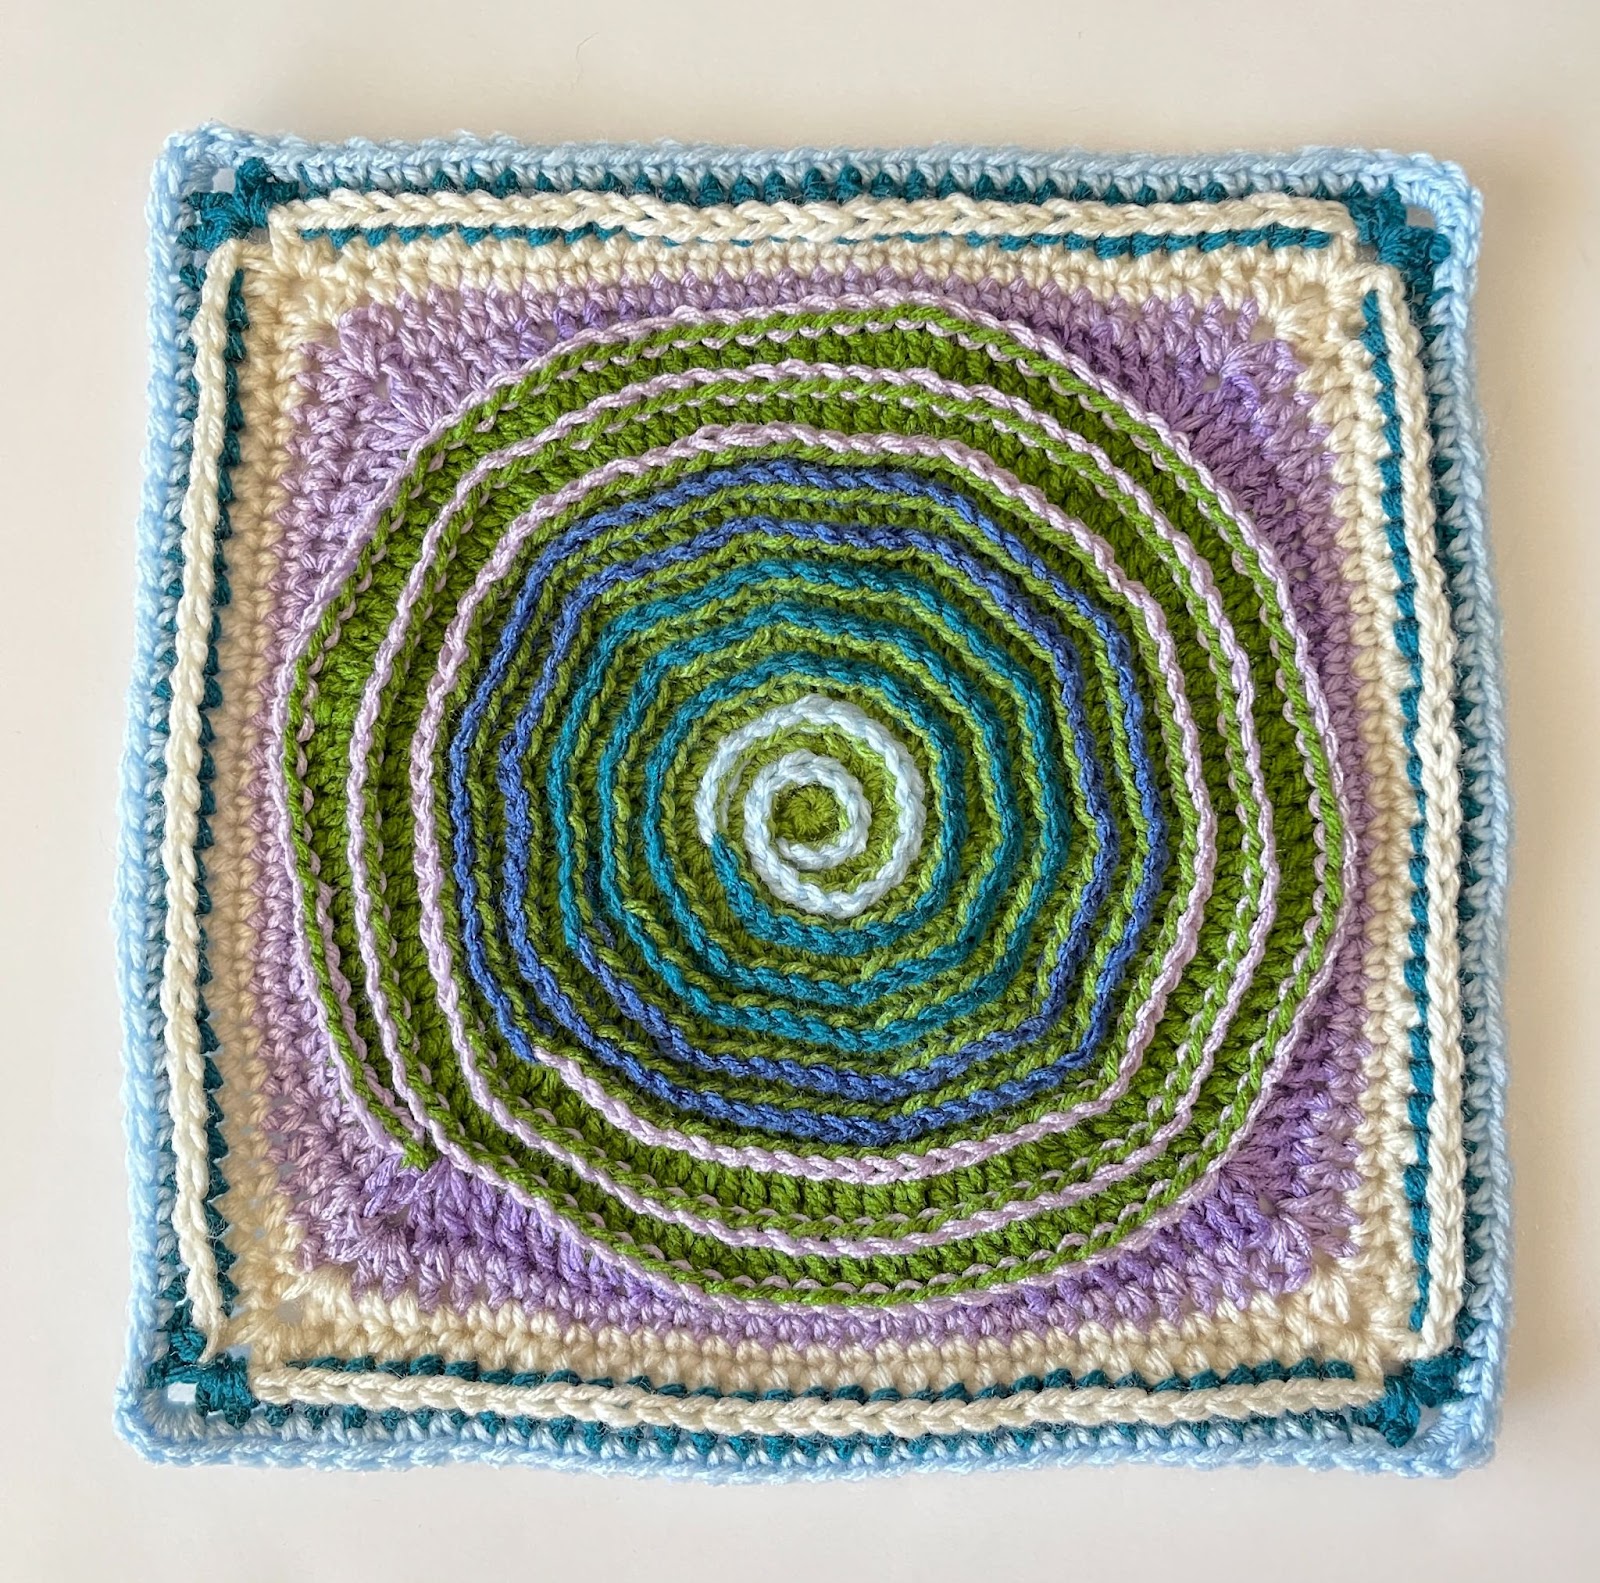
- Yarn: 12” square – 100-125 yards ww yarn Yarn colors used in sample: Red Heart With Love Lilac, Mallard, Lettuce, Iced Blue, Aran
- Crochet Hook: J (6mm)
- Notions: Yarn needle for weaving in ends, stuffing or pillow form
- Measurements: 12” squares
Tips
- Numbers at the beginning of each line may refer to steps and not indicate the number of rows.
- If you have any questions about this pattern please contact [email protected].
Directions
Instructions are written for color changes as shown in the worsted weight/ lavender, cream, and teal sample. Change colors as desired or use a self-striping yarn. Additional rounds will be added to the spiral section after block is complete.
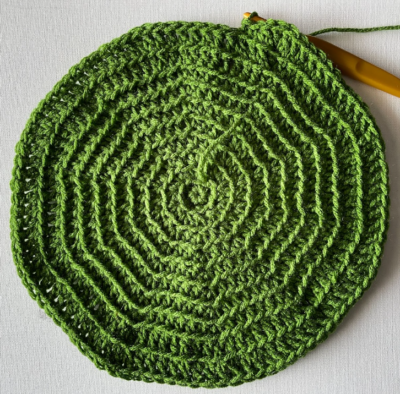
1. With a J hook and yarn color of choice (green in sample), start with a magic circle of 5 sc sts (or preferred method for starting a circle of 5 sc sts), pull closed and place a marker for working in the round. (5sts)
2. 2sc in each st until 1 st remains, 2sc in the next st, changing colors before the last st is complete (see photo below). (10sts)

Note: The following rounds are worked in BLO (Back Loops Only) until noted (after step #8).
3. (sc, hdc) in next st, 2hdc in each st to end of round. (20sts)
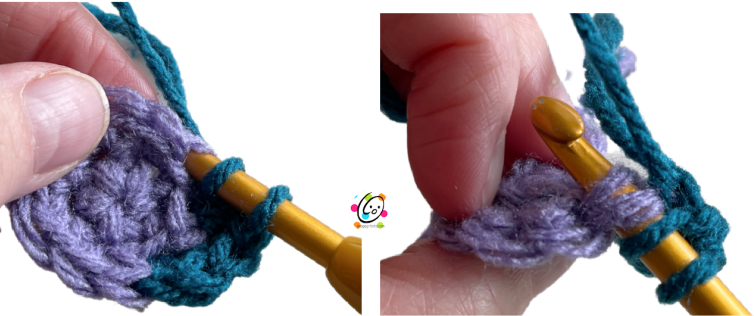
Tip: To prevent holes when working in BLO, I work into the back loop + the 3rd loop behind the st (see photos below).
4. *hdc, 2hdc in next st*, repeat to end of round. (30sts)
5. *hdc 2, 2hdc in next st*, repeat to end of round. (40sts)
6. *hdc 3, 2hdc in next st*, repeat to end of round. (50sts)
7. *hdc 4, 2hdc in next st*, repeat to end of round. (60sts)
8. *hdc 5, 2hdc in next st*, repeat to end of round. (70sts)
9. *hdc 6, 2hdc in next st*, repeat to end of round. (80sts)
10. Notice the change in stitch starting with this round. *dc 9, 2dc in next st*, repeat to end of round. (88sts)
11. *dc 10, 2dc in next st*, repeat to end of round. (96sts)
12. This step is to lower the height of the row and is not a complete round. Hdc in the next st, sc, sl st in the next st.
13. Finish off the current yarn and change colors (lavender in sample). The beginning ch counts as a stitch. Ch 2, (dc, ch 2, 2dc) in same space (to form the corner), *dc 4, hdc 3, sc 9, hdc 3, dc 4, (2dc, ch 2, 2dc) in next st (to form corner)*, repeat twice, dc 4, hdc 3, sc 9, hdc 3, dc 4, sl st in top of beginning ch 2 to join. (108sts + 8 chs)
14. Note: Stop working in BLO unless noted on each step.
Sl st to corner space. Ch 2, (hdc, ch 2, 2hdc) in corner space, sk 1, hdc 3, sc 19, hdc 3, sk 1, *(2hdc, ch 2, 2hdc) in corner space, sk 1, hdc 3, sc 19, hdc 3, sk 1*, repeat to end of round, sl st in first st to join. (116sts + 8 chs) Note: The skipped st might be a little hidden under the corner cluster.
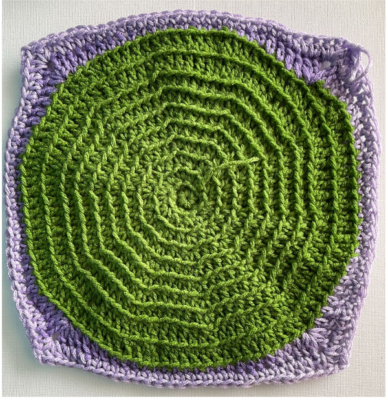
15. Sl st to corner space. Finish off the current yarn and weave in ends. Change colors (cream in sample).
Ch 2, (hdc, ch 2, 2hdc) in corner space, sk 1, hdc 2, sc 23, hdc 2, sk 1, *(2hdc, ch 2, 2hdc) in corner space, sk 1, hdc 2, sc 23, hdc 2, sk 1*, repeat to end of round, sl st in first st to join. (124sts + 8 chs)
16. Sl st to corner space. Finish off the current yarn and weave in ends. Change colors (dark green in sample). The beginning ch counts as a stitch. Ch 2, (dc, ch 2, 2dc) in the same corner space, sk 1 post, BPDC around each post until 1 post remains before the corner (31 posts), sk 1 post, *(2dc, ch 2, 2dc) in corner space, sk 1 post, BPDC around each post until 1 post remains before the corner (31 posts), sk 1 post,* repeat to end of round, sl st in first st to join. Sl st to corner space. (140sts + 8 chs) 11.25”/17” across
17. Finish off the current yarn and change colors (Lt. Blue in sample). Ch 1, *4sc in corner, sk 1, sc 33, sk 1*, repeat to end of round, sl st in first st to join. Finish off and weave in ends. (148sts) 12”/18” across
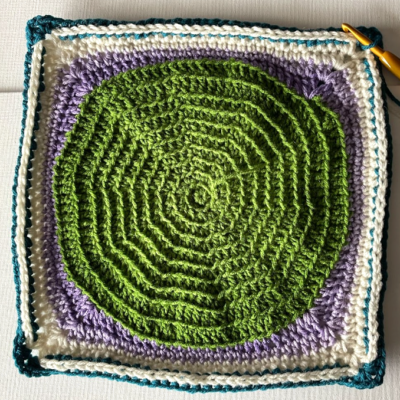
Extra Round (optional if needed for measurement): Ch 1, *4sc in corner, sk 1, sc 35, sk 1*, repeat to end of round, sl st in first st to join. Finish off and weave in ends. (156sts)
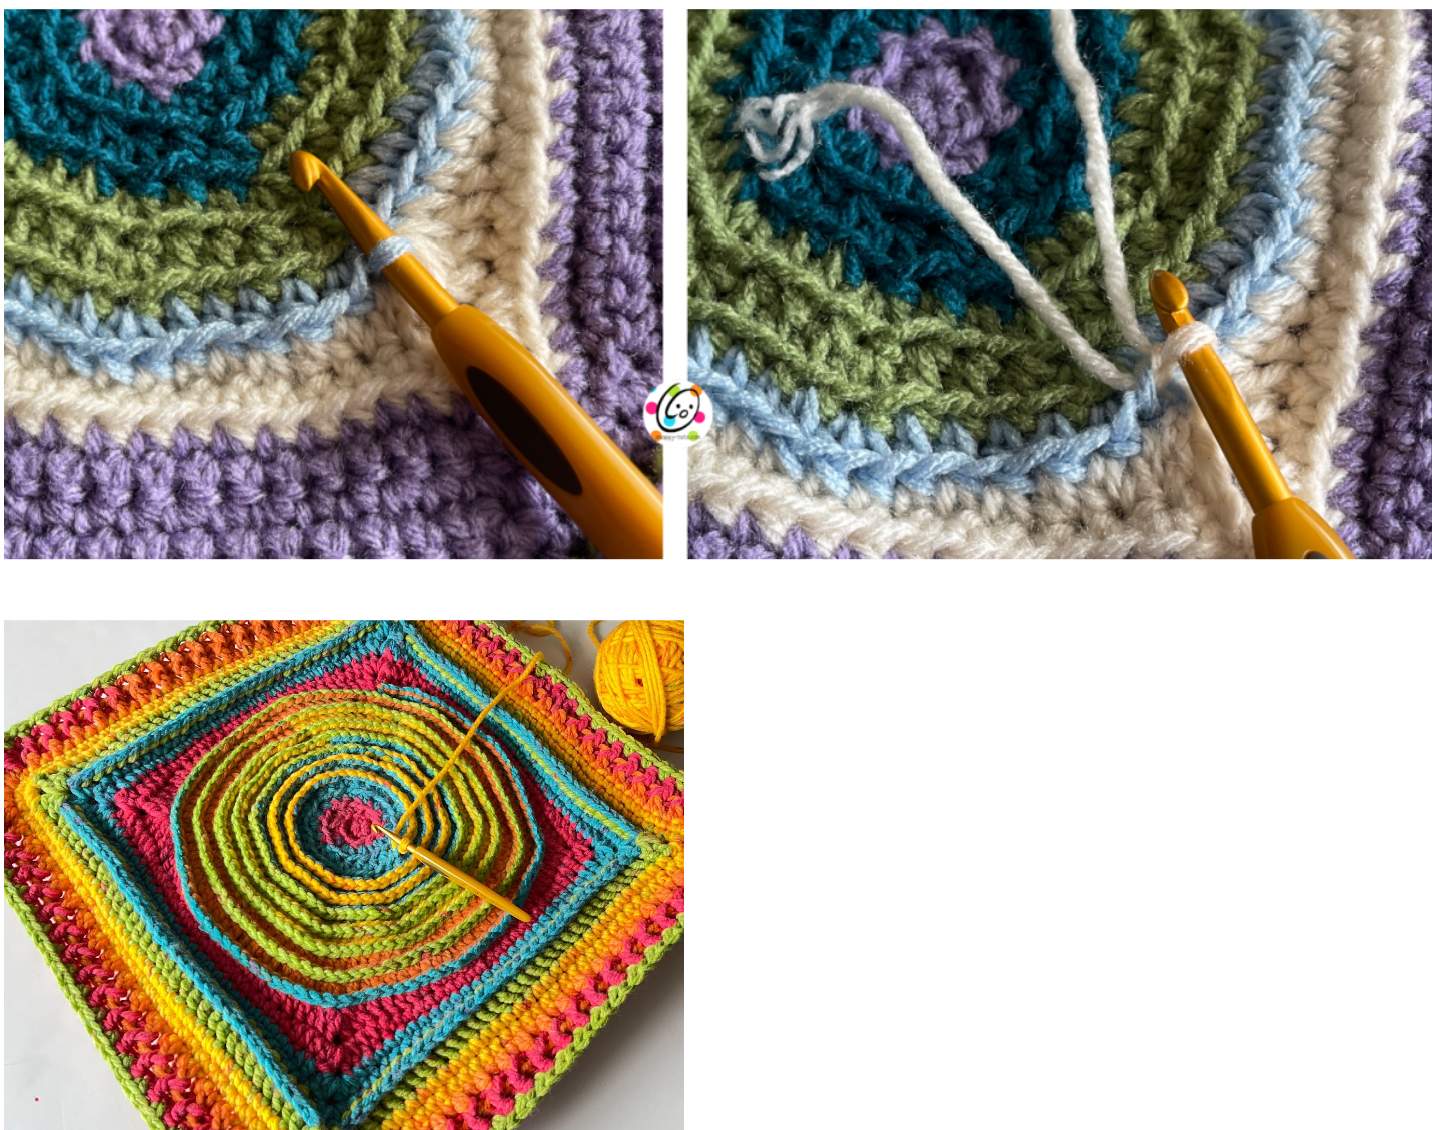
SPIRAL
The colors in the photos below do not match the colors for the main sample or the directions.
Note: For the main sample, I started with Lavender yarn to match the outer edge of the spiral section. After a few rounds I changed to dark green, and then finished with light blue.
With the outer edge of the block towards you, attach yarn to the last front loop of the center section (see photo below, left) . Working in each of the loops (remaining loops), sl st in each stitch, spiraling around, to the center. Finish off and weave in ends.
Pillow
Stack 2 squares on top of each other, wrong sides together.
1. Work this step around the outer edge of the squares, working through both loops of the first 3 sides. Work the fourth side through the front square only, leaving a pocket for stuffing or pillow form.
With a J hook, attach matching yarn to the first of the 4 sts at a corner. Ch 1, sc in the same st, 2sc in the next st, 2sc in the next st, sc 35, *2sc in the next st, 2sc in the next st, sc 35*, repeat one more time, 2sc in the next st, 2sc in the next st. Work the following sts through the front square only, leaving a pocket for stuffing or pillow form. sc 35. Sl st in the first st. (148sts)
2. Ch 2, dc in the same st, 2dc in each of the next 3 sts, dc 36, *2dc in each of the next 3 sts, dc 36*, repeat to end of round, sl st to join. (160sts)
3. Ch 2, FPDC around the next post, [2FPDC around each of the next 6 posts, *BPDC around the next post, FPDC around the next post*, repeat across the side posts], repeat the section between brackets to the end of the round, sl st to join.
4. Finish off the current color and change to a new color. *sc, ch 1, sk 1* repeat to end of round, making sure to not work this too snug. Finish off and weave in ends.
Stuff or insert pillow form.
Sew the open sides together with a yarn needle and matching yarn.
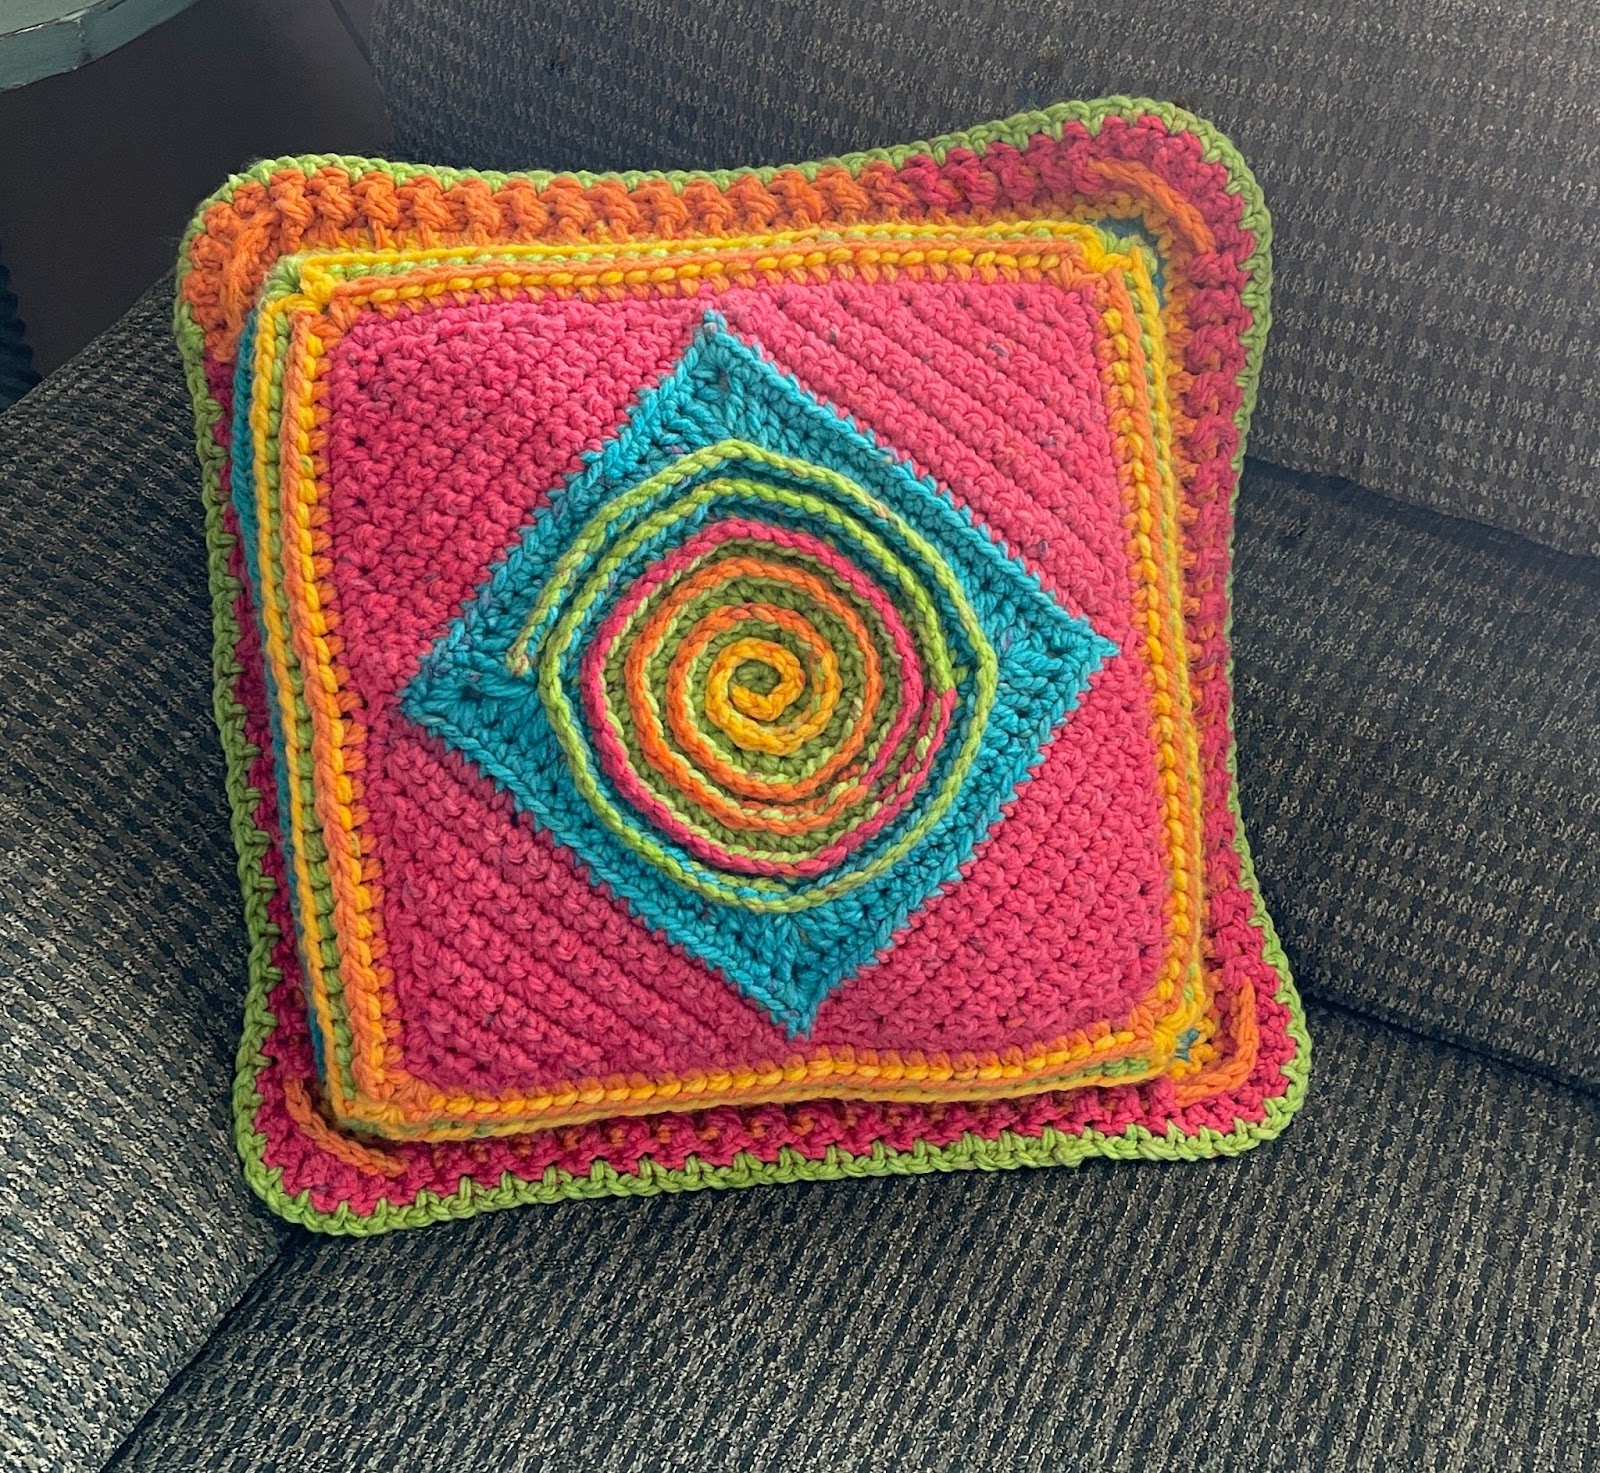
The block in this pattern was designed to match my “Rocky Mtn Spiral Square” and is cute for one side of the pillow too.
Other Snappy Patterns You Might Enjoy
- Spiral Scrubbers
- Blooming With Hope Square (Moogly Cal 2020)
- Farmhouse Squares (Moogly Cal 2019)
- Wedding Square
Pin To Save For Later