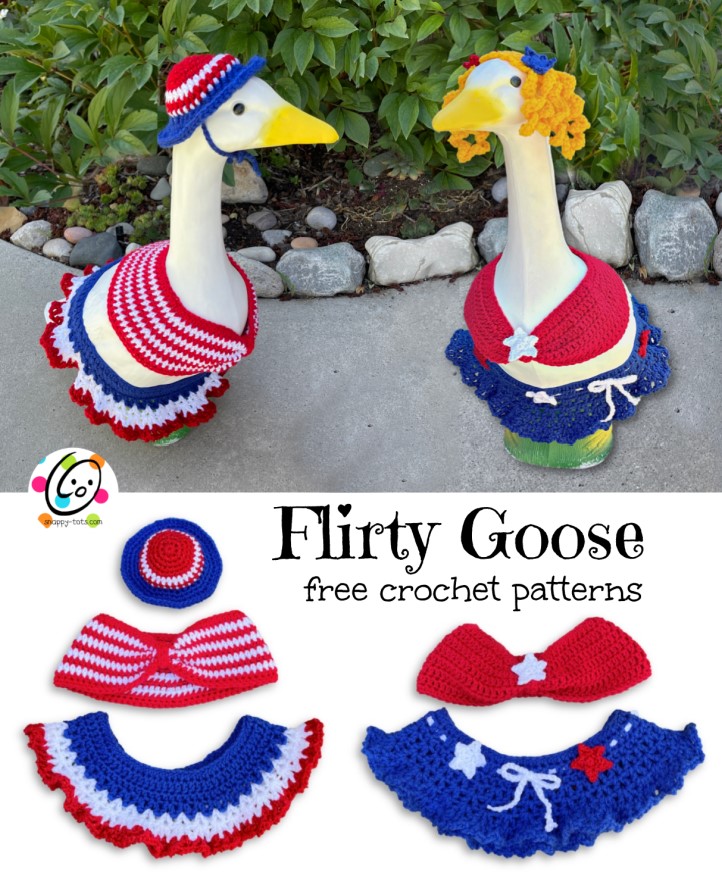
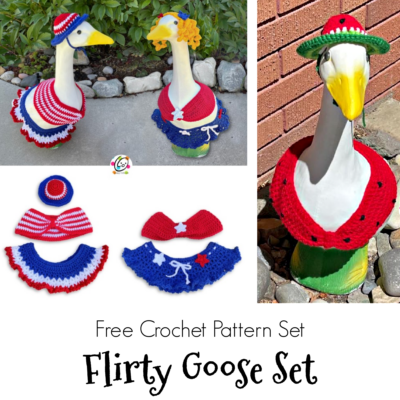
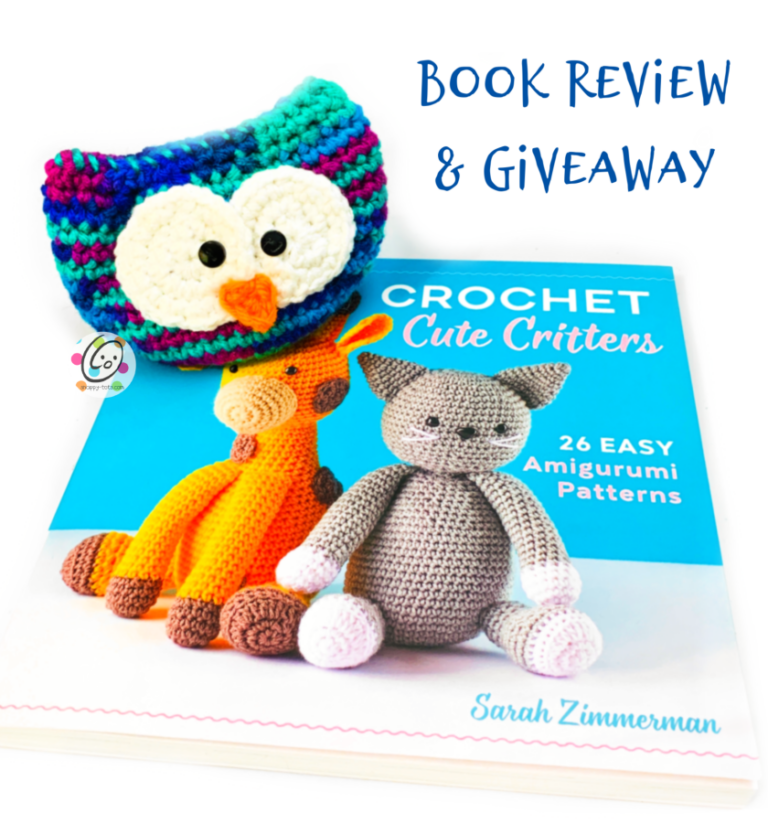
Free Pattern: Flirty Goose Set
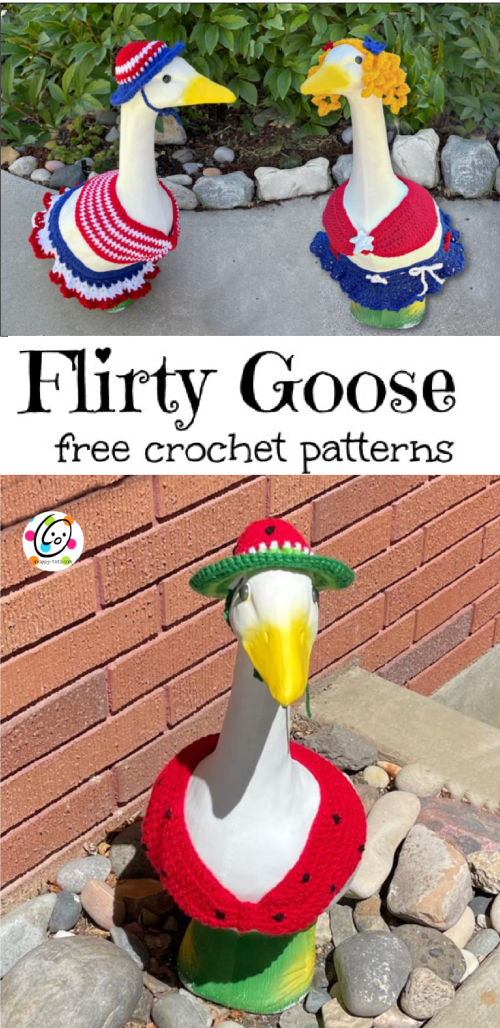
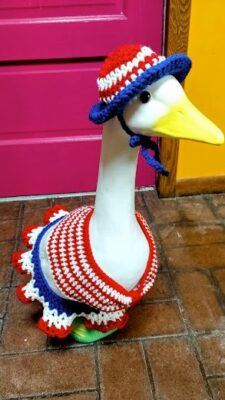
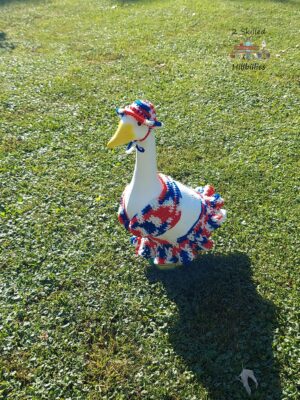
It has been super hot in Utah (and everywhere, right?) so it was time for Ducke and Goose to have some summer outfits. For the 4th of July, I made some patriotic skirts, tops, and sunhats.
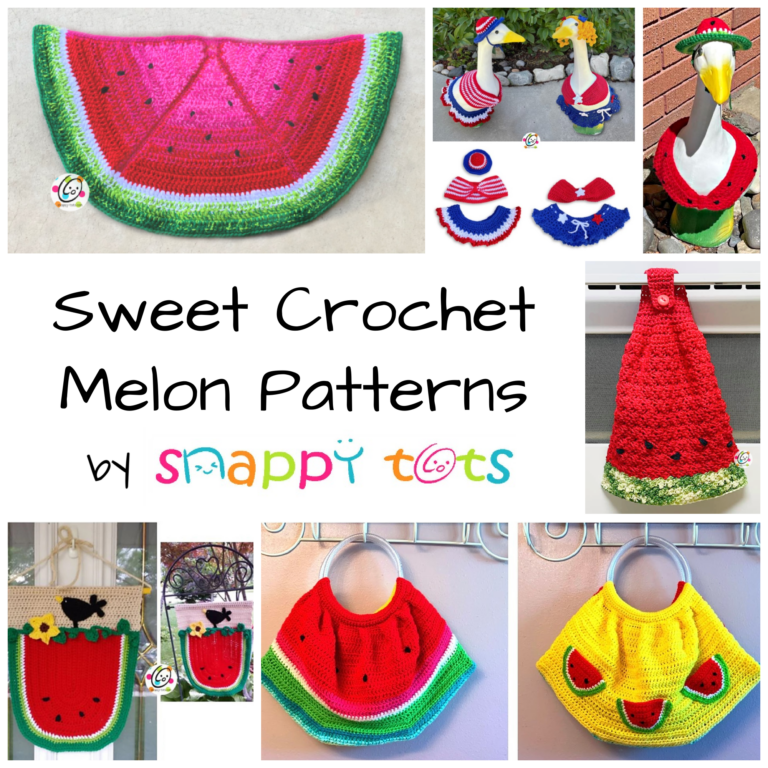
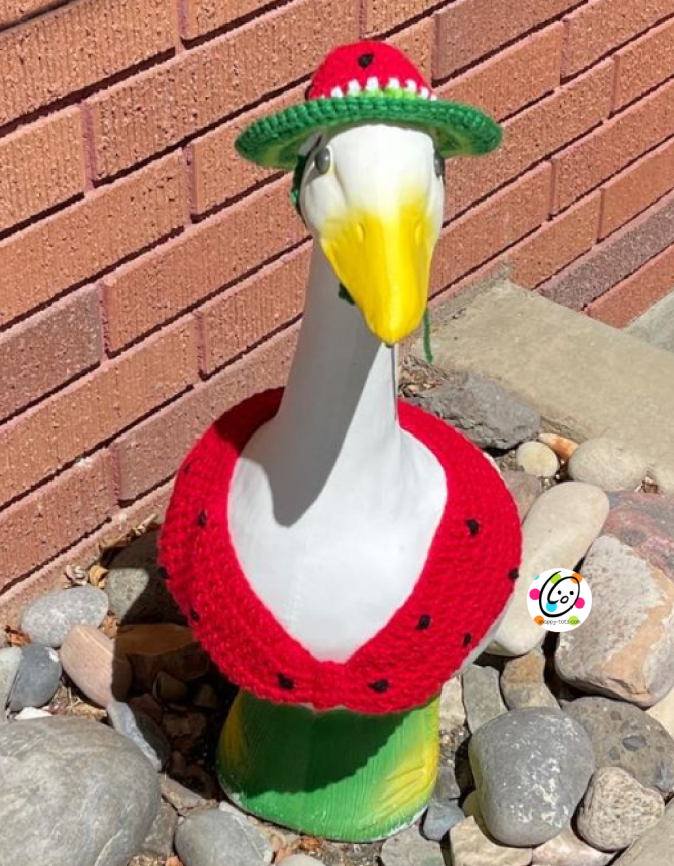
I didn’t get a chance to post the pattern until now, but these could definitely be made in any color. I made a watermelon set.
Scroll down to see some of the awesome creations by my testers!
Watch for more fancy outfits to come each month. You can find the latest “Ducke and Goose” patterns at THIS LINK. See the full list of goose outfits and accessories at THIS LINK.
Where To Get The Goose
This is designed for a 23” goose statue like the one sold by Miles Kimball: https://www.mileskimball.com/buy-large-white-goose-23-h-310493
It is also available from Amazon: https://amzn.to/3AdRWSP
Stylin Geese
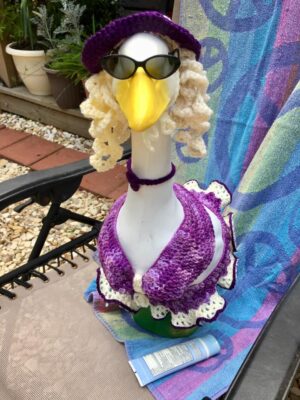
Thank you to my awesome testers for sharing pictures of their creations.


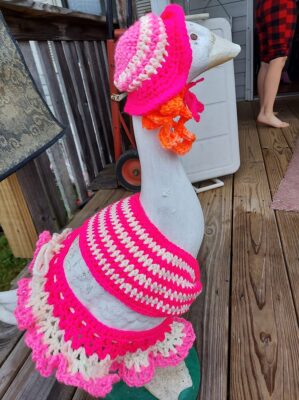


Flirty Goose Set Crochet Pattern
The pattern for the dress is available to view here on the blog. An ad-free, downloadable pdf will also be available to purchase soon.
This pattern includes instructions for a skirt, two tops, and a sunhat.
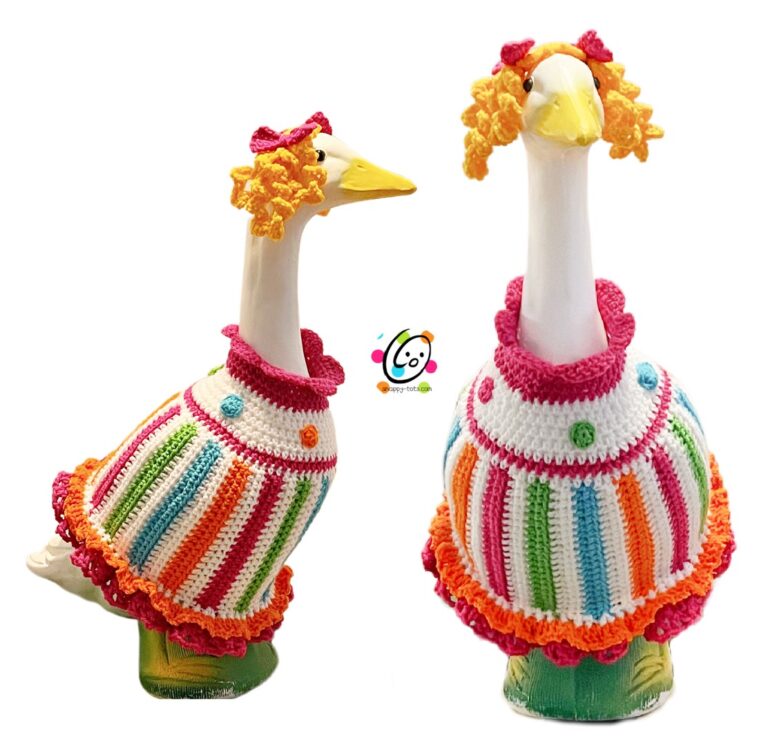
Her wig is available in “Goose Wigs”, a snappy tots pattern.
Materials
- Worsted weight yarn: approximately 200 yards total. Sample colors: Red Heart Super Saver White, Cherry, Royal
- Crochet Hooks: H (5mm), I (5.5mm)
- Supplies: Yarn needle for weaving in ends
- Gauge: 4” with an I hook = 14 hdc sts and 9.5 rows/rounds
Tips
- The first stitch of each row is worked into the same stitch as the turning chain unless noted.
- Numbers at the beginning of each line may refer to steps and not indicate the number of rows/rounds.
- Stitch count remains the same unless noted at end of row/round.
- If you have any questions about this pattern please contact [email protected].
Flirty Skirt
This project starts at the top edge and is worked in rounds. Instructions are written with color changes for the blue, white, and red striped skirt. Substitute colors as desired.
Please make sure you are using a worsted weight yarn similar to Red Heart Super Saver. Thinner worsted weight yarns, such as Caron Simply Soft, will greatly affect the size of the piece.
1. With an I hook and worsted weight yarn (blue in sample), ch 74, sl st in the last ch from hook to join in the round, making sure the ch is not twisted. (74sts)
2. Ch 1, hdc in the same st and in each st to end of round, sl st in the first st to join. (74sts)
Fold in half and measure the piece (side to side). The piece should measure close to 11” across (22” circumference). If it is smaller than 10” across the skirt will not fit your goose and you should go up one size hook. If it is a couple inches bigger (12-13” across) a drawstring can be added to help it stay around the goose. Any bigger than 13” across and I suggest going down a hook size.
3. Ch 1, dc in the same st, dc 35, 2hdc in the next st, dc 36, 2hdc in the next st, sl st in the first st to join. (76sts)
4. Ch 4 (counts as a dc, ch 1), dc in the same st, sk 1, *(dc, ch 1, dc) in the next st, sk 1*, repeat to end of round, sl st in the first space to join. (38 V sts)
5. Finish off the blue yarn and change to white yarn. Ch 4, dc in the same space, (dc, ch 1, dc) in each V st space to the end of the round, sl st in the first space to join.
6. Ch 4, (dc, ch 1, dc) in the same space, (dc, ch 1, dc, ch 1, dc) in each V st space to end of the round, sl st in the first space to join. These clusters create a W shape. (38 W sts)
7. Finish off the white yarn and change to red yarn. The repeat part of this step is worked across each W from the previous round. The photos below are the same. The one on the right marks the W shape and the arrows show the spaces for the repeat section.
Ch 5, dc in the same sp, ch 2, (dc, ch 2, dc) in the next space (second half of the W), *(dc, ch 2, dc) in the space of the first half of the W, ch 2, (dc, ch 2, dc) in the space of the second half of the W*, repeat to end of round, sl st in the first space to join. Finish off and weave in ends.

Tips for step #7:
You are basically working 2 v sts in a row with a ch 2 between them. This forms the W shape.
Make sure you aren’t adding an extra “ch 2”. The repeat is a (V st, ch 2, V st), NO ch 2, (V st, ch 2, V st) NO ch 2… and so on.
Drawstring (optional)
This is shown in the full blue sample and can be added to help cinch in the top or just because you want to.
With an I hook and ww yarn (white in sample), ch 155, finish off and tie a knot in each end.
Use a yarn needle or crochet hook (or a safety pin works too), to pull one end of the drawstring in and out of the DC round near the top of the skirt. I chose to go *under 2 posts, over 1 post* repeated all the way around. Tie a bow.
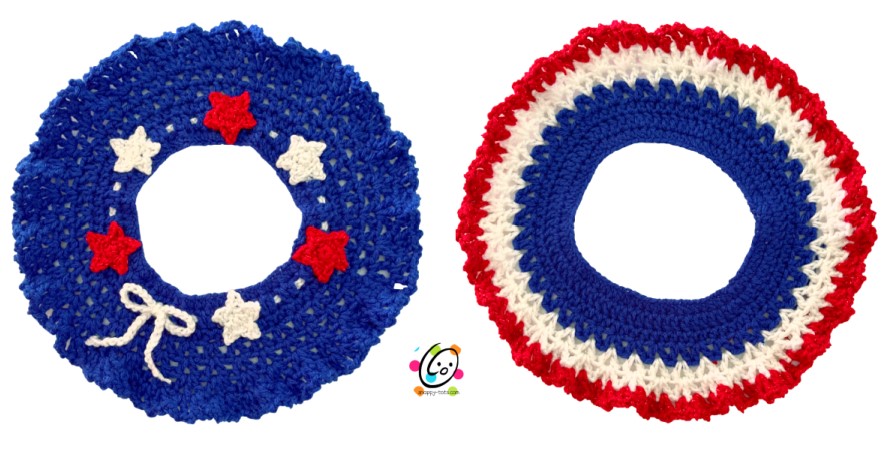
Stars (optional)
There are 3 red stars and 3 white stars on the sample skirt.
1. With an I hook and ww yarn, create a circle of 5 sc sts (or preferred method of creating a circle of 5 sc sts), pull to close and sl st to join. (5sts)
2. *ch 3, sl st in the 2nd ch from hook, hdc in the next ch, sl st in the next st on the circle*, repeat to end of round. Finish off, leaving a long tail for sewing to the skirt.
Place the stars evenly around the top section of the skirt, alternating colors. Use a yarn needle and each yarn tail to sew the stars in place.
Tops
There are two different tops. The main difference is the striped one is wide across the back and the solid red one narrows across the back to create more of a bra top. Both tops can be worn pull down, almost flat against the goose or left loose for a fuller-figured goose.


Tube Top (Striped)
1. With an I hook and red yarn, ch 60, sl st in the last ch from hook to join in the round, making sure the ch is not twisted. (60sts)
2. Ch 1, hdc in the same st and in each st to end of round, sl st in the first st to join.
3. Do not finish off the red yarn. Change to white yarn. For the sample, I carried the unused yarn on the wrong side of the piece. This way there won’t be as many ends to weave in.
Ch 1, sc in the same st, sc 3, *hdc 13, 2hdc in the next st*, repeat to end of round, sl st in the first st to join. (64sts)
Note: The sc 4 sts create a valley which will be worn in the front. A separate band will be added around this section when the tube is complete.
4. Do not finish off the white yarn. Change back to the red yarn. Ch 1, sc in the same st, sc 3, hdc 60, sl st in the first st to join.
5. Change back to the white yarn. Ch 1, sc in the same st, sc 3, *hdc 14, 2hdc in the next st*, repeat to end of round, sl st in the first st to join. (68sts)
6. Change back to the red yarn. Ch 1, sc in the same st, sc 3, hdc 64, sl st in the first st to join.
7. Change back to the white yarn. Ch 1, sc in the same st, sc 3, *hdc 15, 2hdc in the next st*, repeat to end of round, sl st in the first st to join. (72sts)
8. Change back to the red yarn. Ch 1, sc in the same st, sc 3, hdc 68, sl st in the first st to join.
9. Change back to the white yarn. Ch 1, sc in the same st, sc 3, *hdc 16, 2hdc in the next st*, repeat to end of round, sl st in the first st to join. (76sts)
10. Finish off the white yarn. Change back to the red yarn. Ch 1, sc in the same st, sc 3, hdc 72, sl st in the first st to join.
11. Ch 1, sc in the same st and in each st to end of round, sl st in the first st to join. Finish off and weave in ends.
Center band
1. With an I hook and red yarn, ch 9, sc in the 2nd ch from hook and in each ch across. (8sts)
2. Ch 1, turn, sc in the same st and in each st across. Finish off, leaving a long tail for sewing in place.
Gather the middle/sc 4 section of the tube and wrap the center band piece around it. Use the yarn tail and a yarn needle to sew the short ends of the band together. Twist the center band so the seam is on the inside/wrong side of the top.
The beginning edge is the top and should be at the neck when worn.
Bra Top (Solid)
Tube Top (Striped)
1. With an I hook and red yarn, ch 60, sl st in the last ch from hook to join in the round, making sure the ch is not twisted. (60sts)
2. Ch 1, sc in the same st, sc 11, hdc, 2dc in the next st, dc 12, 2dc in the next st, hdc, sc 4, hdc, 2dc in the next st, dc 12, 2dc in the next st, hdc, sc 12, sl st in the first st to join. (64sts)
3. Ch 1, sc in the same st, sc 11, hdc, dc 16, hdc, sc 4, hdc, dc 16, hdc, sc 12, sl st in the first st to join.
4. Ch 1, sc in the same st, sc 5, 2sc in the next st, sc 5, hdc, 2dc in the next st, dc 14, 2dc in the next st, hdc, sc 4, hdc, 2dc in the next st, dc 14, 2dc in the next st, hdc, sc 5, 2sc in the next st, sc 6, sl st in the first st to join. (70sts)
5. Ch 1, sc in the same st, sc 12, hdc, dc 18, hdc, sc 4, hdc, dc 18, hdc, sc 13, sl st in the first st to join.
6. Ch 1, sc in the same st, sc 6, 2sc in the next st, sc 6, hdc, 2dc in the next st, dc 16, hdc, sc 4, hdc, dc 16, 2dc in the next st, hdc, sc 6, 2sc in the next st, sc 7, sl st in the first st to join. (74sts)
7. Ch 1, sc in the same st, sc 14, hdc, dc 18, hdc, sc 4, hdc, dc 18, hdc, sc 15, sl st in the first st to join.
8. Ch 1, sc in the same st, sc 6, 2sc in the next st, sc 7, hdc, 2dc in the next st, dc 17, hdc, sc 4, hdc, dc 17, 2dc in the next st, hdc, sc 7, 2sc in the next st, sc 7, sl st in the first st to join. (78sts)
9. Ch 1, sc in the same st and in each st to end of round, sl st in the first st to join. Finish off and weave in ends.
Center band
1. With an I hook and red yarn, ch 9, sc in the 2nd ch from hook and in each ch across. (8sts)
2. Ch 1, turn, sc in the same st and in each st across. Finish off, leaving a long tail for sewing in place.
Gather the middle/sc 4 section of the tube and wrap the center band piece around it. Use the yarn tail and a yarn needle to sew the short ends of the band together. Twist the center band so the seam is on the inside/wrong side of the top.
The beginning edge is the top and should be at the neck when worn.
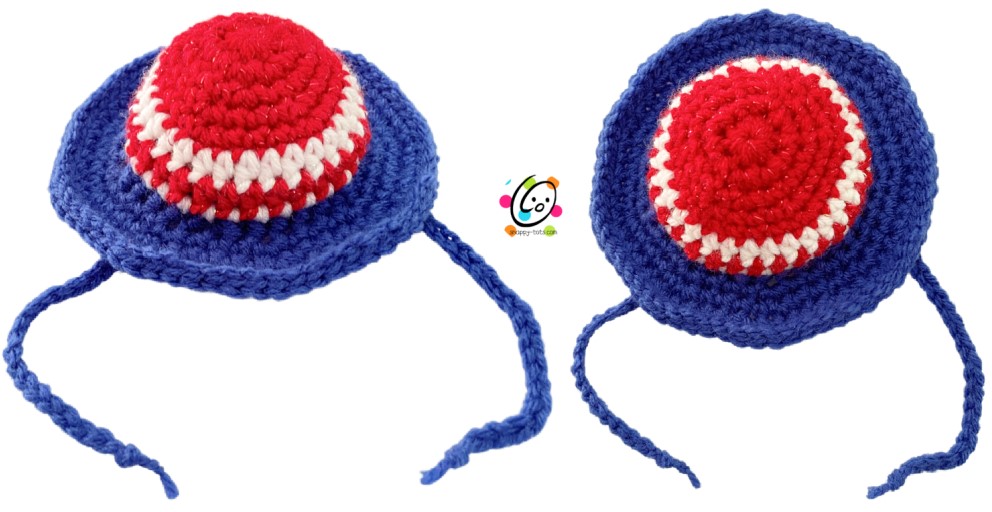
Sunhat
1. With an H hook and worsted weight yarn (red in sample), start with a magic circle of 8 sc sts (or
preferred method for creating a circle of 8 sc sts), pull closed and sl st in the first st to join. (8sts)
2. Ch 1, 2sc in each st to end of round, sl st in the first st to join. (16sts)
3. Ch 1, *sc 3, 2sc in the next st*, repeat to end of round, sl st in the first st to join. (20sts)
4. Ch 1, *sc 3, 2sc in the next st*, repeat to end of round, sl st in the first st to join. (25sts)
5. Ch 1, *sc 4, 2sc in the next st*, repeat to end of round, sl st in the first st to join. (30sts)
6. Do not finish off the current yarn. Change to white yarn for this round. Ch 1, hdc in the same st and in each st to end of round, sl st to join.
7. Do not finish off the current yarn. Change back to red yarn for this round. Ch 1, hdc in the same st and in each st to end of round, sl st to join.
8. Finish off the red yarn. Change to white yarn for this round. Ch 1, hdc in the same st and in each st to end of round, sl st to join.
9. Finish off the white yarn. Change to blue yarn for the rest of the hat. Ch 1, *FPHDC around each of the next 4 posts, 2FPHDC around the next post*, repeat to end of round, sl st to join. (36sts)
10. Ch 1, *sc 3, 2sc in the next st*, repeat to end of round, sl st to join. (45sts)
11. Ch 1, *sc 4, 2sc in the next st*, repeat to end of round, sl st to join. (54sts)
12. Ch 1, sc 2, *2sc in the next st, sc 4*, repeat until 2 sts remain, sc 2, sl st to join. (64sts)
13. Sl st in each st to end of round, sl st to join. Finish off and weave in ends.
Chin Strap
Fold the hat in half to find the placement for the ties. With an H hook and ww yarn (royal in sample), attach the yarn to an inside loop (so it doesn’t show on the outside of the hat).
Ch 30. Finish off and tie a knot in the end of the chain. Repeat for the opposite side.
Melon Version
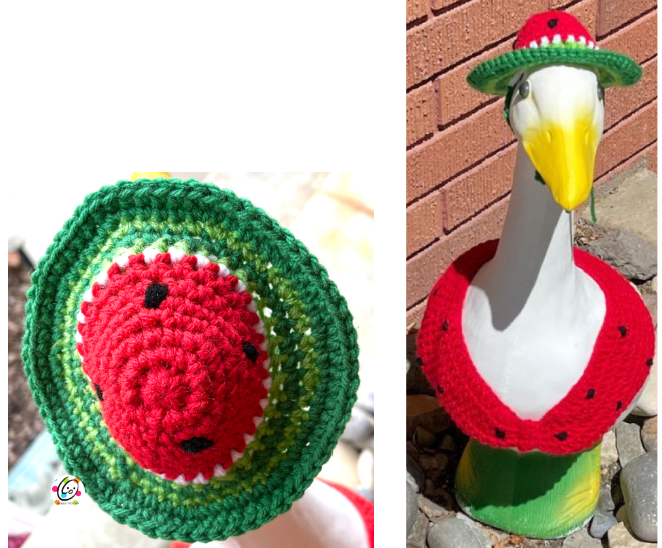
Yarns used in sample: Red Heart Super Saver Cherry, Spring Green, Paddy Green, White
1-7. Red yarn
8. White
9. Medium green
10. Lime green
11-13. Medium green
Seeds: Create the seeds by taking a few sts in random places on the red area with a yarn needle and black yarn.
The top was made in red with seeds stitched with black yarn.
Pin To Save For Later