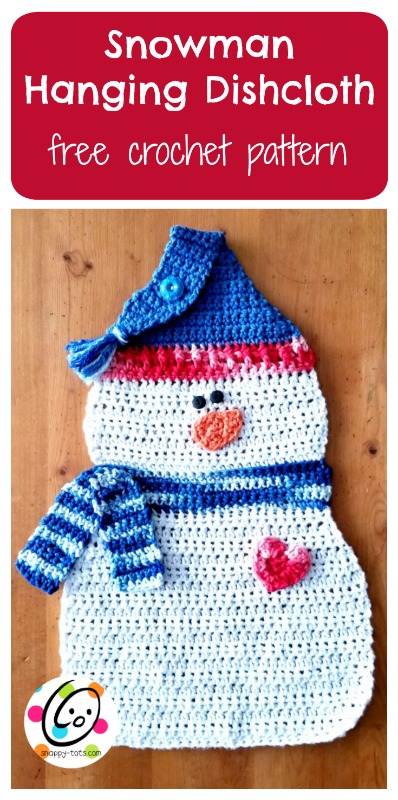
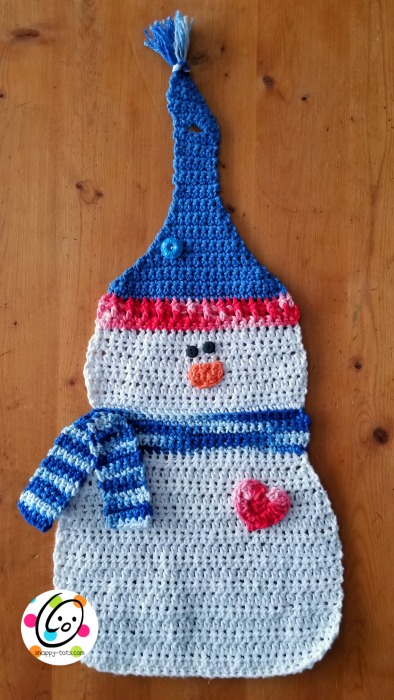
Free Pattern: Snowman Hanging Dishcloth
Hanging dishcloths are one of my favorite projects so I’m hoping to add more throughout the year. Of course I’ve started with a snowman because we always need more snowmen, right? I hope you will enjoy making him and join me the fourth week of each month for more.
Matching Snowgirl Pattern
You might also enjoy the new matching snowgirl. Click here for the free pattern.
Snowman Hanging Dishcloth
This pattern is available to view here on my blog for free below. An ad-free, downloadable PDF of this pattern with all of the photos is also available to purchase: Click HERE.
Materials and Details
- Yarn: Worsted weight cotton in white (100 yards), 1-3 contrasting yarns for hat and scarf (100 yards/ 30 yards each section), small amount of orange for nose and red for heart Yarn used in sample: Red Heart Creme de la Creme in white, Bowl of Cherries, Bluetones, Pumpkin
- Crochet Hooks: H
- Miscellaneous: Yarn needle for weaving in ends, sewing needle, black thread, 2 small black buttons for eyes, one ¾” button for closure.
- Gauge: not needed for this project
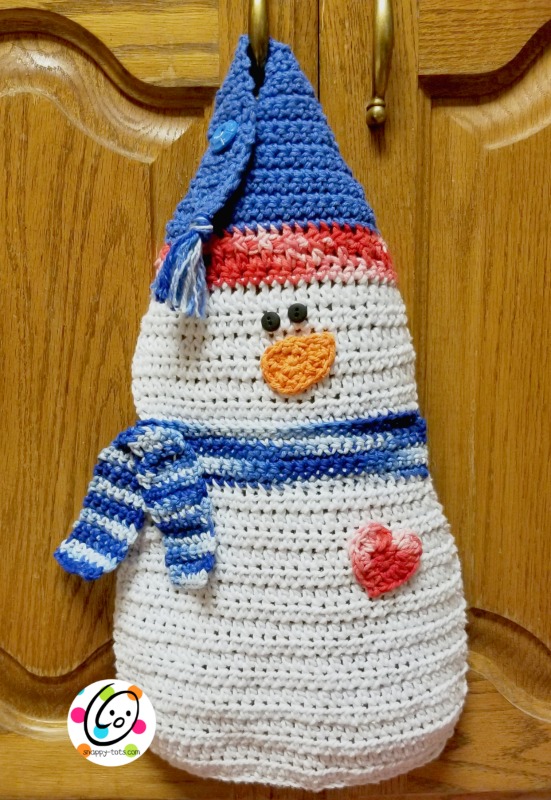
- Finished Measurements: 16” long x 9.5” wide
Tips
- First stitch of each row is worked into the same stitch as the turning chain.
- Numbers at the beginning of each line may refer to steps and not indicate number of rows.
Directions
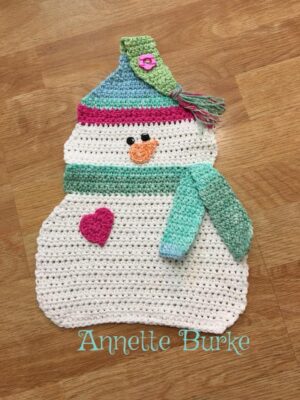
Pattern starts at the bottom of the snowman and is written for colors shown in sample. Substitute colors as desired.
- With an H hook and white yarn, ch 27, 2sc in 2nd ch from hook, sc 24, 2sc in last st. (28sts)
- Ch 2, turn, 2hdc in same st, hdc in each st until 1 st remains, 2hdc in last st. (30sts) 3-4. Repeat step 2. (34sts after step 4) 5-13. Ch 2, turn, hdc in each st to end of row.
- Ch 2, turn, hdc2tog, hdc in each st until 2 sts remain, hdc2tog. (32sts) 15-17. Repeat step 14. (26sts after step 17)
- Ch 2, turn, hdc in each st to end of row.
- Change to blue yarn (or desired color for scarf). Work this step in FLO. Ch 1, turn, 2sc in same st, sc in each st until 1 st remains, 2sc in last st. (28sts) 20-23. Ch 1, turn, sc in each st to end of row.
- Ch 1, turn, sc2tog, sc in each st until 2 sts remain, sc2tog. (26sts)
- Change to white yarn. Work this step in BLO. Ch 1, turn, 2sc in same st, sc in each st until 1 st remains, 2sc in last st. (28sts) 26-28. Ch 2, turn, hdc in each st to end of row.
- Ch 2, turn, hdc2tog, hdc in each st until 2 sts remain, hdc2tog. (26sts)
- Ch 2, turn, hdc in each st to end of row.
- Ch 2, turn, hdc2tog, hdc in each st until 2 sts remain, hdc2tog. (24sts)
- Change to red yarn (or desired color for hat band). Ch 1, turn, 2sc in same st, sc in each st until 1 st remains, 2sc in last st. (26sts)
- Ch 2, turn, hdc in each st to end of row.
- Ch 2, turn, FPHDC around next post, BPHDC around next post,, repeat to end of row. Finish off.
- Turn piece to right side. Attach blue yarn (or desired color for top of hat) to the 2nd st from the edge of the last row. Ch 1, sc in each st until 1 st remains. Leave last st unworked. (24sts)
- Ch 1, turn, sc2tog, sc in each st until 2 sts remain, sc2tog. (22sts) 37-40. Repeat step 36. (14sts after step 40)
- Ch 1, turn, sc2tog, in each st until 2 sts remain, sc2tog. (12sts) 42-44. Repeat step 41. (6sts after step 44)
- Ch 1, turn, sc in each st to end of row. 46-54. Repeat step 45.
Tip: If you would like the hat tail to bend towards the other side (right vs left), add one more row before continuing on to step 55.
- This step creates the button hole. Ch 1, turn, sc 2, ch 3, sk 2, sc 2.
- Ch 1, turn, sc 2, sc3 around chain, sc2tog. (6sts)
- Ch 1, turn, sc2tog, sc 3, 2sc in last st.
- Ch 1, turn, sc 4, sc2tog. (5sts)
- Ch 1, turn, sc 5.
- Ch 1, turn, sc 3, sc2tog. (4sts)
- Ch 1, turn, sc 4.
- Ch 1, turn, sc 2, sc2tog. (3sts)
- Ch 1, turn, sc2tog, sc. (2sts)
- Ch 1, turn, sc2tog. Finish off and weave in ends. Fold “hat tail” over and mark placement for the button. With a sewing needle and thread, sew the button to the hat.
Tassel: cut 8 pieces of yarn 8” long. Fold pieces in half and pull the loops through the tip of the “hat tail”. Pull the ends through the loops until snug. Pull the yarn ends apart for a frizzy look.
Nose
1. With an H hook and orange yarn, create a magic circle of 6 sc sts (or preferred method for creating a circle of 6 sc sts), pull closed and place a marker for working in the round. (6sts)
2. 2sc in each st to end of round. (12sts)
3. (hdc, dc) in next st, ch 2, sl st in 2nd ch from hook, sc in side of dc post, sl st in next st on circle. Finish off, leaving a long tail for sewing in place. With a yarn needle and the yarn tail, sew the nose to the center of the face section. Eyes: With a sewing needle and black thread, sew the small black buttons above the nose for the eyes.
Scarf End Piece
1. With an H hook and same yarn as the scarf, ch 7, sc in 2nd ch from hook and in each ch across. (6sts) 2-16. Ch 1, turn, sc in each st to end of row.
17. Ch 1, turn, sc2tog, sc 2, sc2tog. (4sts) 18-23. Ch 1, turn, sc in each st to end of row.
24. Ch 1, turn, 2sc in same st, sc 2, 2sc in last st. (6sts) 25-39. Ch 1, turn, sc in each st to end of row. Finish off and weave in ends. Fold scarf end piece in half. With a yarn needle and matching yarn, sew the center to the edge of the snowman’s scarf section.
Heart
1. With an H hook and red yarn, create a magic circle of 7 sc sts (or preferred method for creating a circle of 7 sc sts), pull closed and place a marker for working in the round. (7sts)
2. Sl st in next st, 5dc in next st, 2hdc in next st, hdc, (hdc, ch 2, sl st in 2nd ch from hook, hdc), hdc, 2hdc in next st, (5dc, ch 1, sl st) in next st. Finish off, leaving a yarn tail for sewing in place.
Please pin to your favorite board: