

Free Pattern: Football Fan Goose
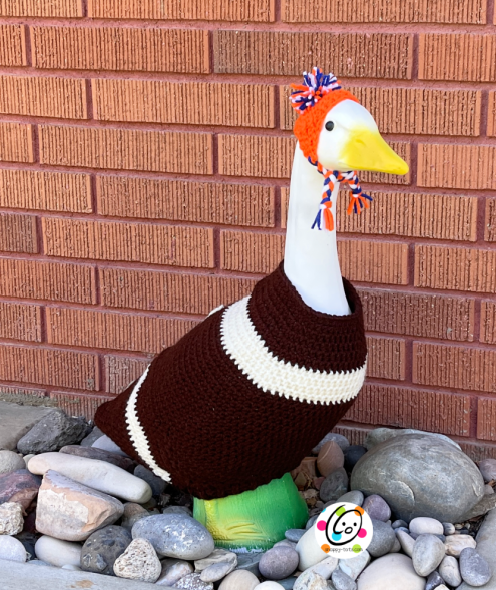
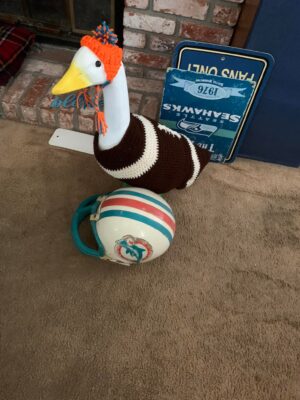
Life is starting to return to normal now that football season is starting again. My husband has been on a countdown so it is time to get out the football decorations and of course Ducke needs his sweater and beanie.
My husband is a big Denver Broncos fan so last fall I made a football sweater and beanie for Ducke. I am working on a really special one to make for another football fan. I will show you when I give it… it is a surprise.
Where To Get The Goose
This is designed for a 23” goose statue like the one sold by Miles Kimball: https://www.mileskimball.com/buy-large-white-goose-23-h-310493
It is also available from Amazon: https://amzn.to/3AdRWSP
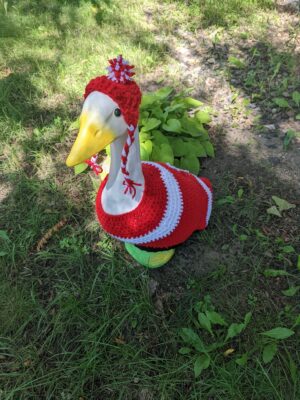
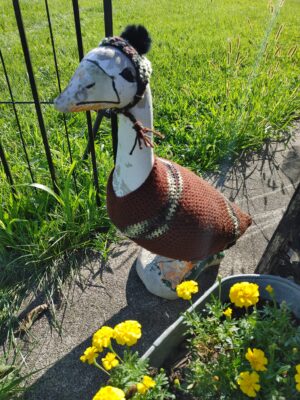
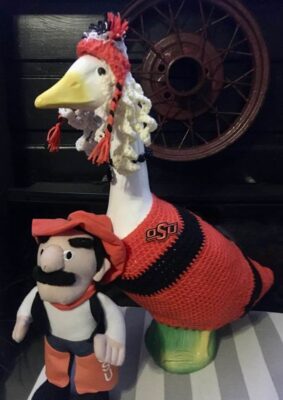
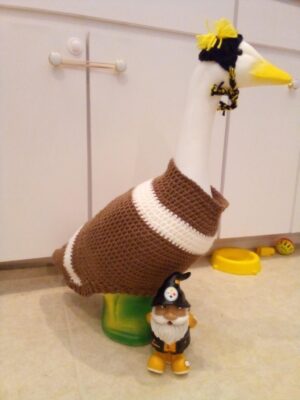
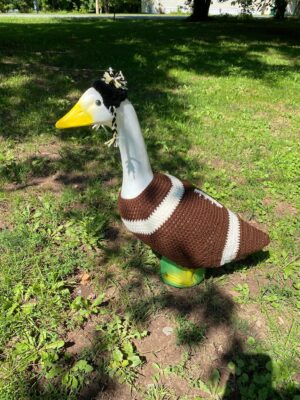
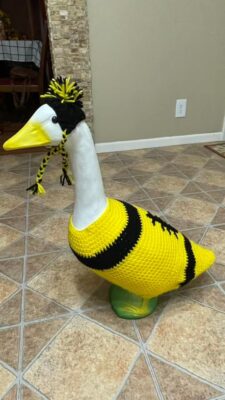
Stylin Geese
Thank you to my awesome testers for sharing pictures of their creations.
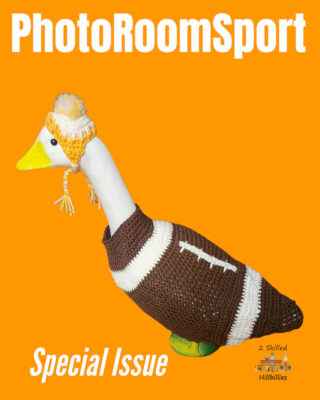
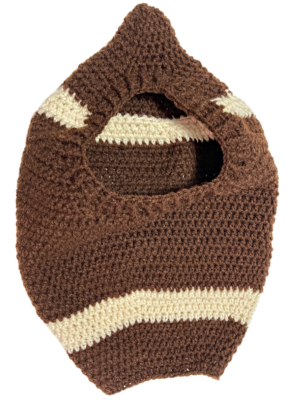
Football Fan Goose Crochet Pattern
The pattern for the sweater is available for free to follow below. An ad-free, downloadable pattern is also available for a small fee from my pattern shops: Ravelry | Etsy
The beanie was made from my free “Goose Beanie” pattern. The instructions for the beanie are also included in the downloadable pdf.
Materials
- Yarn: Football Sweater – 200 yards worsted weight brown, 40 yards worsted weight cream; Beanie – less than 20 yards in 2 colors. Yarn used in sample: Red Heart Super Saver Coffee, Aran, Blue, Bright Yellow
- Crochet Hook: I (5.5mm)
- Supplies: Yarn needle for weaving in ends, 4 stitch markers (yarn scraps work for this too)
- Optional: Measuring tape, scissors
- Gauge: 4” with an I hook = 14 hdc sts and 10.5 rounds
Tips
- The first stitch of each row is worked into the same stitch as the turning chain unless noted.
- Numbers at the beginning of each line may refer to steps and not indicate the number of rows/rounds.
- Stitch count remains the same unless noted at end of row/round.
- If you have any questions about this pattern please contact [email protected].
Directions
Football Sweater
This starts at the neck and is worked towards the tail.
1. With an I hook and brown ww yarn, ch 44, sl st in the last ch from hook to form a circle. Make sure the chain is not twisted. (44sts)
2. Ch 1, hdc in the same ch and in each ch around, sl st in the first st to join. (44sts)
3. Ch 1, hdc in the same st and in each st around, sl st to join.
4. Ch 1, *hdc 10, 2hdc in the next st*, repeat to end of round, sl st to join. (48sts)
5. Ch 1, *hdc 11, 2hdc in the next st*, repeat to end of round, sl st to join. (52sts)
6. Ch 1, *hdc 12, 2hdc in the next st*, repeat to end of round, sl st to join. (56sts)
7. Ch 1, *hdc 13, 2hdc in the next st*, repeat to end of round, sl st to join. (60sts)
8. Finish off the current yarn and change to cream yarn. Ch 1, hdc in the same st and in each st to end of round, sl st to join.
9. Ch 1, *hdc 14, 2hdc in the next st*, repeat to end of round, sl st to join. (64sts)
10. Ch 1, *hdc 15, 2hdc in the next st*, repeat to end of round, sl st to join. (68sts)
11. Ch 1, *hdc 16, 2hdc in the next st*, repeat to end of round, sl st to join. (72sts)
12. Finish off the current yarn and change to brown yarn. Ch 1, hdc in the same st and in each st to end of round, sl st to join.
13. Ch 1, *hdc 35, 2hdc in the next st*, repeat once, sl st to join. (74sts)
14. Ch 1, hdc in the same st and in each st to end of round, sl st to join.
15. Ch 1, *hdc 36, 2hdc in the next st*, repeat once, sl st to join. (76sts)
16. Ch 1, hdc in the same st and in each st to end of round, sl st to join.
17. Repeat the previous round for an additional 8 rounds.
18. This step starts a triangle, wedge shape. Ch 1, sc2tog, sc 16, sc2tog. (18sts) Leave remaining sts unworked.
19. Ch 1, turn, sc2tog, sc in each st until 2 sts remain, sc2tog. (16sts)
20. Repeat the previous row until 4 sts remain.
21. Ch 1, turn, sc2tog, sc2tog. (2sts)
22. Ch 1, turn, sc2tog. Finish off the yarn.
23. Skip 14 sts on the last full round and attach the yarn to the 15th st (see photo below left). Repeat steps 18-22, but do not finish off the yarn at the end of step 22 this time.
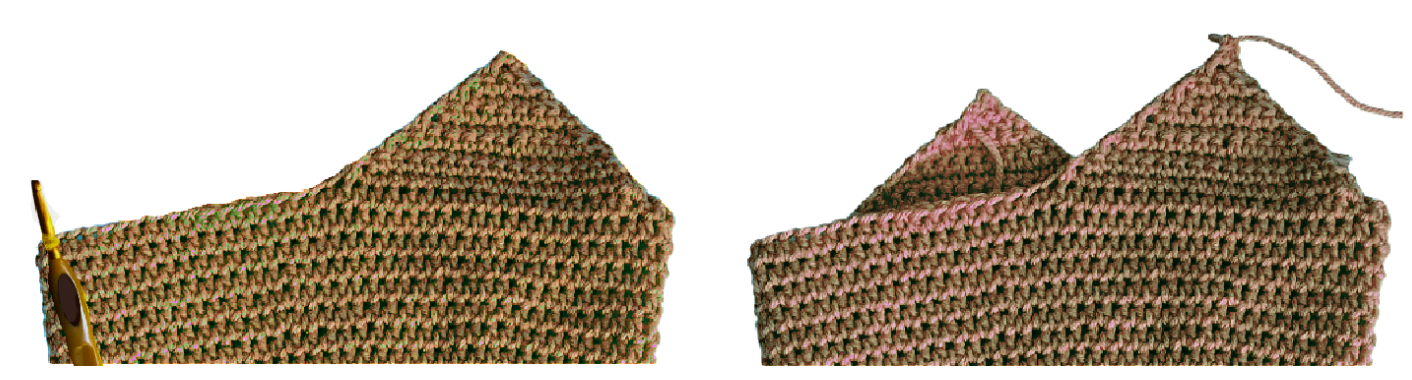
24. This step is worked down the side of the current triangle, across the wider flat edge (not the 14 skipped sts), and up the side of the second triangle.
Ch 1, turn to work from the RS of the piece. Hdc in the same st, hdc 11 sts evenly spaced down the side of the triangle, hdc2tog at the corner (pick up a st from the side and the row), hdc 20, hdc2tog at the corner (pick up a st from the row and the side), hdc 11 sts evenly up the side of the triangle, hdc in the tip of the 2nd triangle. Do not continue down the opposite side of the rectangle. (46sts)
| Steps 27-43 are worked back and forth in rows to extend the piece towards the tail. From this point on, work the hdc sts between the posts of the previous row. This will create a smoother fabric and will blend in better with the section worked in rounds. |
25. Ch 1, turn, 2sc in the same st, sc 8, hdc 28, sc 8, 2sc. (48sts)
26. Ch 1, turn, 2sc in the same st, sc 9, hdc 28, sc 9, 2sc. (50sts)
27-28. Ch 1, turn, hdc in each st to end of row.
29. Finish off the current yarn and change to cream yarn. Ch 1, turn, hdc in each st to end of row.
30. Ch 1, turn, *hdc2tog, hdc 23*, repeat to end of row. (48sts)
31. Ch 1, turn, *hdc2tog, hdc 6*, repeat to end of row. (42sts)
32. Ch 1, turn, *hdc2tog, hdc 5*, repeat to end of row. (36sts)
33. Finish off the current yarn and change to brown yarn. Ch 1, turn, hdc in each st to end of row.
34. Ch 1, turn, *hdc2tog, hdc 7*, repeat to end of row. (32sts)
35. Ch 1, turn, hdc2tog, hdc 28, hdc2tog. (30sts)
36. Ch 1, turn, *hdc2tog, hdc 8*, repeat to end of row. (27sts)
37. Ch 1, turn, *hdc2tog, hdc 7*, repeat to end of row. (24sts)
38. Ch 1, turn, hdc in each st to end of row.
39. Do not turn. Ch 6, sl st in the first st across the gap to create a round. Ch 1, turn, *hdc2tog, hdc 4*, repeat to end of round, sl st to join. (25sts)
40. Ch 1, *hdc2tog, hdc 3*, repeat to end of round, sl st to join. (20sts)
41. Ch 1, *hdc2tog, hdc 8*, repeat once, sl st to join. (18sts)
42. Ch 1, *hdc2tog, hdc 7*, repeat once, sl st to join. (16sts)
43. Ch 1, *hdc2tog, hdc 6*, repeat once, sl st to join. (14sts)
44. Ch 1, *hdc2tog*, repeat to end of round, sl st to join. (7sts). Finish off, leaving a long tail for closing the end.
With a yarn needle, use the yarn tail to weave in and out of the remaining sts, pull to close and secure the yarn tail.
Divide the bottom edge into 4 sections and place a marker at each section. With the right side facing, use the same size hook to attach brown yarn to the bottom edge next to one of the markers.
Ch 1, hdc 76 sts evenly around the bottom opening, sl st in the first st to join. (76sts)
Tip: hdc 19sts between each set of markers.
45. Ch 1, *FPHDC around the next post, BPHDC around the next post*, repeat to end of round, sl st to join.
46. Ch 1, FPHDC2tog, BPHDC2tog, *FPHDC around the next post, BPHDC around the next post*, repeat until 4 sts remain, FPHDC2tog, BPHDC2tog. (72sts)
If needed, repeat step 46 to add more rounds. Finish off and weave in ends.
Stitching
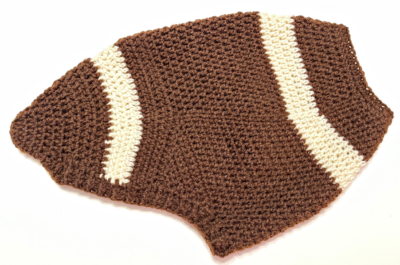
Center Strip: With an I hook and cream yarn, ch 18, sc in the 2nd ch from hook and in each ch across. Finish off, leaving a long tail for sewing to the suit.
With a yarn needle, use the yarn tail to sew the center strip to the middle of the back, centered between the two cream bands.
With a yarn needle and cream yarn, add stitches across the center strip as shown in the photo below.

Pin To Save For Later


