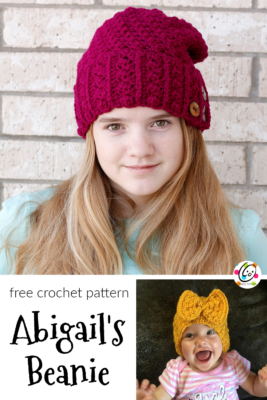
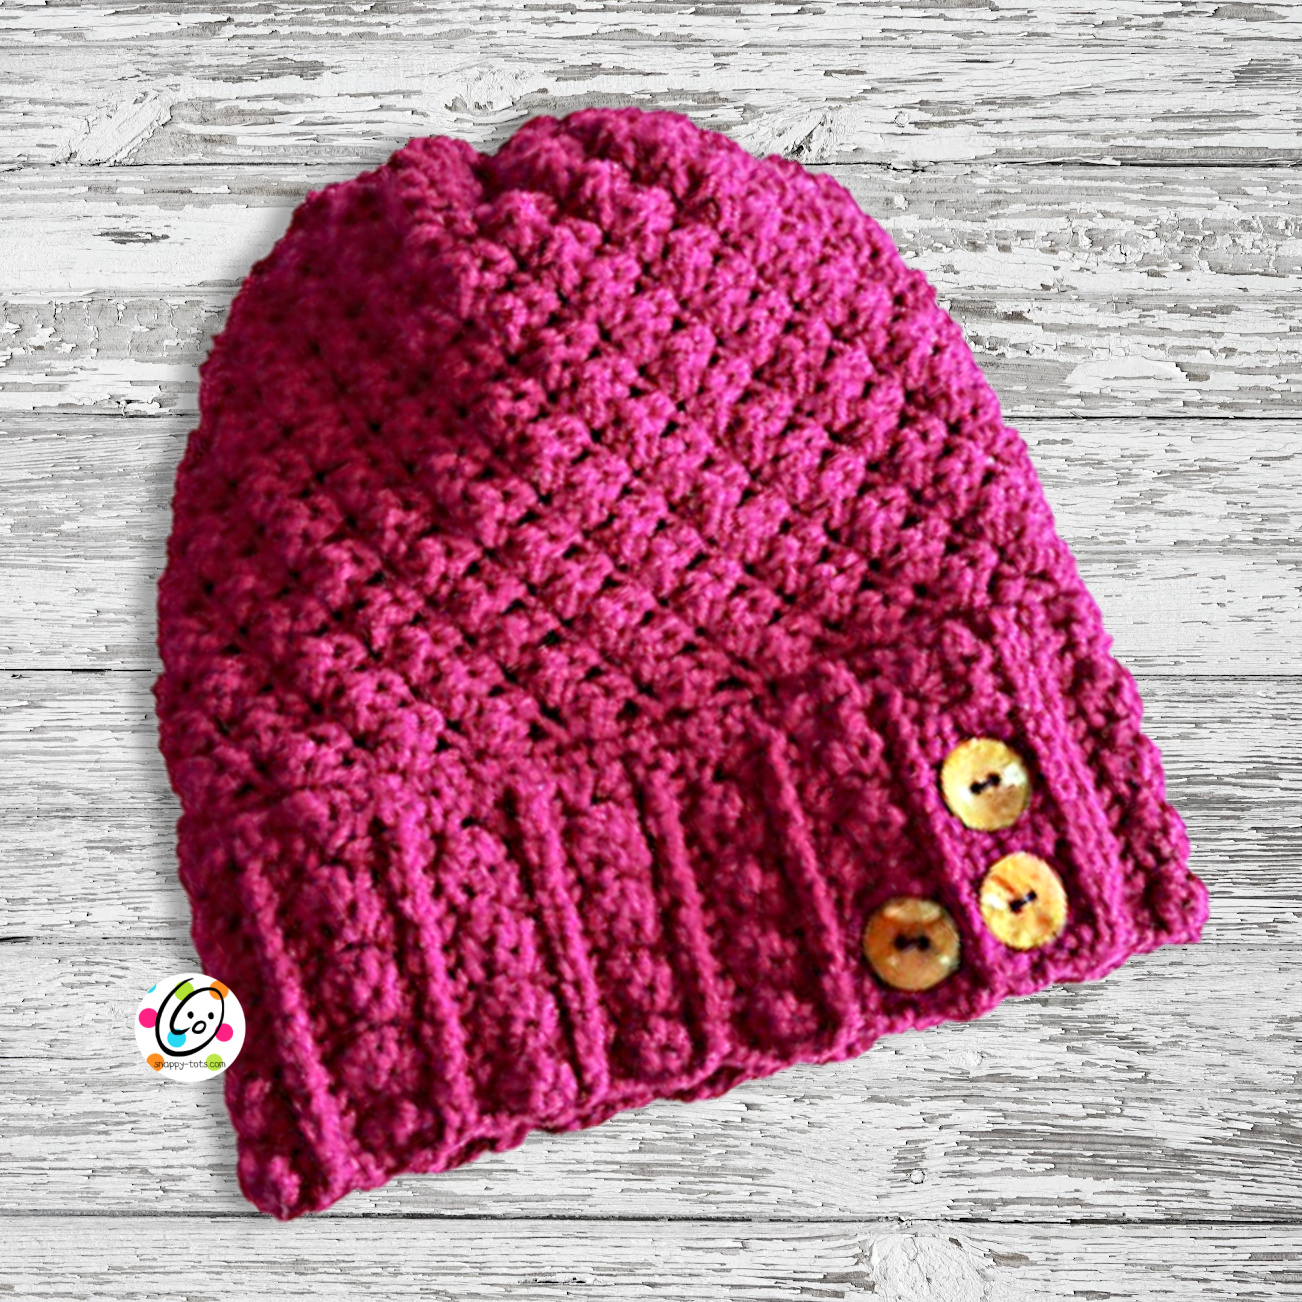
Free Pattern: Abigail’s Beanie
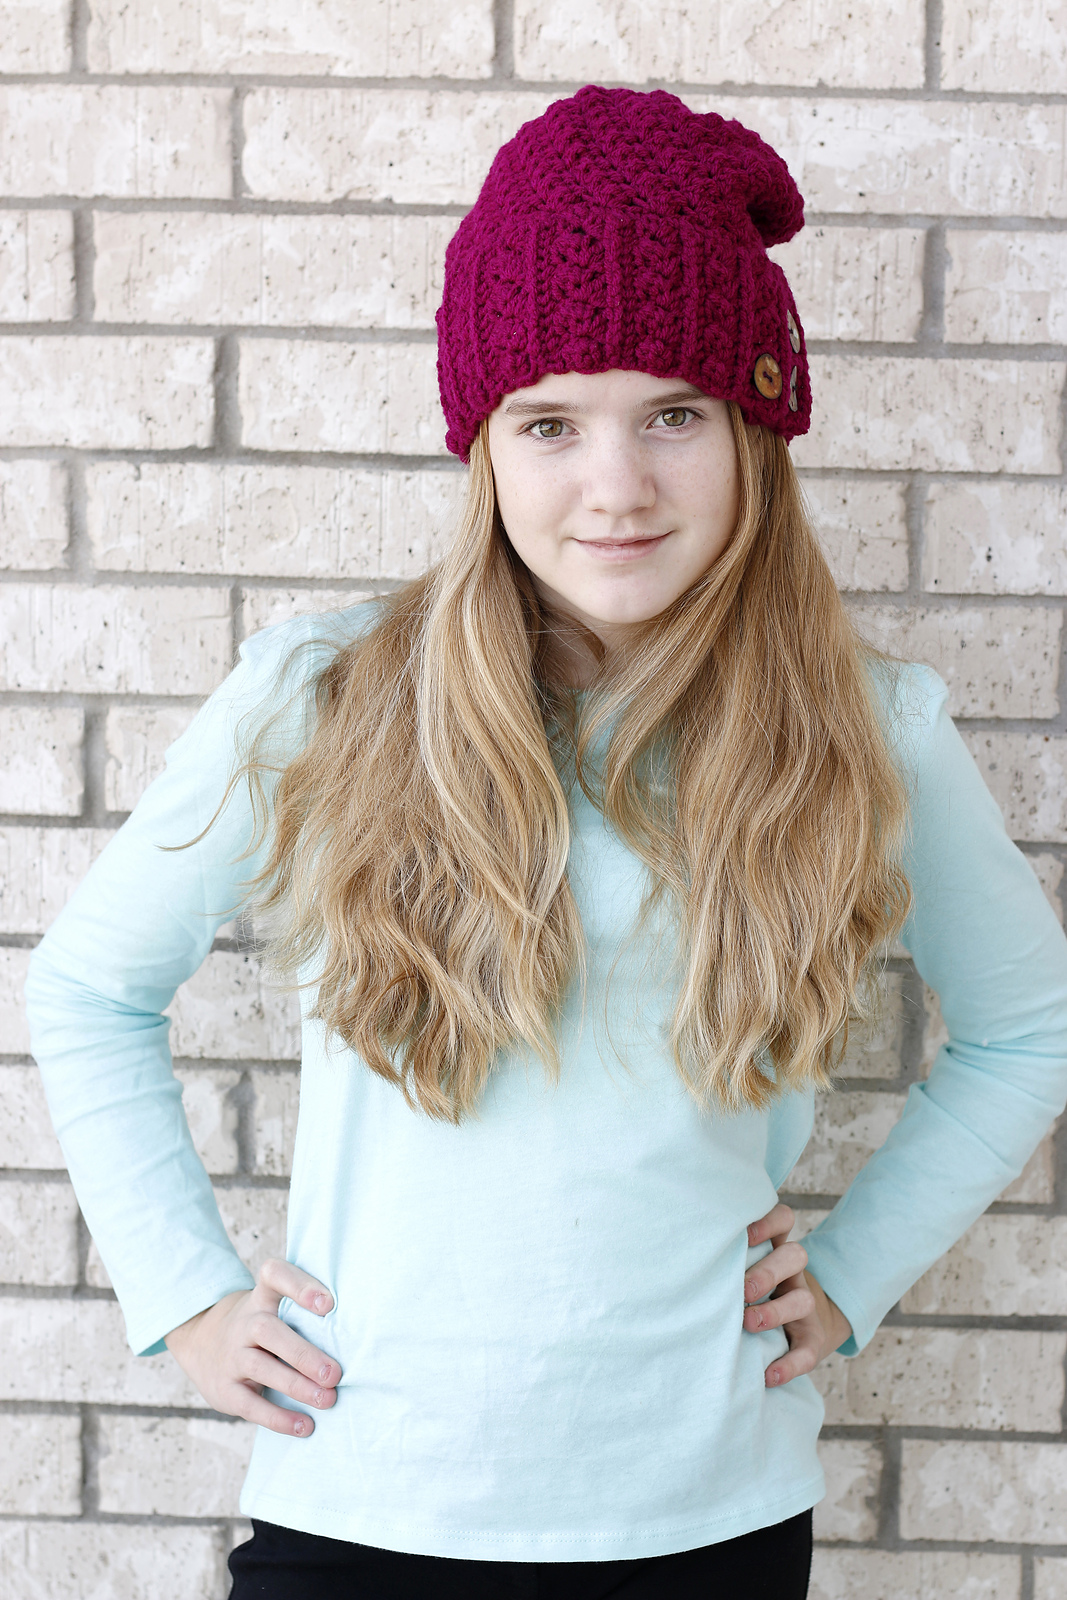
I love a great textured beanie. My “Abigail Beanie” completes a wonderful set of accessories that I hope you will enjoy making, wearing, and giving as gifts.
Beasides a nice texture, this beanie has a unique band, and cute bow. Pattern includes sizes baby to adult.
Matching patterns you might enjoy
Abigail’s Beanie Crochet Pattern
The pattern is available for free below. An ad-free, downloadable pdf is available for a small fee from my Ravelry Shop.
Materials and Details
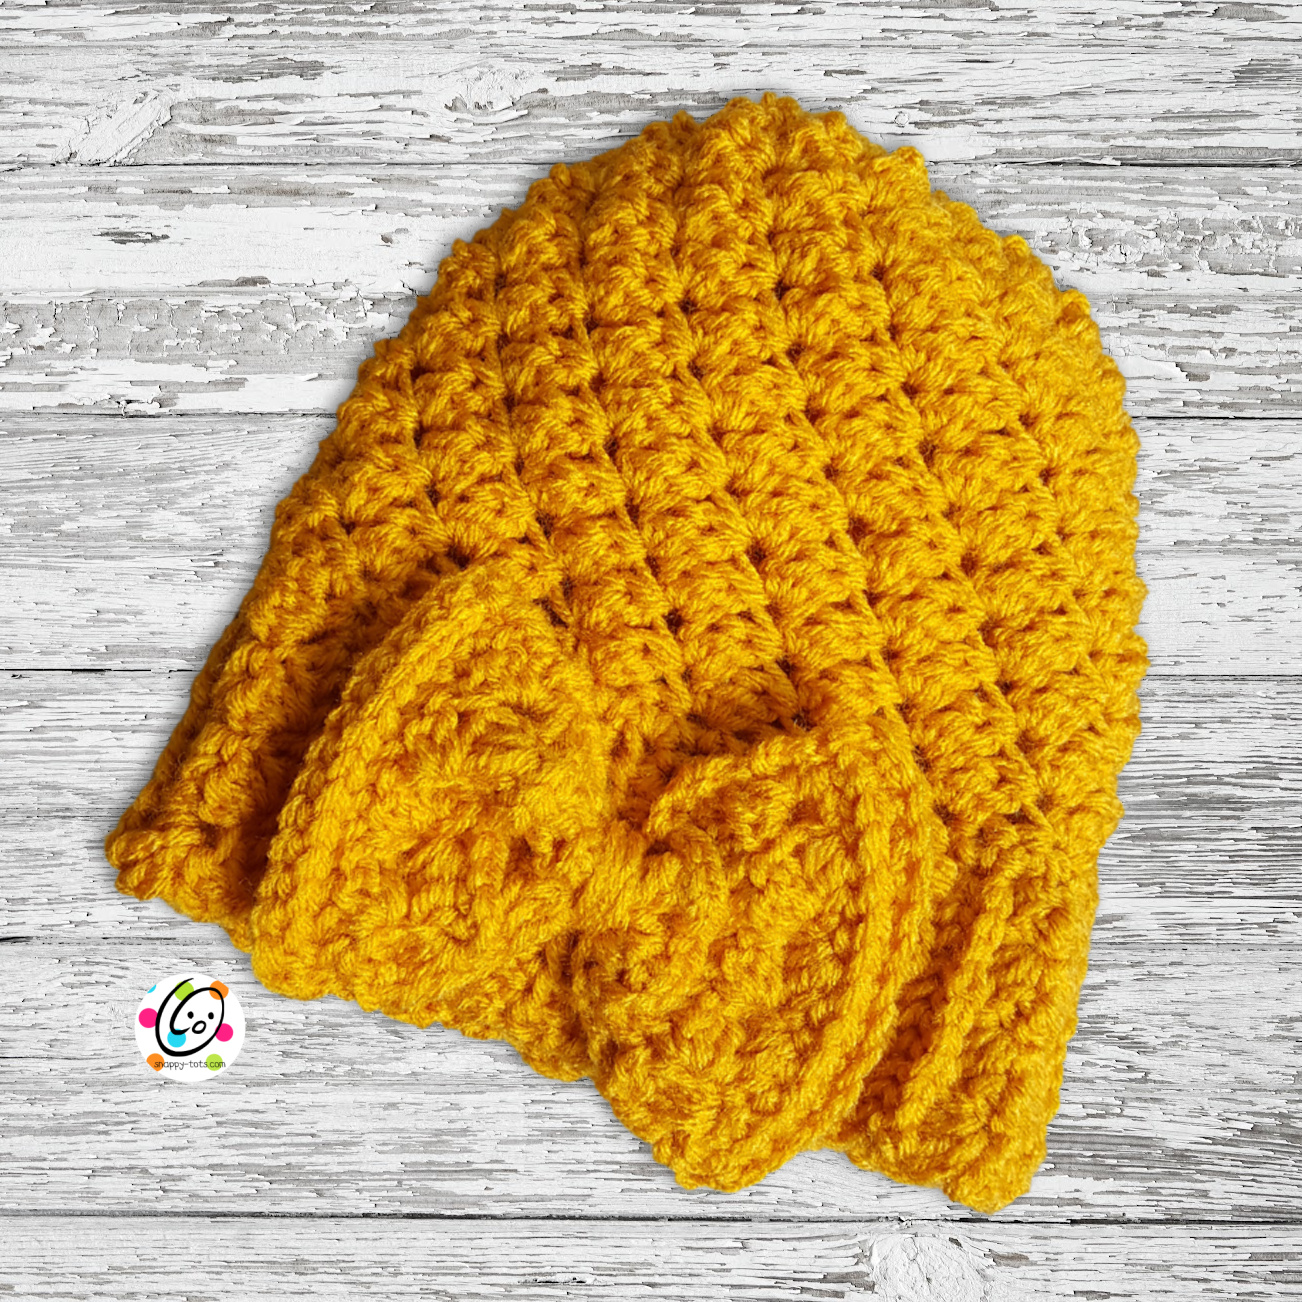
- Yarn: worsted weight yarn. Sample is made from Red Heart With Love yarn (a personal favorite!)
- Crochet Hook: I (5mm), J (5.5mm)
- Miscellaneous: yarn needle, two-three 1” or larger buttons, sewing needle and thread
- Gauge: 4” = 4 clusters and 11 rounds
- Sizes: Baby, Toddler/Small Child; Child (4-6years); Child (8-12 years); Child/Preteen; Teen/Adult
Notes For All Sizes
- There are pictures at the end of this pattern that pertain to all sizes. The stitch and section counts might be different from the size you are working, but all sizes are created the same.
- For body of hat, work the cluster (sc, hdc, dc) in sc sts only from previous round, skipping the hdc and dc of each cluster. The easiest way to do this is find the first sc, then sk 2 sts each time.
- For a different look, clusters could be worked in spaces created by clusters of previous round.
- As written, the body of the hat (top section) is worked from the wrong side/inside of the hat. For a different look, work your next hat from the right side/outside.
Directions: Baby
The hat starts at the bottom band and is worked back and forth in short rows.
1. With I hook and yarn, ch 10, sc in 2nd ch from hook and in each ch across. (9 sts)
2-4. Ch 2, turn, hdc in same st and in each st to end of row.
5. Ch 2, turn, 2hdc in same st, hdc 7, 2hdc in last st. (11sts)
6-7. Ch 1, turn, sc in same st, FPSC around each post to end of row.
8-9. Ch 2, turn, hdc in same st, *sk 2, (sc, hdc, dc) in next st*, repeat until 1 st remains, hdc in last st.
10-11. Ch 1, turn, sc in same st, FPSC around each post to end of row.
Keep repeating steps 8-11 until there are 12 sections. Adjust amount of sections for smaller or larger bands. End last section after row 10 of the repeat, leaving off the last FPSC row.
Measurement to this point: 2.5” wide x 18” (including beginning rows that will be overlapped).
1. Ch 1, turn piece to work into long edge of band. Overlap beginning “plain” rows.
Hold both layers together and sc evenly across, working into both layers. Continue to sc evenly along edge for a total of 45 sts, sl st in to join. (45sts)
Tip: If needed, divide the band in 1/4s and place markers. Work 11 sts in each of the first 3 sections. Work 12 stitches in the last section.
2. From this point on, the hat will be worked in continuous rounds. Do not join at the end of each round. Place a marker to keep track of the beginning of the round.
Change to a J hook. TURN piece to work from the inside of the hat. The rest of the hat is worked from this side so the bumpier texture will be on the right /outside of the hat.
*sk 2 sts, (sc, hdc, dc) in next st*, repeat to end of round. Do not join.
3. *sk 2 sts, (sc, hdc, dc) in next st*, repeat to end of round. Continue to repeat until hat is 7” from starting edge of hat.
4. *sk 2, (sc, hdc) in next st*, repeat to end of round. NOTICE: only TWO stitches are worked into one st, instead of three like the other rounds. (30sts)
5. *sc, sc2tog*, repeat to end of round. (20sts) Finish off, leaving a long tail for closing final edge.
6. With a yarn needle and yarn tail, weave in and out of remaining stitches. Cinch closed. Tie a
knot to secure and weave in ends.
With sewing needle and matching thread, sew 2-3 buttons on overlapped section of bottom band (as shown in sample photos).
Add a pompom to the top if desired.
Directions: Toddler/Small Child
The hat starts at the bottom band and is worked back and forth in short rows.
1. With I hook and yarn, ch 13, sc in 2nd ch from hook and in each ch across. (12sts)
2-4. Ch 2, turn, hdc in same st and in each st to end of row.
5. Ch 2, turn, 2hdc in same st, hdc 10, 2hdc in same st. (14sts)
6-7. Ch 1, turn, sc in same st, FPSC around each post to end of row.
8-9. Ch 2, turn, hdc in same st, *sk 2, (sc, hdc, dc) in next st*, repeat until 1 st remains, hdc in last st.
10-11. Ch 1, turn, sc in same st, FPSC around each post to end of row.
Keep repeating steps 8-11 until there are 13 sections. Adjust amount of sections for smaller or larger bands. End last section after row 10 of the repeat, leaving off the last FPSC row.
Measurement to this point: 3” wide x 19” (including beginning rows that will be overlapped)
1. Ch 1, turn piece to work into long edge of band. Overlap beginning “plain” rows.
Hold both layers together and sc evenly across, working into both layers. Continue to sc evenly along edge for a total of 48 sts, sl st to join. (48sts)
Tip: If needed, divide the band in 1/4s and place markers. Work 12 sts between each set of markers.
2. From this point on, the hat will be worked in continuous rounds. Do not join at the end of each round. Place a marker to keep track of the beginning of the round.
Change to a J hook. TURN piece to work from the inside of the hat. The rest of the hat is worked from this side so the bumpier texture will be on the right /outside of the hat.
*sk 2 sts, (sc, hdc, dc) in next st*, repeat to end of round. Do not join.
3. *sk 2 sts, (sc, hdc, dc) in next st*, repeat to end of round. Continue to repeat until hat is 7” from starting edge of hat.
4. *sk 2, (sc, hdc) in next st*, repeat to end of round. NOTICE: only TWO stitches are worked into one st, instead of three like the other rounds. (32sts)
5. Sc 2, *sc, sc2tog*, repeat to end of round. (22sts) Finish off, leaving a long tail for closing final edge.
6. With a yarn needle and yarn tail, weave in and out of remaining stitches. Cinch closed. Tie a knot to secure and weave in ends.
With sewing needle and matching thread, sew 2-3 buttons on overlapped section of bottom band (as shown in sample photos).
Add a pompom to the top if desired.
Directions: Child (4-6 years)
The hat starts at the bottom band and is worked back and forth in short rows.
1. With I hook and yarn, ch 13, sc in 2nd ch from hook and in each ch across. (12sts)
2-4. Ch 2, turn, hdc in same st and in each st to end of row.
5. Ch 2, turn, 2hdc in same st, hdc 10, 2hdc in last st. (14sts)
6-7. Ch 1, turn, sc in same st, FPSC around each post to end of row.
8-9. Ch 2, turn, hdc in same st, *sk 2, (sc, hdc, dc) in next st*, repeat until 1 st remains, hdc in last st.
10-11. Ch 1, turn, sc in same st, FPSC around each post to end of row.
Keep repeating steps 8-11 until there are 14 sections. Adjust amount of sections for smaller or larger bands. End last section after row 10 of the repeat, leaving off the last FPSC row.
Measurement to this point: 3” wide x 20” (including beginning rows that will be overlapped)
1. Ch 1, turn piece to work into long edge of band. Overlap beginning “plain” rows.
Hold both layers together and sc evenly across, working into both layers. Continue to sc evenly along edge for a total of 51 sts, sl st to join. (51sts)
Tip: If needed, divide the band in 1/4s and place markers. Work 13 sts between each of the first 3 sets of markers, 12 sts between the last 2 markers.
2. From this point on, the hat will be worked in continuous rounds. Do not join at the end of each round. Place a marker to keep track of the beginning of the round.
Change to a J hook. TURN piece to work from the inside of the hat. The rest of the hat is worked from this side so the bumpier texture will be on the right /outside of the hat.
*sk 2 sts, (sc, hdc, dc) in next st*, repeat to end of round. Do not join.
3. *sk 2 sts, (sc, hdc, dc) in next st*, repeat to end of round. Continue to repeat until hat is 7.5” from starting edge of hat.
4. *sk 2, (sc, hdc) in next st*, repeat to end of round. NOTICE: only TWO stitches are worked into one st, instead of three like the other rounds. (34sts)
5. Sc, *sc, sc2tog*, repeat to end of round. (23sts) Finish off, leaving a long tail for closing final edge.
With a yarn needle and yarn tail, weave in and out of remaining stitches. Cinch closed. Tie a knot to secure and weave in ends.
With sewing needle and matching thread, sew 2-3 buttons on overlapped section of bottom band (as shown in sample photos).
Add a pompom to the top if desired.
Directions: Child (8-12 years)/Preteen
The hat starts at the bottom band and is worked back and forth in short rows.
1. With I hook and yarn, ch 16, sc in 2nd ch from hook and in each ch across. (15 sts)
2-4. Ch 2, turn, hdc in same st and in each st to end of row.
5. Ch 2, turn, 2hdc in same st, hdc 13, 2hdc in last st. (17 sts)
6-7. Ch 1, turn, sc in same st, FPSC around each post to end of row.
8-9. Ch 2, turn, hdc in same st, *sk 2, (sc, hdc, dc) in next st*, repeat until 1 st remains, hdc in last st.
10-11. Ch 1, turn, sc in same st, FPSC around each post to end of row.
Keep repeating steps 8-11 until there are 15 sections. Adjust amount of sections for smaller or larger bands. End last section after row 10 of the repeat, leaving off the last FPSC row.
Measurement to this point: 3.5” wide x 21” (including beginning rows that will be overlapped)
1. Ch 1, turn piece to work into long edge of band. Overlap beginning “plain” rows.
Hold both layers together and sc evenly across, working into both layers. Continue to sc evenly along edge for a total of 57 sts, sl st to join. (57sts)
Tip: If needed, divide the band in 1/4s and place markers. Work 19 sts between each set of markers.
2. From this point on, the hat will be worked in continuous rounds. Do not join at the end of each round. Place a marker to keep track of the beginning of the round.
Change to a J hook. TURN piece to work from the inside of the hat. The rest of the hat is worked from this side so the bumpier texture will be on the right /outside of the hat.
*sk 2 sts, (sc, hdc, dc) in next st*, repeat to end of round. Do not join.
3. *sk 2 sts, (sc, hdc, dc) in next st*, repeat to end of round. Continue to repeat until hat is 8.5” from starting edge of hat.
4. Sc, *sk 2, (sc, hdc) in next st*, repeat to end of round. NOTICE: only TWO stitches are worked into one st, instead of three like the other rounds. (30sts)
5. *sc, sc2tog*, repeat to end of round. (20sts) Finish off, leaving a long tail for closing final edge.
With a yarn needle and yarn tail, weave in and out of remaining stitches. Cinch closed. Tie a knot to secure and weave in ends.
With sewing needle and matching thread, sew 2-3 buttons on overlapped section of bottom band (as shown in sample photos).
Add a pompom to the top if desired.
Directions: Teen/Adult
The hat starts at the bottom band and is worked back and forth in short rows.
1. With I hook and yarn, ch 16, sc in 2nd ch from hook and in each ch across. (15 sts)
2-4. Ch 2, turn, hdc in same st and in each st to end of row.
5. Ch 2, turn, 2hdc in same st, hdc 13, 2hdc in last st. (17 sts)
6-7. Ch 1, turn, sc in same st, FPSC around each post to end of row.
8-9. Ch 2, turn, hdc in same st, *sk 2, (sc, hdc, dc) in next st*, repeat until 1 st remains, hdc in last st.
10-11. Ch 1, turn, sc in same st, FPSC around each post to end of row.
Keep repeating steps 8-11 until there are 16 sections. Adjust amount of sections for smaller or larger bands. End last section after row 10 of the repeat, leaving off the last FPSC row.
Measurement to this point: 3.5” wide x 21.5” (including beginning rows that will be overlapped)
1. Ch 1, turn piece to work into long edge of band. Overlap beginning “plain” rows.
Hold both layers together and sc evenly across, working into both layers. Continue to sc evenly along edge for a total of 63 sts, sl st to join. (63sts)
Tip: If needed, divide the band in 1/4s and place markers. Work 16 sts between each of the first 3 set of markers, 15 between the last two markers.
2. From this point on, the hat will be worked in continuous rounds. Do not join at the end of each round. Place a marker to keep track of the beginning of the round.
Change to a J hook. TURN piece to work from the inside of the hat. The rest of the hat is worked from this side so the bumpier texture will be on the right /outside of the hat.
*sk 2 sts, (sc, hdc, dc) in next st*, repeat to end of round. Do not join.
3. *sk 2 sts, (sc, hdc, dc) in next st*, repeat to end of round. Continue to repeat until hat is 8.5” from starting edge of hat.
4. *sk 2, (sc, hdc) in next st*, repeat to end of round. NOTICE: only TWO stitches are worked into one st, instead of three like the other rounds. (42sts)
5. *sc, sc2tog*, repeat to end of round. (28sts)
6. *sc 2, sc2tog*, repeat to end of round. (21sts) Finish off, leaving a long tail for closing final edge.
With a yarn needle and yarn tail, weave in and out of remaining stitches. Cinch closed. Tie a knot to secure and weave in ends.
With sewing needle and matching thread, sew 2-3 buttons on overlapped section of bottom band (as shown in sample photos).
Add a pompom to the top if desired.
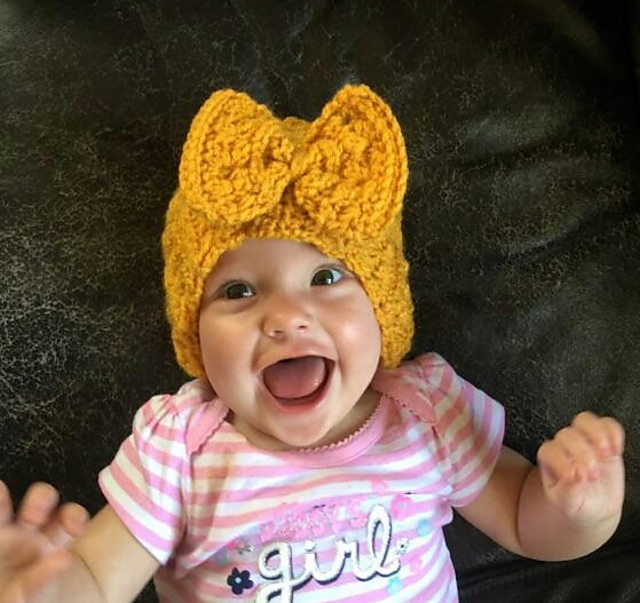
Directions: Bows
Directions: Small Bow
- With I hook and yarn color of choice, ch 15, sc in 2nd ch from hook and in each ch across. (14sts)
2. Ch 1, turn, sc in same st, FPSC around each post to end of row.
3-4. Ch 2, turn, hdc in same st, *sk 2, (sc, hdc, dc) in next st*, repeat until 1 st remains, hdc in last st.
5-6. Ch 1, turn, sc in same st, FPSC around each post to end of row.
7-8. Ch 2, turn, hdc in same st, *sk 2, (sc, hdc, dc) in next st*, repeat until 1 st remains, hdc in last st.
9. Ch 1, turn, sc in same st, FPSC around each post to end of row.
Finish off, leaving a long tail for wrapping around center of bow.
Wrap yarn tail around center of bow several times. Secure tail at back of bow. Use remaining yarn tail, or matching yarn if necessary, to attach bow to band.
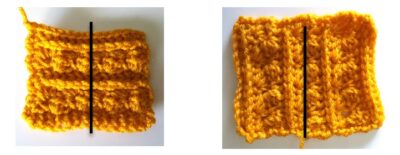
Photo above left: Small bow. The rows are horizontal and is cinched at center line.
Photo above right: Large bow. The rows are vertical and the piece is cinched at center line.
Directions: Large Bow
- With I hook and yarn color of choice, ch 15, sc in 2nd ch from hook and in each ch across. (14sts)
2. Ch 1, turn, sc in same st, FPSC around each post to end of row.
3-4. Ch 2, turn, hdc in same st, *sk 2, (sc, hdc, dc) in next st*, repeat until 1 st remains, hdc in last st.
5-6. Ch 1, turn, sc in same st, FPSC around each post to end of row.
7-8. Ch 2, turn, hdc in same st, *sk 2, (sc, hdc, dc) in next st*, repeat until 1 st remains, hdc in last st.
9-10. Ch 1, turn, sc in same st, FPSC around each post to end of row.
11-12. Ch 2, turn, hdc in same st, *sk 2, (sc, hdc, dc) in next st*, repeat until 1 st remains, hdc in last st.
13. Ch 1, turn, sc in same st, FPSC around each post to end of row.
Finish off, leaving a long tail for wrapping around center of bow.
Wrap yarn tail around center of bow several times. Secure tail at back of bow. Use remaining yarn tail, or matching yarn if necessary, to attach bow to band.
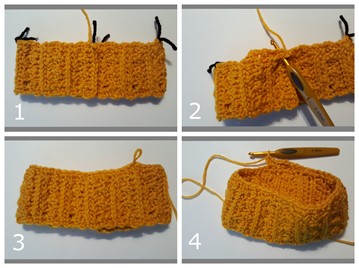
Help Photos
1. Overlap short ends with first (regular) rows behind. Divide band in 1/4s and place markers.
2. Sc through both layers.
3. Sc evenly along edge of band. Check size for amount of stitches.
4. Change to J hook and turn to work from inside of hat.
Pin To Save For Later