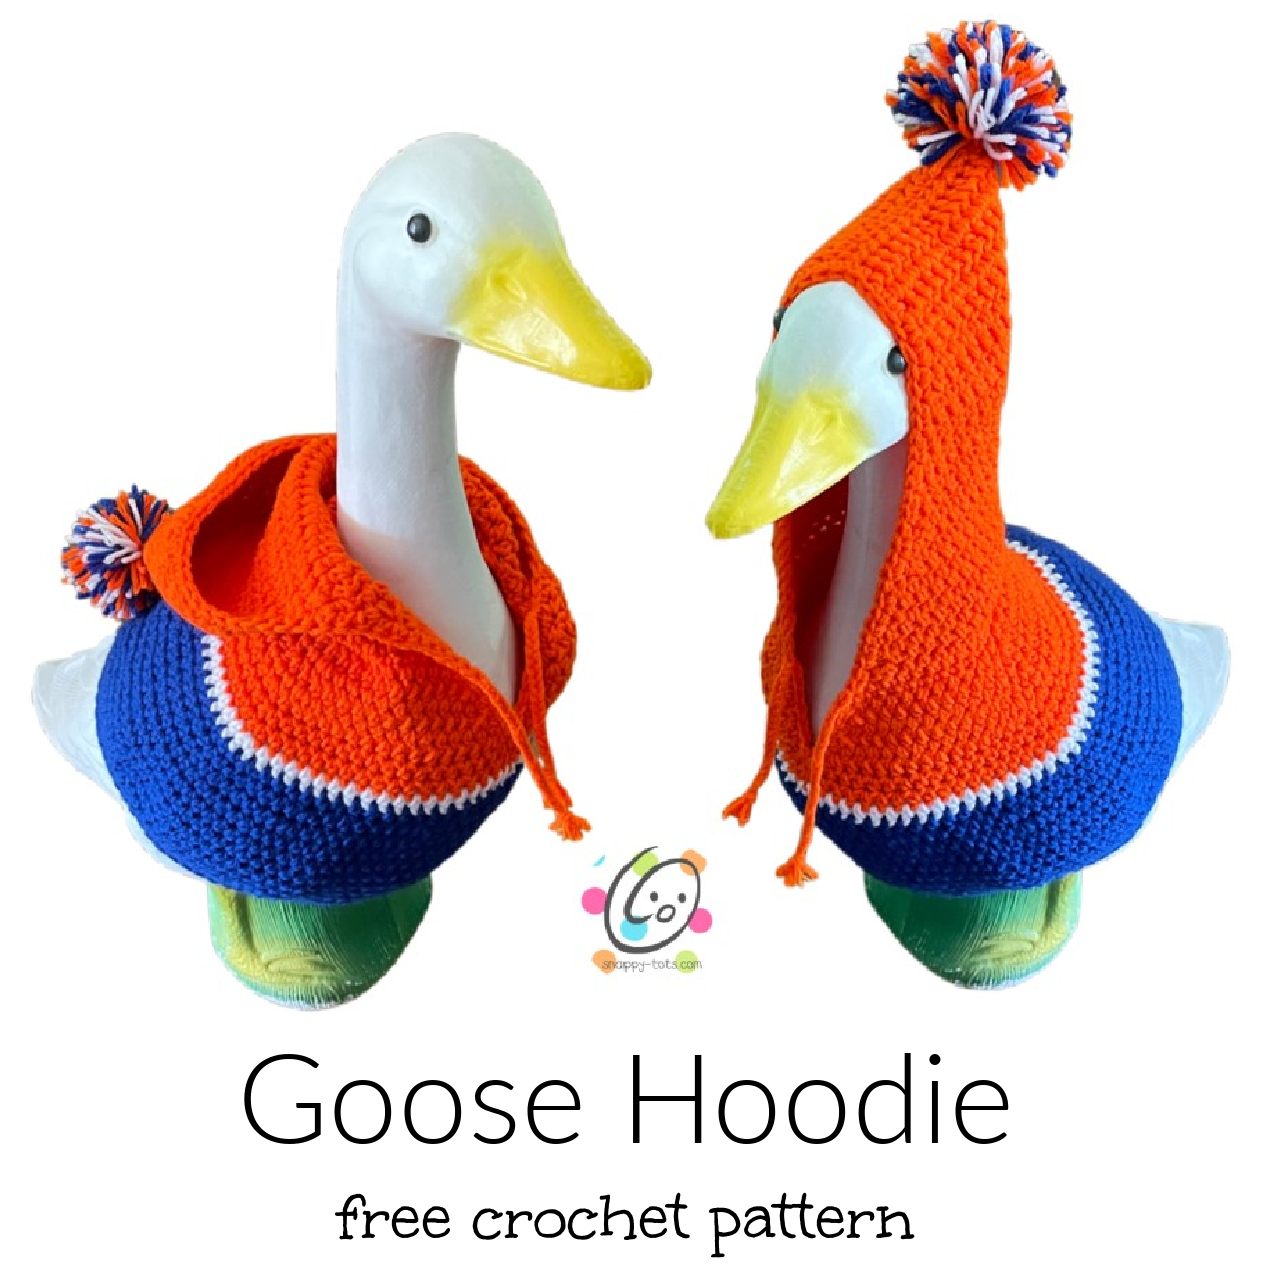
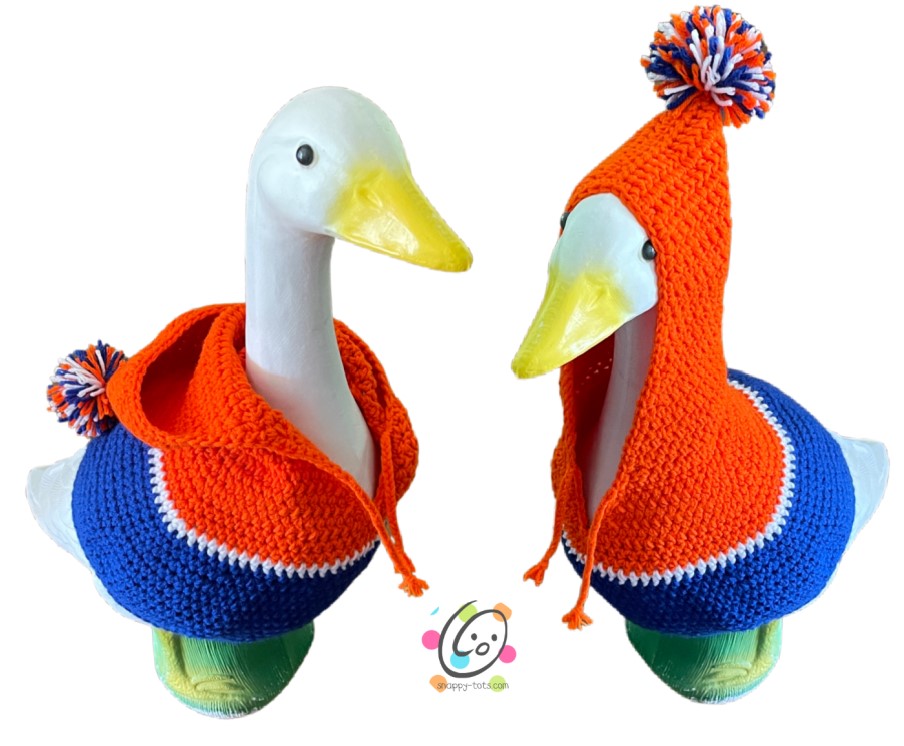
Free Pattern: Goose Hoodie
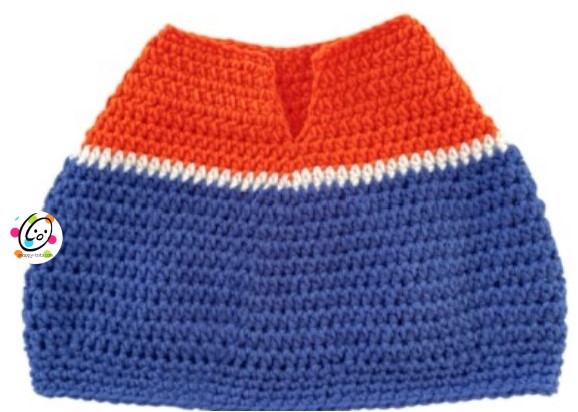
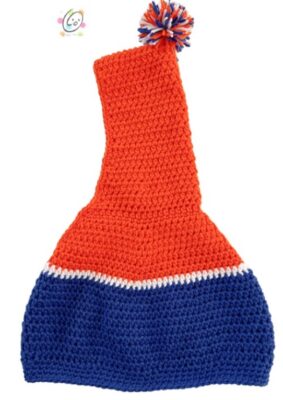
I made Ducke a hoodie to wear for the first Broncos game of the season. Isn’t he adorable?! He has such a cute expression in this pic.

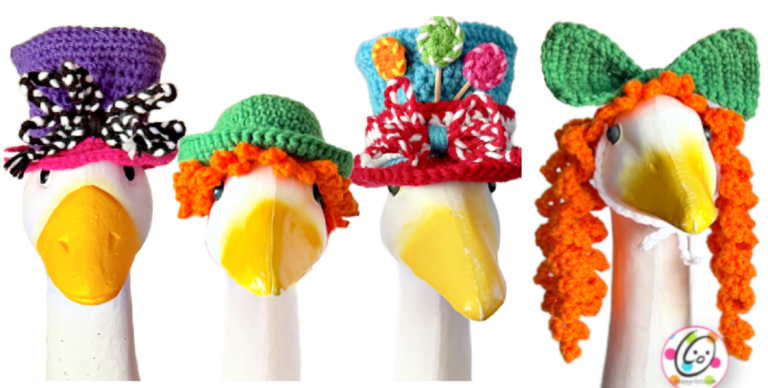
More Goose Clothes
Watch for more fancy outfits to come each month. You can find the latest “Ducke and Goose” patterns at THIS LINK and find more goose outfits and accessories at THIS LINK.
Where To Get The Goose
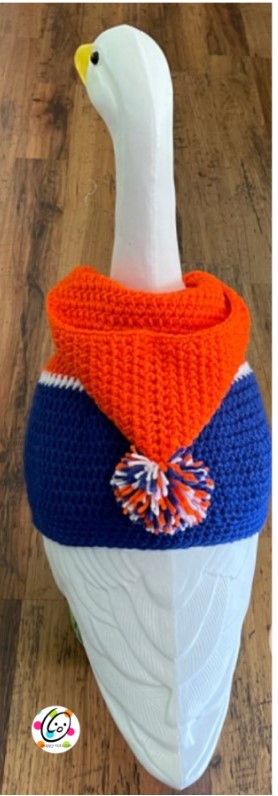
This is designed for a 23” goose statue like the one sold by Miles Kimball: https://amzn.to/3AdRWSP
Goose Hoodie Crochet Patterns
The pattern is available to view here on the blog. An ad-free, downloadable pdf is available to purchase for a small fee from Ravelry
- Yarn: 300 yards worsted weight yarn. Substitute with colors of choice.
- Yarns used in the sample: Red Heart Super Saver Royal (150 yds), Bernat Super Value Bright Orange
- Crochet Hook: H (5mm), I (5.5mm)
- Supplies: Yarn needle for weaving in ends
- Optional: Measuring tape, scissors
Measurements
- Finished Measurements: (measured flat) Sweater: 8” from neck to bottom, 13.5-14” wide across bottom edge; Hood – 9.5” from neck to top of hood
- Gauge – 4” with an I hook = 13 hdc sts and 10 hdc rounds
Tips
- The first stitch of each row is worked into the same stitch as the turning chain unless noted.
- Numbers at the beginning of each line may refer to steps and not indicate number of rows.
- Stitch count remains the same unless noted at end of row/round.
- If you have any questions about this pattern please contact [email protected].
This is designed for a 23” goose statue like the one sold by Miles Kimball.
Directions
This starts at the neck edge and is worked in the round to the bottom edge. The hood is added last.
Instructions are written for color changes/stripes as shown in the main sample. Substitute colors as desired.
1. With an I hook and orange worsted weight yarn (or color of choice), ch 41, sc in the 2nd ch from hook and in each ch across. (40sts)
2. Ch 1, turn, 2hdc in the same st, hdc 9, *2hdc in the next st, hdc 9*, repeat to end of row. (44sts)
For steps 3-7, work the sts between the posts of the previous row instead of in the st. This helps create a smoother fabric. To do this, insert the hook just below where you would for a regular st. Check your st count to make sure you are getting all of the sts, especially the very last one.
3. Ch 1, turn, 2hdc between the first two posts from the previous row, hdc 10, *2hdc between the next 2 posts, hdc 10*, repeat to end of row. (48sts)
4. Ch 1, turn, 2hdc between the first two posts from the previous row, hdc 11, *2hdc between the next 2 posts, hdc 11*, repeat to end of row. (52sts)
5. Ch 1, turn, 2hdc between the first two posts from the previous row, hdc 12, *2hdc between the next 2 posts, hdc 12*, repeat to end of row. (56sts)
6. Ch 1, turn, 2hdc between the first two posts from the previous row, hdc 13, *2hdc between the next 2 posts, hdc 13*, repeat to end of row. (60sts)
7. Ch 1, turn, 2hdc between the first two posts from the previous row, hdc 14, *2hdc between the next 2 posts, hdc 14*, repeat to end of row. Sl st in the first st of the row to create a circle. This is the new beginning of the round. (64sts)
8. Since the rest is worked in the round, you can work in the st. If you prefer the look of working between the posts you can continue to do so.
Ch 1, 2hdc in the same st, hdc 15, *2hdc in the next st, hdc 15*, repeat to end of round, sl st to join. (68sts)
9. Ch 1, 2hdc in the same st, hdc 16, *2hdc in the next st, hdc 16*, repeat to end of round, sl st to join. (72sts)
10. Finish off the current yarn and change to white worsted weight yarn (or color of choice). Ch 1, 2hdc in the same st, hdc 17, *2hdc in the next st, hdc 17*, repeat to end of round, sl st to join. (76sts)
11. Finish off the current yarn and change to blue worsted weight yarn (or color of choice). Ch 1, sc in the same st and in each st to end of round, sl st to join.
12. Ch 1, 2hdc in the same st, hdc 18, *2hdc in the next st, hdc 18*, repeat to end of round, sl st to join. (80sts)
13. Ch 1, 2hdc in the same st, hdc 15, *2hdc in the next st, hdc 15*, repeat to end of round, sl st to join. (85sts)
14. Ch 1, 2hdc in the same st, hdc 16, *2hdc in the next st, hdc 16*, repeat to end of round, sl st to join. (90sts)
15. Ch 1, hdc in the same st and in each st to end of round, sl st to join.
16. Ch 1, 2hdc in the same st, hdc 29, *2hdc in the next st, hdc 29*, repeat to end of round, sl st to join. (93sts)
17. Ch 1, 2hdc in the same st, hdc 30, *2hdc in the next st, hdc 30*, repeat to end of round, sl st to join. (96sts)
18-20. Ch 1, hdc in the same st and in each st to end of round, sl st to join.
21. Ch 1, *hdc 10, hdc2tog*, repeat to end of round, sl st to join. (88sts)
22. Ch 1, *sc 9, sc2tog*, repeat to end of round, sl st to join. (80sts)
23-25. Ch 1, sc in the same st and in each st to end of round, sl st to join.
Finish off and weave in ends.
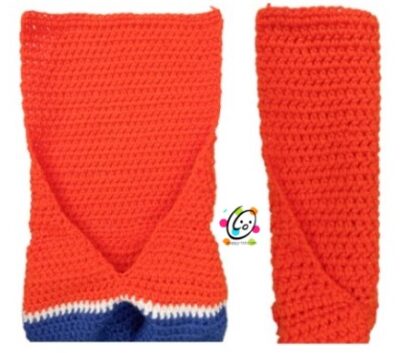
Hood
1. With the right side/outside of the hoodie towards you, use an I hook to attach matching yarn to the first st on the top row. Ch 1, sc2tog, hdc in each st until 2 sts remain, sc2tog. (38sts)
Note: Since the hood is worked back and forth in rows, work the following sts between the posts as in the main part of the hoodie for a smoother fabric.
2. Ch 1, sc2tog, hdc between the posts until 2 sts remain, sc2tog. (36sts)
3. Ch 1, sc2tog, hdc between the posts until 2 sts remain, sc2tog. (34sts)
4-5. Ch 1, turn, hdc between the posts to end of row.
6. Ch 1, sc2tog, hdc between the posts until 2 sts remain, sc2tog. (32sts)
7-8. Ch 1, turn, hdc between the posts to end of row.
9. Ch 1, sc2tog, hdc between the posts until 2 sts remain, sc2tog. (30sts)
10-11. Ch 1, turn, hdc between the posts to end of row.
12. Ch 1, sc2tog, hdc between the posts until 2 sts remain, sc2tog. (28sts)
13. Ch 1, turn, hdc between the posts to end of row.
14. Repeat the previous step for an additional 14 rows. Finish off, leaving a long yarn tail.
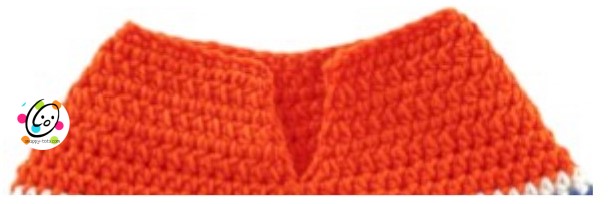
Fold the top edge of the hood in half, right sides together. With a yarn needle, use the yarn tail to sew the layers together. Open the hood back up.
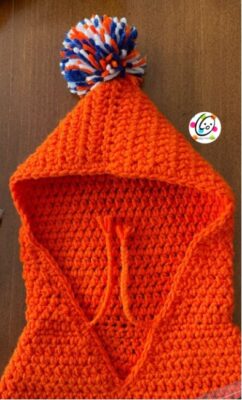
With an I hook and matching yarn, sl st in the bottom of the V. Sc evenly around the opening of the hood, sl st in the first st to join.
Add a pompom to the back point of the hood.
Hoodie Ties
Ties (make 2)
With an H hook, attach matching yarn to the edge of the first row of the hood (where the sweater and hood meet). Ch 30. Finish off and tie a knot near the end of the chain. Weave in the beginning yarn tail.
Repeat for the opposite edge of the opening.
Pin To Save For Later