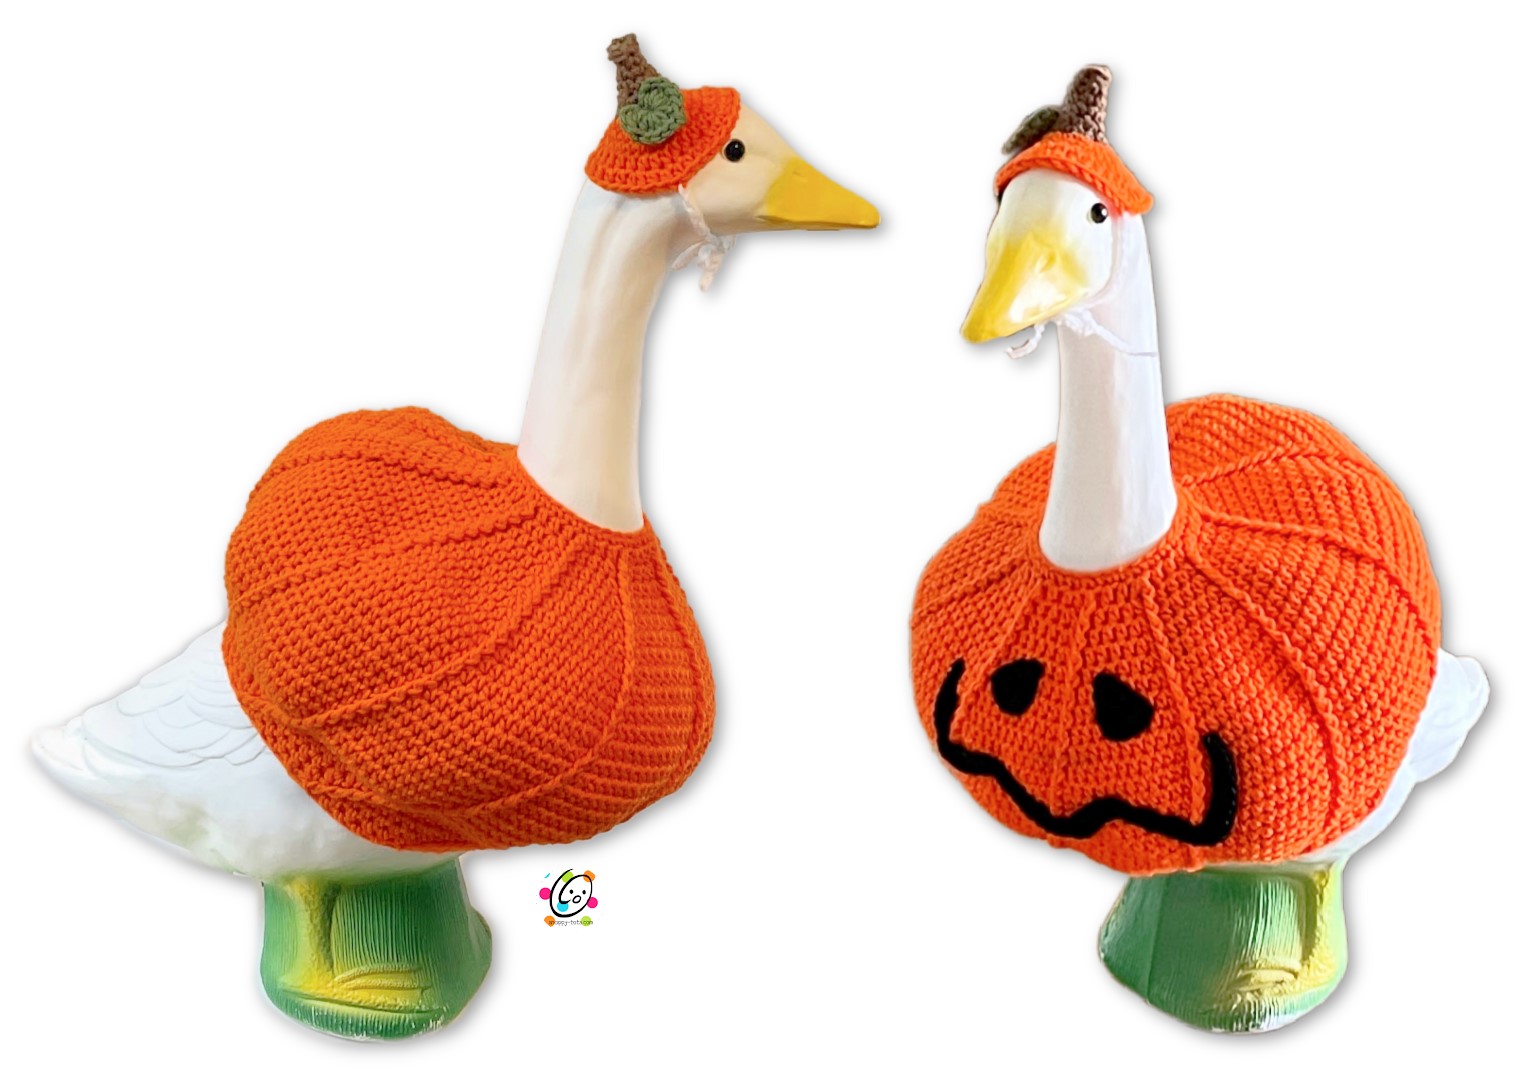
Free Pattern: Pumpkin Goose Set
Woohoo! The best time of the year is finally here! We love fall time in my family so our geese definitely needed pumpkin outfits. You could add a face or leave it off and use the set all fall. I am going to make some large fall leaves to spruce him up after Halloween (unless you want to make him a turkey outfit… coming soon).
Watch for more fancy outfits to be released throughout the year. You can find more “Ducke and Goose” patterns at THIS LINK.
Pumpkin Goose Outfit Crochet Pattern
This pattern is available for free below. An ad-free, downloadable PDF of these patterns with all of the photos is available to purchase from my Ravelry Shop: Click HERE
Materials
- Yarn: 300 yards ww orange yarn, small amounts of brown and green. Yarn used in sample: Mainstays Orange, RHSS Spring Green, Cafe Latte
- Crochet Hook: H (5mm), I (5.5mm)
- Supplies: Yarn needle for weaving in ends
- Optional: Measuring tape, scissors, 6-8 plastic bags for stuffing the pumpkin (optional)
- Gauge: 2” with an I hook = 7 hdc sts and 5 rounds
Tips
- The first stitch of each row is worked into the same stitch as the turning chain unless noted.
- Numbers at the beginning of each line may refer to steps and not indicate the number of rows/rounds.
- Stitch count remains the same unless noted at end of row/round.
- If you have any questions about this pattern please contact [email protected].
Where To Get The Goose
This is designed for a 23” goose statue like the one sold by Miles Kimball: https://www.mileskimball.com/buy-large-white-goose-23-h-310493
Pumpkin Suit
This starts at the neck edge and is worked in rounds to the bottom edge.
1. With an I hook and orange ww yarn, ch 32, sl st in the last ch from hook to form a circle. Make sure the chain is not twisted. (32sts)
2. Ch 1, sc in the same ch and in each ch around, sl st in the first st to join. (32sts) Slip this over the goose’s head and make sure it isn’t too small. It should be snug, but still able to slip over the head and down the neck. If it does not, start over, using a larger hook for the first 2 steps.
3. Ch 1, *hdc 3, 2hdc in the next st*, repeat to end of round, sl st in the first st to join. (40sts)
4. Ch 1, FPDC around the next post, hdc 2, 2hdc in the next st*, repeat to end of round, sl st to join. (50sts)
Tips: there should be 3 posts between the FPDC sts (for this round). Make sure to leave one st empty for the post st. You will work into the next st, not the one at the top of the post.
5. Ch 1, *FPDC around the next post, hdc 3, 2hdc in the next st*, repeat to end of round, sl st to join. (60sts)
6. Ch 1, *FPDC around the next post, hdc 4, 2hdc in the next st*, repeat to end of round, sl st to join. (70sts)
7. Ch 1, *FPDC around the next post, hdc 5, 2hdc in the next st*, repeat to end of round, sl st to join. (80sts)
8. Ch 1, *FPDC around the next post, hdc 6, 2hdc in the next st*, repeat to end of round, sl st to join. (90sts)
9. Ch 1, *FPDC around the next post, hdc 7, 2hdc in the next st*, repeat to end of round, sl st to join. (100sts)
10. Ch 1, *FPDC around the next post, hdc 8, 2hdc in the next st*, repeat to end of round, sl st to join. (110sts)
11. Ch 1, *FPDC around the next post, hdc 9, 2hdc in the next st*, repeat to end of round, sl st to join. (120sts)
12. Ch 1, *FPDC around the next post, hdc 10, 2hdc in the next st*, repeat to end of round, sl st to join. (130sts)
13. Ch 1, *FPDC around the next post, hdc 12*, repeat to end of round, sl st to join.
14. Repeat the previous round for an additional 9 rounds.
15. Ch 1, *FPDC around the next post, hdc 10, hdc2tog, repeat to end of round, sl st to join. (120sts)
16. Ch 1, *FPDC around the next post, hdc 9, hdc2tog, repeat to end of round, sl st to join. (110sts)
17. Ch 1, *FPDC around the next post, hdc 8, hdc2tog, repeat to end of round, sl st to join. (100sts)
18. Ch 1, *FPDC around the next post, hdc 7, hdc2tog, repeat to end of round, sl st to join. (90sts)
19. Ch 1, *FPDC around the next post, hdc 6, hdc2tog, repeat to end of round, sl st to join. (80sts)
20. Ch 1, *FPDC around the next post, hdc 5, hdc2tog, repeat to end of round, sl st to join. (70sts)
21. Ch 1, *FPDC around the next post, hdc 4, hdc2tog, repeat to end of round, sl st to join. (60sts)
22. Ch 1, *FPDC around the next post, hdc 3, hdc2tog, repeat to end of round, sl st to join. (50sts) Finish off and weave in ends.
Stuffing (optional)
The pumpkin suit is cute slipped on the goose as is. I wanted mine to be fuller so I used plastic grocery bags to fill mine out. I slipped the suit over the goose’s head, but didn’t stretch it down just yet. At this point, scrunch a grocery bag a little and insert it in the suit. See photo below.

Keep adding bags and fluff up the suit as needed. Pull the bottom edge down towards the feet.
Face (optional)
Eyes (make 2)
1. With an H hook and black yarn, ch 6, sc in 2nd ch from hook and in each ch across. (5sts)
2. Ch 1, turn, sc2tog, sc 3. (4sts)
3. Ch 1, turn, sc2tog, sc 2. (3sts)
4. Ch 1, turn, sc2tog, sc. (2sts)
5. Ch 1, turn, sc2tog. (1st) Finish off, leaving a long tail for sewing to the pumpkin.
Mouth: With an H hook and black yarn, ch 60, sl st in 2nd ch from hook, sl st in next st, sc 2, dc in each st until 4 sts remain, sc 2, sl st 2. Finish off, leaving a long tail for sewing to pumpkin.
Assembly: After pieces are complete, use a yarn needle and the yarn tails to sew each piece to the pumpkin.
Hat
1. With an I hook and brown (or green) ww yarn, start with a magic circle of 6 sc sts (or referred method for creating a circle of 6 sc sts), pull closed and sl st in the first st to join. (6sts)
2. Ch 1, sc in the same st and in each st to end of round, sl st to join.
3. Work this round in BLO. Ch 1, sc in each st to end of round, sl st to join.
4. Ch 1, 2sc in the same st, sc in each st to end of round, sl st to join. (7sts)
5. Ch 1, 2sc in the same st, sc in each st to end of round, sl st to join. (8sts)
6. Ch 1, 2sc in the same st, sc 3, 2sc in the next st, sc 3, sl st to join. (10sts)
7. Ch 1, 2sc in the same st, sc 4, 2sc in the next st, sc 4, sl st to join. (12sts)
8. Ch 1, 2sc in the same st, sc 3, *2sc in the next st, sc 3*, repeat once more, sl st to join. (15sts) Use your finger or end of crochet hook to push the top center of the stem down into the stem.
9. Finish off the current yarn and change to orange yarn. Ch 1, 2sc in the same st, sc 2, *2sc in the next st, sc 2*, repeat to end of round, sl st to join. (20sts)
10. Ch 1, 2sc in the same st, sc 3, *2sc in the next st, sc 3*, repeat to end of round, sl st to join. (25sts)
11. Ch 1, 2sc in the same st, sc 4, *2sc in the next st, sc 4*, repeat to end of round, sl st to join. (30sts)
12. Ch 1, hdc in the same st and in each st to end of round, sl st to join.
13. Ch 1, 2hdc in the same st, hdc 5, *2hdc in the next st, hdc 5*, repeat to end of round, sl st to join. (35sts)
Finish off and weave in ends.
Chin Strap
Fold the hat in half to find the placement for the ties. With an I hook and ww yarn (white to match the goose), attach the yarn to an inside loop (so it doesn’t show on the outside of the hat). Ch 30. Finish off and tie a knot in the end of the chain. Repeat for the opposite side. When ready, place the hat on the head and use the ties to tie a bow under the chin.
Leaf/Heart
1. With an I hook and green or brown ww yarn, ch 4, sl st in the last ch from hook to join in the round and form a loop. (4sts)
2. Ch 3, 5dc in the loop, ch 2, sl st in the 2nd ch from hook, 5dc in the loop, ch 3, sl st in the loop. Finish off, leaving a yarn tail for sewing to the hat.
With a yarn needle, use the yarn tail to sew the leaf/heart to the base of the stem.