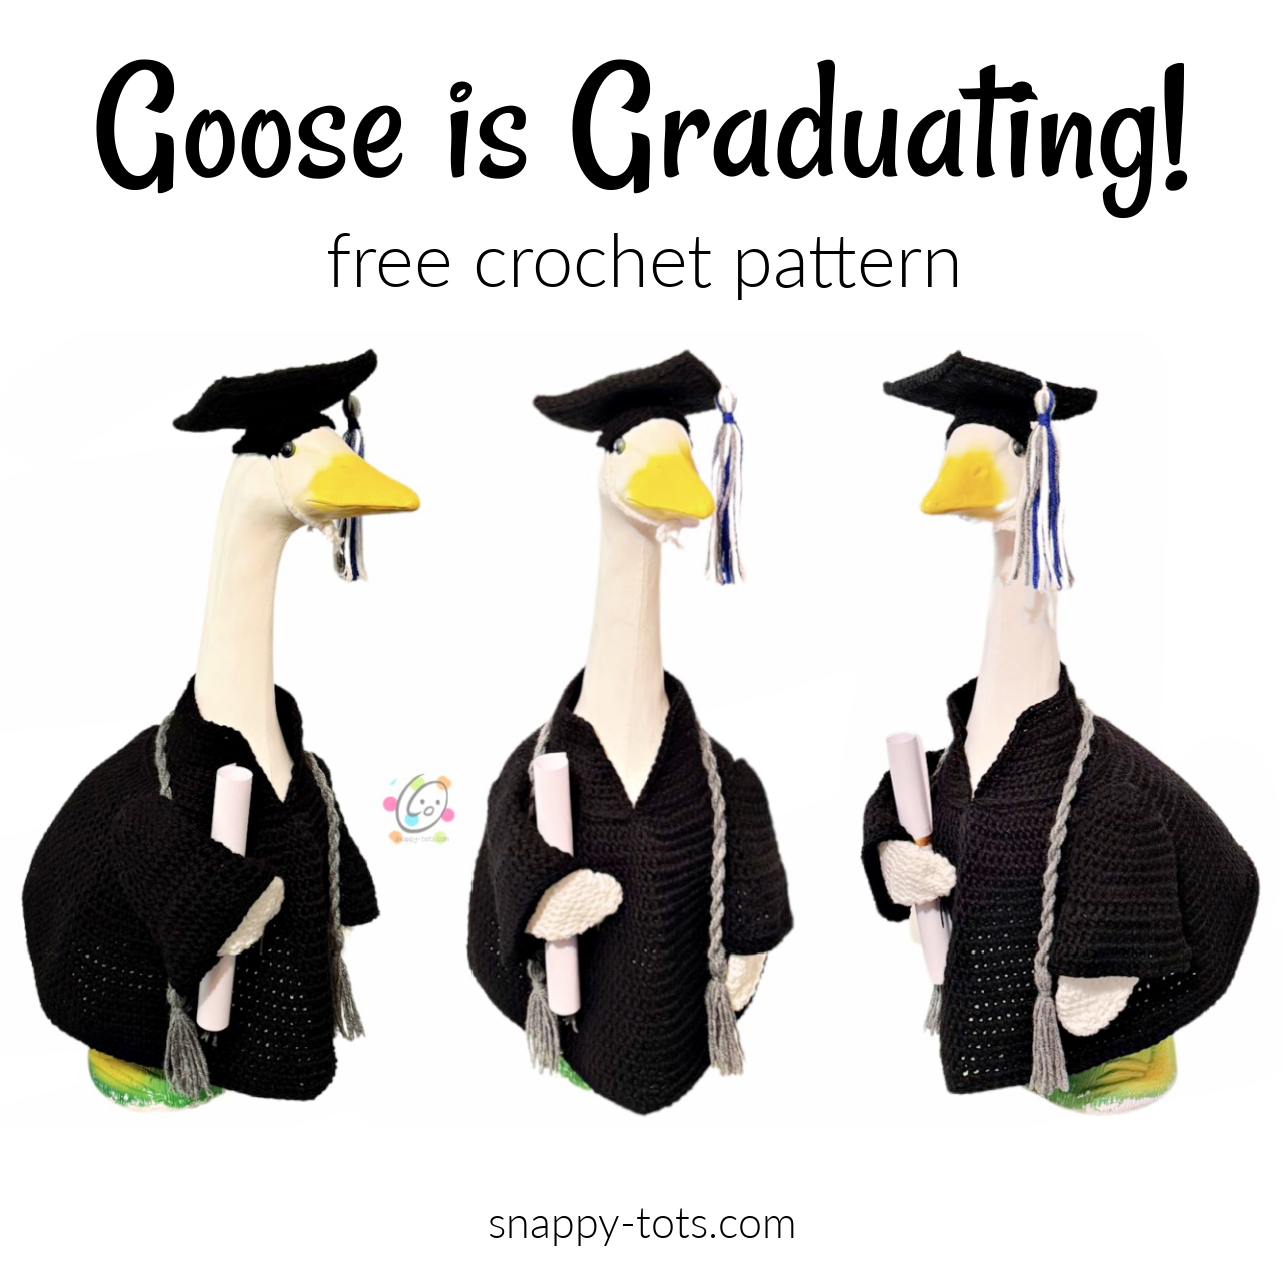
Free Pattern: Graduate Goose
This has been one of my most requested goose outfits, a graduate. So, last year when our grand daughter (whose family also has a goose) was graduating kindergarten I finally made a set.
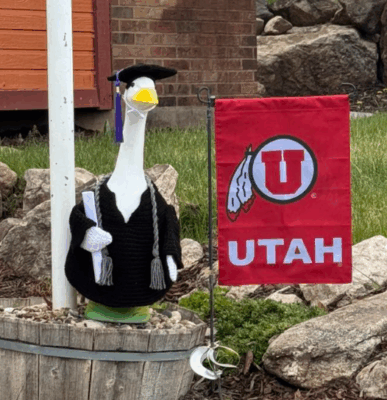
This set has come in handy. Last week our son-in-law graduated from the University of Utah so their goose got to dress up again.
Graduate Goose Crochet Pattern for 23” goose
The crochet pattern is available for free here on my blog. An ad free, downloadable version is also available to purchase for a small fee.
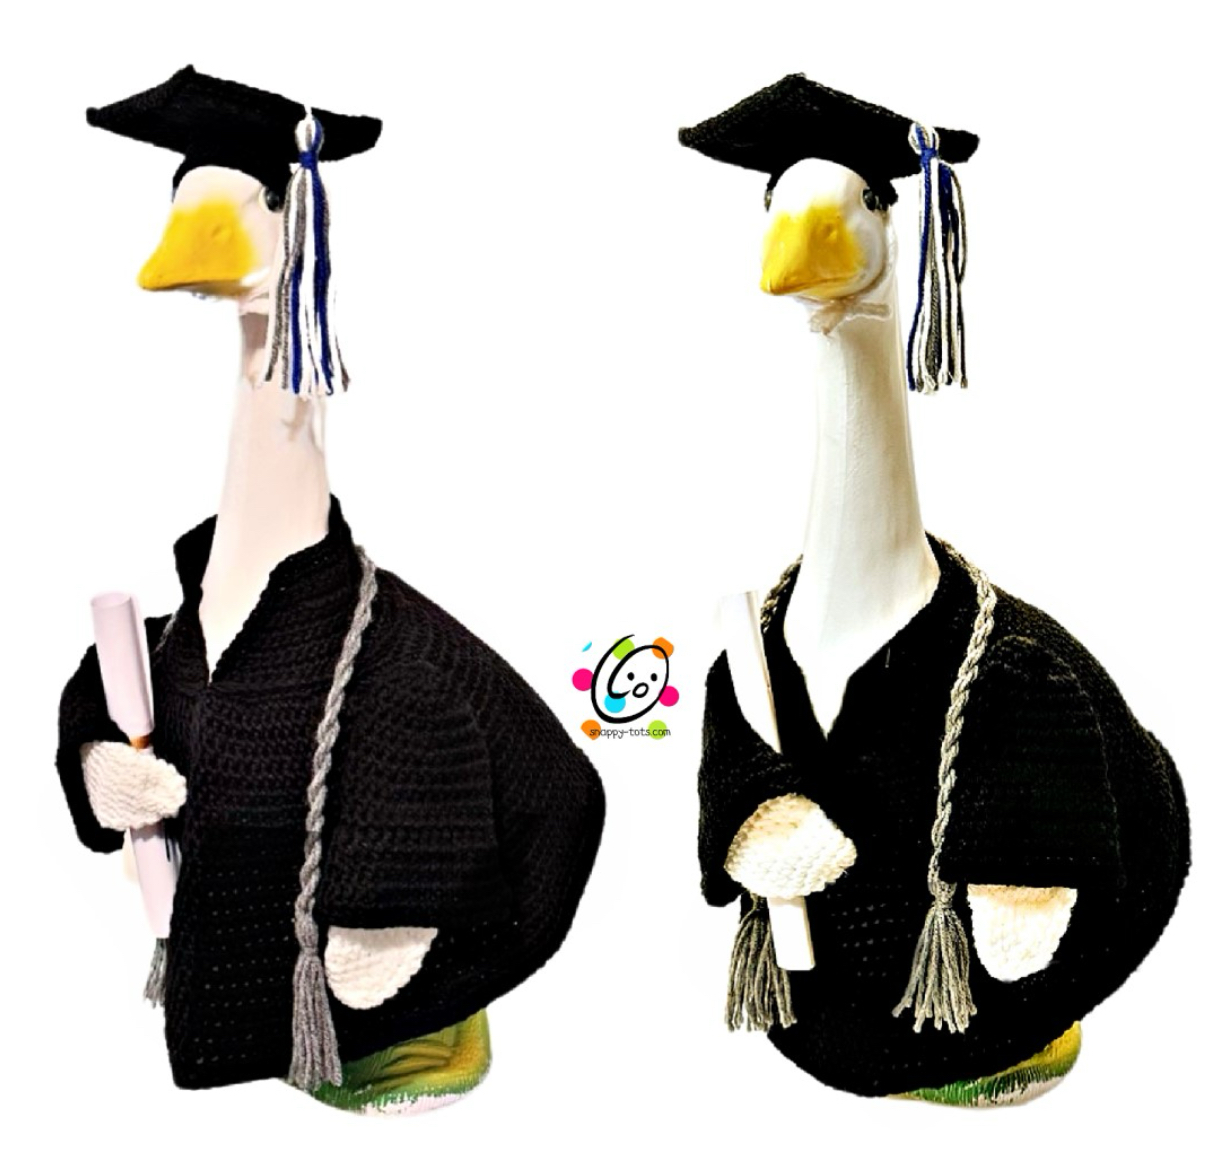
Description: This could be made as a graduation gown or choir robe in any color.
➡️ There are two different gowns, one with a stand up (or fold down) collar and one without.
Materials
- Yarn: Cap -50 yards worsted weight yarn; Gown – 200 yards worsted weight yarn Sample yarns – Red Heart Super Saver Black, Heather Grey, White, Royal Blue
- Crochet Hooks: H (5mm), I (5.5mm)
- Supplies: Yarn needle for weaving in ends, one piece white copy paper, yellow/gold ribbon
Measurements
- Finished Measurements: Cap – 5” square; Gown – 12” long x 18.5” across bottom edge
- Gauge: 4” with an I hook = = 13 hdc sts and 10 hdc rounds
Tips
- The first stitch of each row is worked into the same stitch as the turning chain unless noted.
- Numbers at the beginning of each line may refer to steps and not indicate number of rows.
- Stitch count remains the same unless noted at end of row/round.
- If you have any questions about this pattern please contact [email protected].
This is designed for a 23” goose statue like the one sold by Miles Kimball. Cement gooses tend to be larger than this plastic goose.
Cap
Square (make 1)
1. With an H hook and worsted weight yarn, ch 18, sc in the 2nd ch from hook and in each ch across. (17sts)
2. Ch 1, turn, sc in the same st and in each st to end of row.
3. Repeat the previous step for an additional 15 rows.
4. This step is worked around the outer edge of the square. Ch 2, do not turn. Sc in the same st, sc 15 sts evenly down the side of the square. (sc, ch 2, sc) in the first st of the bottom row, sc in each st until 1 st remains, (sc, ch 2, sc) in the last st, sc 15 sts evenly up the side of the square, (sc, ch 2, sc) in the first st of the top row, sc in each st to end of row, sl st to join. Finish off and weave in ends. Set aside.
Beanie
1. Leave a long yarn tail in the beginning for sewing the beanie to the square when complete. With an H hook and worsted weight yarn, create a magic circle of 8 sc sts (or preferred method to make a circle of 8 sc sts), pull to close, sl st to join. (8sts)
2. Ch 1, 2sc in each st to end of round, sl st to join. (16sts)
3. Ch 1, *sc, 2sc in the next st*, repeat to end of round, sl st to join. (24sts)
4. Ch 1, FPSC around each post to end of round, sl st to join. Note: This round is to help bend the beanie from the top to the sides.
5-6. Ch 1, sc in the same st and in each st to end of round, sl st to join.
7. Ch 1, *sc 11, 2sc in the next st*, repeat once, sl st to join. (26sts)
8. Ch 1, *sc 12, 2sc in the next st*, repeat once, sl st to join. (28sts) Finish off and weave in ends.
Look at the beanie and notice the two increase points. Pin the top of the beanie to the middle of the square with the increase points even with points of the square. This way when the hat is worn with the points of the square front and back and at each side by the ears. … do geese have ears on the sides of their head?
With a yarn needle, use the beginning yarn tail from the beanie to sew the top to the center of the square.
Ties: With an H hook and white worsted weight yarn, sl st into one increase point on the beanie. Ch 30, finish off and trim the end. Repeat for the second tie on the opposite side.
Top “Button”
1. With an H hook and worsted weight yarn to match the square, create a magic circle of 5 sc sts (or preferred method to make a circle of 5 sc sts), pull to close, sl st to join. (5sts)
2. Sl st in each st to end of round. Finish off, leaving a long tail for sewing to the hat. Set aside.
Square (make 1): make another square. Do not finish off at the end.
Before sewing the squares together, we will sew the “button” to the middle of the second square.
With a yarn needle, use the yarn tail to sew the button to the middle of the second square. Note: Sew the button just inside the last round of sts. This way the edge will still be loose enough to hold the tassel.
Place the two squares together (beanie side down, button side up). Working through the sts on the outer edges of both squares, sl st in each st around, with (sl st, ch 1, sl st) at each corner.
Tassel: Cut 20 pieces of worsted weight yarn 12” long. Use any color(s). Set 2 pieces aside.
Fold the yarn pieces in half. Use one of the extra yarn pieces to wrap around the middle of the folded yarn pieces. Tie in a knot so one end hangs down with the other yarn tails and the other will be wrapped around the button on the hat.
Use the extra yarn piece to wrap several times around the folded yarns, approximately ¾” from the fold.
Trim the yarn ends.
Wrap the end of the extra yarn at the top around the button so the tassel hangs beyond the hat.
Gown With Collar
1. With an I hook and worsted weight yarn (Sample: Black), ch 37, sc in the 2nd ch from hook and in each ch across. (36sts)
2. Ch 1, turn, 2sc in the same st, sc in each st until 1 st remains, 2sc in the last st. (38sts)
3. Ch 1, turn, 2sc in the same st, sc in each st until 1 st remains, 2sc in the last st. (40sts)
4. Ch 1, turn, 2sc in the same st, sc in each st until 1 st remains, 2sc in the last st. (42sts)
5. Ch 1, turn, 2sc in the same st, sc in each st until 1 st remains, 2sc in the last st. (44sts)
6. Ch 1, turn, 2sc in the same st, sc in each st until 1 st remains, 2sc in the last st. (46sts)
7. Ch 1, turn, 2sc in the same st, sc in each st until 1 st remains, 2sc in the last st. (48sts)
8. Ch 1, turn, *sc 11, 2sc in the next st*, repeat to end of row. (52sts)
9. Ch 1, turn, *sc 12, 2sc in the next st*, repeat to end of row. (56sts)
10. Ch 1, turn, *sc 13, 2sc in the next st*, repeat to end of row. (60sts)
11. Ch 1, turn, *sc 14, 2sc in the next st*, repeat to end of row. (64sts) Sl st in the first st of the row to create a circle.
12. This step is worked around the neck opening. Ch 1, sc 10 sts evenly spaced up the side of the rows, 2sc in the first st of the top edge, sc in each st across the row until 1 st remains, 2sc in the last st. Sc 10 sts evenly spaced down the side of the rows, sl st in the first st on the bottom edge.
13. Ch 1, FPSLST (front post sl st) around each post until 1 st remains. This next step is worked into 2 sts to tighten the gap. Insert hook in the next st and in the first st at the beginning of the previous row (behind the post st). See photo below. Pull up a loop. YO and pull through all loops on hook. Pull snug.
14. This step is worked into the sts from the round before the post sts, leaving the post sts to create a ridge. Ch 1, *sc 3, 3sc in the next st*, repeat to end of round, sl st to join. (96sts)
15. Do not ch 1 at the beginning of this round. Place a marker to work in continuous rounds from this point on. *sc in the next st, hdc in the next st*, repeat to end of round.
16. Hdc in each st to end of round.
17. *hdc 23, 2hdc in the next st*, repeat to end of round. (100sts)
18. Hdc in each st to end of round.
19. Repeat the previous round an additional 6 rounds.
20. *hdc 9, 2hdc in the next st*, repeat to end of round. (110sts)
21. Hdc in each st to end of round.
22. Repeat the previous round an additional 2 rounds.
23. *hdc 10, 2hdc in the next st*, repeat to end of round. (120sts)
24. Hdc in each st to end of round.
25. Repeat the previous round an additional 3 rounds.
26. *hdc 23, 2hdc in the next st*, repeat to end of round. (125sts)
27. Hdc in each st to end of round.
28. Loosely sl st in each st to end of round. Finish off and weave in ends. Skip to sleeves on page 8.
Gown Without Collar
1. With an I hook and worsted weight yarn (Sample: Black), ch 45, sc in the 2nd ch from hook and in each ch across. (44sts)
2. Ch 1, turn, 2sc in the same st, sc in each st until 1 st remains, 2sc in the last st. (46sts)
3. Ch 1, turn, 2sc in the same st, sc in each st until 1 st remains, 2sc in the last st. (48sts)
4. Ch 1, turn, 2sc in the same st, sc 15, 2sc in the next st, sc 14, 2sc in the next st, sc 15, 2sc in the last st. (52sts)
5. Ch 1, turn, 2sc in the same st, sc 16, 2sc in the next st, sc 16, 2sc in the next st, sc 16, 2sc in the last st. (56sts)
6. Ch 1, turn, 2sc in the same st, sc 17, 2sc in the next st, sc 18, 2sc in the next st, sc 17, 2sc in the last st. (60sts)
7. This step is worked around the neck opening. Ch 1, sc 5 sts evenly spaced up the side of the rows, 2sc in the first st of the top edge, sc in each st across the row until 1 st remains, 2sc in the last st. Sc 5 sts evenly spaced down the side of the rows, sl st in the first st on the bottom edge.
8. Ch 1, 2sc in the same st, sc 19, 2sc in the next st, sc 18, 2sc in the next st, sc 19, 2sc in the last st, sl st in the first st of the row to join in the round. (64sts)
9. Ch 1, sc in the same st, sc 6, 2sc in the next st, *sc 7, 2sc in the next st*, repeat to end of round, do not sl st to join. (72sts)
10. Do not ch 1 at the beginning of this round. Place a marker to work in continuous rounds from this point on.
Work the first sc a little more snug to close any gap. Sc in the next st, sc 7, 2sc in the next st, *sc 8, 2sc in the next st*, repeat to the end of the round. (80sts)
11. *sc 9, 2sc in the next st*, repeat to end of round. (88sts)
12. *sc 10, 2sc in the next st*, repeat to end of round. (96sts)
13. Hdc in each st to end of round.
14. *hdc 23, 2hdc in the next st*, repeat to end of round. (100sts)
15. Hdc in each st to end of round.
16. Repeat the previous round an additional 4 rounds.
17. *hdc 9, 2hdc in the next st*, repeat to end of round. (110sts)
18. Hdc in each st to end of round.
19. Repeat the previous round an additional 2 rounds.
20. *hdc 10, 2hdc in the next st*, repeat to end of round. (120sts)
21. Hdc in each st to end of round.
22. Repeat the previous round an additional 3 rounds.
23. *hdc 23, 2hdc in the next st*, repeat to end of round. (125sts)
24. Hdc in each st to end of round.
25. Loosely sl st in each st to end of round. Finish off and weave in ends. Continue to sleeves.
Sleeves (make 2)
The sleeve starts at the top/shoulder.
Leave a long tail in the beginning for attaching sleeve to suit when complete.
1. With an I hook and worsted weight yarn to match the jacket (black in sample), start with a magic circle of 8 sc sts (or preferred method for starting a circle of 8 sc sts), pull to close and place a marker for working in the round. (8sts)
2. 2hdc in each st to end of round. (16sts)
3. *2hdc in the next st, hdc 3*, repeat to end of round. (20sts)
4. Hdc in each st to end of round.
5. *2hdc in the next st, hdc 4*, repeat to end of round. (24sts)
6-7. Hdc in each st to end of round.
8. *2hdc in the next st, hdc 11*, repeat once. (26sts)
9. Hdc in each st to end of round.
10. Sc, sl st. This is the new beginning of the round. Ch 1, hdc in the same st and in each st to end of round, sl st to join.
11. Ch 1, FPHDC around each post from the previous round, sl st to join. Slip the loop off the hook. This part will be finished after the white part of the wing is complete.
12. The white yarn for the remaining part of the wing will be attached to the inner ridge created from step
13. Pull the top edge back and use an I hook to attach white yarn to a st. Ch 1, hdc in the same st and in each st to end of round, sl st to join. (26sts)
14. Ch 1, *hdc2tog, hdc 11*, repeat once, sl st to join. (24sts)
15. Ch 1, hdc2tog, hdc in each st until 2 sts remain, hdc2tog, sl st to join. (22sts)
16. Ch 1, hdc2tog, hdc in each st until 2 sts remain, hdc2tog, sl st to join. (20sts)
17. Ch 1, hdc2tog, hdc in each st until 2 sts remain, hdc2tog, sl st to join. (18sts)
18. Ch 1, hdc in each st to end of round, sl st to join.
19. Ch 1, hdc2tog, hdc in each st until 2 sts remain, hdc2tog, sl st to join. (16sts)
20. Ch 1, sc2tog, sc in each st until 2 sts remain, sc2tog, sl st to join. (14sts)
21. Ch 1, sc2tog, sc in each st until 2 sts remain, sc2tog, sl st to join. (12sts)
22. Ch 1, sc2tog, sc in each st until 2 sts remain, sc2tog, sl st to join. (10sts)
23. Ch 1, *sc2tog*, repeat to end of round, sl st to join. (5sts) Finish off, leaving a long tail for sewing the end.
With a yarn needle, use the yarn tail to weave in and out of the remaining sts. Pull closed and secure the end.
Finishing the sleeve:
1. Slip the black loop back on the hook. Ch 1, 2hdc in the same st, hdc 11, 2hdc in the next st, hdc 12, 2hdc in the next st, sl st to join. (29sts)
2. Ch 1, 2hdc in the same st, hdc 13, 2hdc in the next st, hdc 13, 2hdc in the next st, sl st to join. (32sts)
3. Ch 1, 2hdc in the same st, hdc 15, 2hdc in the next st, hdc 14, 2hdc in the next st, sl st to join. (35sts)
4. Ch 1, 2hdc in the same st, hdc 16, 2hdc in the next st, hdc 16, 2hdc in the next st, sl st to join. (38sts)
5. Loosely sl st in each st to end of round. Finish off and weave in ends.
Notice in the main photo above that one edge of the white wing part tapers towards the end tip and the other stays more straight. Also, the widest part of the sleeve should be at the bottom edge of the sleeve. Adjust your wing and flatten it to resemble the photo.
Use the beginning yarn tail to sew the top 1” of the shoulder part of each wing to the gown. This is easiest when the suit is on the goose. See main photos for placement.
Tip: I like to put the gown on the goose, pin the sleeves in place, and set the goose across the room. Look at it from different angles and adjust if needed.
If the goose will be holding something, the white tips can be sewn together or just one (or both) sewn to the gown.
Diploma: I used a regular piece of white copy paper and rolled it from one short edge. Tie a piece of ribbon around the middle.
Cord: Cut 3 strands of worsted weight yarn in choice of colors, 60” long.
Have someone help you with this part. Each person holds one set of ends and twists the yarn. Make sure you are twisting the yarn and not undoing what the other one is doing. When it is twisted A LOT, walk towards the other person and grab the center as you go. Hold the center of the twist with one hand and both ends in the other. Let go of the center piece and allow the twists to wrap around each other.
Decide how long you want the cord (before tassels). Tie a knot in each end of cord.
Tassel: Cut 18 pieces of worsted weight yarn 10” long. Set 2 pieces aside to wrap around the strands.
Divide the remaining strands into 2 groups of 8. Pull the ends of one group through one end of the cord until the ends are even. Use one of the extra yarn pieces to wrap around the strands, just below the knot. Trim the yarn ends.
Repeat for the other end of the cord.
Contact & Snappy Spots
Please visit Snappy Tots online for giveaways, new release announcements, events and fun.
Blog: http://snappy-tots.com
Shop: http://shop.snappy-tots.com
Facebook: http://www.facebook.com/snappytots
Pinterest: http://www.pinterest.com/snappytots
Instagram: http://www.instagram.com/snappytots
Twitter: http://www.twitter.com/snappytots
If you have any questions, comments or suggestions please email [email protected].
I hope you will enjoy this pattern and I would love to see what you make. Please share pix as a ravelry project or tag me in social media posts by adding #snappytots.
I hope you have a wonderful day!
Pin To Save For Later