Free Pattern: Baby Groot Beanie
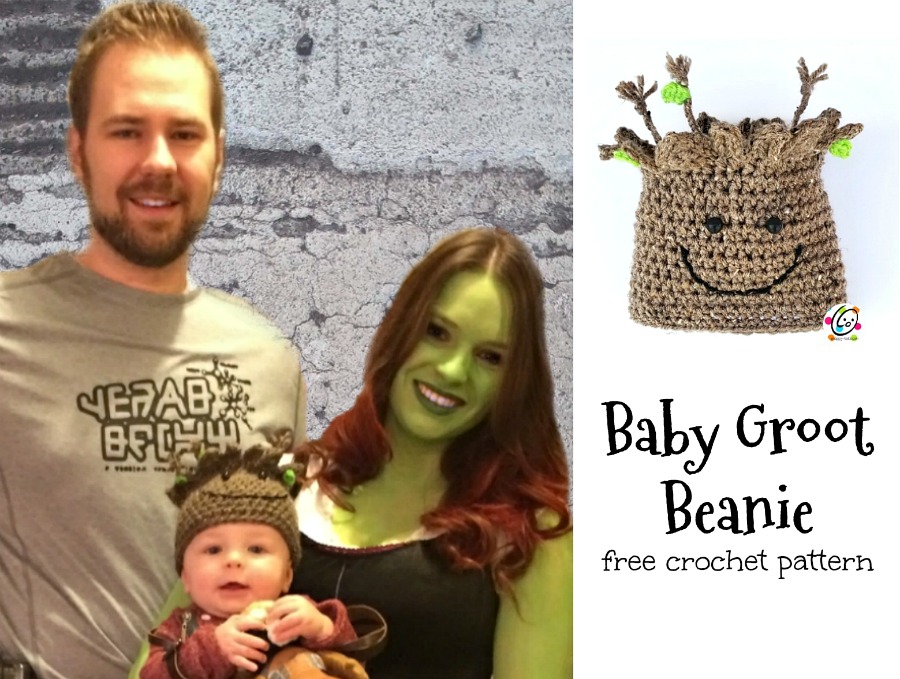
My friend asked me to make a baby groot beanie for her grandson. His parents were planning on a “Guardians of the Galaxy” theme for their costumes so of course their new little baby would be perfect for the Baby Groot character.
I had seen the wonderful “Potted Baby Groot” by Twinkie Chan and decided to give a beanie a try.
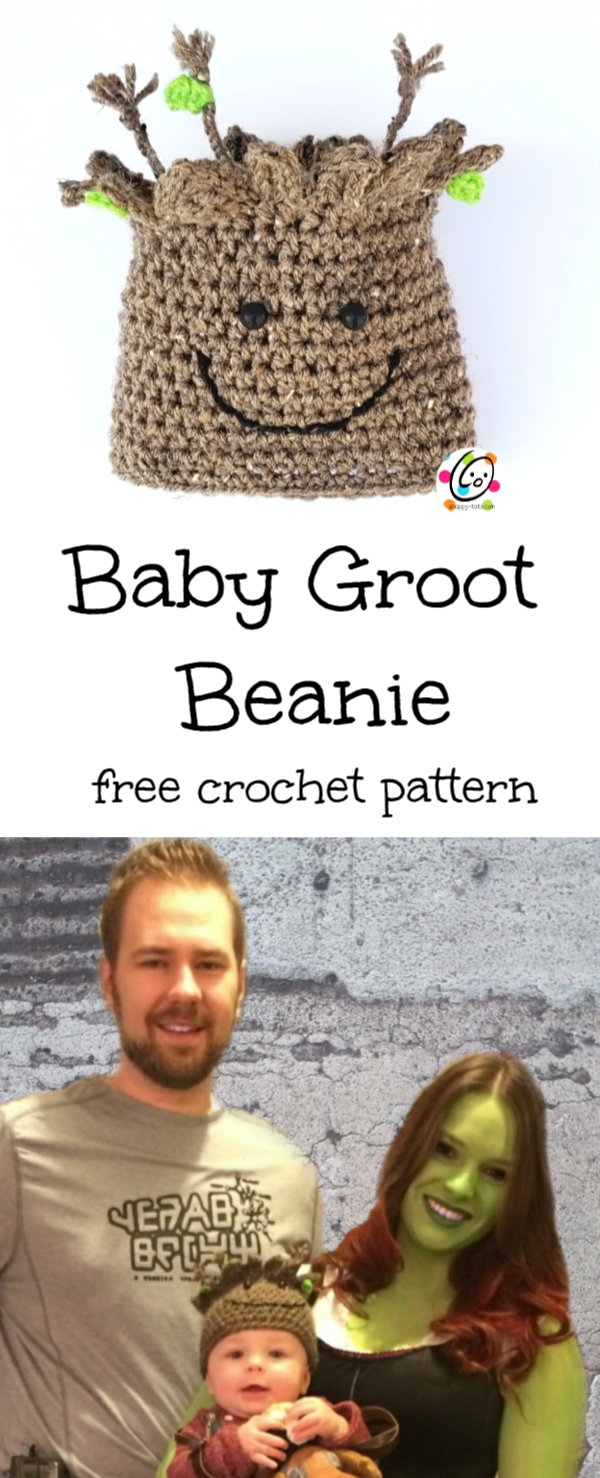
I LOVE how it turned out and they were happy with it so that’s the important part. Aren’t the three of them amazing? After seeing the picture, I whipped up some baby booties to go with it (free pattern coming. I am tickled with how they turned out. Loving her green skin the very most tho.
Baby Groot Beanie
I started with a basic beanie and added the “random wood edge” around the top after. Groot seems like a dreadlock kinda guy so I added some braids sticking up out of the top for the sticks.
Project Info
• Skill Level: Easy. Basic crochet skills are needed and must be able to read a crochet pattern.
• Completion Time (how long it takes the designer to make one): 1.5 hours
List of supplies
Yarn: Worsted weight yarn in medium brown (sample: Vanna’s Choice in Barley. I really like the fleck. I thought it looked extra woodsy.); small amounts of worsted weight green for leaves and black for stitching.
Hooks: H (5mm), I (5.5mm)
Miscellaneous: yarn needle, sewing needle, black thread, measuring tape, 2 small black buttons for eyes, preferably slightly bulged on top like a safety eye (safety eyes have a long post on the inside and would not be a good choice for a hat in my opinion).
Instructions
Tips: Please read these first.
- Rounds start with 8 increases each to form a flatter top, and then switch to 6 increases each starting on round #4.
- All sizes start the same, and then skip to “body” section when increase round for desired size has been completed.
- This is a basic beanie. The top parts could be attached to almost any style beanie, including one commercially made.
1. With an I hook and yarn, start with a magic circle of 8 sts (or preferred method for starting a circle of 8 sc sts). Place marker for working in the round. (8sts)
2. 2hdc in each st to end of round. (16sts)
3. *hdc, 2 hdc in next st*, repeat to end of round. (24sts)
4. *hdc 3, 2 hdc in next st*, repeat to end of round. (30sts)
5. *hdc 4, 2 hdc in next st*, repeat to end of round. (36sts)
6. *hdc 5, 2 hdc in next st*, repeat to end of round. (42sts) 4.5″ across circle
7. Place a marker to keep track of this round for the wood edge later. Hdc in each st around until hat is 6″ long from starting point to bottom edge (lay hat flat on a surface to measure).
8. Sc in each st to end of round.
9. Sl st in next st. Finish off and weave in end.
Wood Edge
1. This wood edge is worked around the posts of the first hdc round after the increases (marker from step 7). With the bottom of the hat towards you, use an I hook to attach matching yarn to a post on this round. Ch 5, Sl st in the 2nd ch from hook, sc in each of the next 2 chs, hdc in the next ch, sc around each of the next 2 posts. One peak made.
2. Ch 6, sl st in the 2nd ch from hook, sc in each of the next 2 chs, hdc in each of the next 2 chs, sc around each of the next 5 posts. Second peak made.
3. This peak is worked back and forth in rows. Ch 1, turn, sc in the same st, sc 3. (4sts) Ch 1, turn, sc2tog, sc 2. (3sts) Ch 1, turn, sc2tog, sc. (2sts) Ch 1, turn, sc2tog. Ch 1, sc 5 sts evenly down the side of the peak. Third peak made.
4. Ch 5, Sl st in the 2nd ch from hook, sc in each of the next 2 chs, hdc in the next ch. Fourth peak made.
5. Sc around each of the next 4 posts. Ch 1, turn, sc in the same st, sc 2. (3sts) Ch 1, turn, sc in the same st, sc 2. (3sts) Ch 1, turn, sc2tog, sc. (2sts) Ch 1, turn, sc2tog. (2sts) Ch 1, sc 4 sts evenly down the side of the peak. Sc around each of the next 2 posts. Fifth peak made.
6. Ch 5, Sl st in the 2nd ch from hook, sc in each of the next 2 chs, hdc in the next ch, sc around each of the next 2 posts. Sixth peak made.
7. Ch 6, sl st in the 2nd ch from hook, sc in each of the next 2 chs, hdc in each of the next 2 chs, sc around each of the next 4 posts. Seventh peak made.
8. Ch 1, turn, sc in the same st, sc 2. (3sts) Ch 1, turn, sc in the same st, sc 2. (3sts) Ch 1, turn, sc2tog, sc. (2sts) Ch 1, turn, sc2tog. (2sts) Ch 1, sc 4 sts evenly down the side of the peak. Sc around each post to end of round. Eighth peak made. Finish off and weave in ends.
Braids (make 3 or more)
Cut 3 strands of matching yarn 8″ long. Pull one end of the strands through a space at the top of the hat. Pull the opposite ends through another space next to the first until the ends are even. Tightly braid the strands and tie knot near the end. Repeat for additional braids.
Leaves (make 3 or more)
With an H hook and green yarn, ch 3, sl st in 2nd ch from hook, (sc, hdc) in last ch. Sl st evenly around the leaf. Finish off, leaving a yarn tail for sewing to the hat.
With a yarn needle, use the yarn tail to sew the leaves in random places on the wood edge and braids.
Face: With a yarn needle and black yarn, stitch a mouth in place. With a sewing needle and black thread, sew the eyes in place. See main photo for placement.
I hope you enjoyed making this quick and easy project.
Thanks for crocheting with me!
~ Heidi
Pin To Save For Later
