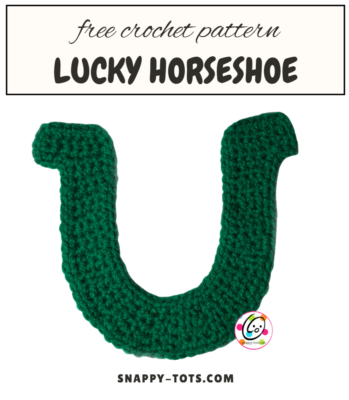
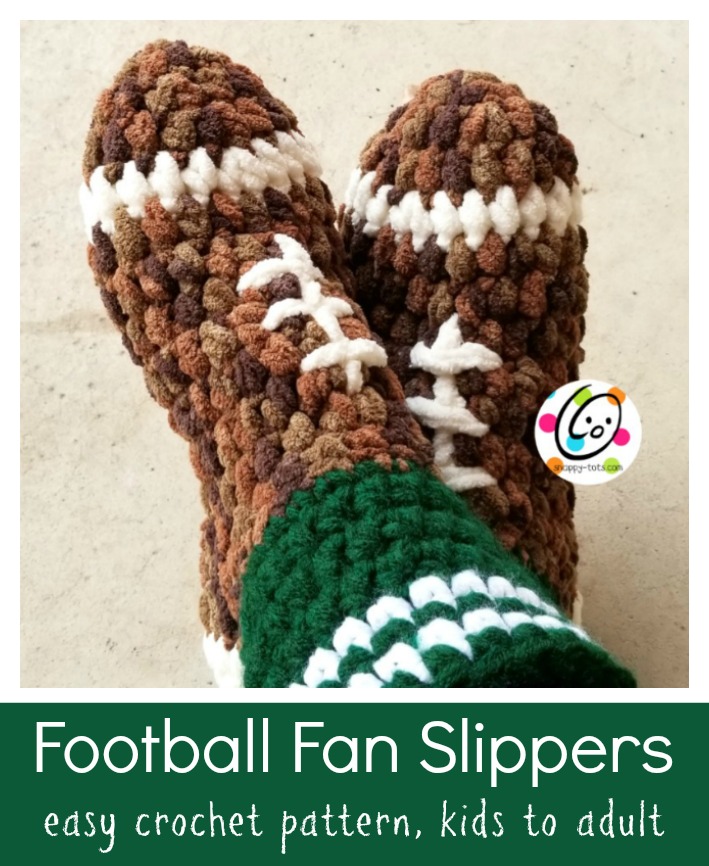
Free Pattern: Lucky Horseshoe
A few years ago I had some requests for a horseshoe applique to go on the bottom of my “Big Kids Cocoons” instead of paw prints. With St. Patrick’s Day just around the corner, I thought I would go ahead and release the pattern here in case anyone would like to make a lucky horseshoe.
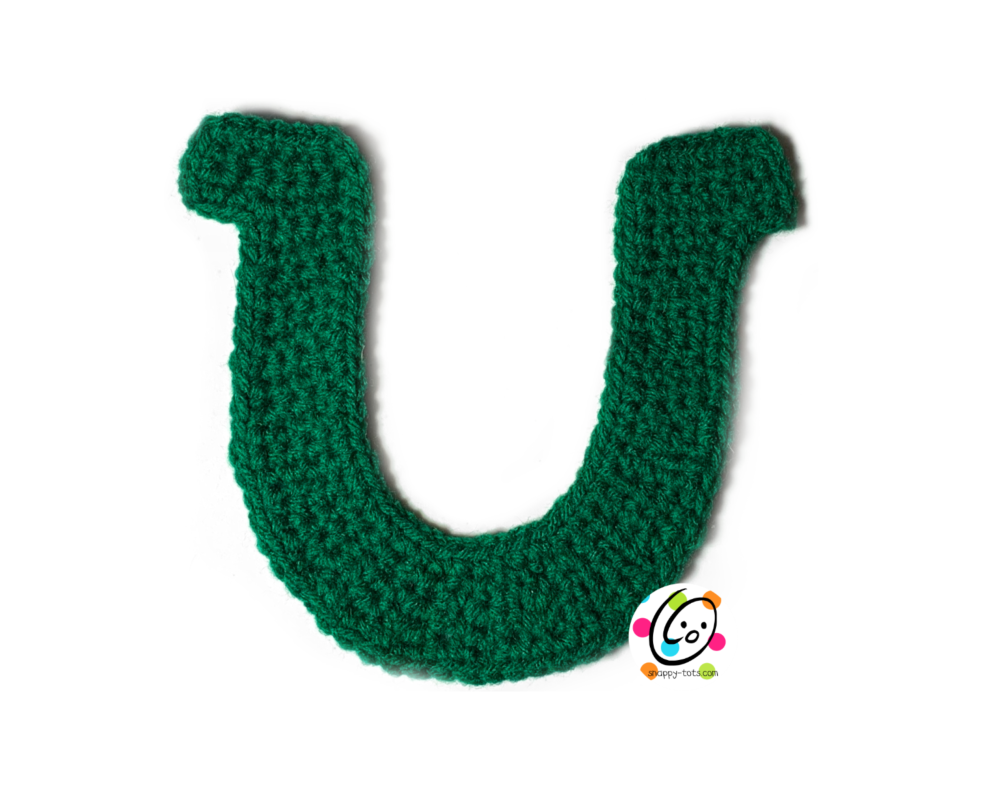
Horseshoe Pattern
Materials and Details
- Yarn: Worsted weight in choice of colors
- Crochet Hook: H (5mm)
- Measurements: 6.5” high x 7.5” wide
Directions
1. With an H hook, ch 7, sc in 2nd ch from hook and in each ch across. (6sts)
2. Ch 1, turn, sc in each st to end of row.
3. Ch 1, turn, sc 4. Leave remaining sts unworked
4-5. Ch 1, turn, sc in each st to end of row.
6. Ch 1, turn, 2sc in same st, sc, sc2tog. (4sts)
7-8. Ch 1, turn, sc in each st to end of row.
9. Ch 1, turn, sc2tog, sc, 2sc in last st. (4sts)
10-11. Ch 1, turn, sc in each st to end of row.
12. Ch 1, turn, 2sc in same st, sc, sc2tog. (4sts)
13-14. Ch 1, turn, sc in each st to end of row.
15. Ch 1, turn, sc 2, hdc 2.
16. Ch 2, turn, hdc 2, sc 2.
17. Ch 1, turn, sc in each st to end of row.
18. Ch 2, turn, hdc, sc 3.
19. Ch 1, turn, sc 2, hdc 2.
20. Ch 2, turn, hdc 2, sc 2.
21. Ch 1, turn, sc 3, hdc.
22. Ch 2, turn, dc, hdc, sc 2.
23. Ch 1, turn, sc, hdc, dc 2.
24. Ch 2, turn, dc, hdc, sc 2.
25. Ch 1, turn, sc, hdc, dc 2.
26. Ch 2, turn, dc 2, hdc, sc.
27. Ch 1, turn, sc 2, hdc, dc.
28. Ch 2, turn, hdc, sc 3.
29. Ch 1, turn, sc 2, hdc 2.
30. Ch 2, turn, hdc 2, sc 2.
31. Ch 1, turn, sc 3, hdc.
32. Ch 2, turn, hdc 2, sc 2.
33. Ch 1, turn, sc 2, hdc 2.
34. Ch 2, turn, hdc 2, sc 2.
35. Ch 1, turn, sc2tog, sc, 2sc in last st. (4sts)
36-37. Ch 1, turn, sc in each st to end of row.
38. Ch 1, turn, sc, hdc 3.
39-40. Ch 1, turn sc in each st to end of row.
41. Ch 1, turn, sc2tog, sc, 2sc in last st. (4sts)
42-43. Ch 1, turn, sc in each st to end of row.
44. Ch 3, turn, sc in 2nd ch from hook, sc in next ch, sc 4. (6sts)
45. Ch 1, turn, sc in each st to end of row.
46. This step is worked around outer edge of horseshoe. Ch 1, sc in same st, (sc, ch 1, sc) in next st (corner of horseshoe tip), sc evenly around outer edge of horseshoe, working (sc, ch 1, sc) in each corner at opposite end of the U.
Tip: as you place the sc sts, make sure to not add too many or the shoe will ripple, but enough to allow the outer edge to curve. Finish off and weave ends.
I hope you have enjoyed this project. If you end up using this on something please share a picture. I love to see what you make.
Pin To Save For Later