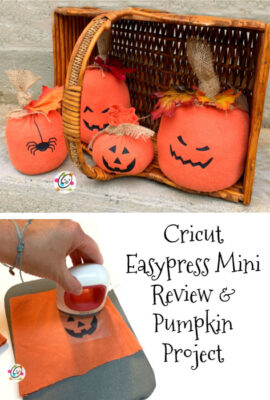
Cricut EasyPress Mini Review and Pumpkin Project
This is a sponsored conversation written by me on behalf of Cricut. The opinions and text are all mine.
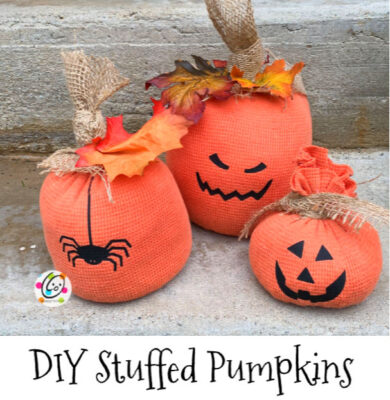
We LOVE Halloween so I am always looking for fun new projects to make. When the new Cricut Mini EasyPress came in the mail (THANK YOU CRICUT) I wanted to try it out on some pumpkins for my mom’s house. I LOVE how they turned out and still can’t get over that cutie patootie Mini EasyPress. I hope you will give these a try and share them so I can see too.
The New Cricut Mini EasyPress
When I first heard they were coming out with a “mini” one I never imagined just how mini it would be. My first thought? Why would I need another EasyPress? I already have two different sizes.
Oh my heck! Look at this itty bitty thing!
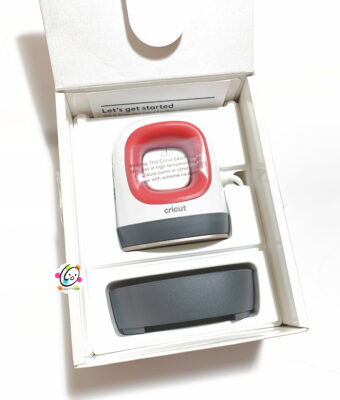
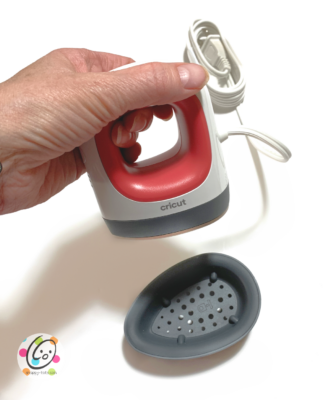
Back to my question: I already have two different sizes so why would I need the new mini? Look at the difference in those two. Even my “small” EasyPress looks gigantic now. The Cricut EasyPress Mini is perfect for small and/or unique projects like hats, shoes, shirt sleeves, cuffs, and pockets. It even works great on stuffed animals! I have wanted to try putting my grandkids names on stuffed animals and now this mini press is the perfect size.
Just as Great as Its Big Brothers
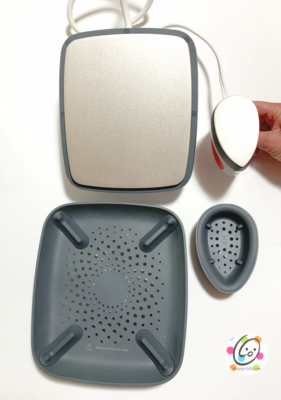
It might be mini, but the Cricut EasyPress Mini offers the same benefits and technology as the Cricut EasyPress 2: even heat plate and easy-to-use heat settings for heat transfers. Plus, you can use this thing to press fabric seams!
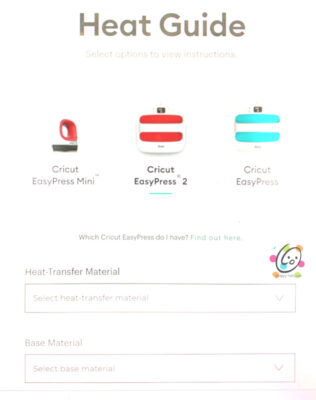
Where’s the temperature window? When I first saw these three squiggly lines I thought WHAT ON EARTH? Then I realized they each stand for different settings. Ok… still doesn’t help this newbie. SO… thankfully the mini is now in the EasyPress Heat Guide. Just choose your products at that site and it will tell you the temps and stuff. WHEW!
Let’s Make Some Stuffed Pumpkins
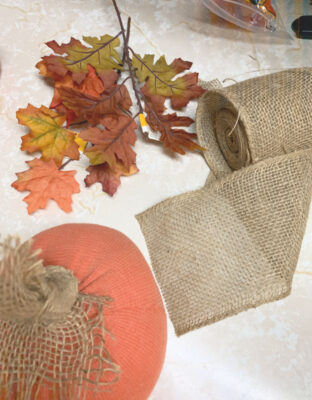
Materials
To Make The Pumpkins
- Orange shirt or 1/2 yard orange fabric
- Scissors
- Stuffing
- 1 cup unpopped popcorn kernels (or something similar) per pumpkin to weight the bottom
- Burlap: 3″ wide x 8″ per pumpkin
- Large artificial leaves
- Orange embroidery floss or orange thread
- Sewing needle
- Hot Glue Gun (I use Gorilla glue in mine… I still am LOVING that this has been invented!)
Cricut Supplies For The Faces
- Cricut EasyPress Mini, EasyPress or Iron
- Cricut Black Iron-on Vinyl
- Cricut Maker or Explore
- Green Standard Grip mat or blue Light Grip mat
Instructions
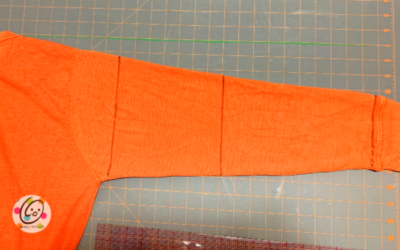
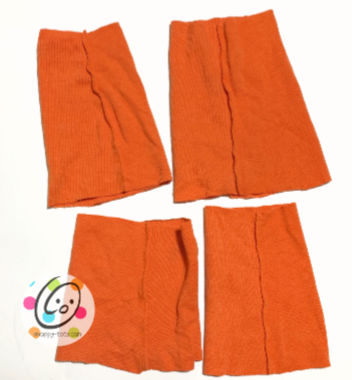
I had an orange thermal shirt I picked up at a thrift store and decided to use the sleeves for the pumpkins. My sewing machine hates me so I avoid using it whenever possible. I laid the shirt on a flat surface and marked off each sleeve so I could get 2 pumpkins per sleeve. I wanted the pumpkins to be different sizes so I cut the sleeve off center. Keep in mind that the sleeves taper towards the wrist so the pumpkins will be different widths.
You could use orange fabric instead and sew two edges together to form a tube if you’d prefer.
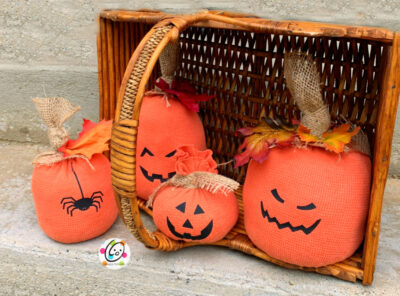
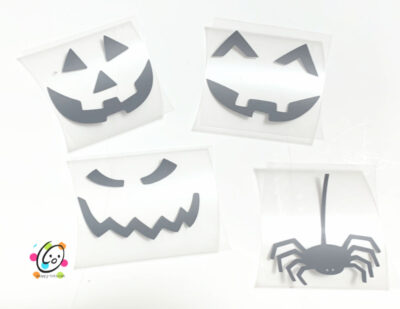
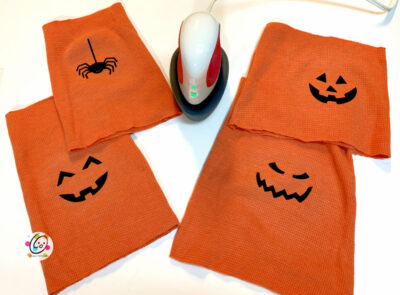
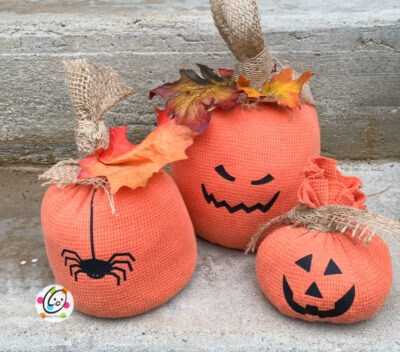
I created 3 Jack O Lantern faces and one spider. You can get those for free by going to: Cricut Design Space: Stuffed Pumpkins
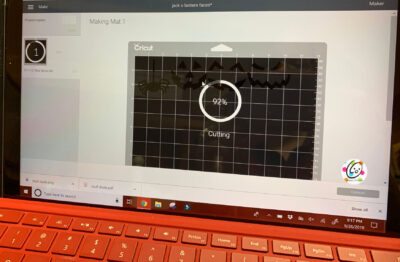
I do all of my Cricut stuff on my laptop. I am always amazed at how easy Cricut Design Space is to use!
MAJOR TIP: I found I was losing internet connection in the middle of a cutting project so I started using the USB cable instead of bluetooth and I haven’t had a problem since!
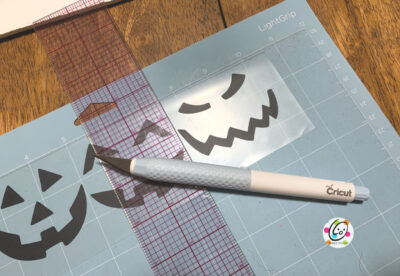
Reminder: Shiny side of the iron-on vinyl goes DOWN, towards the mat.
Tip: Leave the piece on the mat when weeding (pulling that extra stuff off). It is super helpful because the sticky mat holds it in place for you. It’s like having an extra hand and we always can use those, right?
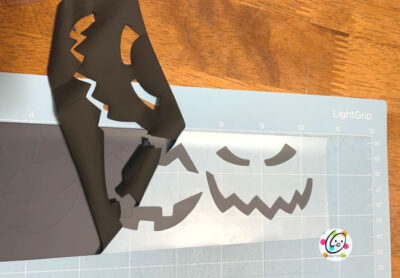
The pieces will all cut out close together to conserve vinyl. I finally invested in a Cricut knife (cutting blade) to help make it easier to use less vinyl. Cut the faces apart.
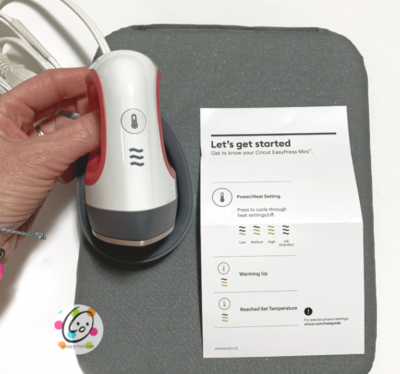
PIN THIS LINK: EasyPress Heat Guide
This helpful online tool now includes the mini. You choose your products and it tells you heat settings, time to heat things, when to peel, etc.
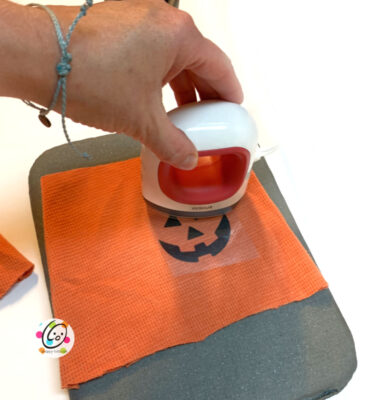
I still giggle every time I see this mini thing. He is the perfect size for our little Jacks and the little heating mat is just the right size.
Stuffing the Pumpkins
After all four pieces had faces, I turned them inside out.
Using 2 strands of orange embroidery floss and a needle, I went in and out of the widest edge, then pulled the floss to gather the fabric. Secure the floss with a knot to hold the gather tight. Turn the tubes right side out.
My first attempt was not quite how I had them pictured. I used only stuffing inside and they looked like lumpy oranges.
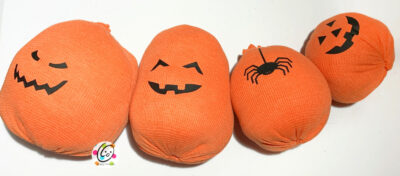
The next morning, after taking another look, I decided some weight in the bottom of each pumpkin would not only give them a better shape, but would help them stand up and not be so lumpy. I ripped out the top edge and took out the stuffing.
I put 1-2 cups of unpopped popcorn kernels in the bottom of each pumpkin. Because the cloth was a dense weave I was able to put the kernels directly into the pumpkin. If your fabric is an open weave or if you stuff a crocheted pumpkin, you will want to first put your kernels into a nylon sock and tie a knot in the end. This will keep the kernels from working their way out of the fabric.
After the kernels, fill them the rest of the way with stuffing. You could also add some potpourri or cinnamon for a touch of fall scent. Sew the top closed with the floss too. It will create a little nub and that’s ok because we won’t see it when the stem is in place.
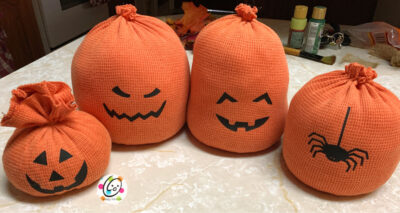
You’ll notice the little guy has a bigger pouf on top. For this one I pull the top part off and used a small hair rubber band to hold it in place. Later you’ll see I tied a piece of burlap around the top. This would be cute for a treat bag.
Gather your supplies.
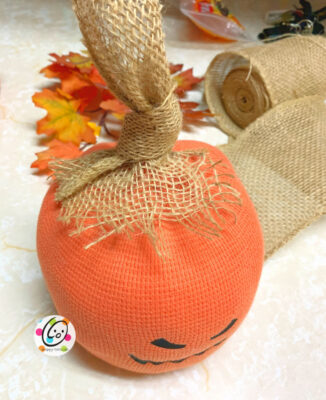
Cut a piece of burlap approximately 12″ long. Tie a knot in the middle and pull one end apart slightly. This is the end that goes on the top of the pumpkin. Put a lot of hot glue on top of the pumpkin nub (where you sewed the opening). Push the burlap knot onto the hot glue and hold in place until the glue has cooled. Scrunch the wide part of a leaf and glue at the base of the stem’s knot. Add additional leaves as desired.
For the little guy I cut a piece of burlap 12″ long and then cut that piece in half lengthwise. Since the burlap pulls apart, be careful tying it around the pumpkin top. Ribbon could be used instead.
Loaded up and getting ready to go to my mom’s house.
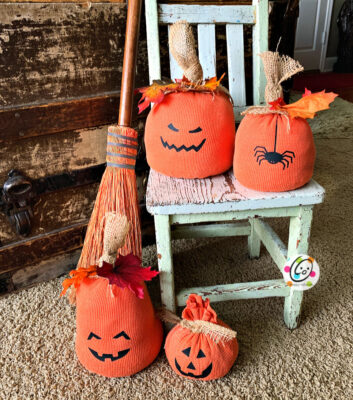
They made themselves at home.
Pin To Save For Later