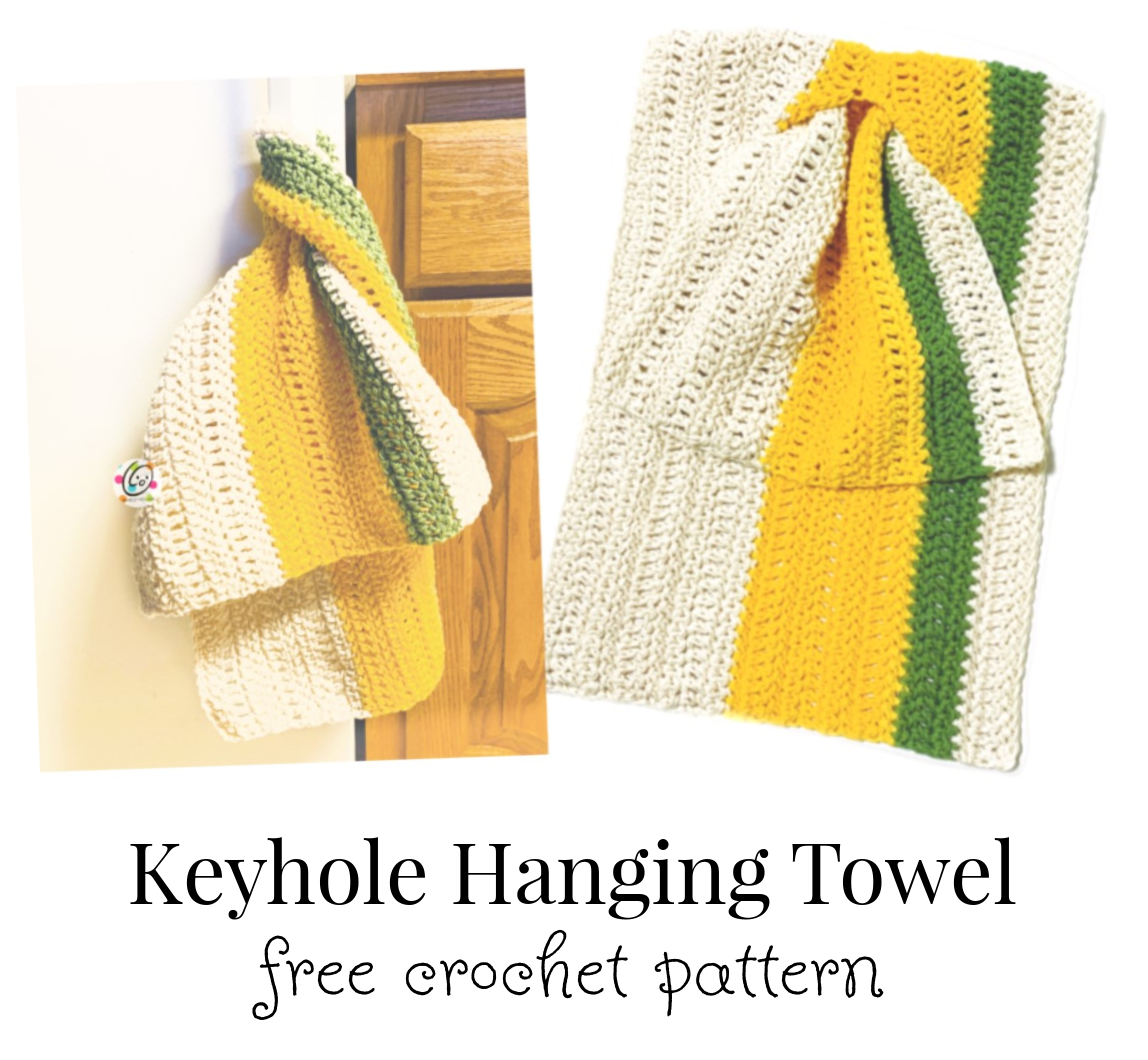
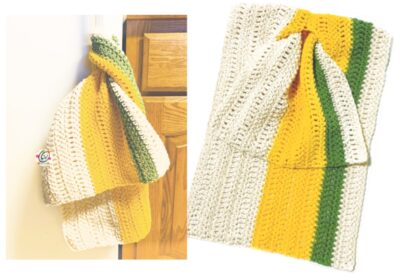
Weekly Wash #38: Keyhole Hanging Towel
I’ve made a few towels with a keyhole opening and they are really popular in my house because they don’t have to do up a button to get it to stay. Boys! lol
This towel is made using a half herringbone stitch. You could substitute a regular hdc if you’d prefer.
Similar patterns you might enjoy:
Keyhole Hanging Towel Crochet Pattern
This pattern is available for free below. An ad-free, downloadable PDF of this pattern with all of the photos is available to purchase from my Ravelry Shop: Click HERE
Materials
- Yarn: 320-340 yds worsted weight COTTON yarn
Yarn used in the main sample:
Color A – Cream: 140 yds Sugar & Cream Ecru
Color B – Yellow: 120 yds Sugar ‘n Cream Yellow
Color C – Green: 80 yds Sugar ‘n Cream Sage
- Crochet Hooks: I (5.5mm)
- Notions: Yarn needle for weaving in ends
- Optional: Measuring tape, scissors
Measurements
- Finished Measurements: 10.5” wide x 28” long (full length)
- Gauge: not needed for this project.
Tips
- First stitch of each row is worked into the same stitch as the turning chain.
- Numbers at the beginning of each line may refer to steps and not indicate number of rows.
- Stitch count remains the same unless noted at end of row/round.
- If you have any questions about this pattern please contact [email protected].
Special Stitch
Herringbone Half Double Crochet (HHDC): Yarn over and insert the hook into the next stitch. Yarn over and pull the loop through the stitch AND through the first loop on the hook. Two loops remain on hook. Yarn over again and pull the loop through both loops on the hook.
Photo tutorial and video if needed: How to crochet the HHDC
Directions
- This project is worked from one long side to the other.
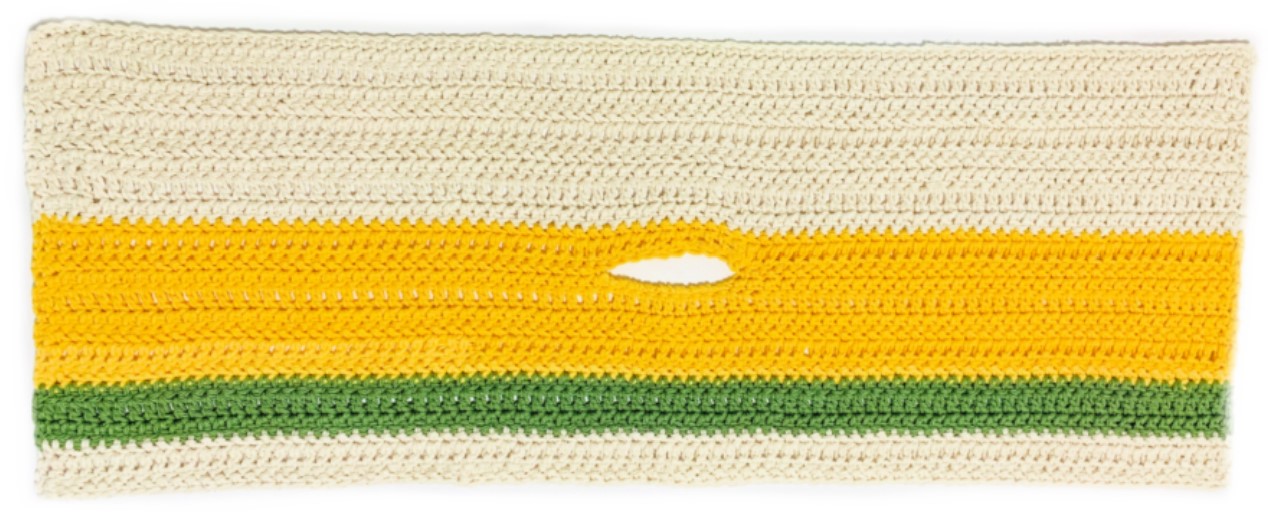
- Each row starts with a “ch 1”, even the hdc and dc rows. No this is not a typo. I tried it with a ch 2 and it was bulgy at the edges. Notice my finished cloth on the next page and how straight those edges are!
- This piece is created by repeating 3 rows, one hhdc row, one dc row and one hhdc row. I LOVE the look this sequence created and how a simple row of DC added an open ladder appearance.
- The directions are written for the color changes as shown, but feel free to add more or less rows. If so, I suggest changing colors between the two hhdc rows that end up next to each other.
Directions
This project is worked from one long side to the other. Each row starts with a “ch 1”, even the hdc and dc rows. No this is not a typo. I tried it with a ch 2 and it was bulgy at the edges. Notice my finished cloth on the next page and how straight those edges are! This piece is created by repeating 3 rows, one hhdc row, one dc row and one hhdc row. I LOVE the look this sequence created and how a simple row of DC added an open ladder appearance. The directions are written for the color changes as shown, but feel free to add more or less rows. If so, I suggest changing colors between the two hhdc rows that end up next to each other.
- With an I hook and color A (cream yarn in sample), ch 87, sc in 2nd ch from hook and in each ch across. (86sts)
- Ch 1, turn, hdc in same st, hhdc (see “special stitches” on page 1) in each st until 1 st remains, hdc in last st.
- Ch 1, turn, dc in same st and in each st to end of row.
- Ch 1, turn, hdc in same st, hhdc (see “special stitches” on page 1) in each st until 1 st remains, hdc in last st. Note: Steps 2-4 are repeated across the cloth. If you would like to change the width of the stripes, change yarn colors after step 4 as desired.
- Repeat steps 2-4 two more times.
- Change to color B (yellow yarn in sample). Ch 1, turn, hdc in same st, hhdc in each st until 1 st remains, hdc in last st.
- Ch 1, turn, dc in same st and in each st to end of row.
- This step creates the keyhole opening. Ch 1, turn, hdc in same st, hhdc 36, sc, ch 10, sk 10, sc, hhdc 36, hdc in last st.
- Ch 1, turn, hdc in same st, hhdc 37, sc 10 around ch, hhdc 37, hdc in last st.
- Ch 1, turn, dc in same st and in each st to end of row.
- Ch 1, turn, hdc in same st, hhdc in each st until 1 st remains, hdc in last st.
- Ch 1, turn, hdc in same st, hhdc in each st until 1 st remains, hdc in last st.
- Ch 1, turn, dc in same st and in each st to end of row.
- Ch 1, turn, hdc in same st, hhdc in each st until 1 st remains, hdc in last st.
- Change to color C (green yarn in sample). Ch 1, turn, hdc in same st, hhdc in each st until 1 st remains, hdc in last st.
- Ch 1, turn, dc in same st and in each st to end of row.
- Ch 1, turn, hdc in same st, hhdc in each st until 1 st remains, hdc in last st.
- Change to color A (cream yarn in sample). Ch 1, turn, hdc in same st, hhdc in each st until 1 st remains, hdc in last st.
- Ch 1, turn, dc in same st and in each st to end of row.
- Ch 1, turn, hdc in same st, hhdc in each st until 1 st remains, hdc in last st. Finish off and weave in ends.
I hope you enjoyed making this quick and easy project. I would love to see your creations. Please add your project to Ravelry and/or share online and include #snappytots.
Thanks for crocheting with me!
~ Heidi

Pin To Save For Later