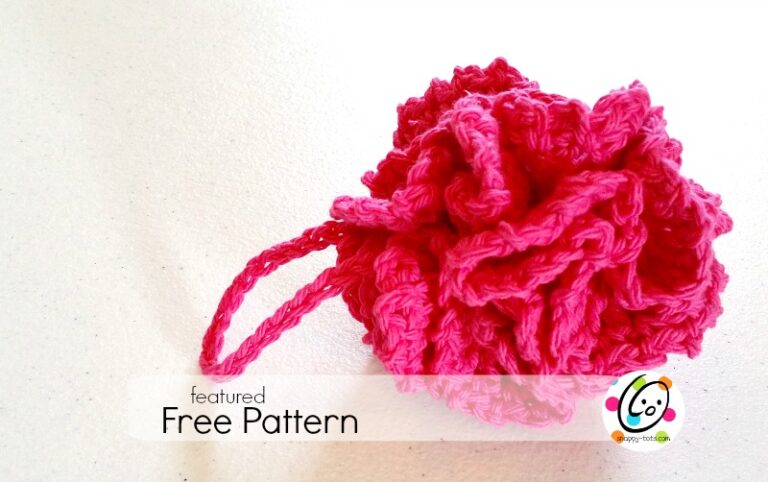
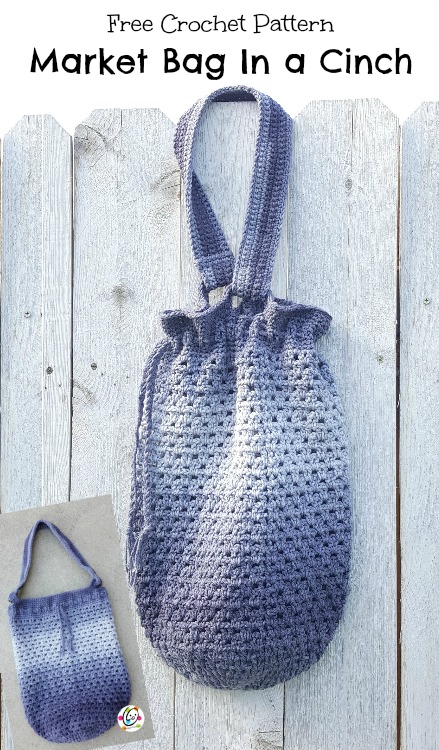
Free Pattern: Market Tote in a Cinch
Every summer we spend a lot of time in our travel trailer. I am always needing a bag for something. Whether it’s for a project, change of clothes, snacks or something else, I can never have enough bags. On our last trip, I decided I would try out a skein of the new Red Heart Super Saver Ombre and make a bag I could fit almost anywhere for those last minute needs.
I had designed a “Farmer’s Market Bag” a few years ago and have used it a ton. This time I added a drawstring to cinch in the top, plus just one (instead of the original two) handle to make it easier to carry and hang on hooks when not in use.
I hope you will like this simple, but super usable, tote.
Want to save this for later?
- Pin it!
- CLICK HERE to add it to your favorites on Ravelry.
Project Info
- Project Description: a simple market tote bag with a drawstring and one handle.
- Skill Level: Basic crochet skills are needed and must be able to read a crochet pattern.
- Completion Time (how long it takes the designer to make one): 2 hours
Materials and Details
• Yarn: Red Heart Yarns Ombre – one skein / 480 yards as written. More needed for a longer bag.
• Crochet Hook: H, J
• Miscellaneous: yarn needle
• Gauge: not needed for this project
• Measurements: 21” wide x 14” tall; Handle – 11” long
Note: Starting on round 3, work stitches in the space between stitches of previous round.
Instructions
- With J hook and ww yarn, start with a magic circle of 9 sts (or preferred method for starting a circle of 9
sc sts), sl st to join. (9 sts) - Ch 2, 2dc in each st, sl st to join (18sts)
- See “note” at beginning of pattern. Ch 2, 2dc in first space, dc in next space, repeat to end of round, sl st to join. (27sts)
-
Ch 2, 2dc in first space, dc in each of next 2 spaces, repeat to end of round, sl st to join. (36sts)
-
Ch 2, 2dc in first space, dc in each of next 3 spaces, repeat to end of round, sl st to join. (45sts)
-
Ch 2, 2dc in first space, dc in each of next 4 spaces, repeat to end of round, sl st to join. (54sts)
-
Ch 2, 2dc in first space, dc in each of next 5 spaces, repeat to end of round, sl st to join. (63sts)
-
Note: the first (dc, ch 1, dc) of this round is worked between the 2 dc from previous round.
Ch 2, (dc, ch 1, dc) in next space, sk 1 space, repeat until 2 spaces remain, sk 1, dc, ch 1, sl st to beginning ch to join. (32 V sts)
Note: the first (dc, ch 1, dc) is worked between the 2 dc from previous round. Tie a scrap of yarn or attach a stitch marker to the outside of the bag to mark the “right side” for future use.
- Ch 3, turn, dc in same space as ch, (dc, ch 1, dc) in space between V st (not in the middle of the V, but between 2 V sts), repeat to end of round, sl st in 2nd ch at beginning to join. (32 V sts)
-
Repeat step 9 until bag is 16” from starting edge or desired length. Make sure to end on the right side of the bag.
-
Ch 1, sc in same sp, 2sc in space between 2 V st, sc in middle of V st, repeat to end of round, sl st to join. (94 sts)
12-13. Ch 1, sc in each st to end of round, sl st to join.
- Ch 2, dc in each st to end of round, sl st to join. This round creates the holes for the drawstring to be added.
-
This step creates the slots for the handle. Ch 12, sk 10, sc 36, sl st in next st, ch 12, sk 10, sc 36. Do not sl st to join. Place a marker for working in the round.
-
Sc in each ch and st to end of round. (96sts)
-
Sc in each st to end of round.
-
Sl st in each st to end of round. Finish off and weave in ends.
Handle
1. With and H hook and same yarn from bag, ch 101, sc in 2nd ch from hook and in each ch across. (100sts)
2-8. Ch 1, turn, sc in each st to end of row.
9. This step is worked around the outer edge of the handle. Ch 1, sl st in same st. Pivot piece to the left. Sl st
evenly down the edge of the handle, working (sl st, ch 1, sl st) in the corner. Sl st across short end of handle,
working (sl st, ch 1, sl st) in the corner. Pivot piece to the left. Sl st evenly down the second edge of the
handle, working (sl st, ch 1, sl st) in the corner. Sl st across short end of handle. Finish off, leaving a yarn tail
for sewing handle.
Wrap one end around one of the handle bars on the bag. Make sure the right side (sl st side) of the handle is facing out, towards the right side of the bag. Fold the end of the handle around the bar and back against itself. With a yarn needle and matching yarn, sew the short end to the handle. Repeat for opposite end of the handle.
Drawstring
Cut 6 strands of yarn 40” long. Tie a knot in one end of the strands, approximately 2” from the end.
Divide strands and braid. Tie another knot at the end of the braid, approximately 2” from the end.
Fold the bag in half, with the handle points at the sides. Insert one end of the drawstring under a dc post at the center from step #14. Go under another post and pull the end out. Go over 2 posts. Continue weaving the drawstring in and out, under two posts, over two posts until back to the front. Pull the end out, leaving 1-2 posts between the drawstring ends.
Optional: Slip a bead or buttons over the drawstring ends to keep from pulling back through the bag.
I hope you enjoyed making this quick and easy project. I would love to see your creations. Please add your project to Ravelry and/or share online and include #snappytots.
Thanks for crocheting with me!
~ Heidi