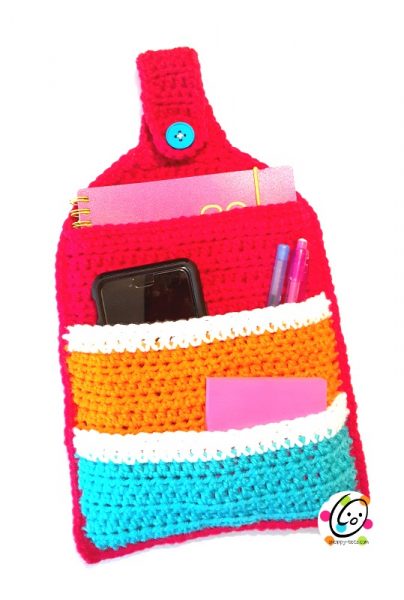
Free Pattern: Locker Pockets
I think everyone can use a few pockets for a notepad, pens, gum, tissues or our phone. This little organizer is great for hanging in a locker, by your desk or even your car. This also makes a great gift and is perfect for craft fairs because it is fairly quick to make and works for almost anyone.

I designed this project as part of the “Back to School Crochet Along 2017“, hosted by The Underground Crafter and Stitches’N’Scraps
Click HERE for more information about the Crochet Along and to get each of the project patterns.

Locker Pockets
Project Info
- Project Description: Pocket and tissue holder for lockers, classrooms, the office and home.
- Skill Level: Basic crochet skills are needed and must be able to read a crochet pattern.
- Completion Time (how long it takes the designer to make one): 1.5 hours
Materials and Details
- Yarn: worsted weight yarn in choice of colors Sample: Red Heart Super Saver Stripes Parrot Stripe, White (flower)
- Crochet Hook: H, I
- Miscellaneous: yarn needle, 1 large button for flower center, 1 slightly smaller button to stack on top of flower center (optional), travel tissue pack
- Gauge: not needed for this project
- Measurements: 6” wide x 10” tall
- Note: Instructions are written for colors of sample and may be substituted as desired.
Instructions
- With H hook and yarn, ch 21, sc in 2nd ch from hook and in each ch across. (20sts)
- Ch 2, turn, hdc in each st to end of row.
- Repeat row #2 until piece measures 14” from beginning edge. Add or subtract length to this section if desired.
- Ch 1, turn, sc2tog, sc 16, sc2tog. (18sts)
- Ch 1, turn, sc2tog, sc 14, sc2tog. (16sts)
- Ch 1, turn, sc in each st to end of row.
- Ch 1, turn, sc2tog, sc 12, sc2tog. (14sts)
- Ch 1, turn, sc2tog, sc 10, sc2tog. (12sts)
- Ch 1, turn, sc in each st to end of row.
- Ch 1, turn, sc2tog, sc 8, sc2tog. (10sts)
- Ch 1, turn, sc2tog, sc, ch 4, sk 4, sc, sc2tog. (8sts)
- Ch 1, turn, sc2tog, sc 4 around ch, sc2tog. (6sts) Finish off and weave in ends. Set aside.
Tissue Holder Pocket
Make 2:
1. Make sure the beginning chain isn’t too snug or this row won’t be as wide as the rest. With H hook and yarn, ch 21, sc in 2nd ch from hook and in each ch across. (20sts) 2-4. Ch 2, turn, hdc in each st to end of row. 5-6. Ch 2, turn, hdc in same st, hdc 4, sc 10, hdc 5.
7. Ch 1, turn, sl st in each st to end of row. Finish off, leaving a tail for sewing to bag.
Flower
- With H hook and yarn color of choice, start with a magic circle of 5 sts (or preferred method for starting a circle of 5 sc sts), join and pull closed. (5sts)
- *Ch 5, 3dc in 3rd ch from hook, hdc, sc, sl st in next st on circle*, repeat to end of round.
- *Sl st 4, 3sc in tip of petal, sl st 4, sl st between petals*, repeat to end of round. Finish off, leaving a yarn tail for sewing flower to bag.
Assembly
Lay base piece on a flat surface. Fold piece so starting edge lines up with the last full row near the top (before decreases begin). Mark where the bottom edge will be when folded. Unfold piece.
Lay one tissue pocket piece so the straight edge is even with the row marked for the bottom fold. Last edge of each pocket piece is slightly arched and should be towards the middle of the pocket. Place second pocket piece directly above first piece. First piece should overlap second piece slightly. Pin edges to hold in place. With yarn needle and matching yarn, sew pocket pieces along outer edges of bag. Do not sew center edges to the bag.
Place flower on bag with buttons on top of the flower center. With a needle and yarn tail, sew the buttons to the flower center and to the bag.
Outer Edge Trim
For this next part, take your time and be patient. We will be crocheting through several layers at once to sew our pieces together.
Attach yarn to outer edge of piece. With an I hook, sc evenly along edge of piece, working through all pocket layers. (2sc, ch 1, 2sc) in each corner. Continue working around piece. Sl st in first st to join. Finish off and weave in ends.
I hope you enjoyed making this quick and easy project. I would love to see your creations. Please add your project to Ravelry and/or share online and include #snappytots.
Thanks for crocheting with me!
~ Heidi
Please pin this project to one of your boards to save for later:
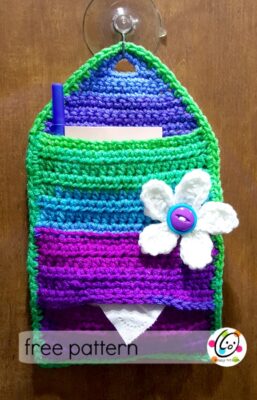
Looking For Something Similar?
Try my “Keep It Handy Organizer” for a bigger set of pockets.