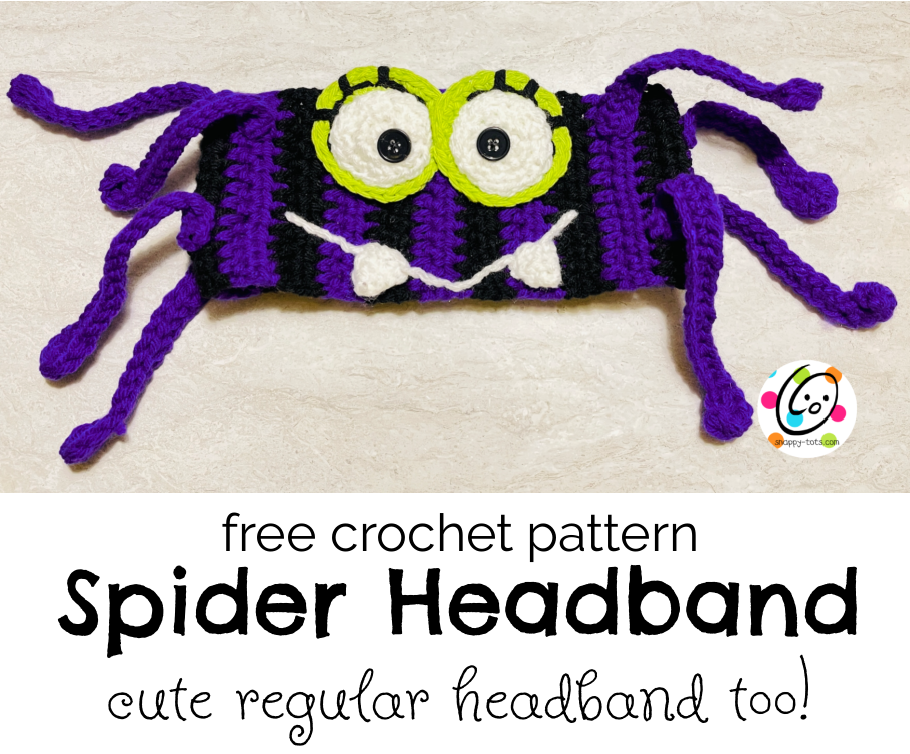
Free Pattern: Spider Headband, for everyday too
Need a last-minute Halloween costume or fun headband for those morning walks? My Spider Headband is fun and easy to wear and make.
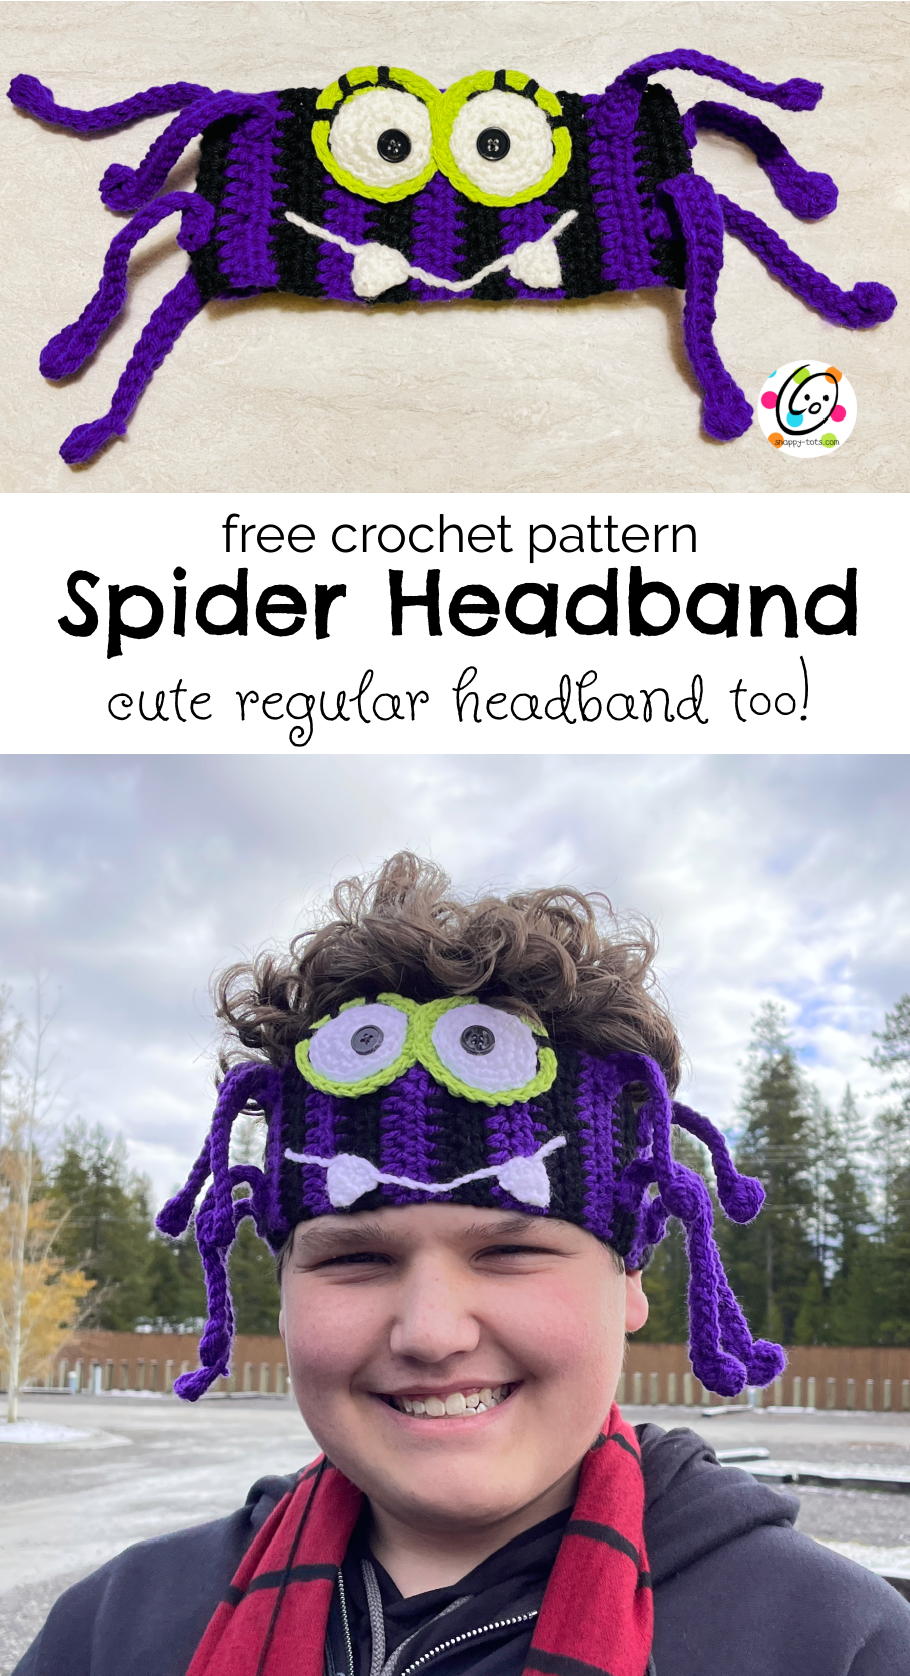
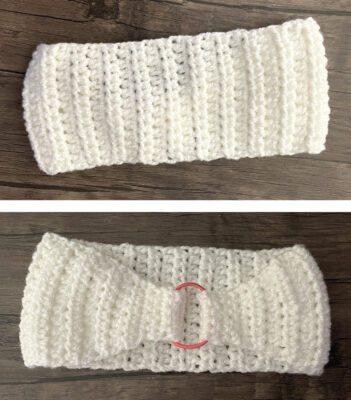
This pattern also makes a great headband for every day.
Spider Headband Crochet Pattern
The instructions for this headband are available below.
Materials
- Yarn: worsted weight. Less than 100 yards for each band. Sample colors: RHSS Black, Amethyst, White; Sugar and Cream Hot Green
- Crochet Hook: H (5 mm)
- Notions: Yarn needle for weaving in ends, 2-½” black buttons, child-size hairbands (1 per band). Other size hairbands can be used. Just be aware of how much they stretch.
- Optional: Measuring tape, scissors
Details
- Finished Measurements: Toddler – Child: 15” circ x 3” wide Large Child – Adult: 17” circ x 3” wide
- Gauge: 3″ = 11 hdc sts and 7.5 rows
- Size: One size fits age 12 to average adult. Add more rows to the middle section for longer bands.
Tips
- First stitch of each row is worked into the same stitch as the turning chain.
- Numbers at the beginning of each line may refer to steps and not indicate number of rows.
- Stitch count remains the same unless noted at end of row/round.
- If you have any questions about this pattern please contact [email protected].
- Match measurements to create the correct length.
- There are extra pictures at the end of the pattern for all of the sizes.
Directions
1. With an H hook and ww yarn (black in sample), ch 6, sc in 2nd ch from hook and in each ch across. (5sts)
2-5. Ch 1, turn, sc in same st and in each st to end of row.
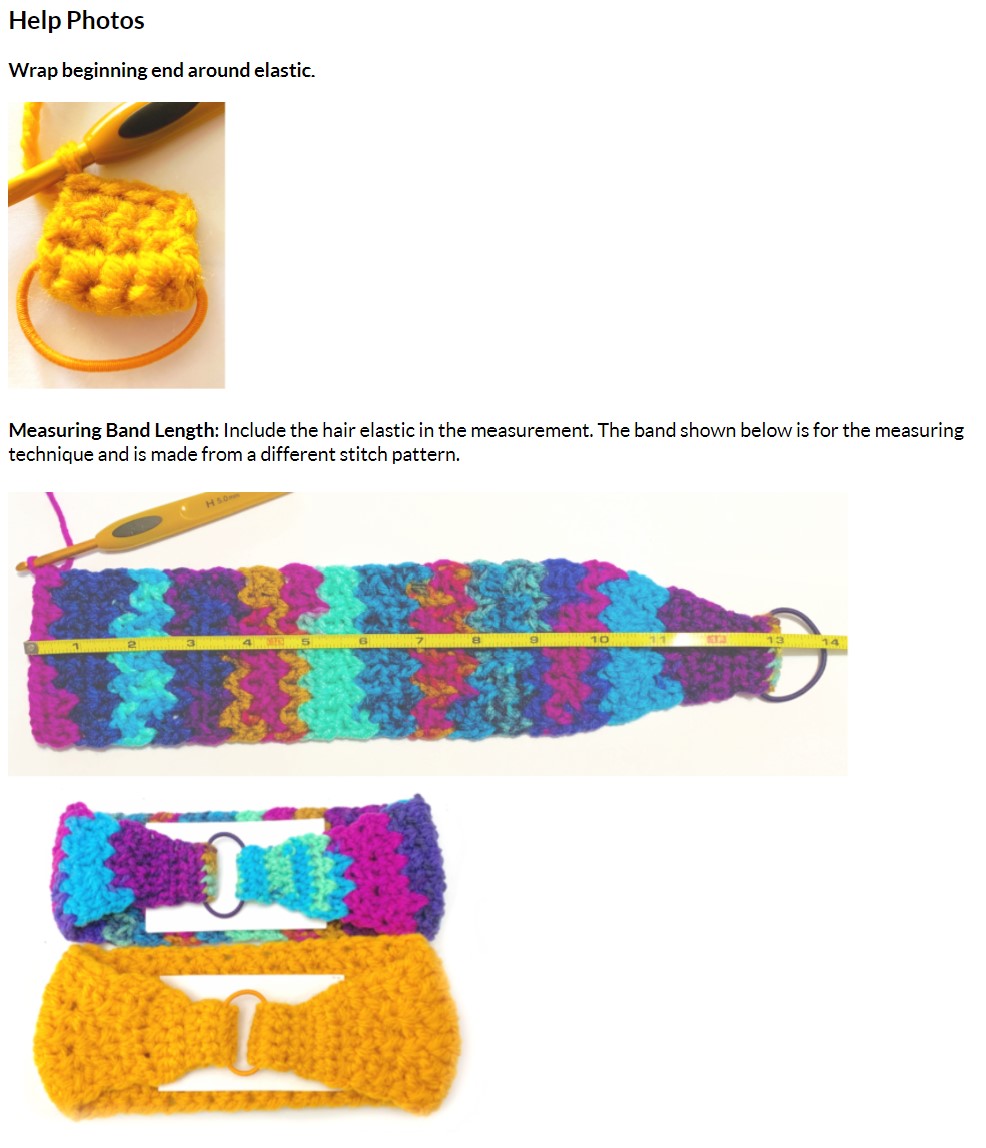
6. Wrap end around a hair elastic band. Match short ends. Ch 1. Working through both layers, sc in each st to end of row.
7. Ch 1, turn, 2sc in same st, sc 3, 2sc in last st. (7sts)
8. Ch 1, turn, hdc in same st and in each st to end of row.
9. Ch 1, turn, 2hdc in same st, hdc 5, 2hdc in last st. (9sts)
10. Ch 1, turn, hdc in same st and in each st to end of row.
11. Ch 1, turn, 2hdc in same st, hdc 2, 2hdc in next st, hdc 3, 2hdc last st. (12sts)
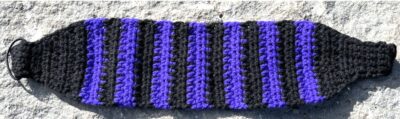
Note: The following rows are written for the striped sample version. If you would prefer to do a solid-colored headband, repeat step #12 for a total of 28 rows and then skip to step #21.
12. Ch 1, turn, hdc in same st and in each st to end of row.
13. Finish off the current yarn and change yarn color (purple in sample). Ch 1, turn, hdc in same st and in each st across.
14. Ch 1, turn, hdc in same st and in each st to end of row.
15. Finish off the current yarn and change yarn color (black in sample). Ch 1, turn, hdc in same st and in each st across.
16. Ch 1, turn, hdc in same st and in each st to end of row.
17. Finish off the current yarn and change yarn color (purple in sample). Ch 1, turn, hdc in same st and in each st across.
18. Ch 1, turn, hdc in same st and in each st to end of row.
19. Repeat steps 15-18 until there are 7 purple stripes.
20. Finish off the current yarn and change yarn color (black in sample). Ch 1, turn, hdc in same st and in each st across.
21. Ch 1, turn, hdc2tog, hdc 3, hdc2tog, hdc 3, hdc2tog. (9sts)
22. Ch 1, turn, hdc2tog, hdc 5, hdc2tog. (7sts)
23. Ch 1, turn, hdc in same st and in each st to end of row.
24. Ch 1 turn, sc2tog, sc 3, sc2tog. (5sts)
25. Ch 1, turn, sc in each st to end of row.
26. Repeat previous row for an additional 5 rows.
Finish off, leaving a yarn tail for sewing end. Wrap short end around the hair elastic, making sure it isn’t twisted. With a yarn needle, use the yarn tail to sew the short end to the band.
Face
White Eye Piece (make 2)
1. With an H hook and white yarn, create a magic circle of 6 sc sts (or preferred method of creating a circle of 6 sc sts), pull closed and sl st to join. (6sts)
2. Ch 1, 2sc in each st to end of round, sl st to join. (12sts)
3. Ch 1, *sc, 2sc in the next st*, repeat to end of round, sl st to join. (18sts) Finish off, leaving a long tail for sewing in place. Set aside.
Green/Back Eye Piece (make 2)
1. With an H hook and white yarn, create a magic circle of 8 sc sts (or preferred method of creating a circle of 8 sc sts), pull closed and sl st to join. (8sts)
2. Ch 1, 2sc in each st to end of round, sl st to join. (16sts)
3. Ch 1, *sc, 2sc in the next st*, repeat to end of round, sl st to join. (24sts)
4. Ch 1, sc in each st to end of round, sl st to join. Finish off, leaving a long tail for sewing in place.
Place a white piece on top of the green piece. Use the yarn tail from the white piece and a yarn needle to sew the outer edge of the white piece to the green piece.
With a sewing needle and black thread, sew a black button on top of the white piece.
Repeat for the second eye.
Use the yarn tail from each green/back piece and a yarn needle to sew the eyes to the headband. See main photo for placement.
Mouth: With a yarn needle and white yarn, stitch the mouth in place.
Teeth (make 2)
1. Leave a yarn tail in the beginning for sewing the tooth in place. With an H hook and white yarn, ch 4, sc in the 2nd ch from hook, sc 2. (3sts)
2. Ch 1, turn, sc3tog.
3. Ch 1, turn, sl st. Finish off the end yarn tail.
Use the yarn tail from each tooth and a yarn needle to sew the teeth in place.
Eyelashes: With a yarn needle and black yarn, take a few sts around the edge of the green back piece in 3 places per eye. See main photo.
Leg A (make 4)
1. Leave a long yarn tail in the beginning for sewing this end to the body. With an H hook and ww yarn to match the body, ch 20, 5hdc in 2nd ch from hook, sl st in the next st, sc in each st to end of row.
2. Ch 1, turn, sl st in each sc st and hdc st. Sl st in first st after the 5hdc from previous row. Finish off, leaving a yarn tail for sewing in place.
“foot”/Bottom of legs: Wrap the last yarn tail around the leg, right before the circle created by the 5hdc. Pull snug and secure the end.
Leg B (make 4)
1. Leave a long yarn tail in the beginning for sewing this end to the body. With an H hook and ww yarn to match the body, ch 18, 5hdc in 2nd ch from hook, sl st in the next st, sc in each st to end of row.
2. Ch 1, turn, sl st in each sc st and hdc st. Sl st in first st after the 5hdc from previous row. Finish off, leaving a yarn tail for sewing in place.
“foot”/Bottom of legs: Wrap the last yarn tail around the leg, right before the circle created by the 5hdc. Pull snug and secure the end.
Sew 2 of Leg A and 2 of Leg B on each side of the headband.
Use the beginning yarn tails and a yarn needle to sew each of the flat edges of the legs to the spider band. See main photo for placement. On each side there are 2 legs near the top and 2 legs near the bottom.
Tip: I lay the leg so the “foot” end is point up past the top of the band. Then flip the leg down and this helps it stand out.
Pin To Save For Later