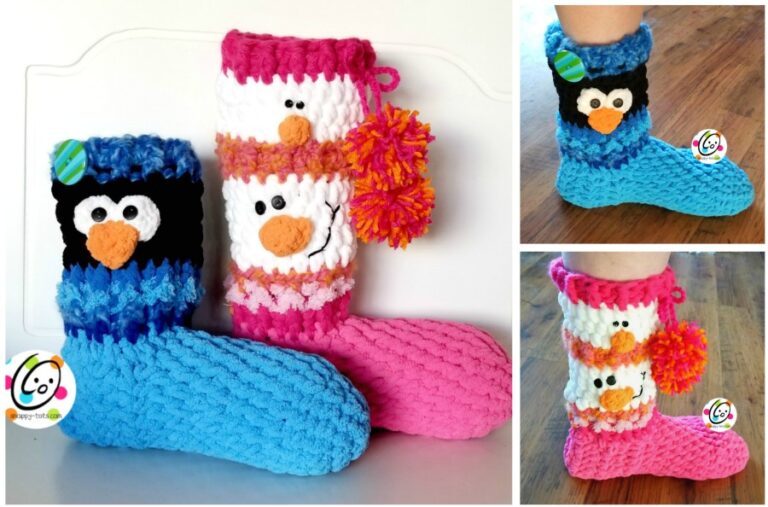
Free Pattern: Big Kids Happy Feet Slippers
An easy to make, but comfy to wear slipper is one of my most favorite projects. A few years ago I designed my “Infinitely Happy Feet Slippers” for teens and women. I have made several pairs since and love seeing ones others have made.
They are so easy to make that I designed a smaller size for kids too.
Teen and Women’s Pattern
Get the pattern for my “Infinitely Happy Feet Slippers” in sizes teen/women for free at THIS LINK.
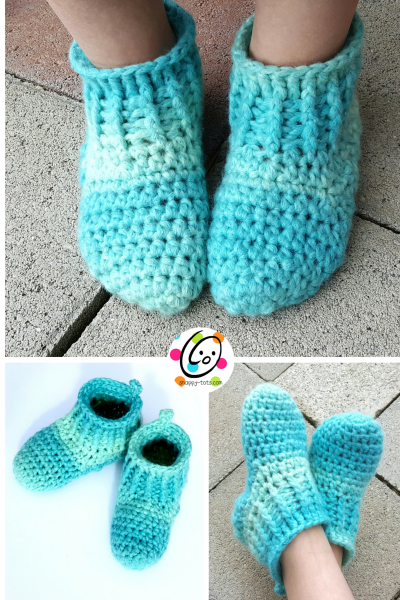
Big Kids Happy Feet Slippers
The crochet pattern for these slippers is available for free below.
A downloadable, ad-free pattern that includes the instructions and all pictures is also available to purchase from my Ravelry Shop.
SALE! Save 60% off this pattern until 11/16/20. No coupon needed. The discount will be applied in the cart.
Materials and Measurements
Yarn: 120-140 yards bulky weight (size 5): suggested yarn – Red Heart Boutique Infinity Yarn
Crochet Hook: K
Miscellaneous: yarn needle to weave in ends
Gauge: 4” = 9 rows and 11 hdc
Size: Children shoe sizes 12.5 – 7
Tips
- Yarns of SIMILAR WEIGHT may be substituted but may affect size and appearance.
- Work in continuous rounds, placing a marker to keep track of the beginning of the round, unless noted in pattern.
- WARNING: handmade slippers are SLIPPERY and should be worn on carpeted surfaces or
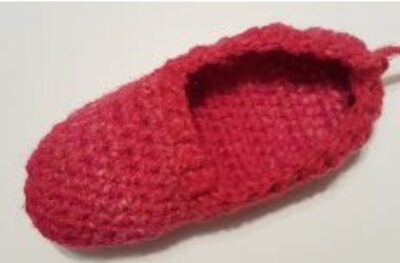
please consider adding gripper fabric or a similar item to the sole. - Slippers begin at the toe and work towards the heel. Cuff is added last.
- Stitch counts remain the same unless noted at the end of the row.
Skill level: Intermediate Beginner with basic crochet skills, able to read a pattern and knowledge of front and back post stitches.
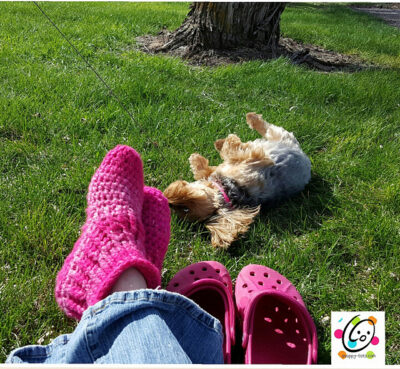
I think you will LOVE using Red Heart Infinity yarn. I chose the color “Blossom” which is a beautiful, rosy pink, for the adult pair. It makes a super soft pair of slippers.
Shoe sizes 12 – 3.5 (Make 2)
1. With K hook, start with magic circle of 8 sc sts (or preferred method of starting a circle of 8 sc sts), pull closed and place marker for working in the round. (8sts)
2. 2sc in each st to end of round. (16sts)
3. *hdc 7, 2hdc in next st*, repeat once. (18sts)
4. *hdc 8, 2hdc in next st*, repeat once. (20sts)
5. *hdc 9, 2hdc in next st*, repeat once. (22sts)
6-8. Hdc in each st to end of round.
9. Sc in next st, sl st in next st. At this point, you will start working back and forth in rows, creating the sole of the slipper. Ch 1, turn, sc in same st, hdc 10, sc. (12sts) There will be unworked sts.
10. Ch 2, turn, hdc in same st, hdc 11. (12sts)
Repeat step #10 until piece is 1.5″ shorter than desired length, finishing on the WRONG side (inside) of the slipper.
Tips for Length
- Determine this by measuring from tip of toe and referring to charts near end of pattern.
- For example, I wear a size 8 so I would keep repeating step #11 until the piece
measured 8″. Then continue below. - Write down the number of rows you work for this part so you can work the same amount of rows for the second slipper.
11. Ch 2, turn, hdc2tog, hdc 8, hdc2tog. (10sts)
12. Ch 2, turn, hdc2tog, hdc 6, hdc2tog. (8sts)
13. Ch 2, turn, hdc2tog, hdc 4, hdc2tog. (6sts)
14. This step is worked around the top edge of the slipper. It is divided into 4 sections: first side, bridge, second side, heel. Ch 1. Sc 12 sts evenly along the first side of the slipper, sc2tog (at corner of side and bridge), sc 9 across bridge, sc2tog (at corner of side and bridge), sc 12sts evenly along second side of slipper, (working across the heel) sc2tog, sc 2, sc2tog, sl st to join. (39sts)
15. Ch 2, hdc in same st, hdc 3, *hdc2tog, hdc 5*, repeat to end of round, sl st to join. (34sts)
16. Ch 2, hdc in same st, hdc 8, *hdc2tog, hdc*, repeat 4 more times, hdc 8, hdc2tog. (28sts)
17-18. The slipper will start to to pull in around the top as shown in photo below. Ch 2, *FPHDC
around next post, BPHDC around next post*, repeat to end of round, sl st to join.
<img width="400" height="263" src="https://snappy-tots.com/wp-content/uploads/2016/04/happy-feet-400x263.jpg" alt="" loading="lazy" srcset="https://i0.wp.com/snappy-tots.com/wp-content/uploads/2016/04/happy-feet.jpg?resize=400%2C263&ssl=1 400w, https://i0.wp.com/snappy-tots.com/wp-content/uploads/2016/04/happy-feet.jpg?resize=220%2C145&ssl=1 220w, https://i0.wp.com/snappy-tots.com/wp-content/uploads/2016/04/happy-feet.jpg?w=560&ssl=1 560w" sizes="(max-width: 400px) 100vw, 400px" />
<p>19. Ch 2, FPHDC2tog, *FPHDC around next post, BPHDC around next post*, repeat until 2 posts remain, FPHDC2TOG. (26sts)
20-21. Note: All post stitches from this point to end of pattern are front post stitches only. Ch 2, FPHDC around each post to end of round, sl st to join.
- This step creates the little loop at the heel to help pull on the slippers. It is optional. I thought it was cute. Ch 8, sl st in same st on slipper. Finish off, secure and weave in ends.
Shoe sizes 4 – 7 (Make 2)
1. With K hook, start with magic circle of 8 sts (or preferred method of starting a circle of 8 sc sts), pull closed and place marker for working in the round. (8sts)
2. 2sc in each st to end of round. (16sts)
3. *hdc 7, 2hdc in next st*, repeat once. (18sts)
4. *hdc 8, 2hdc in next st*, repeat once. (20sts)
5. *hdc 9, 2hdc in next st*, repeat once. (22sts)
6-9. Hdc in each st to end of round.
10. Sc in next st, sl st in next st. At this point, you will start working back and forth in rows, creating the sole of the slipper. Ch 1, turn, sc in same st, hdc 10, sc. (12sts) There will be unworked sts.
11. Ch 2, turn, hdc in same st, hdc 11. (12sts)
Repeat step #11 until piece is 1.5″ shorter than desired length, finishing on the WRONG side (inside) of the slipper.
Tips for Length
- Determine this by measuring from tip of toe and referring to charts near end of pattern.
- For example, I wear a size 8 so I would keep repeating step #11 until the piece
measured 8″. Then continue below. - Write down the number of rows you work for this part so you can work the same amount of rows for the second slipper.
12. Ch 2, turn, hdc2tog, hdc 8, hdc2tog. (10sts)
13. Ch 2, turn, hdc2tog, hdc 6, hdc2tog. (8sts)
14. Ch 2, turn, hdc2tog, hdc 4, hdc2tog. (6sts)
15. This step is worked around the top edge of the slipper. It is divided into 4 sections: first side, bridge, second side, heel. Ch 1. Sc 14 sts evenly along the first side of the slipper, sc2tog (at corner of side and bridge), sc 9 across bridge, sc2tog (at corner of side and bridge), sc 14 sts evenly along second side of slipper, (working across the heel) sc2tog, sc 2, sc2tog, sl st to join. (43sts)
16. Ch 2, hdc in same st, *hdc2tog, hdc 5*, repeat to end of round, sl st to join. (37sts)
17. Ch 2, hdc in same st, hdc, *hdc2tog, hdc 5*, repeat to end of round, sl st to join. (32sts)
18-19. The slipper will start to to pull in around the top as shown in photo below. Ch 2, *FPHDC
around next post, BPHDC around next post*, repeat to end of round, sl st to join.
20. Ch 2, FPHDC2tog, *FPHDC around next post, BPHDC around next post*, repeat until 2 posts remain, FPHDC2TOG. (30sts)
21-23. Note: All post stitches from this point to end of pattern are front post stitches only. Ch 2,
FPHDC around each post to end of round, sl st to join.
24. This step creates the little loop at the heel to help pull on the slippers. It is optional. I thought
it was cute. Ch 8, sl st in same st on slipper. Finish off, secure and weave in ends.
        <h2>Suggestions</h2>
    <p><strong>Extra warm feet</strong> (shown below): start with one strand Red Heart Infinity yarn plus one strand super saver yarn. Work with both strands until cuff is started around opening of slipper. Continue with only the infinity yarn. Red heart super saver shocking pink matches Infinity Blossom really well.

Add a sole: Handmade slippers are SLIPPERY and should be worn on carpeted surfaces or please consider adding gripper fabric or similar item to the sole. Click HERE for some great suggestions.
This yarn is super soft and the slippers would make a nice gift for those who need an extra special hug.
Please Share Your Pix
I LOVE to see your creations from Snappy patterns. When sharing, please include #snappytots so we can find your pix.
Please contact the designer with any questions, comments or concerns. Help with this pattern is available through email. [email protected].
Items made from Snappy Tots’ patterns MAY be sold. Please include a link to snappy-tots.com if selling online.
Making variations from this pattern is great, but the pattern may NOT be sold. ALL parts of this pattern belond to Snappy Tots.
~~~~~~~~~~~~~~~~~~~~~~~~~
All text and graphics/photos are Copyright ©2020 Snappy Tots by Heidi Yates, all rights reserved. No pattern may be reproduced or distributed, in part or whole by any means, without written permission. Finished products created from this pattern may be sold. Please include a reference to snappy-tots.com as the pattern source when possible.