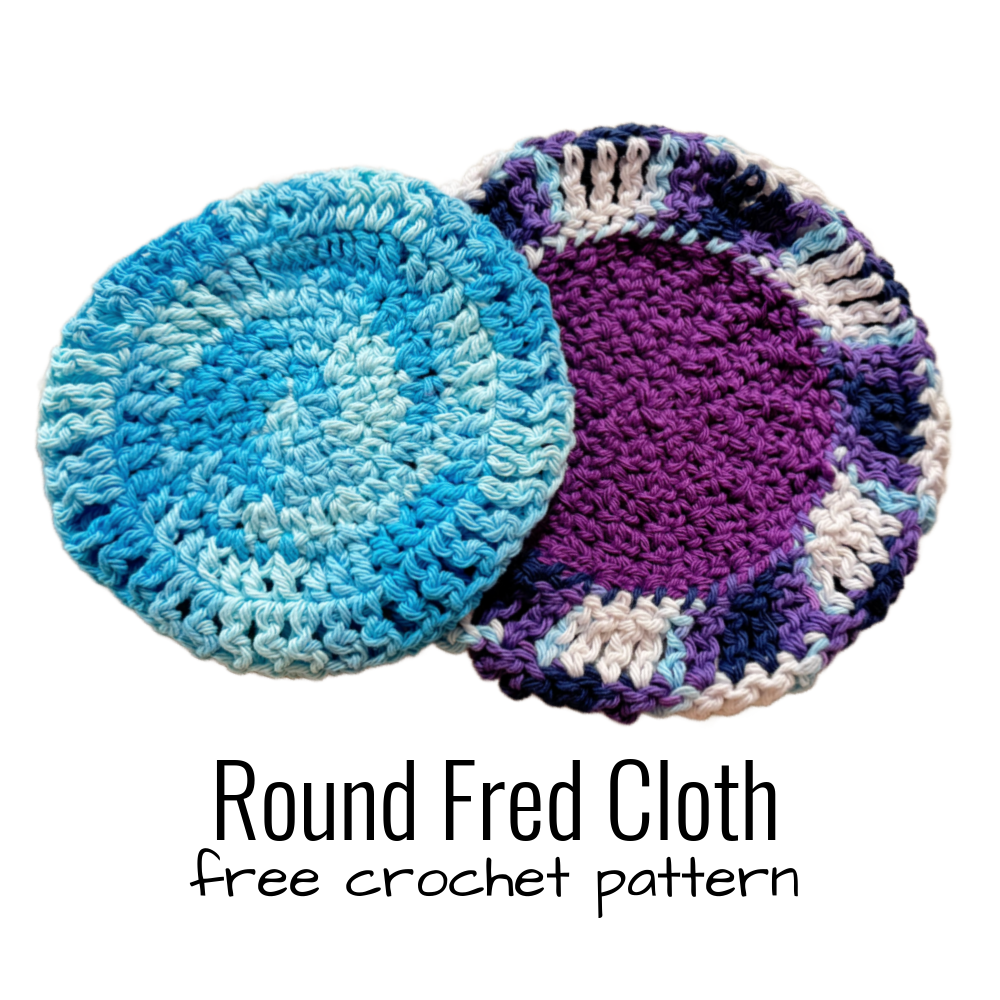
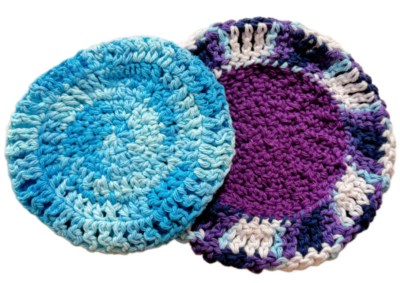
Free Pattern: Round Fred Cloth
Fred, my new make believe spring cleaner, wanted some cloths to go along with Fred’s Hanging Towel. These round cloths are quick to make and a great way to use up your yarn ends.
I made this to match my weekly wash patterns from January 2020. I hope you will enjoy these patterns too. The patterns are free to follow along on my blog, plus several of them have a paid pdf for a small fee:
Fred’s Hanging Towel Crochet Pattern
The pattern is available to follow along for free below.
Free Weekly Wash
Would you like an ad-free downloadable pdf of this pattern? The pdf of the weekly wash patterns for 2025 will be free for one week in my weekly newsletters.
– If you don’t already receive my newsletters, please sign up below for my mailing list. You will receive a code to start downloading your weekly wash. Newsletters will be sent each Wednesday (sometimes Thursday morning).
IMPORTANT ANNOUNCEMENT: the penguin hanging towel was released in 2020 and is not included in this year’s weekly wash freebies. ONLY the patterns released this year as part of the ”weekly wash 2025” are included in the freebies.
Let’s Be Email Buddies
Subscribe to my weekly newsletter so I can send you a free pattern each week and a free pattern on your birthday.
Round Fred Cloth Crochet Pattern
Materials and Details
- Yarn: Worsted weight Cotton 60-80 yds per cloth
- Crochet Hook: I (5.5mm)
- Miscellaneous: Yarn needle for weaving in ends
- Finished Measurements: 6” across
- Gauge: Not necessary for this project
Reminders
- Increases and regular sts: 2hdc in the next st = an increase. Work 2 hdc in the next st hdc 2 = work one hdc in each of the next 2 sts. St count does not increase.
Tips
- The first stitch of each row is worked into the same stitch as the turning chain unless noted.
- Numbers at the beginning of each line may refer to steps and not indicate the number of rows.
- Stitch count remains the same unless noted at the end of row/round.
- If you have any questions about this pattern please contact [email protected].
Directions – 6” cloth
1. With an I hook and worsted weight cotton yarn, start with a magic circle of 8 hdc sts (or preferred method for starting a circle of 8 hdc sts) pull to close and sl st to join. (8sts)
2. Ch 1, (sc, dc) in each st to end of round, sl st to join. (16sts)
3. Ch 1, (sc, dc) in the same st, sc in the next st, *(sc, dc) in the next st, sc in the next st*, repeat to end of round, sl st to join. (24sts)
4. Ch 1, (sc, dc) in the same st, sc in the next st, dc in the next st, *(sc, dc) in the next st, sc in the next st, dc in the next st*, repeat to end of round, sl st to join. (32sts)
5. Ch 1, (sc, dc) in the same st, sc in the next st, dc in the next st, sc in the next st *(sc, dc) in the next st, sc in the next st, dc in the next st, sc in the next st*, repeat to end of round, sl st to join. (40sts)
6. Ch 2, FPDC around each post from the previous round, sl st to join.
7. Finish off the current yarn and change to a different color for the outer edge if desired. Ch 2, tr in each st to end of round.
8. Ch 2, tr in each st to end of round. Finish off, leaving a long tail for sewing the outer edge in place.
9. If the outer edge hasn’t folded inward by itself, make sure it is folded in all the way around so it lines up next to the ridge creating by working step 6 around the post. Try to match the sts up as close as possible so the outer band won’t ripple.
With a yarn needle, use the yarn tail to sew the layers together. Finish off and weave in ends.
Directions – 7” cloth
1. With an I hook and worsted weight cotton yarn, start with a magic circle of 8 hdc sts (or preferred method for starting a circle of 8 hdc sts) pull to close and sl st to join. (8sts)
2. Ch 1, (sc, dc) in each st to end of round, sl st to join. (16sts)
3. Ch 1, (sc, dc) in the same st, sc in the next st, *(sc, dc) in the next st, sc in the next st*, repeat to end of round, sl st to join. (24sts)
4. Ch 1, (sc, dc) in the same st, sc in the next st, dc in the next st, *(sc, dc) in the next st, sc in the next st, dc in the next st*, repeat to end of round, sl st to join. (32sts)
5. Ch 1, (sc, dc) in the same st, sc in the next st, dc in the next st, sc in the next st *(sc, dc) in the next st, sc in the next st, dc in the next st, sc in the next st*, repeat to end of round, sl st to join. (40sts)
6. Ch 1, (sc, dc) in the same st, sc in the next st, dc in the next st, sc in the next st, dc in the next st, *(sc, dc) in the next st, sc in the next st, dc in the next st, sc in the next st, dc in the next st*, repeat to end of round, sl st to join. (48sts)
6. Ch 2, FPDC around each post from the previous round, sl st to join.
7. Finish off the current yarn and change to a different color for the outer edge if desired. Ch 2, tr in each st to end of round.
8. Ch 2, tr in each st to end of round.
9. Ch 2, *tr 7, 2tr in the next st*, repeat to end of round, sl st to join. (54sts)
10. Ch 2, tr in each st to end of round.
11. If the outer edge hasn’t folded inward by itself, make sure it is folded in all the way around so it lines up next to the ridge creating by working step 6 around the post. Try to match the sts up as close as possible so the outer band won’t ripple. Since there are 48 sts on the ridge around the center and 54 sts around the outer edge, you will need to decrease some sts.
With a yarn needle and yarn tail, *sew 6 sts from both layers together, pick up the next st on the ridge and 2 sts on the outer edge and sew together*, repeat to end of round. Finish off and weave in ends.
Pin To Save For Later