Free Pattern: Monster Tissue Holder
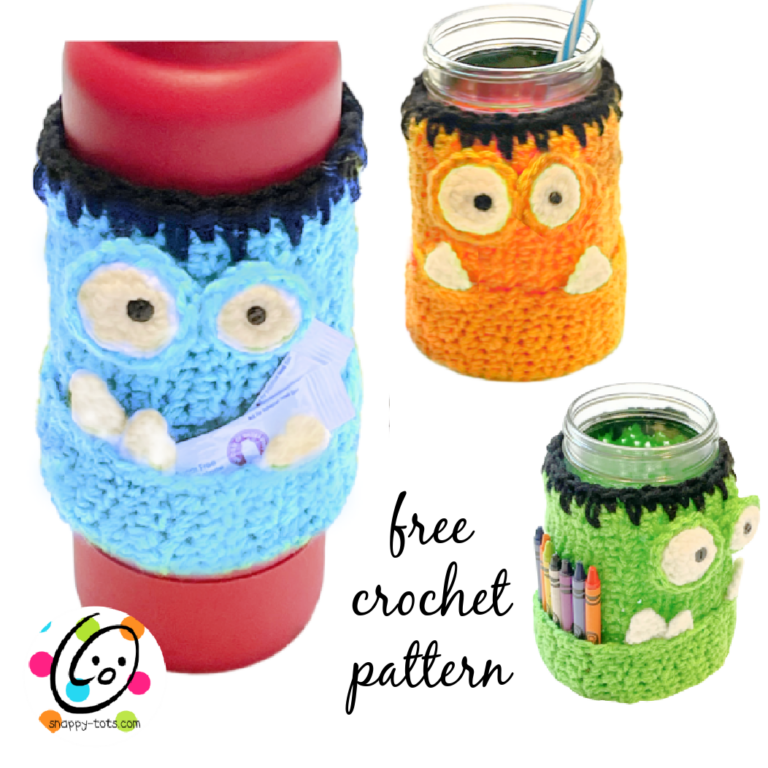
Be prepared for monster colds with this cute tissue holder.

I think pocket tissues in a cute cover make a great gift. I have designed a few different types you might want to try.
More patterns like this:
Monster Tissue Cover
Skill level: beginner with basic crochet skills
Materials and Measurements
- Yarn – Red Heart Super Saver in White, Turqua, Black
- Crochet Hook: I
- Miscellaneous: yarn needle, 2 small black buttons, sewing needle, black thread, package of pocket tissues
- Gauge: not important for this project
Directions
1. With an I hook and black worsted weight yarn, ch 19, sc in 2nd ch from hook and in each ch across. (18sts) Finish of and change to white yarn.
2-5. These rows create a flat middle section for the face to be applied later. Ch 2, turn, hdc in same st, sl st in next st, hdc in next st, sl st in next st, sc 10, hdc in next st, sl st in next st, hdc in next st, sl st in next st.
6. Ch 2, turn, hdc in same st, sl st in next st, *hdc in next st, sl st in next st*, repeat to end of row.
7. Repeat previous row for an additional 16 rows.
8. Ch 1, turn, sc in the same st and in each st to end of row.
9. Finish off white yarn and change to black yarn. Ch 1, turn, sc in the same st and in each st to end of row.
Face Piece
1. With an I hook and blue yarn, ch 12, sc in the 2nd ch from hook and in each ch across. (11sts)
2. Ch 1, turn, sc2tog, sc 7, sc2tog. (9sts)
3. Ch 1, turn, sc2tog, sc, hdc 3, sc, sc2tog. (7sts) Finish off, leaving a long yarn tail for sewing outer edge to the base piece.
Place the face piece on top of the flat section of the base piece. With a yarn needle, use the yarn tail to sew the face piece in place. See main photo for placement if needed.
Eyes (make 1)
1. With an I hook and white yarn, ch 5, sc in the 2nd ch from hook and in each ch across. (4sts)
2. Ch 1, turn, (hdc, dc) in same st, (hdc, ch 1, sl st) in next st, (sl st, hdc) in next st, (dc, hdc, ch 1, sl st) in next st. Finish off, leaving a long tail for sewing in place.
With a yarn needle, use the yarn tail to sew the eyes in place with the flat edge at the top of the face piece.
With a sewing needle and black thread, sew the buttons on top for pupils.
Teeth (make 1): With an I hook and white yarn, ch 22, sl st in the 2nd ch from hook, *(sl st, ch 2, sl st in the 2nd ch from hook, sl st) in the next ch, sl st 2*, repeat until 2 chs remain, (sl st, ch 2, sl st in the 2nd ch from hook, sl st) in the next ch, sl st in the last ch. Finish off, leaving a long yarn tail for sewing in place.
With a yarn needle, use the yarn tail to sew the flat edge of the teeth strip against the top edge of the black strip, below the face.
Nostrils: With a yarn needle and black yarn, stitch the nostrils in place.
Pompom “Hair”: Wrap white yarn around your hand 4-6 times to make a small pompom. Slide the loops off your hand and tie a piece of white yarn around the center. Cut the loops, leaving long tails on the center yarn piece. Trim pompom as desired and pull the yarn pieces apart for a frizzy look. Pull the yarn tails through separate sts above the face piece. Tie in a knot on the wrong side of the base piece.
Assembly
Fold piece with wrong sides together so beginning and ending rows (black sections) overlap. With an I hook, attach white yarn to a bottom corner of the side. Working evenly across the edge and through both layers, ch 1, *sl st in next spot, ch 1*, repeat across. Finish off and weave in end. Repeat for opposite edge.
Pin To Save For Later


