Free Pattern: Gnome Luminary
Gnomes have been one of my mom’s favorites since I was little. On vacations to the Oregon Coast she would tell use she could see gnomes in the trees and tell us stories about them. She really made them come to life.
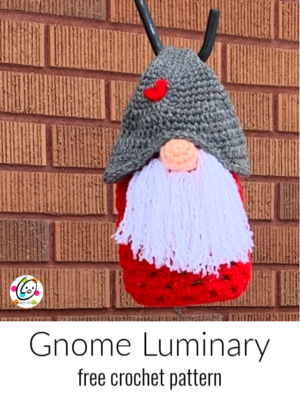
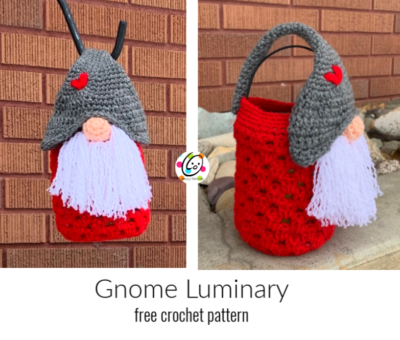
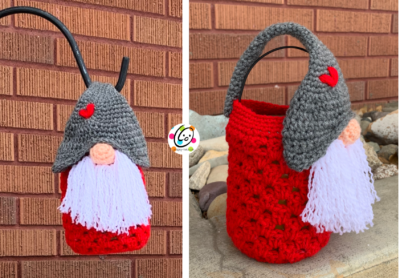
Since gnomes are popular lately I thought it would be fun to make one into a luminary cover. It slips over a mason jar and I put a battery operated tea light inside. It could be used for treats or gifts too.
Warning: Do not use an open flame candle with this project.
More luminary patterns
Gnome Luminary
Materials and Details
- Yarn: 75-100 yards worsted weight yarn in color(s) of choice. Sample Yarns: Red Heart Super Saver Heather Grey, Cherry Red, White; Caron Simply Soft Light Country Peach (nose)
- Crochet Hook: H (5mm)
- Miscellaneous: yarn needle, glass jar
- Optional: Wire for hanger, scissors, tape measure
- Sizes: Pint, Quart
- Gauge: not needed for this project
Tips
- The number at the beginning of each line refers to the step and not the number of rows.
- Stitch counts remain the same unless noted at end of row.
- Substitute colors as desired.
- Main sample is quart size.
Pint
6.25” long x 5.5” across
1. With an H hook and ww yarn (red part in sample), start with a magic circle of 8 sc sts (or preferred method for creating a circle of 8 sc sts), pull closed and place a marker for working in the round. (8sts)
2. 2sc in each st to end of round. (16sts)
3. *hdc, 2hdc in next st*, repeat to end of round. (24sts)
4. *hdc 2, 2hdc in next st*, repeat to end of round. (32sts)
5. *hdc 7, 2hdc in next st*, repeat to end of round. (36sts)
6. Sc in next st, sl st in next st. This is to shorten the round height. This is now the beginning of the round. Ch 2 (counts as a st for the cluster rounds), 2dc in same st, sk 2, *3dc in next st, sk 2*, repeat to end of round, sl st in top of beginning ch to join.
Note: If you would prefer to start with a ch 3 please do so.
7. Ch 2, turn, 2dc in the space below, 3dc in each space between clusters from previous round, sl st in top of beginning ch to join. (36sts)
8. Ch 2, turn, 2dc in the space below, 3dc in each space between clusters from previous round, sl st in top of beginning ch to join.
9. Repeat previous round for an additional 6 rounds (9 cluster rounds in total).
10. This step starts a band of sc sts at the top of the cover. Ch 1, *sc 2, sc in space between clusters*, repeat to end of round, sl st in first st to join.
11-13. Ch 1, sc in each st to end of round, sl st to join.
Finish off and weave in ends.
Skip to “features”.
Quart
7.5” long x 6.5” across
1. With an H hook and ww yarn (red part in sample), start with a magic circle of 8 sc sts (or preferred method for creating a circle of 8 sc sts), pull closed and place a marker for working in the round. (8sts)
2. 2sc in each st to end of round. (16sts)
3. *hdc, 2hdc in next st*, repeat to end of round. (24sts)
4. *hdc 2, 2hdc in next st*, repeat to end of round. (32sts)
5. Hdc 2, *2hdc in next st, hdc 2*, repeat to end of round. (42sts)
6. Sc in next st, sl st in next st. This is to shorten the round height. This is now the beginning of the round. Ch 2 (counts as a st for the cluster rounds), 2dc in same st, sk 2, *3dc in next st, sk 2*, repeat to end of round, sl st in top of beginning ch to join.
Note: If you would prefer to start with a ch 3 please do so.
7. Ch 2, turn, 2dc in the space below, 3dc in each space between clusters from previous round, sl st in top of beginning ch to join. (42sts)
8. Ch 2, turn, 2dc in the space below, 3dc in each space between clusters from previous round, sl st in top of beginning ch to join.
9. Repeat previous round for an additional 9 rounds (12 cluster rounds in total).
10. This step starts a band of sc sts at the top of the cover. Ch 1, *sc 2, sc in space between clusters*, repeat to end of round, sl st in first st to join.
11-14. Ch 1, sc in each st to end of round, sl st to join.
Finish off and weave in ends.
Continue to “features”.
Features
Hat
1. With an H hook and ww yarn (grey in sample), start with a magic circle of 6 sc sts (or preferred method for starting a circle of 6 sc sts), pull closed and place a marker for working in the round. (6sts)
2. Sc in each st around until hat tail measures 3” from starting point.
3. 2sc in the next st, sc 5. (7sts)
4-6. Sc in each st to end of round.
7. 2sc in the next st, sc 6. (8sts)
8-10. Sc in each st to end of round.
11. 2sc in the next st, sc 7. (9sts)
12-14. Sc in each st to end of round.
15. *2sc in the next st, sc 2*, repeat to end of round. (12sts)
16-17. Sc in each st to end of round.
18. *2s in the next st, sc 2*, repeat to end of round. (16sts)
19-20. Sc in each st to end of round.
21. *2sc in the next st, sc 3*, repeat to end of round. (20sts)
22. Sc in each st to end of round.
23. *2sc in the next st, sc 4*, repeat to end of round. (24sts)
24. Sc in each st to end of round.
25. *2sc in the next st, sc 5*, repeat to end of round. (28sts)
26. *2sc in the next st, sc 6*, repeat to end of round. (32sts)
27. *2sc in the next st, sc 7*, repeat to end of round. (36sts)
28. *2sc in the next st, sc 8*, repeat to end of round. Sl st in the first st of the round to start working in the round from this point on. (40sts)
29. Ch 1, *hdc 7, 2hdc in the next st, hdc 7, sc 5*, repeat once, sl st to join. (42sts)
30. Ch 1, *hdc 8, 2hdc in the next st, hdc 7, sc 5*, repeat once, sl st to join. (44sts)
31. Ch 1, *hdc 16, sc 6*, repeat once, sl st to join.
32. Ch 1, *hdc 8, 2hdc in the next st, hdc 8, sc 5*, repeat once, sl st to join. (46sts)
33. This step creates the first ear flap. Ch 1, sc2tog, sc 14, sc2tog. Leave remaining sts unworked. (16sts)
34. Ch 1, turn, sc2tog, sc 12, sc2tog. (14sts)
35. Ch 1, turn, sc2tog, sc 10, sc2tog. (12sts)
36. Ch 1, turn, sc2tog, sc 2, 2hdc in the next st, hdc 2, 2hdc in the next st, sc 2, sc2tog. Finish off and weave in ends.
37. This step creates the second ear flap. Skip 5 sts on the main hat. Attach yarn to the next st. Repeat steps 33-36. Do not finish off when complete.
38. Ch 1, turn to work from the right side of the piece. Loosely sl st around the bottom edge of the hat. Finish off, leaving a long tail for sewing hat to the jar cover.
Nose
1. With an H hook and light peach yarn, start with a magic circle of 6 sc sts (or preferred method for starting a
circle of 6 sc sts), pull closed and place marker for working in the round. (6sts)
2. 2sc in each st to end of round. (12sts)
3. *sc, 2sc in next st*, repeat to end of round. (18sts)
4. *sc, sc2tog*, repeat to end of round. (12sts)
5. *sc2tog*, repeat to end of round. (6sts) Finish off, leaving a tail for sewing in place. Stuff nose with yarn pieces or small amount of stuffing.
Assembly
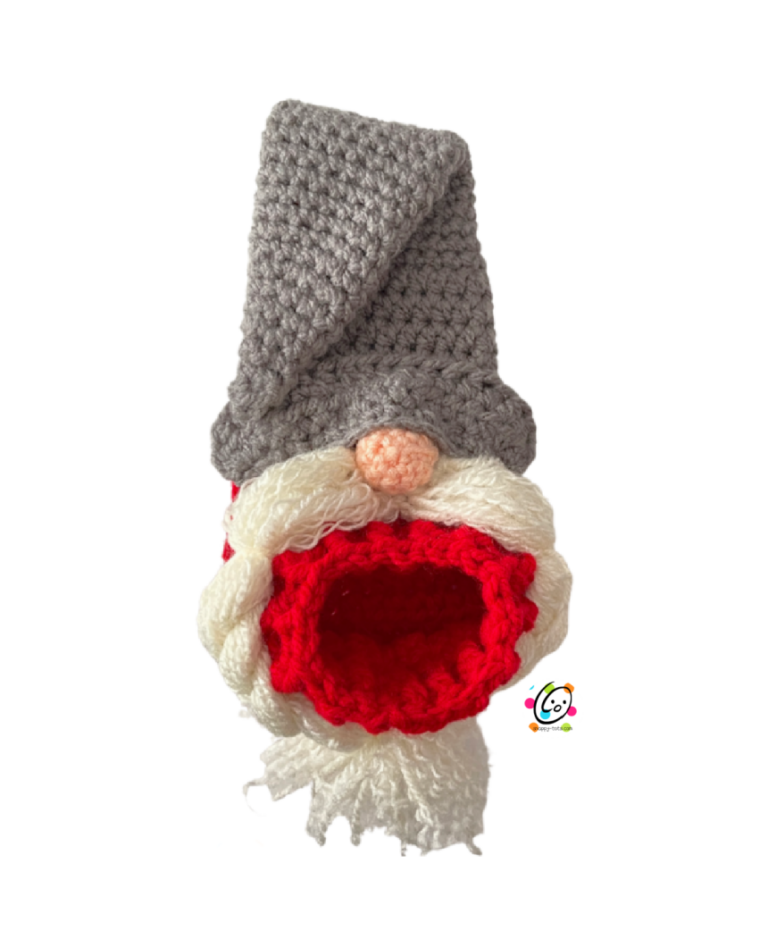
Lay the jar cover on a flat surface. Place something inside the jar cover to keep from sewing the layers together.
Flatten the hat. Place the bottom of the hat on top of the jar with the ear flaps at the sides. See photo below left.
With the yarn tail from the hat and a yarn needle, sew the back layer of the hat to the top edge of the jar cover.
With the yarn tail from the nose and a yarn needle, sew the open edge of the nose to the jar cover so it is up against the middle, of the hat edge. See photo below right. Fold the front layer of the hat down so it covers the top edge of the nose. With matching yarn and a yarn needle, so the hat to the top of the nose to hold in place.

Heart: With red yarn and a yarn needle, create the heart by taking a few sts in the hat.

Beard
Cut several strands of white yarn approximately 8-10” long. Take 2 strands at a time, fold in half and pull the center loops through a st next to the hat. See photo at right. Pull the yarn tails through the loops and snug.
Repeat across the bottom edge of the hat, under the nose and across the other edge of the hat.
Trim the bottom edge of the beard as desired.
Pull yarn pieces apart for a frizzy beard.

Fold the tip of the hat back and sew to the opposite edge of the jar cover.
Wire Hanger: slip your gnome cover over your jar to check needed height for the wire hanger. It should fit right under the gnome’s hat.
Add the wire hanger. Here is a great video on how to add a wire hanger to a glass jar: https://www.youtube.com/watch?v=9smjkDfiDlk
Pin To Save For Later