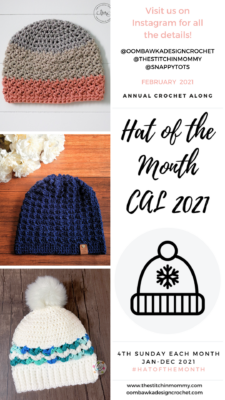
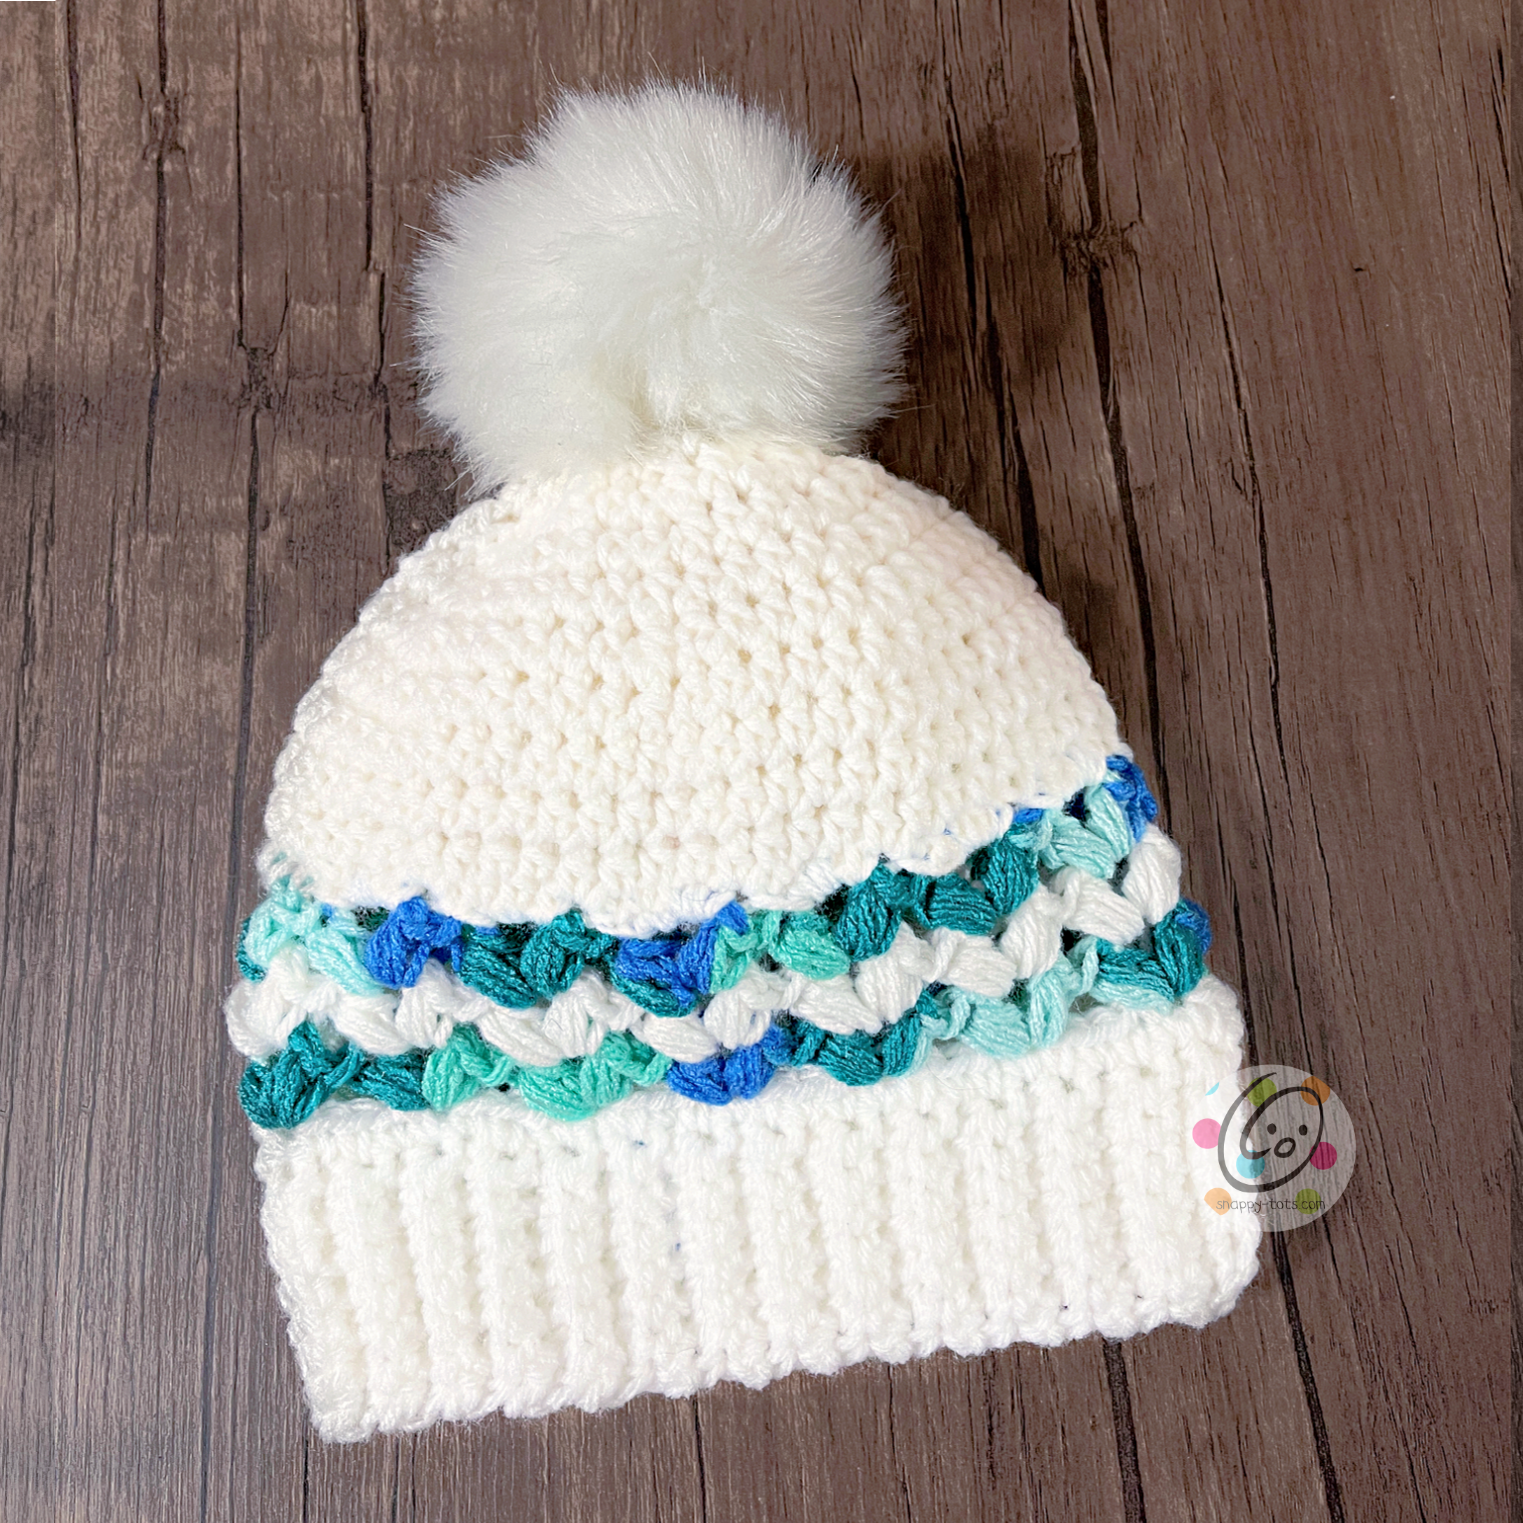
Free Pattern: Circle of Love Beanie
This beanie was designed to match my “Circle of Love Scarf“. It is pretty quick and easy to crochet. I hope you will enjoy this project.
Matching Patterns You Might Enjoy
- Free: Circle of Love Scarf
- Free: Chunky Puffy Heart Cowl
- Free: Puffy Heart Scarf
- Paid: Puffy Heart Beanie
Circle of Love Beanie Pattern
Scroll down to view the free pattern or purchase an ad-free, downloadable PDF version from my Ravelry Shop.
Materials & Details
- Yarn: 200 yards ww yarn. Sample yarns: Red Heart Super Saver Color Block Liquid Teal, White
- Crochet Hook: J (6mm)
- Notions: Yarn needle for weaving in ends, pompom (optional)
- Sizes: Small Child (2-4T), Large Child (5-10 Years), Teen/Adult
- Gauge: 4” with a J hook = 14 rows of sc in the beginning band; 6.5 rounds of puff clusters and 3.75 puff clusters
Tips
- Numbers at the beginning of each line may refer to steps and not indicate the number of rows.
- The beginning ch does not count as a st.
- The stitch count remains the same unless noted otherwise.
- If you have any questions about this pattern please contact [email protected].
- Help photos are available at the end of this pattern.
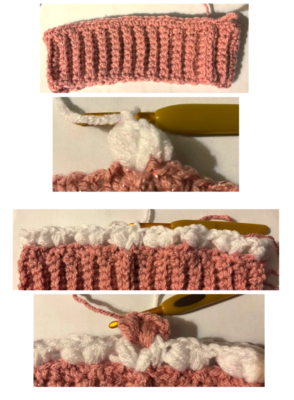
Special Stitch: Puff Cluster
Insert hook in next st and pull up a loop, *YO, insert hook in same st and pull up a loop*, repeat once. There should be 6 loops on the hook. YO and carefully pull the yarn through all of the loops on the hook. Ch 1. First puff complete.
Note: Do NOT YO when starting the first puff of the cluster. DO YO when starting the second puff of the cluster.
Ch 1. This is between the two puff clusters. YO, insert hook in next st and pull up a loop, *YO, insert hook in same st and pull up a loop*, repeat once. There should be 7 loops on the hook. YO and carefully pull the yarn through all of the loops on the hook. Ch 1.
Tips for this special stitch:
- Pull your loops up a little higher than if working a regular hdc st. This will make it easier to work through the loops on the hook plus creates a puffier heart.
- I lost the loops a few times and had to redo the puff so don’t worry if that happens.
- The “ch 1” at the end finishes off the puff st.
Directions
Size: Small Child (2-4T)
This starts at the bottom edge of the hat.
1. With a J hook and ww yarn, ch 8, sc in the 2nd ch from hook and in each ch across. (7sts)
2. Ch 1, turn, sc in the same st, sc in BLO of the next 5 sts, sc in the last st.
3. Repeat the previous step for an additional 46 rows (48 rows from starting edge).
4. Ch 1, turn. Fold the piece to match the short ends. Working through both layers, loosely sl st in each st across.
5. This step is worked across the edge of the band. Ch 1, sc 48 sts evenly around the opening, 1 st at the edge of each row, sl st in the first st to join. (48sts)
6. Change colors if desired (variegated in sample). Ch 1, (puff cluster) in the same st. Sk 3, *(puff cluster) in the next st, sk 3*, repeat to end of round, sl st in ch 1 space between beginning puffs to join. (12 puff clusters)
Note: Follow instructions above for the puff cluster special stitch. Please read the tips and remember to “ch 1” after each puff. After the first puff, you will have a ch 1 to finish that puff and another ch 1 between the two puffs.
7. Change colors if desired (white in sample). Ch 1, (puff cluster) in same ch 1 space,* (puff cluster) in the next ch 1 space*, repeat to end of round, sl st in ch 1 space between beginning puffs to join.
8. Repeat previous round, changing colors back to the variegated yarn if desired.
9. Finish off yarn and change to white yarn. Ch 1, 4sc in each ch 1 space (in the middle of the puff cluster) to end of round, sl st in the first st to join. (48sts)
10-11. Ch 1, hdc in the same st and in each st to end of round, sl st to join.
12. Ch 1, *hdc 4, hdc2tog*, repeat to end of round, sl st to join. (40sts)
13. Ch 1, *hdc 3, hdc2tog*, repeat to end of round, sl st to join. (32sts)
14. Ch 1, *hdc 2, hdc2tog*, repeat to end of round, sl st to join. (24sts)
15. Ch 1, *hdc, hdc2tog*, repeat to end of round, sl st to join. (16sts)
16. Ch 1, *hdc2tog*, repeat to end of round, sl st to join. (8sts)
17. With a yarn needle, use the yarn tail to weave in and out of the remaining sts. Pull closed and secure yarn. The remaining yarn could be used to sew a pompom to the top.
Pompom Top: With a yarn needle and remaining yarn, sew a commercial pompom to the top center of the beanie. A handmade pompom could be added instead.
Size: Large Child
This starts at the bottom edge of the hat.
1. With a J hook and ww yarn, ch 8, sc in the 2nd ch from hook and in each ch across. (7sts)
2. Ch 1, turn, sc in the same st, sc in BLO of the next 5 sts, sc in the last st.
3. Repeat the previous step for an additional 54 rows (56 rows from starting edge).
4. Ch 1, turn. Fold the piece to match the short ends. Working through both layers, loosely sl st in each st across.
5. This step is worked across the edge of the band. Ch 1, sc 56 sts evenly around the opening, 1 st at the edge of each row, sl st in the first st to join. (56sts)
6. Do NOT finish off the current yarn. Change to a variegated/contrasting yarn (Liquid Teal in sample). Ch 1, (puff cluster) in the same st. Sk 3, *(puff cluster) in the next st, sk 3*, repeat to end of round, sl st in ch 1 space between beginning puffs to join. (14 puff clusters)
Note: Follow instructions on page 1 for the puff cluster special stitch. Please read the tips and remember to “ch 1” after each puff. After the first puff, you will have a ch 1 to finish that puff and another ch 1 between the two puffs.
7. Change colors if desired (white in sample). Ch 1, (puff cluster) in same ch 1 space,* (puff cluster) in the next ch 1 space*, repeat to end of round, sl st in ch 1 space between beginning puffs to join.
8. Repeat previous round, changing colors back to the variegated yarn if desired.
9. Finish off yarn and change to white yarn. Ch 1, 4sc in each ch 1 space (in the middle of the puff cluster) to end of round, sl st in the first st to join. (56sts)
10-12. Ch 1, hdc in the same st and in each st to end of round, sl st to join.
13. Ch 1, *hdc 5, hdc2tog*, repeat to end of round, sl st to join. (48sts)
14. Ch 1, *hdc 4, hdc2tog*, repeat to end of round, sl st to join. (40sts)
15. Ch 1, *hdc 3, hdc2tog*, repeat to end of round, sl st to join. (32sts)
16. Ch 1, *hdc 2, hdc2tog*, repeat to end of round, sl st to join. (24sts)
17. Ch 1, *hdc, hdc2tog*, repeat to end of round, sl st to join. (16sts)
18. Ch 1, *hdc2tog*, repeat to end of round, sl st to join. (8sts)
19. With a yarn needle, use the yarn tail to weave in and out of the remaining sts. Pull closed and secure yarn. The remaining yarn could be used to sew a pompom to the top.
Pompom Top: With a yarn needle and remaining yarn, sew a commercial pompom to the top center of the beanie. A handmade pompom could be added instead.
Size: Teen/Adult
This starts at the bottom edge of the hat.
1. With a J hook and ww yarn, ch 10, sc in the 2nd ch from hook and in each ch across. (9sts)
2. Ch 1, turn, sc in the same st, sc in BLO of the next 7 sts, sc in the last st.
3. Repeat the previous step for an additional 58 rows (60 rows from starting edge).
4. Ch 1, turn. Fold the piece to match the short ends. Working through both layers, loosely sl st in each st across.
5. This step is worked across the edge of the band. Ch 1, sc 60 sts evenly around the opening, 1 st at the edge of each row, sl st in the first st to join. (60sts)
6. Change colors if desired (white in sample). Ch 1, (puff cluster) in the same st. Sk 3, *(puff cluster) in the next st, sk 3*, repeat to end of round, sl st in ch 1 space between beginning puffs to join. (15 puff clusters)
Note: Follow instructions on page 1 for the puff cluster special stitch. Please read the tips and remember to “ch 1” after each puff. After the first puff, you will have a ch 1 to finish that puff and another ch 1 between the two puffs.
7. Change colors if desired (white in sample). Ch 1, (puff cluster) in same ch 1 space,* (puff cluster) in the next ch 1 space*, repeat to end of round, sl st in ch 1 space between beginning puffs to join.
8. Repeat previous round, changing colors back to the variegated yarn if desired.
9. Finish off yarn and change to white yarn. Ch 1, 4sc in each ch 1 space (in the middle of the puff cluster) to end of round, sl st in the first st to join. (60sts)
10-14. Ch 1, hdc in the same st and in each st to end of round, sl st to join.
15. Ch 1, *hdc 4, hdc2tog*, repeat to end of round, sl st to join. (50sts)
16. Ch 1, *hdc 3, hdc2tog*, repeat to end of round, sl st to join. (40sts)
17. Ch 1, *hdc 3, hdc2tog*, repeat to end of round, sl st to join. (32sts)
18. Ch 1, *hdc 2, hdc2tog*, repeat to end of round, sl st to join. (24sts)
19. Ch 1, *hdc, hdc2tog*, repeat to end of round, sl st to join. (16sts)
20. Ch 1, *hdc2tog*, repeat to end of round, sl st to join. (8sts)
21. With a yarn needle, use the yarn tail to weave in and out of the remaining sts. Pull closed and secure yarn. The remaining yarn could be used to sew a pompom to the top.
Pompom Top: With a yarn needle and remaining yarn, sew a commercial pompom to the top center of the beanie. A handmade pompom could be added instead.
Help Photos
These photos are of the teen/adult size, but the smaller sizes are done the same way.
Pin To Save For Later