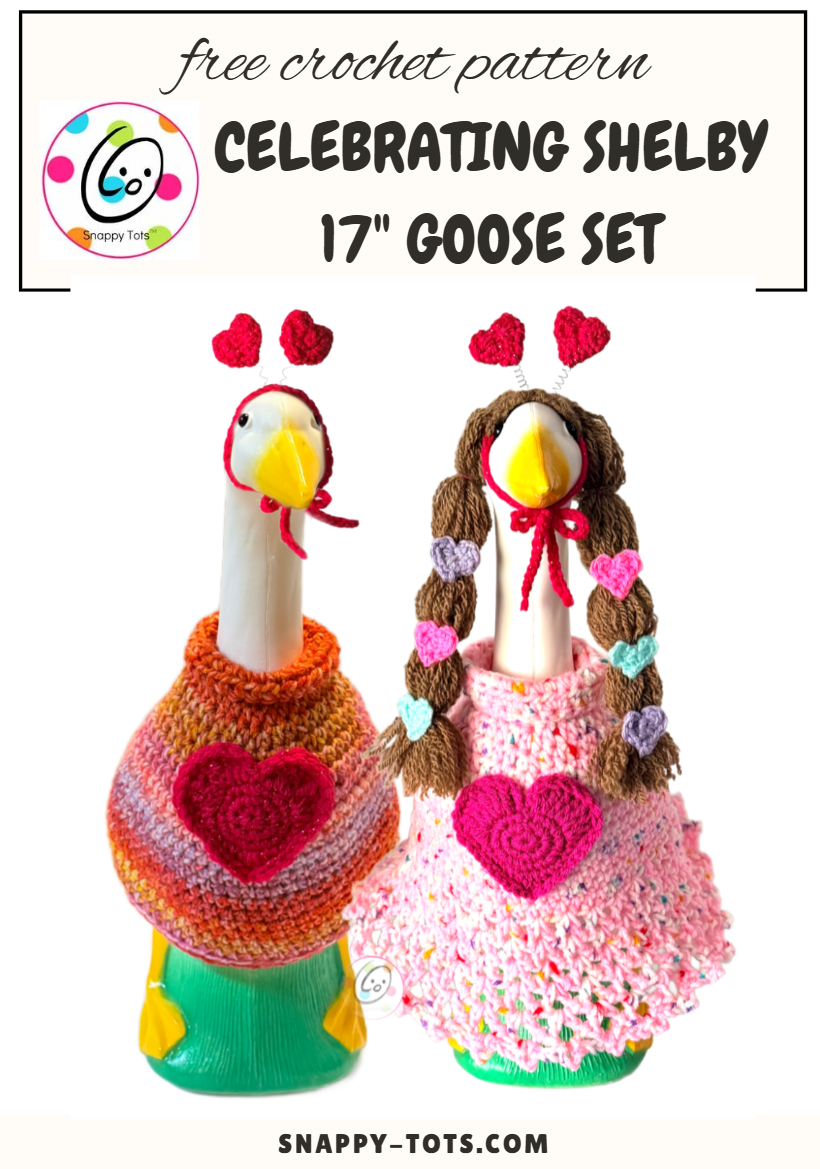
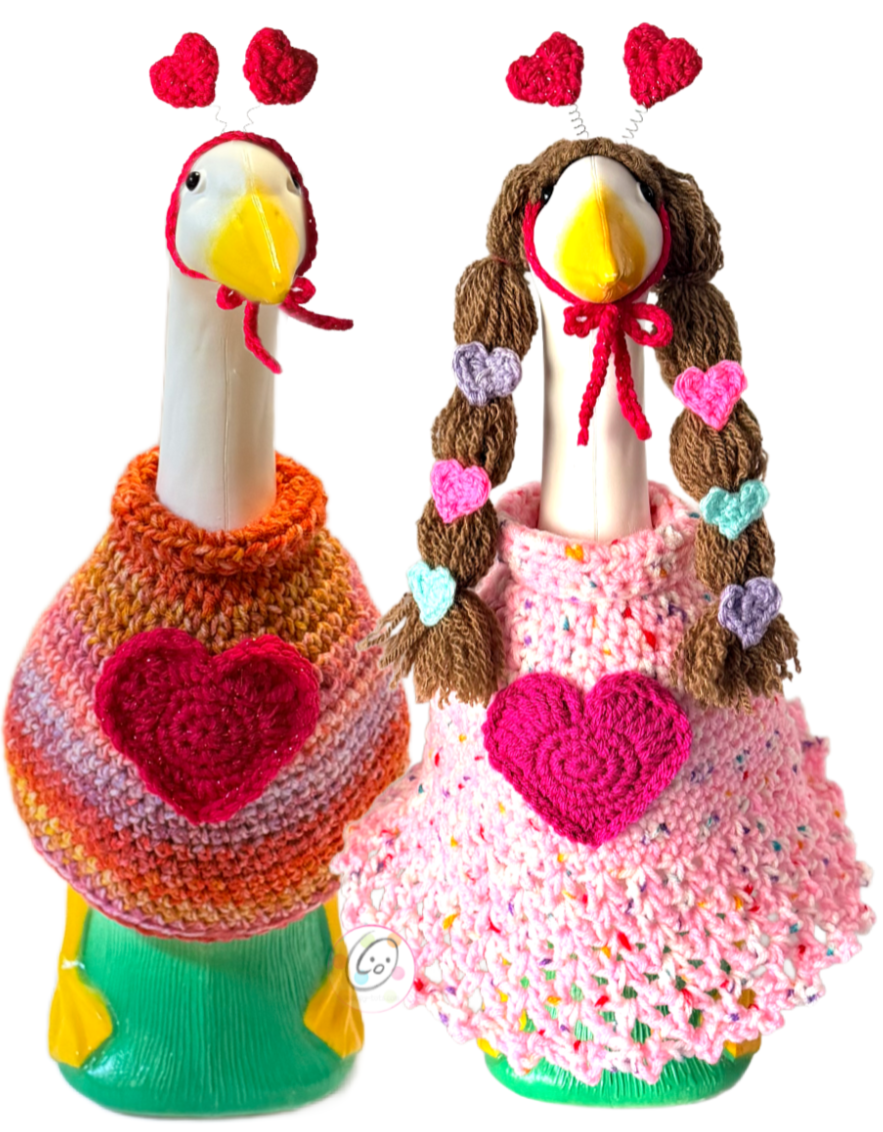
Free Pattern: 17in Celebrating Shelby Set
Meet my latest set, “Celebrating Shelby”. This sweater and dress set is designed for your 17” goose friend to wear throughout the year, celebrating each holiday along the way when you don’t have time to make a whole new outfit. Your favorite applique can be sewn to the front or made to be interchangeable. You’ll love the springy headbands and will want one for each celebration too.
Yearlong Crochet Along
Join me ALL YEAR LONG as our geese celebrate the different holidays with add on packs, all free on my blog.
The pattern for this first pack is below and includes the dress and sweater, plus hearts because love is always in season.
Where can you find all of the patterns for the monthly packs? Since there will end up being MANY patterns and in 3 different sizes (yep a mini is in the works), I have set up a hub for all patterns, all sizes: SHELBY HUB
More Patterns Great for Valentines, February, and LOVEly Settings
- Heart Purse: This would be cute for a cross body purse for your goose.
- Little Stuffed Heart
- Small Dangling Hearts
Celebrating Shelby Dress and Sweater Crochet Patterns
The patterns are available to follow along here on my blog for free below. An ad-free, downloadable pattern is also available to purchase from my shops for a small fee: Etsy | Ravelry
Materials and Details
- Yarn: 150 yards worsted weight yarn (per outfit).
Sample yarns
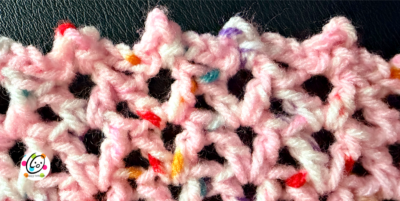
Dress: Red Heart Speckles Bubblegum, Shocking Pink
Sweater: Red Heart Bitty Stripes Pink Lemonade
Mini Hearts: Red Heart Pretty N Pink, Aruba, Pale Plum, Metallic Red
Hair: Red Heart Cafe - Crochet Hook: G (4.25-4.5mm), H (5mm), I (5.5mm)
- Supplies: Yarn needle for weaving in ends, tiny spring (best from inside a pen) or thin wire to create your own
- Optional: Measuring tape, scissors, 8 small rubber bands for the hairstyle, pliers
Optional for Interchangeable heart: 2 – 1” brads (paper fastener) - Gauge: 4” with an I hook = 13 hdc sts and 10 rounds
- Measurements (measured flat)
Dress: Bottom edge – 13.5″ across (straight line, not along the curve), Neck – 4” across , Length – 13.5” (before top roll)
Sweater: Bottom edge – 9” across, Neck – 3.5” across, Length – 9.5”
Tips
- The first stitch of each round is worked into the same stitch as the turning chain unless noted.
- Numbers at the beginning of each line may refer to steps and not indicate the number of rows/rounds.
- Stitch count remains the same unless noted at end of row/round.
- If you have any questions about this pattern please contact [email protected].
This is designed for a 17” goose statue like the one sold by Miles Kimball: https://www.mileskimball.com/buy-gaggleville-porch-goose-baby-17-h-statue-377693
Goose measurements: 14 1/2″ long x 7″ wide x 17″ high
The Dress
This starts at the neck and is worked towards the bottom edge.
1. With an I hook and worsted weight yarn (Sample: Bubblegum), ch 26, sl st in the last ch from hook to form a circle. Make sure the chain is not twisted. Ch 1, sc in the same ch and in each ch to end of round, sl st to join. (26sts)
2. Ch 1, *hdc 12, 2hdc in the next st*, repeat to end of round, sl st in the first st to join. (28sts)
3. Ch 1, hdc in the same st and in each st to end of round, sl st to join.
4. Ch 1, *hdc 6, 2hdc in the next st*, repeat to end of round, sl st to join. (32sts)
5. Ch 1, *hdc 7, 2hdc in the next st*, repeat to end of round, sl st to join. (36sts)
6. Ch 1, *hdc 8, 2hdc in the next st*, repeat to end of round, sl st to join. (40sts)
7. Ch 1, *hdc 9, 2hdc in the next st*, repeat to end of round, sl st to join. (44sts)
8. Ch 1, *hdc 10, 2hdc in the next st*, repeat to end of round, sl st to join. (48sts)
9. Ch 1, *hdc 11, 2hdc in the next st*, repeat to end of round, sl st to join. (52sts)
10. Ch 1, *hdc 12, 2hdc in the next st*, repeat to end of round, sl st to join. (56sts)
11. Ch 1, hdc in the same st and in each st to end of round, sl st to join.
12. Repeat the previous round for an additional 4 rounds.
13. This step starts the skirt. Ch 4, dc in the same st, sk 1, *(dc, ch 1, dc) in the next st, sk 1*, repeat to end of round, sl st in the first space to join.
14. Ch 4, dc in the same space, (dc, ch 1, dc) in each space to end of round, sl st in the first space to join.
15. Repeat the previous round one time.
Tip: I think this would be a beautiful long dress as well. To add length, see the notes under each of the following steps.
16. Ch 5, dc in the same space, (dc, ch 2, dc) in each space to end of round, sl st in the first space to join.
Note: to add length, repeat step 16 two more times.
17. Ch 6, dc in the same space, (dc, ch 3, dc) in each space to end of round, sl st in the first space to join.
Note: to add length, repeat step 17 two more times or until skirt is 1” shorter than desired length.
18. This step adds trim to the bottom edge of the skirt. *ch 4, sl st in the same space, ch 3, sl st in the next ch 3 space*, repeat to end of round.
Note: This should create little bumps above each ch 3 space from step 17, with a chain between. Finish off and weave in ends.
Top Edge: In the sample, the top edge is rolled down just a bit to finish if off with a type of turtleneck look. This is optional. You could leave the neck up and add a little necklace or beads to dress up the outfit.
The Sweater
This starts at the neck and is worked towards the bottom edge.
1. With an I hook and worsted weight yarn (Sample: Pink Lemonade), ch 26, sl st in the last ch from hook to form a circle. Make sure the chain is not twisted. Ch 1, sc in the same ch and in each ch to end of round, sl st to join. (26sts)
2. Ch 1, *hdc 12, 2hdc in the next st*, repeat once, sl st in the first st to join. (28sts)
3. Ch 1, hdc in the same st and in each st to end of round, sl st to join.
4. Ch 1, *hdc 6, 2hdc in the next st*, repeat to end of round, sl st to join. (32sts)
5. Ch 1, *hdc 7, 2hdc in the next st*, repeat to end of round, sl st to join. (36sts)
6. Ch 1, *hdc 8, 2hdc in the next st*, repeat to end of round, sl st to join. (40sts)
7. Ch 1, *hdc 9, 2hdc in the next st*, repeat to end of round, sl st to join. (44sts)
8. Ch 1, *hdc 10, 2hdc in the next st*, repeat to end of round, sl st to join. (48sts)
9. Ch 1, *hdc 11, 2hdc in the next st*, repeat to end of round, sl st to join. (52sts)
10. Ch 1, *hdc 12, 2hdc in the next st*, repeat to end of round, sl st to join. (56sts)
11. Ch 1, hdc in the same st and in each st to end of round, sl st to join.
12. Repeat the previous round for an additional 10 rounds. Add more rounds for a longer sweater if desired.
13. Work this step in BLO (plus I like to pick up the “third loop” from behind). Ch 1, sc in BLO of each st to end of round, sl st to join.
14. Loosely sl st in each st to end of round. Finish off and weave in ends.
Top Edge: In the sample, the top edge is rolled down just a bit to finish if off with a type of turtleneck look. This is optional. You could leave the neck up and add a little necklace or beads to dress up the outfit.
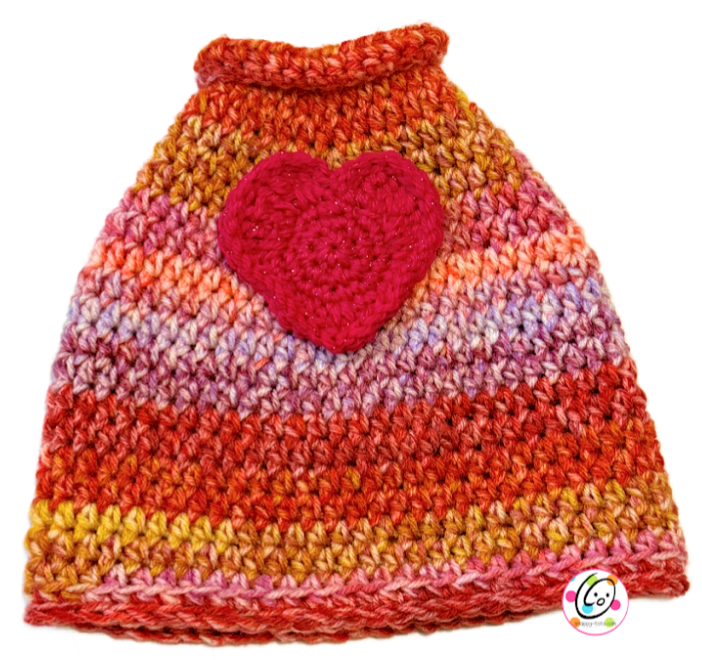
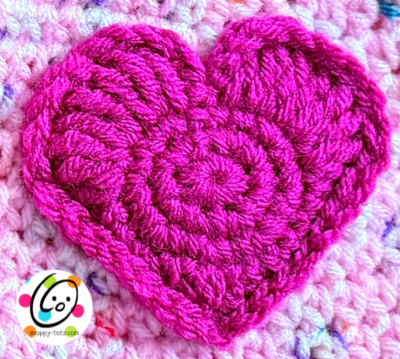
Chest Applique Heart (make 1 per outfit)
- 3-3.25” across and tall
- This is shown on the dress, but would be great on the sweater as well.
- It can be sewn directly to the dress/ sweater or made to be interchangeable.
- For a slightly smaller heart, use an F hook. Lighter weight yarn could also be used for an even smaller heart for the dress/ sweater.
1. With a G hook and worsted weight yarn (Sample: Shocking Pink), create a magic circle of 8 sc sts (or preferred method of starting a circle of 8 sc sts), pull closed and sl st to join. (8sts)
2. Ch 1, 2sc in each st to end of round, sl st to join. (16sts)
3. Ch 1, *sc, 2sc in the next st*, repeat until 2 sts remain, sc 2, sl st to join. (23sts)
4. Ch 3, tr in the same st, 2tr in the next st, tr, 2tr in the next st, (tr, dc) in the next st, hdc, sc 3, hdc 2, (dc, ch 1, dc) in the next st, hdc 2, sc 3, hdc, (dc, tr) in the next st, 2tr in the next st, tr, 2tr in the next st, (tr, ch 2, sl st) in the last st.
Finish off. If this will be sewn to the dress/ sweater, leave a long tail for sewing. If you would like to interchange this applique with others, weave in the ends.
Interchangeable appliques
Why make these interchangeable? I have 8 geese I try to keep dressed for family and friends (plus my 3 that are usually naked) and I don’t always have time to create full sets for each. I have lots of applique patterns that would be cute on their outfits.
How to Attach the Appliques: I wanted a way they could be swapped out without attaching snaps to the sweater since the appliques will be different sizes and shapes.
Option 1 (sample): After playing around with a few things, I found something that works perfectly: brads (paper fasteners)
While you could just push the brad through the two pieces, I didn’t want to see the gold knobs on the front. I made a little circle, slipped the brad through, and sewed it to the back of the applique. Small appliques might just need one, but this heart is big and I wanted it to appear like it was sewn in place.
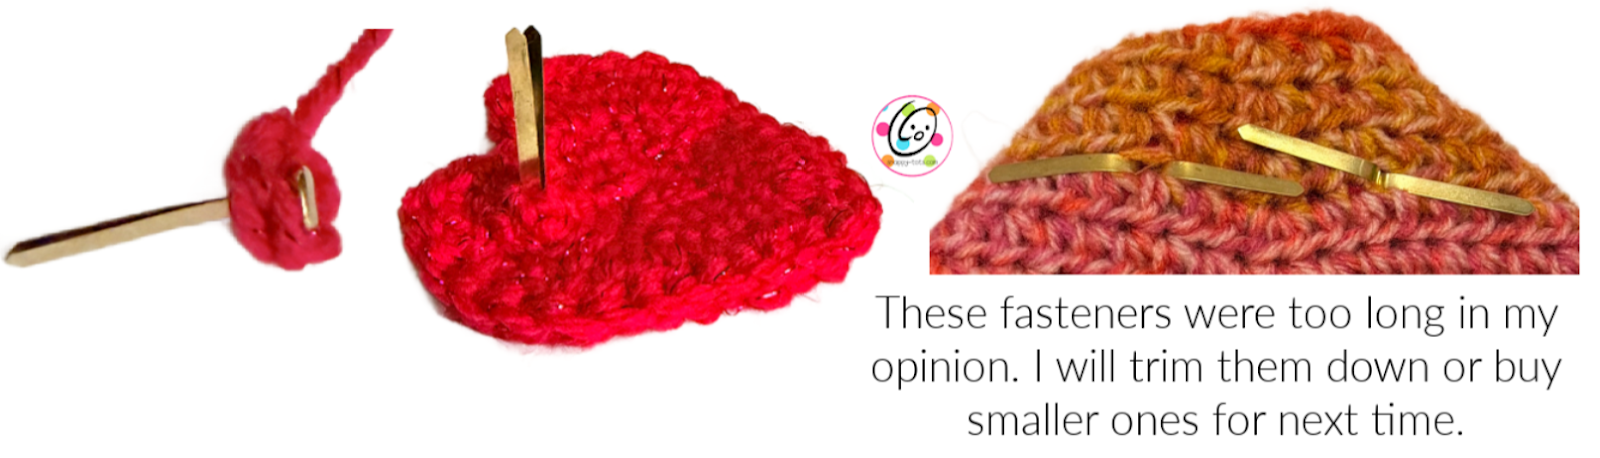
1. Make 2 Circles (photo below left): With an H hook and matching yarn, create a magic circle of 5 sc sts (or preferred method for making a circle of 5 sc sts), pull to close and sl st to join. (5sts) Finish off, leaving a long tail for sewing in place.
2. Insert a brad through the middle of each circle. Set one aside. With the knob end of the brad next to the back of the heart, use a yarn needle and the yarn tail to sew the circle to the heart. Check the front of the heart as you sew to make sure you are catching the sts and keeping it looking nice. Placement: the brad circles are sewn to the top, rounded section of the heart (photo below middle shows placement for one. The other is sewn next to the opposite edge.
3. Decide where you want the heart to be on the sweater. From the front/right side of the sweater, push the brads through to the inside. Carefully turn the sweater inside out and flatten the brads (photo below right). If you have long brads like in the photo I suggest trimming the ends so they won’t poke through the sweater.
Option 2: Buttons could be sewn to the back of the appliques and then slipped through the sweater. This option might not stay in place as well and could leave gaps in the sweater.
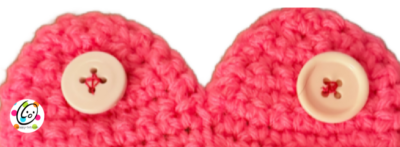
Sample photo is of a different heart, but the button attachment is the same.
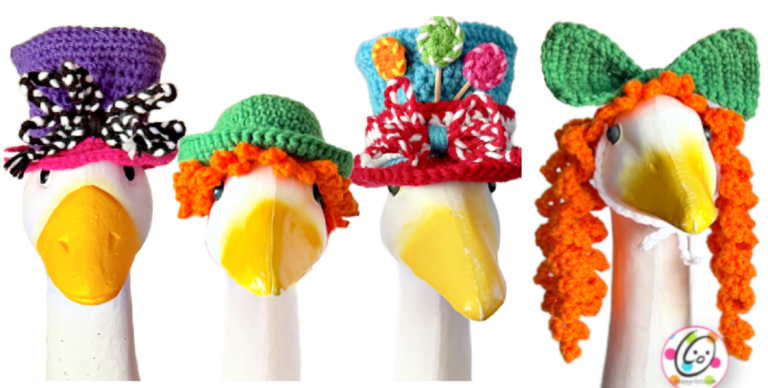
Wig and Headband
Wig Base
This is worked from side to side, creating a center piece that will sit on top of the goose head.
1. With a G hook and worsted weight yarn (Sample: Cafe), ch 2, 2sc in the 2nd ch from hook. (2sts)
2. Ch 1, turn, 2sc in each st. (4sts)
3. Ch 1, turn, 2sc in the same st, sc 2, 2sc in the last st. (6sts)
4. Ch 1, turn, sc in the same st and in each st to end of row.
5. Repeat previous row for an additional 4 rows.
6. Ch 1, turn, sc2tog, sc 2, sc2tog. (4sts)
7. Ch 1, turn, sc2tog, sc2tog. (2sts) Finish off and weave in ends. Set aside.
Headband: Choose one of the options below.
- Sewn to wig: With a G hook and worsted weight yarn (Sample: Metallic Red), ch 30, surface crochet across the center of the wig from one point to the other (starting point to the ending point), ch 30. Finish off and pull the ends of the chain snug to secure the sts. Trim ends.
- Separate headband: With a G hook and worsted weight yarn (Sample: Metallic Red), ch 71, sl st in the 2nd ch from hook, sl st 29, sc 10, sl st 30. Finish off and weave in ends.
Ponytails
Cut 24 pieces of worsted weight yarn (same as wig base) 23” long (or desired length). Divide the strands into 4 groups of 6.
Tips: I like to pull the yarn pieces a part (in half) so it looks less like yarn. Secure the wig section or have someone hold it for you as you continue with styling the hair. You can put the wig on the goose and tie it snug in place, but it will still slip around when you start styling the hair…and then your goose will get all fidgety and probably won’t want to sit still anymore.
Pull the end of 6 strands through one tip of the wig until the ends are even. Pull another 6 strands through the other tip. These hang down each side, but the hair is added across the back of the wig to cover the bottom edge.
Repeat with the last 2 groups of 6 strands, adding each group to one long edge (pick one as the back and both sets go in this same edge). See photo on page 6.
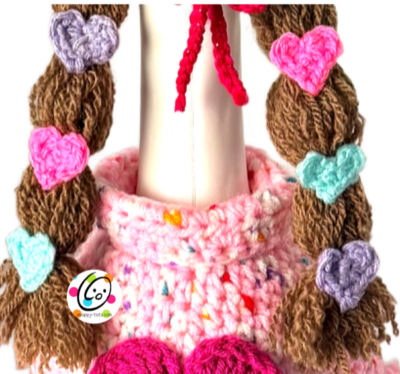
Choose your hairstyle: At this point you could make a big ponytail, divide into thirds and braid, or create the bubbles like the sample.
Bubbles: have 4 small rubber bands ready (clear hair bands work great). Loosely gather the hair and carefully place the hairband around this hair. Tug the hair a bit until you get the look you want. Repeat 3 more times or desired amount. Refer to photo if needed.
Repeat for the opposite side of the head.
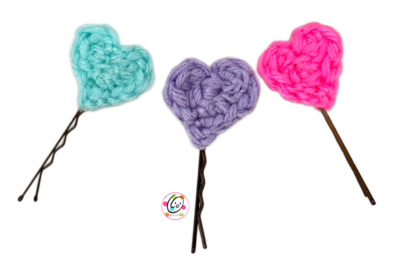
Mini Hearts for Hair and Springy Headband
- Hair: make 6 or desired amount based on hairstyle…I originally did 8 but the 2 up by the head looked like earmuffs so that is why there aren’t any there. Sample: 2 Aruba, 2 Pale Plum, 2 Pretty N Pink
- Headband: make 4 and set aside.
With a G hook and worsted weight yarn (), ch 3. Work the following sts in the 3rd ch from hook: dc, hdc, sc ch 2, sl st in the next ch from hook, ch 1, sc, hdc, dc, ch 2, sl st. Finish off, leaving a long tail.
Headband Hearts note: Weave in the tail on 2 of the hearts and leave a long tail on 2 of the hearts.
Pix and process for these tiny hearts:
- With a G hook and worsted weight yarn, ch 3. Work the following sts in the 3rd ch from hook: dc, hdc, sc ch 2, sl st in the next ch from hook ch 1, (left photo is up to this point)
- sc, (middle photo is after this st)
- hdc, dc, ch 2, sl st. (Right photo after all sts complete)
Adding the Hearts to the Hair
For the sample, I used the beginning and ending tails to tie the hearts around the hair where the rubberbands were added. The Wig could be complete at this point or continue to add the springs and hearts.
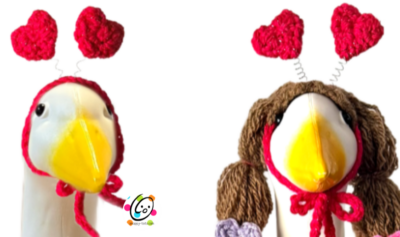
Springy Headband Assembly
Note: These hearts work well because they are small and lightweight. If you decide you want to make bigger, stuffed items you will need to provide a stronger base and spring.
First, find a spring or use a thin wire wrapped around a small item, like a small crochet hook or nail.
Tug the ends of the spring until it is approximately 2.5” long.
Flatten approximately 1” at the middle. I used a pair of pliers. Set aside.
Attaching the spring to the headband: Place the middle, flat section of the spring on top of the middle of the headband on the wig. If you did not crochet the headband to the wig you can do that in this same step. Just make sure the headband is centered on the wig.
With a yarn needle and matching yarn (same as headband) sew around the spring and headband several times. This needs to be snug so the spring with stay in place.
Working with 2 hearts at a time (one with a yarn tail and one without), use a yarn needle and the yarn tail to sew the hearts together, leaving an opening at the bottom tip. Insert one end of the spring and finish sewing the hearts together. Repeat for the other hearts/end of spring.
Another Option: The little hearts are cute on bobby pins too! I first made these and slipped them in the hairstyle, but I wanted them to be more secure (plus the pins were too long… hmm, if there are smaller bobby pins this would be cute to add to other hairstyles and hats.
Pin To Save For Later