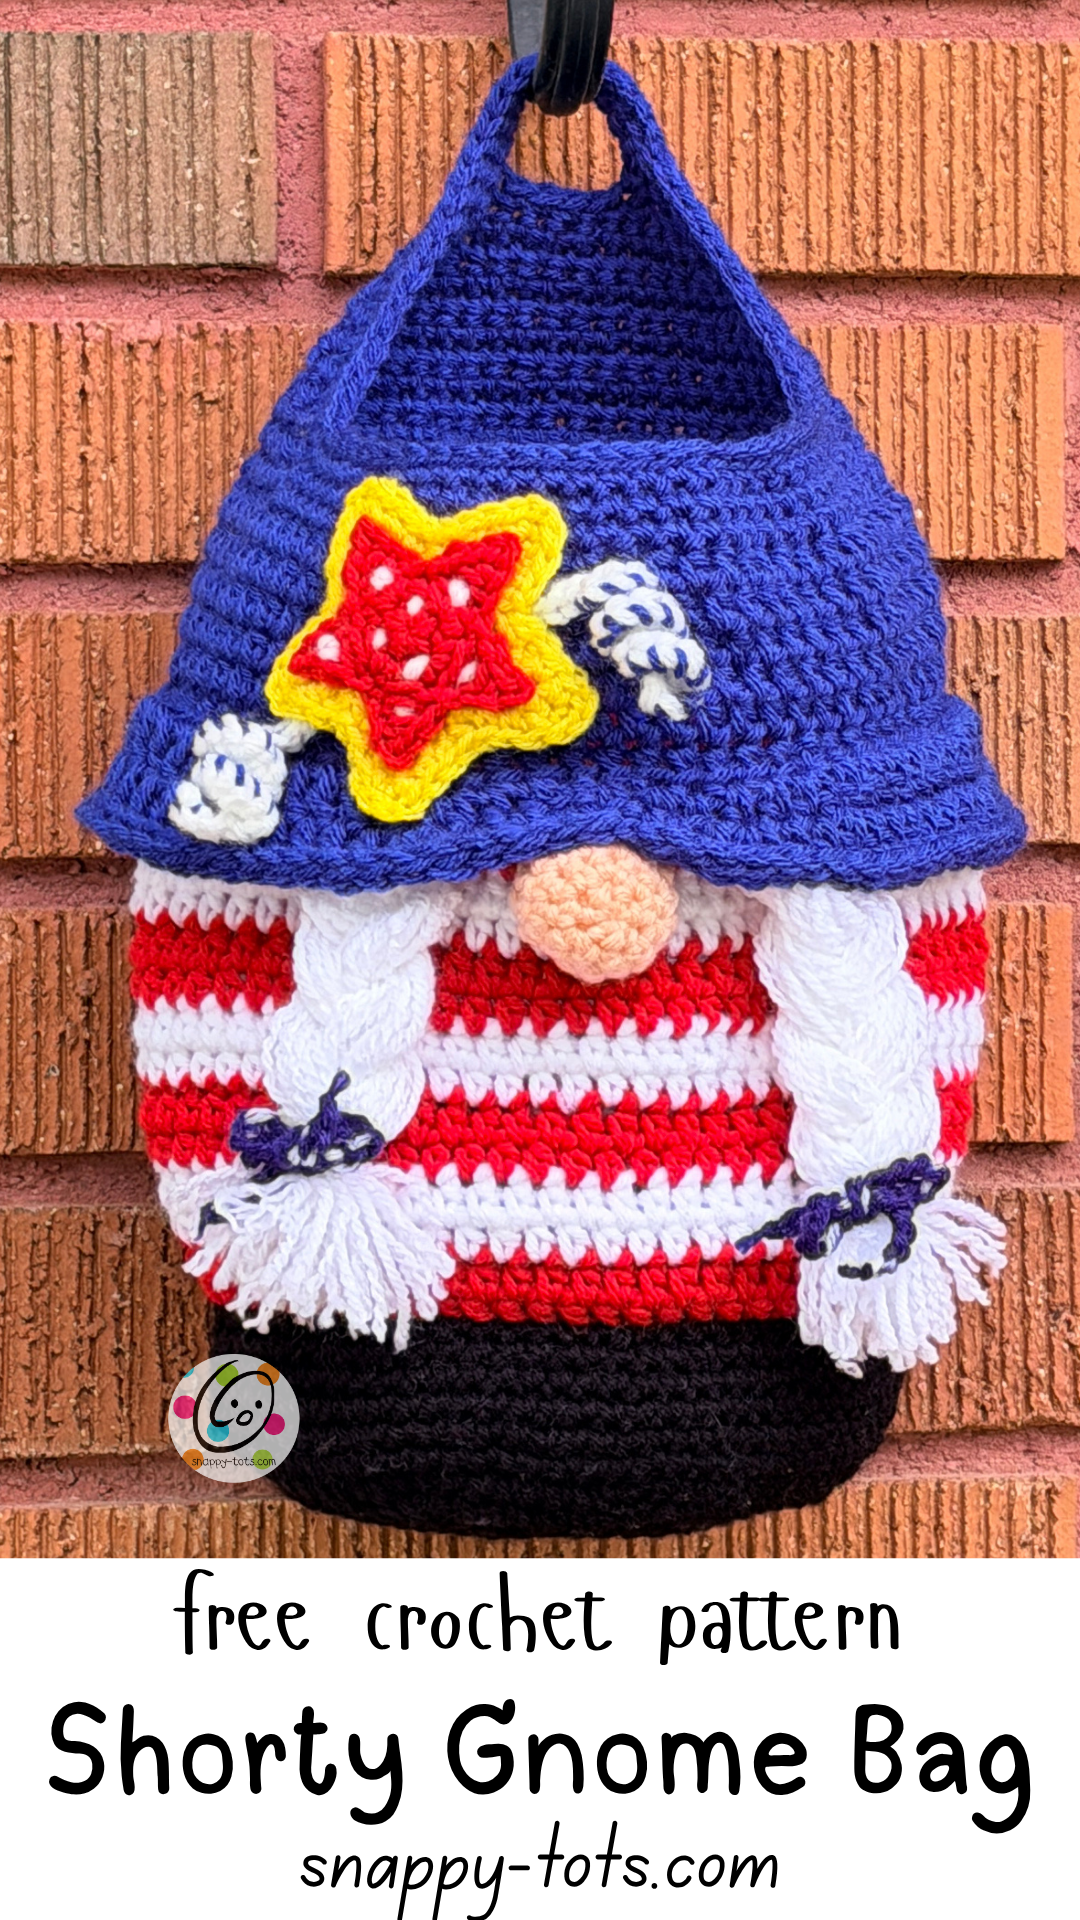
Free Pattern: Shorty Gnome Bag
I am still loving gnomes and I hope you are too! Every summer I like to hang out my patriotic decorations. This year I wanted to make a new gnome to hang from my mailbox and thought a patriotic one would be fun, especially this year since it is America’s 250th birthday.

This gal would be cute in any theme, plus the gnome pieces could be left off for an everyday bag too.
Shorty Gnome Bag Crochet Pattern
The pattern for this bag is free to follow along below. An ad-free, downloadable pdf is also available from my pattern shops for a small fee. Etsy | Ravelry
Materials
– Crochet hooks: H (5mm), I (5.5mm)
– Yarn: Worsted weight. Yardage is approximate maximum amounts based on red heart super saver yarn
- Shoes: 100 yards, Sample – Red Heart Super Saver Black
- Shirt: 100 yards, Sample – Red Heart Super Saver Cherry and White
- Hat: 70 yards, Sample – Red Heart Super Saver Royal Blue
- Nose: I Love This Yarn Light Peach
- Star Burst on Hat: Red Heart Super Saver Bright Yellow, Cherry, White, Royal Blue
- Braids: White, Americana (Hair Bows)
– Yarn needle, stitch markers, small amount of stuffing
Details
Finished Measurements: 12” tall x 10” wide (measured flat)
Tips
- The first stitch of each row is worked into the same stitch as the turning chain unless noted otherwise.
- Numbers at the beginning of each line may refer to steps and not indicate number of rows.
- Instructions are written with color changes as shown in sample. Substitute colors as desired.
- Stitch count remains the same unless noted at the end of the line.
Directions
This project starts at the bottom of the bag, creating 2 circles for a strong base that will hold its shape.
1. With an I hook and worsted weight yarn (Sample: Black), start with a magic circle of 8 sc sts (or preferred method of starting a circle of 8 sc sts), pull closed, and place a marker for working in the round. (8sts)
2. 2sc in each st to end of round. (16sts)
3. *sc, 2sc in the next st*, repeat to end of round. (24sts)
4. *sc 2, 2sc in the next st*, repeat to end of round. (32sts)
5. *sc 3, 2sc in the next st*, repeat to end of round. (40sts)
6. *sc 4, 2sc in the next st*, repeat to end of round. (48sts)
7. *sc 5, 2sc in the next st*, repeat to end of round. (56sts)
8. *sc 6, 2sc in the next st*, repeat to end of round. (64sts)
9. *sc 7, 2sc in the next st*, repeat to end of round. (72sts) Finish off and weave in end
10. Repeat steps 1-9 but do not finish off the second circle.
11. Place the first circle under the second circle. Continue with the same yarn and hook. This step will be worked into the sts of both circles at the same time by inserting a hook in the next st of the top circle, then into the next st on the bottom circle, treating them as one st from this point on. Place a marker to continue working in the round.
Sc in each st to end of round. (72sts)
12. Sc in each st for 5 additional rounds.
13. Sl st in the next. This is the new beginning of the round. Ch 1, *sc 7, sc2tog*, repeat to end of round, sl st to join. (64sts) Finish off the current yarn.
14. Change to worsted weight yarn for the “shirt”. The sample is red and white stripes (starting with red), but you could do a variegated or solid color. Note: I know sc sts do not have much of a post to work around but it can be done, just take your time.
Ch 1, *FPHDC* around each post to end of round, sl st in the first st to join. (64sts)
Part of the remaining steps are worked between the posts of the previous round to create a more solid fabric. To do this, insert the hook slightly below the st, between the posts.
Event though most of the bag is made in one piece, I do break it down into sections.
The Shirt Section
At this point, choose one of the following options for the shirt (A or B):
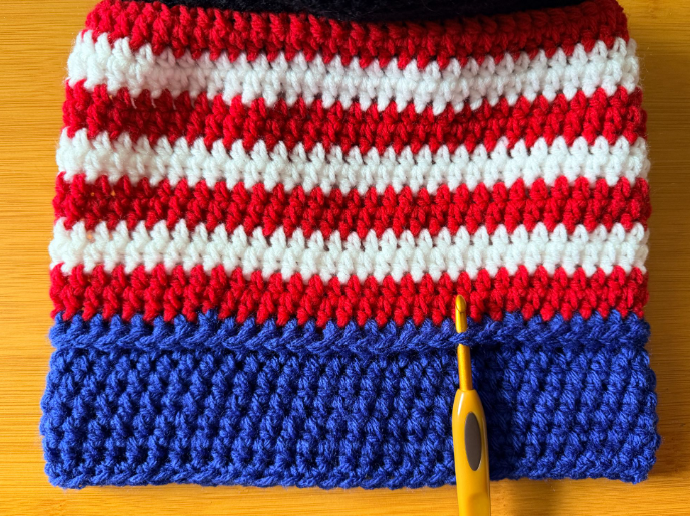
A. Stripes
The sample has red and white stripes, each made up of two rounds.
1. After the FPHDC continue with the same color (Sample: Cherry). Ch 1, hdc in each st to end of round, sl st in the first st to join.
2. Change to yarn for the next stripe (Sample: White). Work this round IN the st as usual. Ch 1, hdc in each st to end of round, sl st to join.
3. Ch 1, hdc between the posts to end of round, sl st in the first st to join.
4. Change to yarn for the next stripe (Sample: red). Work this round IN the st as usual. Ch 1, hdc in each st to end of round, sl st to join.
5. Ch 1, hdc between the posts to end of round, sl st in the first st to join.
Repeat steps 2-5 until there are 7 stripes/ 14 rounds including the post stitch round. Then skip to “the hat”.
B. One yarn (solid color/variegated)
Place a marker for working in the round.
1. Sc in the next st, hdc in each st to end or round. St count should remain at 64sts until noted.
2. Hdc between the posts for an additional 12 rounds.
At this point there should be 14 rounds in the shirt section. Continue with “the hat”.
The Hat
1. Change to yarn for the hat (Sample: Royal Blue). Ch 1, *hdc 14, hdc2tog*, repeat to end of round, sl st in the first st to join. (60sts)
2. Ch 1, BPHDC around each post to end of round, sl st in the first st to join. This creates a ridge on the right side of the project. A brim will be added to this ridge when project is complete.
3. Ch 1, hdc between the posts to end of round, sl st in the first st to join.
4. Repeat the previous round for an additional 4 rounds.
5. Ch 1, sc in each st to end of round, sl st in the first st to join. Finish off and weave in ends.
Hat Brim: choose where you want the center front of the bag to be. For example, if you did stripes you might want to put the color change section at the back.
With the top opening of the bag towards you, use the same size hook and yarn to start in a st on the ridge created by the post stitch round. See photo.
This step has a variety of sts. Take your time.
Reminder: sc 2 = one sc in each of the next 2 sts; 2sc = work 2 sc in the same st for an increase.
1. Ch 1, sc 2, hdc 2, 2hdc in the next st, dc 6, 2dc in the next st, dc 7, 2dc in the next st, dc 6, 2dc in the next st, dc 6, 2dc in the next st, dc 6, 2dc in the next st, dc 7, 2dc in the next st, dc 6, 2hdc in the next st, hdc 2, sc 2, sl st in the first st to join. (68sts)
2. Ch 1, sc 2, hdc, 2hdc in the next st, hdc 2, *2dc in the next st, dc 6*, repeat 7 more times (or until 6 sts remain), hdc 2, 2hdc in the next st, hdc, sc 2, sl st in the first st to join. (78sts)
3. Sl st in each st to end of round, making sure to not pull these sts too snug. Finish off and weave in ends.
Top of Bag
Place the bag on a flat surface with the nose indent (on the brim) center front. Mark the sts on the top of the bag at each edge (right and left).
Flip the bag over to work from the back.
1. Use an I hook and matching yarn (Sample: Royal Blue). Starting in the st marked at the right edge (with the top of the bag up and the back of the bag facing you). This is the right side (RS) of the bag. Ch 1, sc2tog, sc 26, sc2tog. (28sts)
2. Ch 1, turn. (WS) Sc2tog, sc in each st until 2 sts remain, sc2tog. (26sts)
3. Repeat the previous step until there are only 10sts.
4. Ch 1, turn. (RS) Sc 3, ch 8, sk 4, sc 3. (6sts plus 8 chains)
5. Do not turn. This step is worked around the top opening of the bag. Sc 8 sts evenly down the side of the bag, sc2tog at the corner (where side and front meet), sc 28, sc2tog at corner (front and side meet), sc 8 sts evenly up the side of the bag, sc 3, sc 8 around the chain, sc 3, sl st in the first st to join. (60sts)
6. Ch 1, sc in each st to end of round, sl st in first st to join.
7. Sl st in each st to end of round. Make sure these sts are not worked too snug. Finish off and weave in ends.
Shooting Star
Large Star
1. With an H hook and worsted weight yarn (Sample: Bright Yellow), start with a magic circle of 10 sc sts (or preferred method for starting a circle of 10 sc sts), pull closed and sl st to join. (10sts)
2. Ch 1, *sc, 2sc in the next st*, repeat to end of round, sl st to join. (15sts)
3. *ch 4, sc in the 2nd ch from hook, sc, hdc, sk 1 st on the circle, sl st 2*, repeat to end of round, sl st in the first st to join.
5. *sc 3 up the side, (sc, ch 2, sc) in the next st, sc 3 sts down the side, sk the st in the valley*, repeat to end of round, sl st in the first st to join. Finish off, leaving a long tail for sewing to the hat. Set aside.
Middle Star
1. With an H hook and worsted weight yarn (Sample: Cherry), start with a magic circle of 5 sc sts (or preferred method for starting a circle of 5 sc sts), pull closed and sl st to join. (5sts)
2. Ch 1, 2sc in each st to end of round, sl st to join. (10sts)
3. *ch 4, sl st in 2nd ch from hook, sc, hdc, sk 1 st on the circle, sl st*, repeat to end of round. Finish off, leaving a long tail for sewing in place.
Dots: With a yarn needle and worsted weight yarn (Sample: White), create dots randomly on the star by taking a couple small sts for each. Set aside.
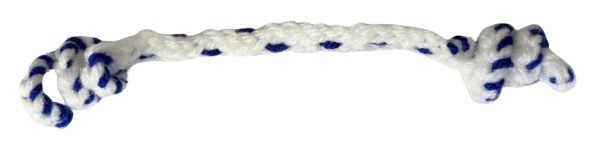
Curly Q’s
With an H hook and worsted weight yarn (Sample: White), ch 40, 3sc in the 2nd ch from hook and in each of the next 8 chains, sl st 21, 3sc in each of the remaining chains. Finish off and weave in ends.
With a yarn needle and a long piece of contrasting worsted weight yarn (Sample: Royal Blue) start at one end and wrap around the sts by inserting the hook from back to front in each st. Since the middle, straight section is hidden under the star, I did not wrap the sts, but instead ran my needle straight across. See photo below.
With a yarn needle, use the yarn tail from the middle star to sew it to the large star.
Place the large star on the hat to find where you would like it attached. Place the middle of the curly Q strand underneath the large star.
With a yarn needle, use the yarn tail from the large star to sew it and the curly q to the bag.
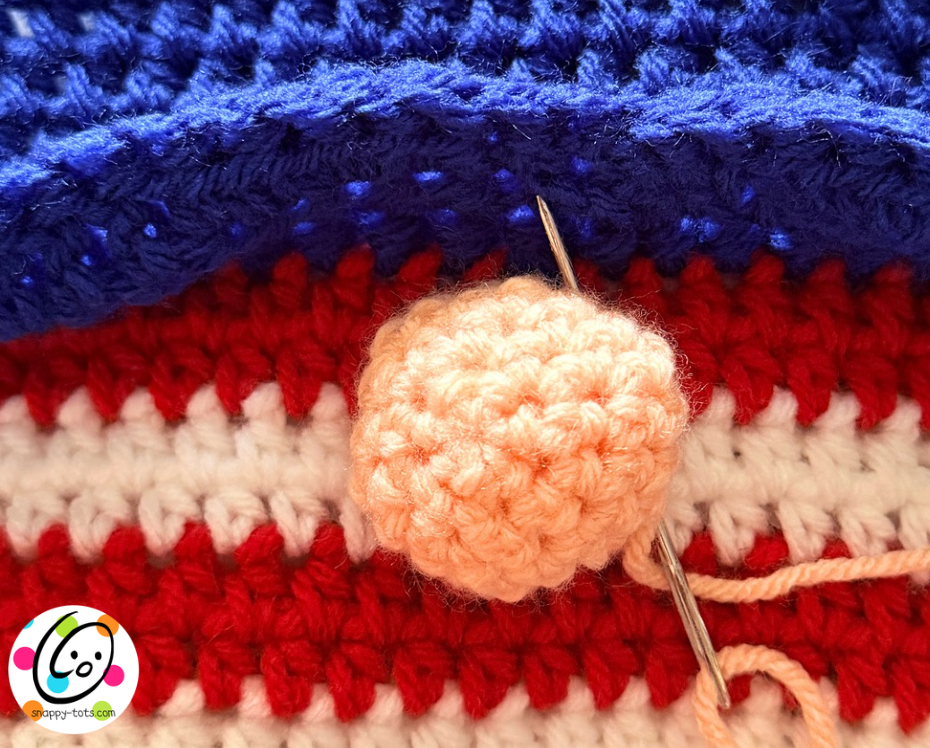
Nose (make 1)
1. With an H hook and worsted weight yarn (Sample: Light Peach), start with a magic circle of 6 sc sts (or preferred method of starting a circle of 6 sc sts), pull closed, and place a marker for working in the round. (6sts)
2. 2sc in each st to end of round. (12sts)
3. *sc, 2sc in the next st*, repeat to end of round. (18sts)
4. Sc in each st to end of round.
5. *sc2tog, sc*, repeat to end of round. (12sts) Finish off, leaving a yarn tail for sewing in place.
Lightly stuff the nose. Tip: On small items like this, I like to use some of the matching yarn to stuff it.
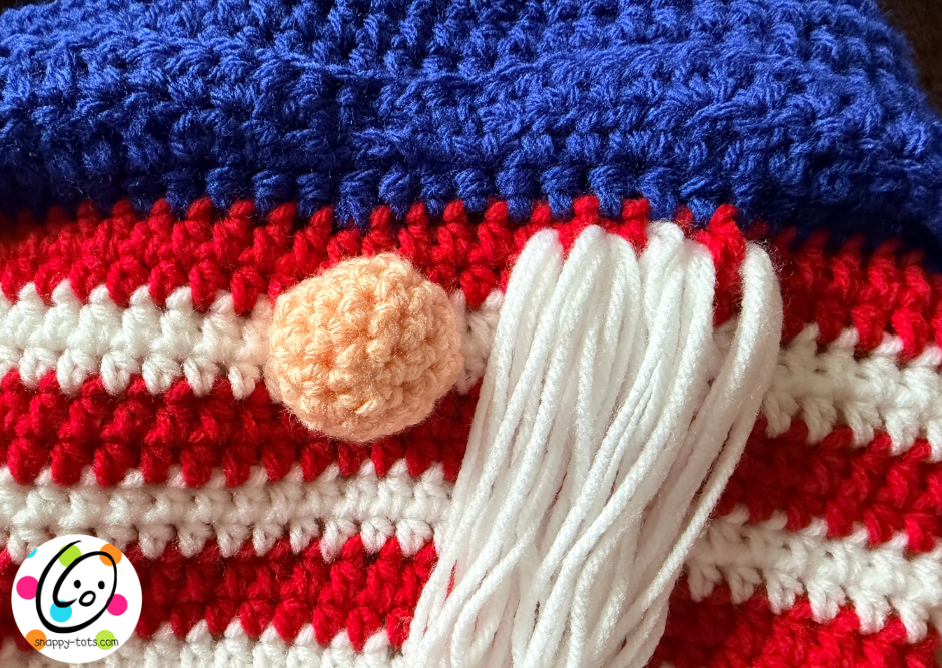
Place the nose under the indented section of the hat brim. With a yarn needle, use the yarn tail from the nose to sew the opening to the bag. See photo for placement.
Braids
- Cut 36 strands of worsted weight yarn (Sample: White) 14” long. Set 18 strands aside for the second braid. Working with 6 strands of yarn at a time, fold in half and pull the center loops through sts on one side of the nose. Repeat 2 more times. See photo
- Pull the strands of yarn apart to frizz the yarn and make it fuller.
- Cut a 6” piece of yarn and pull apart in half. These will be used to tie around the bottom of the braids.
- Divide the strands in thirds and loosely braid. Tie the 6” piece of yarn around the bottom of the braid.
- Trim ends if needed.
- Repeat for the second braid.
Hair Bows: (make 2)
With an H hook and worsted weight yarn (Sample: Americana), ch 35. Finish off and trim the ends. Wrap each piece around a braid and tie in a bow.
Pin To Save For Later