DIY: Stacking Pan Jack
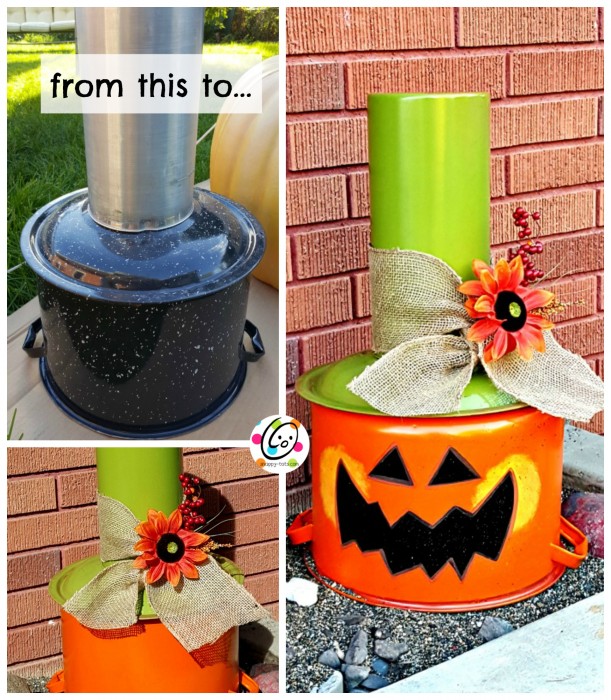
Fall is by far my favorite time of year. I love everything about it, especially Halloween. I wanted a new decoration by my front door so I checked out my mom’s thrift store for some ideas. I love big canning pots, but rarely see them. She had a few, plus an interesting tall, skinny metal thing. At first I thought I would make a totem pole-ish stack of Halloween characters. That skinny metal thing yelled STEM at me …and a pumpkin was born.
How To Make a Pumpkin
Materials
Large pot with lid
Smaller pot for stem
Note: your pots will vary from mine and that is great. Pumpkins are all different shapes and sizes. These would be cute made from coffee cans with a soup can stem.
E6000 glue: found at any home depot or similar store.
Burlap – 1.5 yards
Floral pick
Paint for face: Decoart in the following colors – pumpkin, cadmium yellow, russet, lamp black.
Spray Paint: one can orange and one can green
Note: not all spray paints are created equal! Cheaper paints are just that, CHEAP and do not cover well. I really like Rustoleum and they even have this awesome split pea green color (not really called that…I couldn’t find a color name on it).
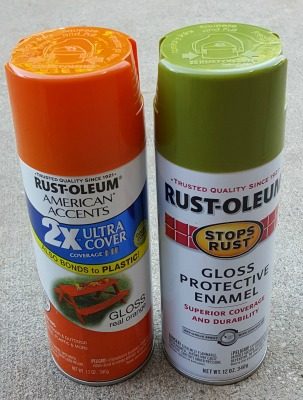
I also grabbed a darker orange for another project and …it was THEE WORST spray paint I have used. The others covered really well with 2 coats and would cover lighter things well with one coat. This one, however, would have been covered better with the mist from my other can. Do NOT buy this one: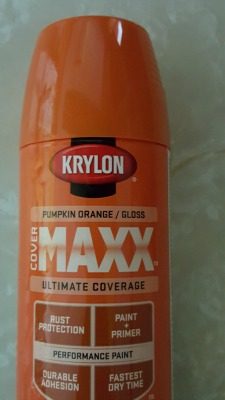
First I washed the pots and let them dry. I laid my giant piece of cardboard out on the lawn…so keep my husband from griping about spray painted grass.
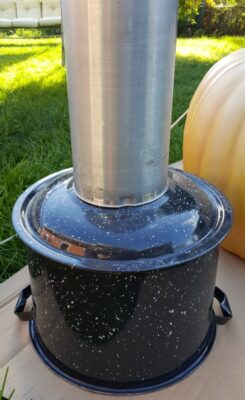
I spray painted the pot orange. The pot lid and the tall skinny metal thing are green. Allow them to dry well. Place the lid on a flat surface. Apply a bead of E6000 around the opening edge of the stem piece. Sit on top of the lid and press firmly. E6000 takes awhile to dry so I leave mine over night.
The pumpkin pot is cute with or without a face. I plan on spinning mine around after Halloween, turning him into a fall decoration.
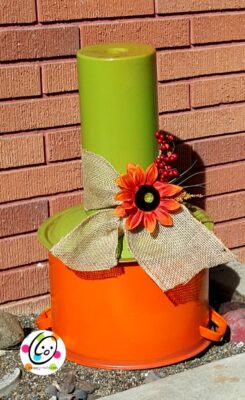
Once the glue is dry, wrap burlap around the base and tie into a bow. Insert flow pick into knot.
How to Paint The Face
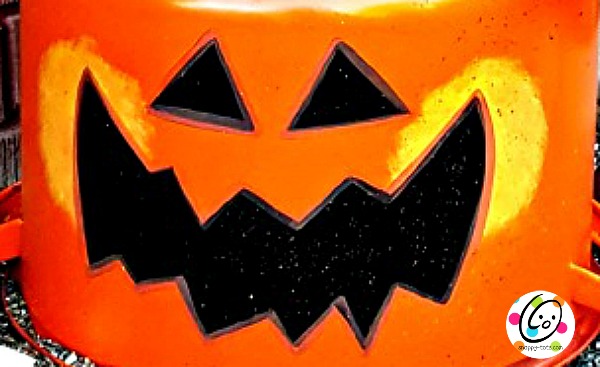
I turned the pan upside down so the open end will be on the ground when finished. This way the pan lid will over the top of the pumpkin when finished.
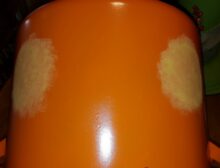
- With yellow paint and stencil brush (or old paint brush), load the paint and then brush off most of it on a paper towel. Stipple (dab) paint in two large circles for the cheeks. You should be able to see some orange through the yellow.
- I free handed the eyes and mouth, but there are tons of pumpkin faces online. Print one off, cut out and trace in place.
With black paint and a 1″ brush (or similar) paint the eyes and mouth in place.
- Allow to dry.
- I like to add some shading with a wash of brown. Load a 1/4″ brush with water and small amount of medium-dark brown paint. Outline the mouth and eyes, allowing the paint to overlap onto the black. I also use a larger brush and similar paint to shade around the bottom edge.
- Fly specks: dip an old tooth brush into paint from the palette plus a little water. Dap on a paper towel. Test this on a piece of paper first. Drag your finger across the tooth brush to create specks of paint.
-
All to dry and spray with a gloss varnish.
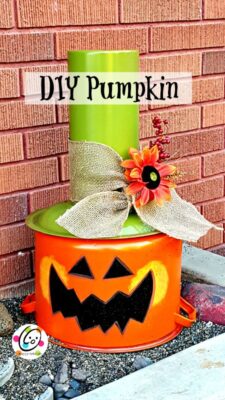 Place lid on top of pumpkin and he is done.