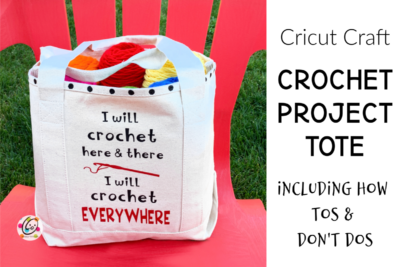
Cricut Craft: Project Tote for Crocheters
Last time I was in a giant craft store picking up some yarn I decided to check out the Cricut section. HOLY COW! I couldn’t believe all of the wonderful things available. There were bins of plain hats, bags and shirts to use with iron-ons. I found this perfect-size tote bag just screaming to go home with me. I knew I wanted to add a cute crochet saying so I asked in my facebook group for suggestions. They know how much I love Dr. Seuss so a few shared Seuss-inspired crochet sayings.
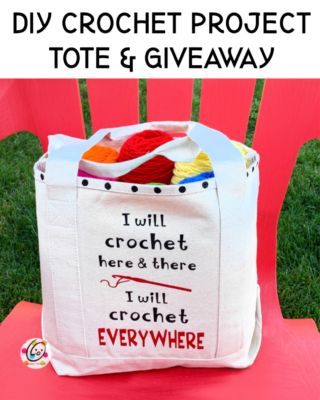
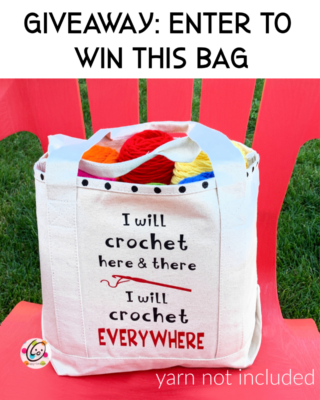
I really love how this bag turned out and hope you do too! I’ve decided to give it to one of my followers. Scroll down to enter or CLICK HERE to jump down quicker.
How To Make One Too
Materials We Used
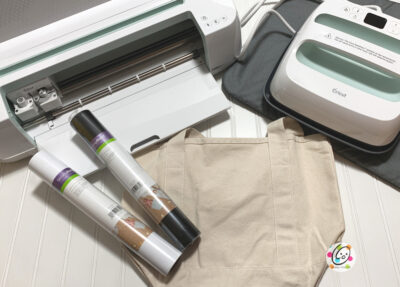
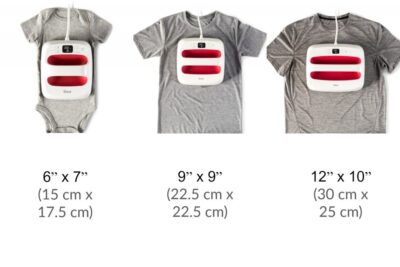
- Cricut Easypress 2 machine (size small/6″ x 7″) or iron
- Cricut Maker
- Cricut Everyday Iron-On Vinyl: Black, Red
- Computer or other device to access Cricut Design Space
- Weeder tool, Standard Grip Cutting Mat
- Cricut Brite Pad
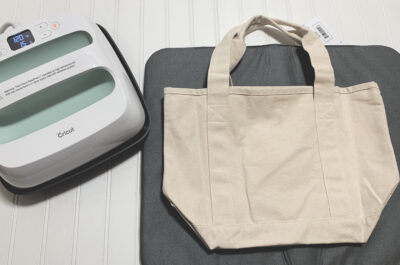
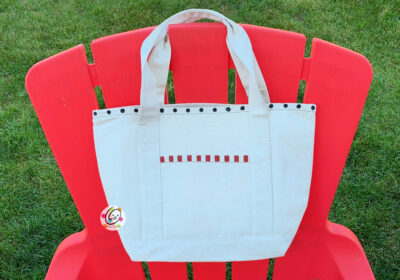
- Canvas Tote Bag. Dimensions: 15 x 15.25 x 16.25 inches
- Fabric Paint (optional): black and red
Extra Supplies Worth Having
The Cricut Tools Basic Set includes a lot of things that come in handy: a weeder, scraper, scissors, tweezers and spatula.
Making the Iron-on Vinyl
Step 1: Making The Graphic
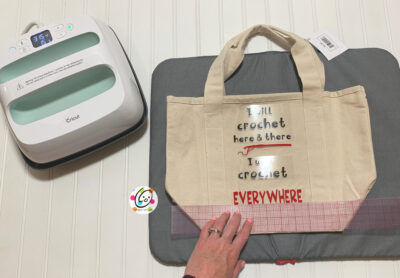
I had this saying in mind so I made my own graphic. It does include a font that I purchased so there is a small fee to use the graphic.
CLICK HERE to make this in Cricut Design Space.
For tips on using design space, check out Design Space For Beginners.
Step 2: Cutting the Vinyl
- Place your iron on vinyl shiny plastic-side DOWN on your standard grip cutting mat.
- Follow the guided steps.
- Make sure to click “Mirror Image (for iron-on)” so it flips your image.
- Don’t peel the Cricut vinyl sheet off the mat yet. We are going to remove the extra vinyl that’s not part of your design first.
- Use the Cricut weeding tool to remove any unwanted vinyl. Make sure you get every little piece out of the letter centers too. When done, peel the piece off the mat.
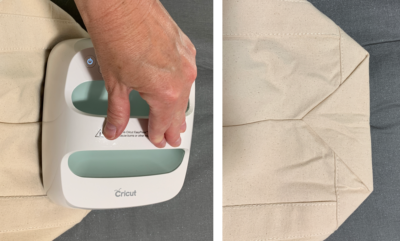
- Cut around the outer edge of the vinyl to remove the extra film. You don’t have to be super close to the letters. If you use the same bag I did (that has the handles down the sides) it is important to remove the extra film from the sides so the vinyl can lay flat on the bag.
My bag was pretty wrinkled when I bought it. I heated my small Easy Press machine to 340 degrees (suggested temp for cotton canvas) and used it to first press out any wrinkles on the bag. I also used it to make the corners nice and crisp too.
Temp Settings: Need to know the temperature to use for your fabric? Cricut has an online heat guide you can use. I also really like the downloadable charts from “Hey, Let’s Make Stuff”.
Place the bag on an EasyPress Mat. Check placement and make sure it is straight.
Step 3: Applying The Vinyl
When the EasyPress has reached the necessary heat, place it on top of the vinyl. Push the button to begin the timer for 30 seconds.
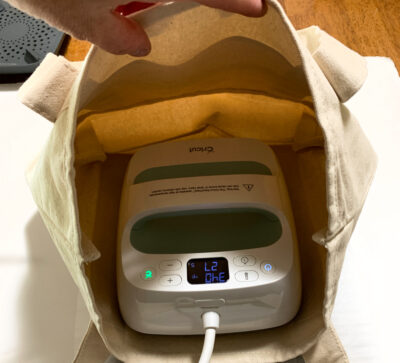
Flip the bag over. Cricut suggests also ironing from the back of the piece, but since this is a bag I put my EasyPress inside so I was only working with one layer of the bag. See more info about this below under “what we learned”.
Allow the vinyl to cool a bit and peel off the film.
Step 4: Painted Accents (optional)
I wanted to add some more color to the bag so I added black dots around the top edge with the tip of my paint brush and black fabric paint. I added red squares across the top of the pocket with a 1/4″ flat paint brush and red fabric paint. Allow the paint to dry thoroughly.
What We Learned
How Tos: Links I found super helpful with this project
~ Make your own designs in Cricut Design Space
Don’t Dos
I am getting really good about finding ways to NOT do Cricut stuff. I hope you will learn from my “don’t dos” and be able to avoid my mistakes.
~ Transfer Tape is NOT needed when you use iron-on vinyl. I know several of you pros just spit your coffee out laughing at that no-brainer there, but for some reason I keep thinking I need to use it on my vinyl. Yes, “Transfer Tape”, that clear, sticky, tape-like stuff you use with vinyl to apply it to items.
~ Make sure to use the right size EasyPress 2 machine for the project. Cricut sent me two sizes and I wondered why I would ever use the smaller one. The bigger one covered the project, so just always go big right? WRONG. Because of the straps running down the sides of my vinyl they weren’t allowing the EasyPress surface to sit down on the bag so I wasn’t getting a strong bond.
Of course I didn’t realize this until after I had thrown away the film from the vinyl. Now what? I found some super helpful people in a fb group that suggested using parchment paper if you need to repress the iron on. THEY ROCK!
Win This Bag
Pin To Save For Later
This is a sponsored conversation written by me on behalf of Cricut. The opinions and text are all mine.
Congratulations to Our Winner