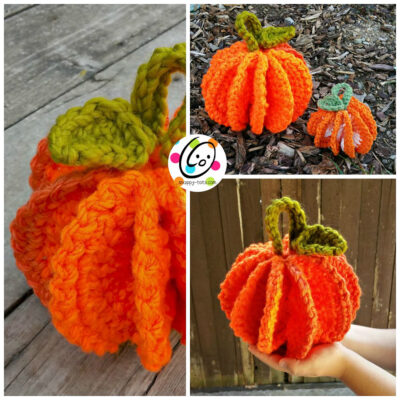
Free Pattern: Scrubbie and Jumbo Pumpkins
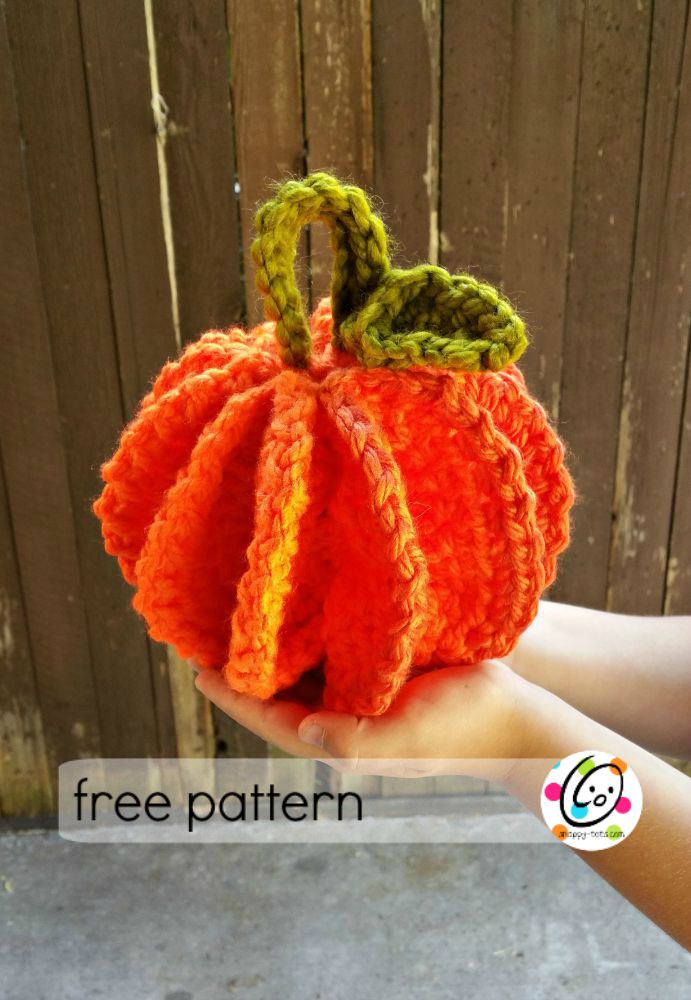
WOOHOO! It’s finally fall. I love this time of year and had to celebrate the day by making pumpkins. I made a larger version of my “PeachTawashi” as a pumpkin scrubbie. It turned out so cute. I decided to try it with super bulky yarn and it is an awesome decoration.

Jumbo Pumpkin and Tawashi Pattern
Scroll down to view the free pattern or purchase an ad-free, downloadable PDF version from my Ravelry Shop.
FREE FOR 72 hours: CLICK HERE to download the pdf of this pattern for free until 10/3/22 with coupon code: almostoct Make sure you enter the coupon code and it changes to free BEFORE checking out.
Materials
Yarn for scrubbie cotton yarn in orange, green, orange/white variegated or other color for “inside” ribs Yarn for jumbo pumpkin decoration: super bulky yarn in green and orange.
Hook: I for scrubbie, N for jumbo
Miscellaneous: yarn needle
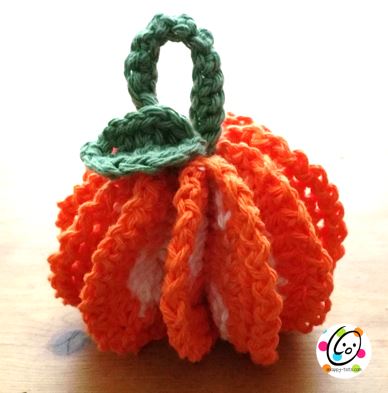
Directions The scrubbie and jumbo pumpkin are made exactly the same, just with different supplies. Scrubbie: use cotton yarn and an I hook; Jumbo pumpkin: use super bulky yarn and N hook
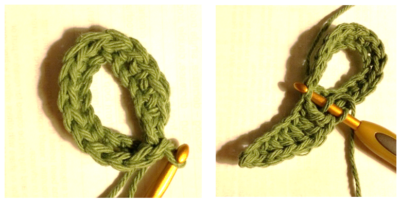
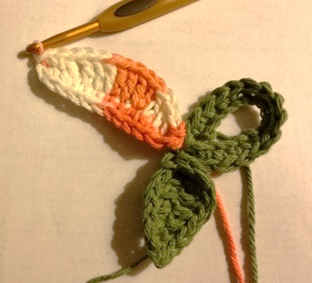
1. With I hook and green cotton yarn (or desired color for top “loop/stem”), ch 15, sc in 2nd ch from hook and in each ch across, sl st in first ch to form a loop (see photo below left). Do not finish off. (14sts)
2. This step creates the leaf. With I hook and green yarn, ch 8, sl st in 2nd ch from hook, sc, hdc 2, dc
3. Pivot piece to work into remaining loops from beginning chain (see photo below right), dc 3, hdc 2, sc, sl st. Finish off and weave in ends.
3. This step creates the center post of the pumpkin. With hook and variegated yarn (or desired color for inside ribs), attach yarn next to where leaf and loop/stem meet (see photo at right). Ch 13, sc in 2nd chain from hook and in next 10 chs, sl st in last chain before loop.
4. Ch 1, (work in back loops of previous chain) sc, hdc, dc, dc, dc2 in one st, dc, dc2 in one st, dc, dc, hdc, sc, sl st in last st. First rib complete.
5. Ch 1. Do not turn. Pivot piece to work along center post. Work in FLO. Sc 12, sl st in base of beginning top/stem loop. Note: Place a marker in one of the back loops (remaining loops) from previous step. This is where the final rib will be worked to complete the circle.
Ch 1, turn, (work in back loops) sc, hdc, dc, dc, dc2 in one st, dc, dc2 in one st, dc, dc, hdc, sc, sl st. Second rib complete.
6. *Ch 1, turn to work in remaining loops of previous rib. Sc 12, sl st in base of beginning top/stem loop. Ch 1, turn, (work in back loops) sc, hdc, dc, dc, dc2 in one st, dc, dc2 in one st, dc, dc, hdc, sc, sl st*, repeat until there are 11 ribs.
7. Last “rib” is crocheted into the back loops of the beginning rib and previous rib which will seam the piece together (see photos below). Insert hook through both layers. Sc, hdc, dc, dc, dc2 in one st, dc, dc2 in one st, dc, dc, hdc, sc, sl st.
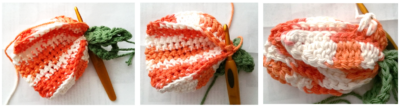
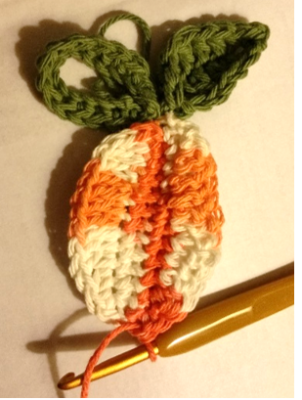
Edging: Change to orange yarn. Turn to work along top of rib. *ch 1, sc 2, hdc 3, 2hdc in next st, 2hdc in next st, hdc 3, sc 2*, repeat for each rib. After working across each rib, do not finish off. *ch 1, sl st in next st*, repeat across each rib.
Finish off, leaving a long yarn tail. With yarn needle, weave in and out of stitches around bottom circle and pull snug. Push needle up through center and out by loop/stem. Thread through one top stitch and pull slightly to form tawashi into a ball shape. Secure yarn, tie a knot and weave in ends.
Crochet Video
Make a pumpkin with me! Follow this link or paste it in your browser to see me make these from start to finish: CLICK HERE
Pin To Save For Later