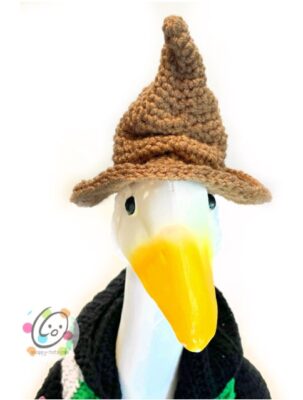
Free Pattern: Wizard Goose
My two oldest “kids” grew up with this favorite wizard book series and are still big fans in their thirties. For my daughter’s last birthday I gave her a goose and designed this outfit. I also made some little books for him to carry. Instructions for this outfit and how I made the books are further down in this post. You can also purchase a downloadable, ad free pdf for a small fee.

More Goose Clothes
Watch for more fancy outfits to come each month. You can find the latest “Ducke and Goose” patterns at THIS LINK and find more goose outfits and accessories at THIS LINK.
Where To Get The Goose
This is designed for a 23” goose statue like the one sold by Miles Kimball: https://amzn.to/3AdRWSP
Wizard Goose Crochet Pattern
The pattern is available to view here on the blog. An ad-free, downloadable pdf is available to purchase for a small fee from Ravelry
INCLUDED IN THIS PATTERN: Crochet instructions are included for making the hat, jacket, and scarf. As well as instructions for making the books (not crocheted).
- Yarn: 300 yards worsted weight yarn. Substitute with colors of choice.
- Yarns used in the sample: Red Heart Super Saver Black (150 yds), Cafe Late, Light Grey (50 yards), Paddy Green (50 yards), White
- Crochet Hook: H (5mm), I (5.5mm)
- Supplies: Yarn needle for weaving in ends, 1” button, sewing needle, matching thread
- Optional: Measuring tape, scissor, applique
- Books (per book): 2 pieces 5 x 7” chipboard, balsa wood, or similar for the inside of the books; Decopauge or craft glue, paint brush, varnish; strong glue; light sand paper
Measurements
- Finished Measurements: (measured flat) Sweater: 8” from neck to bottom, 13.5-14” wide across bottom edge; Hood – 9.5” from neck to top of hood
- Gauge – 4” with an I hook = 13 hdc sts and 10 hdc rounds
Tips
- The first stitch of each row is worked into the same stitch as the turning chain unless noted.
- Numbers at the beginning of each line may refer to steps and not indicate number of rows.
- Stitch count remains the same unless noted at end of row/round.
- If you have any questions about this pattern please contact [email protected].
This is designed for a 23” goose statue like the one sold by Miles Kimball.
Jacket
This starts at the neck edge and is worked back and forth in rows. The hood is added last.
1. With an I hook and worsted weight yarn (Black in sample), ch 41, sc in the 2nd ch from hook and in each ch across. (40sts)
2. Ch 1, turn, 2hdc in the same st, hdc 9, *2hdc in the next st, hdc 9*, repeat to end of row. (44sts)
From this point on, work the sts between the posts of the previous row instead of in the st. This helps create a smoother fabric. To do this, insert the hook just below where you would for a regular st. Check your st count to make sure you are getting all of the sts, especially the very last one.
3. Ch 1, turn, 2hdc between the first two posts from the previous row, hdc 10, *2hdc between the next 2 posts, hdc 10*, repeat to end of row. (48sts)
4. Ch 1, turn, 2hdc between the first two posts from the previous row, hdc 11, *2hdc between the next 2 posts, hdc 11*, repeat to end of row. (52sts)
5. Ch 1, turn, 2hdc between the first two posts from the previous row, hdc 12, *2hdc between the next 2 posts, hdc 12*, repeat to end of row. (56sts)
6. Ch 1, turn, 2hdc between the first two posts from the previous row, hdc 13, *2hdc between the next 2 posts, hdc 13*, repeat to end of row. (60sts)
7. Ch 1, turn, 2hdc between the first two posts from the previous row, hdc 14, *2hdc between the next 2 posts, hdc 14*, repeat to end of row. (64sts)
8. Ch 1, turn, 2hdc between the first two posts from the previous row, hdc 15, *2hdc between the next 2 posts, hdc 15*, repeat to end of row. (68sts)
9. Ch 1, turn, 2hdc between the first two posts from the previous row, hdc 16, *2hdc between the next 2 posts, hdc 16*, repeat to end of row. (72sts)
10. Ch 1, turn, 2hdc between the first two posts from the previous row, hdc 17, *2hdc between the next 2 posts, hdc 17*, repeat to end of row. (76sts)
11. Ch 1, turn, hdc between the first 2 posts and between the posts to the end of the row.
12. Repeat the previous row for an additional 7 rows.
13. Ch 1, turn, 2hdc between the first two posts from the previous row, hdc 18, *2hdc between the next 2 posts, hdc 18*, repeat to end of row. (80sts)
14-15. Ch 1, turn, hdc between the first 2 posts and between the posts to the end of the row.
16. Ch 1, turn, 2hdc between the first two posts from the previous row, hdc 19, *2hdc between the next 2 posts, hdc 19*, repeat to end of row. (84sts)
17-18. Ch 2, turn, dc between the first 2 posts and between the posts to the end of the row.
19. Ch 1, turn, 2dc between the first two posts from the previous row, dc 20, *2dc between the next 2 posts, dc 20*, repeat to end of row. (88sts)
20-21. Ch 1, turn, dc between the first 2 posts and between the posts to the end of the row.
22. Ch 1, turn, 2dc between the first two posts from the previous row, dc 21, *2dc between the next 2 posts, dc 21*, repeat to end of row. (92sts)
23. Ch 1, turn, dc between the first 2 posts and between the posts to the end of the row.
24. Repeat the previous row for an additional 3 rows.
25. Ch 1, turn, hdc IN each st to end of row. Finish off and weave in ends.
Hood
1. With the right side/outside of the hoodie towards you, use an I hook to attach matching yarn to the first st on the top row. Ch 1, sc2tog, hdc in each st until 2 sts remain, sc2tog. (38sts)
Note: Since the hood is worked back and forth in rows, work the following sts between the posts as in the main part of the hoodie for a smoother fabric.
2. Ch 1, sc2tog, hdc between the posts until 2 sts remain, sc2tog. (36sts)
3. Ch 1, sc2tog, hdc between the posts until 2 sts remain, sc2tog. (34sts)
4-5. Ch 1, turn, hdc between the posts to end of row.
6. Ch 1, sc2tog, hdc between the posts until 2 sts remain, sc2tog. (32sts)
7-8. Ch 1, turn, hdc between the posts to end of row.
9. Ch 1, sc2tog, hdc between the posts until 2 sts remain, sc2tog. (30sts)
10-11. Ch 1, turn, hdc between the posts to end of row.
12. Ch 1, sc2tog, hdc between the posts until 2 sts remain, sc2tog. (28sts)
13. Ch 1, turn, hdc between the posts to end of row.
14. Repeat the previous step for an additional 14 rows. Finish off, leaving a long yarn tail.
Fold the top edge of the hood in half, right sides together. With a yarn needle, use the yarn tail to sew the layers together. Open the hood back up.
With an I hook and from the right side, attach matching yarn to a corner on the bottom. Ch 1, sc in each st across the bottom edge. 3sc in the corner, sc evenly up the opening, including the hood, and down the other side. Sl st to join. Finish off and weave in ends.
Optional: Add a pompom to the back point of the hood.
Closure: With an H hook and black yarn, ch 15, sl st in the 2nd ch from hook and in each ch across. (14sts) Finish off, leaving a yarn tail for sewing to the jacket.
Fold the strip in half to form a loop. With a yarn needle, use the yarn tail to sew the ends to one edge of the jacket approximately 2” from the neck.
With a sewing needle and matching thread, sew a button straight across from the loop on the opposite edge of the jacket.
Sleeves (make 2)
The sleeve starts at the top/shoulder.
Leave a long tail in the beginning for attaching sleeve to suit when complete.
1. With an I hook and worsted weight yarn to match the jacket (black in sample), start with a magic circle of 8 sc sts (or preferred method for starting a circle of 8 sc sts), pull to close and place a marker for working in the round. (8sts)
2. 2hdc in each st to end of round. (16sts)
3. *2hdc in the next st, hdc 3*, repeat to end of round. (20sts)
4. Hdc in each st to end of round.
5. *2hdc in the next st, hdc 4*, repeat to end of round. (24sts)
6-7. Hdc in each st to end of round.
8. *2hdc in the next st, hdc 11*, repeat once. (26sts)
9. Hdc in each st to end of round.
10. Sc, sl st. This is the new beginning of the round. Ch 1, hdc in the same st and in each st to end of round, sl st to join.
11. Ch 1, FPHDC around each post from the previous round, sl st to join. Slip the loop off the hook. This part will be finished after the white part of the wing is complete.
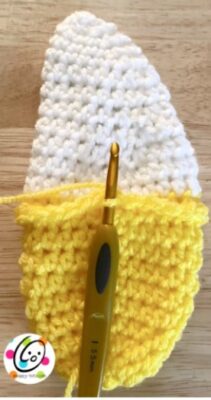
12. The white yarn for the remaining part of the wing will be attached to the inner ridge created from step
13. Pull the top edge back and use an I hook to attach white yarn to a st.
Ch 1, hdc in the same st and in each st to end of round, sl st to join. (26sts)
14. Ch 1, *hdc2tog, hdc 11*, repeat once, sl st to join. (24sts)
15. Ch 1, hdc2tog, hdc in each st until 2 sts remain, hdc2tog, sl st to join. (22sts)
16. Ch 1, hdc2tog, hdc in each st until 2 sts remain, hdc2tog, sl st to join. (20sts)
17. Ch 1, hdc2tog, hdc in each st until 2 sts remain, hdc2tog, sl st to join. (18sts)
18. Ch 1, hdc in each st to end of round, sl st to join.
19. Ch 1, hdc2tog, hdc in each st until 2 sts remain, hdc2tog, sl st to join. (16sts)
20. Ch 1, sc2tog, sc in each st until 2 sts remain, sc2tog, sl st to join. (14sts)
21. Ch 1, sc2tog, sc in each st until 2 sts remain, sc2tog, sl st to join. (12sts)
22. Ch 1, sc2tog, sc in each st until 2 sts remain, sc2tog, sl st to join. (10sts)
23. Ch 1, *sc2tog*, repeat to end of round, sl st to join. (5sts) Finish off, leaving a long tail for sewing the end.
With a yarn needle, use the yarn tail to weave in and out of the remaining sts. Pull closed and secure the end.
Finishing the sleeve:
1. Slip the black loop back on the hook. Ch 1, *hdc 12, 2hdc in the next st*, repeat once, sl st to join. (28sts)
2-3. Ch 1, hdc in each st to end of round, sl st to join.
4. Ch 1, 2hdc in the same st, hdc in each st to end of round, sl st to join. (29sts)
5. Ch 1, 2hdc in the same st, hdc in each st to end of round, sl st to join. (30sts)
6. Loosely sl st in each st to end of round. Finish off and weave in ends.
Notice in the main photo above that one edge of the white wing part tapers towards the end tip and the other stays more straight. Adjust your wing and flatten it to resemble the photo.
Use the beginning yarn tail to sew the top 1” of the shoulder part of each wing to the body suit. This is easiest when the suit is on the goose. See main photos for placement.
Tip: I like to put the jacket on the goose, pin the sleeves in place, and set the goose across the room. Look at it from different angles and adjust if needed.
If the goose will be holding something, the white tips can be sewn together or just one (or both) sewn to the jacket (as shown in the sample).
Scarf
1. With an H hook and worsted weight yarn (green in sample), ch 9, sc in the 2nd ch from hook and in each ch across. (8sts)
2. Ch 2, turn, dc in the same st and in each st to end of row.
3. Repeat the previous row until scarf is desired length.
4. Ch 1, turn, sc in the same st and in each st to end of row. Finish off and weave in ends.
Color sequence for sample: 15 stripes of 4 dc rows each. Finish off the color when changing to the new yarn.
Fringe: Cut several strands of yarn 10” long. Fold two strands in half. Use a crochet hook to pull the center loops through a st at the end of the scarf. Pull the tails through the loops until snug against the scarf. Repeat across both ends.
Trim ends.
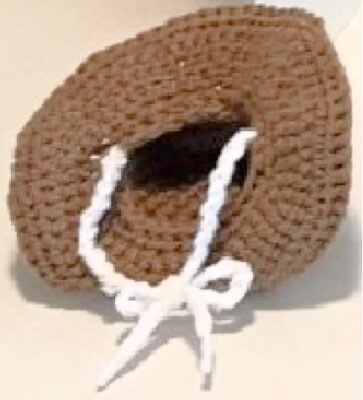
Hat

1. With an I hook and worsted weight yarn (tan in sample), start with a magic circle of 6 sc sts (or preferred method for starting a circle of 6 sc sts), pull to close and place a marker for working in the round. (6sts)
2. Sc in each st to end of round.
3. *2sc in the next st, sc 2*, repeat once. (8sts)
4. Sc in each st to end of round.
5. *2sc in the next st, sc 3*, repeat once. (10sts)
6. Sc in each st to end of round.
7. *2sc in the next st, sc 4*, repeat once. (12sts)
8. Sc in each st to end of round.
9. *2sc in the next st, sc 3*, repeat to end of round. (15sts)
10. *2sc in the next st, sc 4*, repeat to end of round. (18sts)
11. Sc in each st to end of round.
12. *2sc in the next st, sc 5*, repeat to end of round. (21sts)
13. Sc in each st to end of round.
14. *2sc in the nextt st, sc 6*, repeat to end of round. (24sts)
15. Sc in each st to end of round.
16. *2sc in the next st, sc 7*, repeat to end of round. (27sts)
17. Sc in each st to end of round.
18. *2sc in the next st, sc 8*, repeat to end of round. (30sts)
19-20. Sc in each st to end of round.
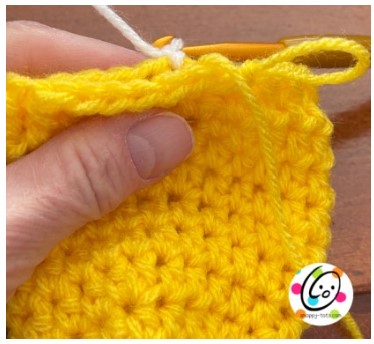
21. Sl st in the next st. This is the new beginning of the round. Ch 1, hdc in the same st and in each st to end of round, sl st to join.
22. Ch 1, *FPHDC around each of the next 4 posts from the previous round, 2FPHDC around the next post*, repeat to end of round, sl st to join. (36sts)
23. Ch 1, *sc 3, 2sc in the next st*, repeat to end of round, sl st to join. (45sts)
24. Ch 1, *sc 4, 2sc in the next st*, repeat to end of round, sl st to join. (54sts)
25. Ch 1, *sc 8, 2sc in the next st*, repeat to end of round, sl st to join. (60sts)
26. Ch 1, *hdc 5, 2hdc in the next st*, repeat to end of round, sl st to join. (70sts)
27. Do not ch at the beginning of this round. Sl st in each st to end of round. Finish off and weave in ends.
“Face”/Folds on front
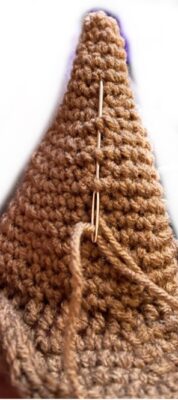
Use a yarn needle and matching yarn to weave in and out of the sts up one side of the hat. See photo at right.
Secure one end of the yarn to the inside of the hat. Pull the other end until hat is folded as much as desired. Secure this yarn tail on the inside of the hat.
Ties: Fold the hat in half to find the placement for the ties. With an H hook and worsted weight white yarn (to match the goose), attach the yarn to an inside loop (so it doesn’t show on the outside of the hat). Ch 40. Finish off and tie a knot in the end of the chain. Repeat for the opposite side.
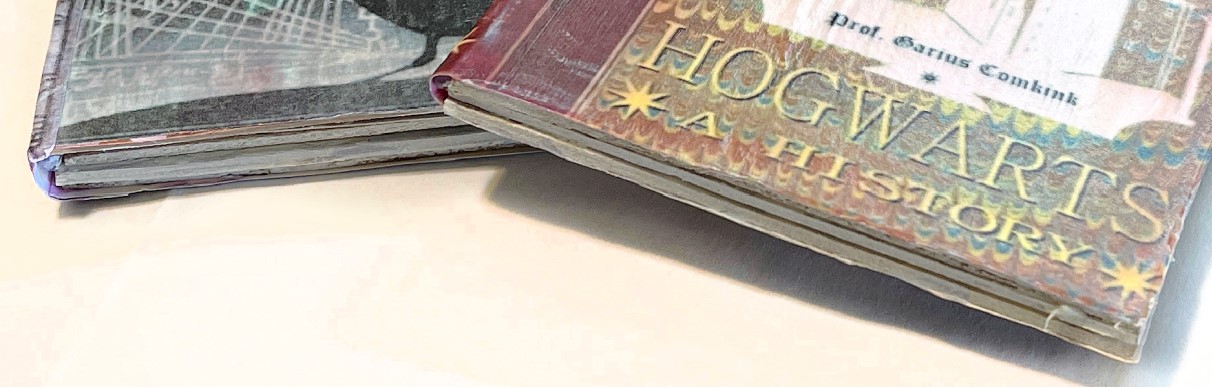
Books

- These could be made from a variety of materials so please substitute as needed.
- I would not expose these to the outside and weather.
- Keep the books fairly thin and lightweight or your goose will get tired of holding them for a long time.
1. Start by finding the book covers you will be using. It is easier to cut the insides to match the size of the covers.
Sample covers were downloaded from this site: https://harrypotterprops.tumblr.com/post/165898397670/some-book-covers-for-decorate-agendas-notebooks
Please make sure you check the site for usage restrictions. I made mine for a gift.
Real book covers could be used. He could also hold any books you might already own.
2. Open the covers and print on regular copy paper. If you have a specific size in mind you will want to open the file in a photo editing program such as canva, photoshop, picmonkey.
3. Cut 2 pieces for the inside “pages” (thin balsa wood, chipboard, or similar) to fit the cover. NOTE: remember there is a spine to the book. See the close up below.
4. Stack the inside “pages” and wrap the cover around to check once again to make sure it is the thickness you desire. Glue the inside “pages” together with a strong glue. Allow to dry.
5. Wrap the cover around the inside “pages”. Choose one of the options below:
Decopauge (used in samples): following instructions on the product, use a paint brush to coat the top of the book. Allow to dry. I did not glue the cover to the spine.
Repeat for the back of the book.
Allow to thoroughly dry. Lightly sand the edges for a worn look.
Glue and Varnish: Use a craft glue attach the cover front and back.
Use a brush on varnish to coat the entire cover.
Allow to thoroughly dry. Lightly sand the edges for a worn look.