Free Pattern: Snappy Sockers
Slippers are my go-to gift item because I love them so much and everyone needs a cozy pair, right? I prefer slippers that are easy to make and don’t require a lot of construction or constant pattern watching.
I’ve been wanting an easy but cute pair that is more similar to socks. I hope you will enjoy making these. You could easily whip up a pair in an evening.
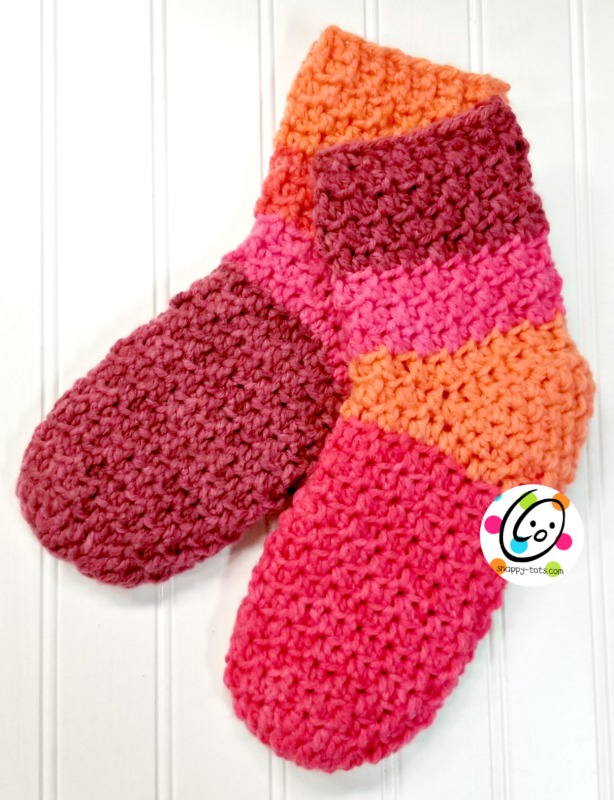
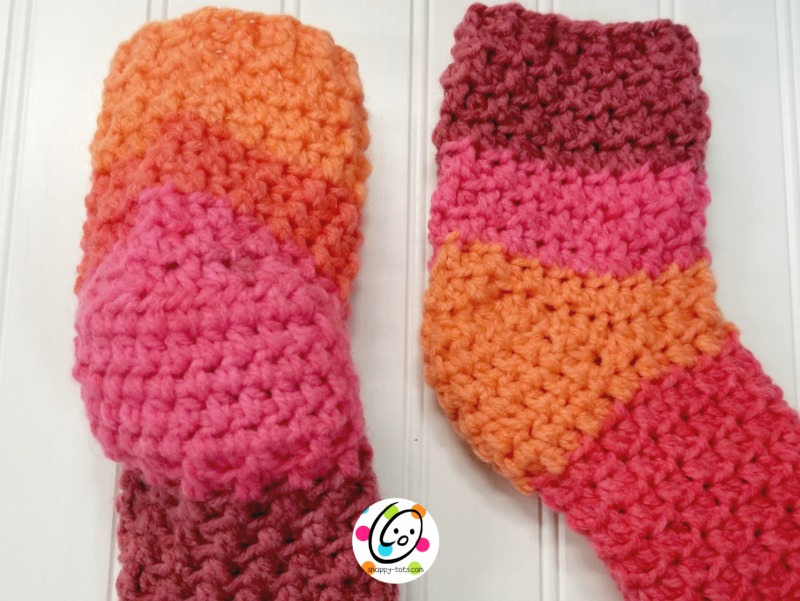
Any color combo looks great with these.
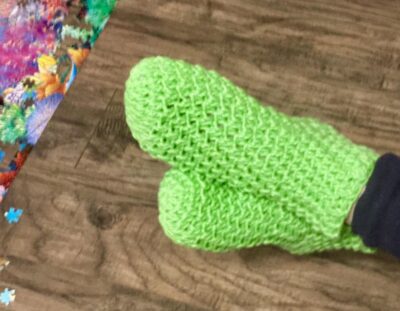
They look great in solid colors too. Thanks to Shaunna Hallon for sharing a photo of her cute sample.
Snappy Sockers Crochet Pattern
The pattern is available to view here on the blog. An ad-free, downloadable pdf is available to purchase from my shop: Ravelry
LIMITED SPECIAL: As part of my “make ahead monday” event, you can download this pattern for free for a limited time. Offer ends 4/17/23. You can either CLICK HERE to download directly or use the following coupon code to download it from Ravelry at THIS LINK. Coupon code: freemamonday
Description
These lightweight slippers are a family favorite. The stitch combination creates a nice stretch, making them easy to slip on.
The slippers are worked from toe to heal and then, the cuff is added. Feel free to substitute colors/yarns as desired. I suggest using similar yarn weights.
Materials
- Yarn: 200 yards worsted weight; The sample was made from Bernat Pop, Scarlet Sizzle
- Miscellaneous: Yarn needle, measuring tape, scissors, stitch markers
- Crochet Hook: H (5mm), I (5.5mm)
Details
- Sizes: Children’s Large (shoe size 2-5), Teen/Women’s, Men’s
- Gauge with an H hook: 2 inches = 7.5 hdc and 8 rounds
- Gauge with an I hook: 2 inches = 6.5 hdc and 4.5 rounds
Tips
- The first stitch of each row is worked into the same stitch as the turning chain unless noted.
- Numbers at the beginning of each line may refer to steps and not indicate the number of rows.
- The sample was made for a women’s size 8. Step 5 was repeated 12 times.
- Keep track of the number of rounds worked so you will be able to make the next slipper the same length.
Disclaimer
This pattern was written for specific yarn weights. When substituting yarns, please choose yarns of similar weight/thickness. Different yarns may produce different outcomes, including size and shape.
Children’s Large (shoe sizes 2-5)
- The sample slippers were made with self-striping yarn, but I did control where the color changes occurred by cutting the yarn and moving to the next color of the skein. Create any color sequence you desire.
- These are worked in continuous rounds. Do not join at the end of each round. Place a marker to keep track of the start of each round.
Make 2
1. With an H hook and worsted weight yarn, start with a magic circle of 7 sc sts (or preferred method of starting a circle of 7 sc sts), pull closed, and place a marker for working in the round. (7sts)
2. 2hdc in each st to end of round. (14sts)
NOTE
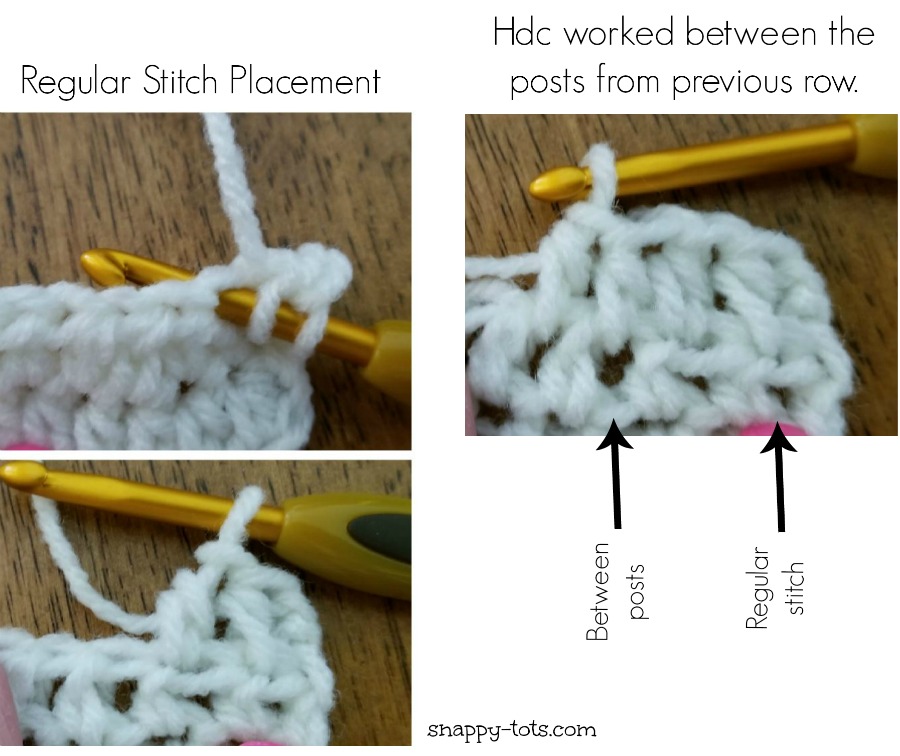
From this point on, work each st BETWEEN the posts of the previous round. This is done by inserting the hook slightly below the st, between the posts. It helps create a thicker, dense fabric. See the photo at end of the pattern for hook placement if needed.
3. *hdc, 2hdc in next st*, repeat to end of round. (21)
4. *hdc 2, 2hdc in next st*, repeat to end of round. (28sts)
5. Return to work into the stitch. *hdc in FLO, hdc in BLO*, repeat to end of round.
Repeat the previous round until the slipper is 3” shorter than the desired length. See size chart at end of the pattern.
6. This step starts the heel. Change yarn color for a contrasting heel if desired.
Sc in next st, sl st in next st. The stitches for steps 6-10 are worked between the posts of the previous round. (WS) Ch 1, turn, sc2tog, hdc12, sc2tog. (14sts)
7. (RS) Ch 1, turn, sc in same st, hdc 12, sc.
8. (WS) Ch 1, turn, sc2tog, hdc 10, sc2tog. (12sts)
9. (RS) Ch 1, turn, sc in same st, hdc 10, sc.
10. (WS) Ch 1, turn, sc2tog, hdc 8, sc2tog. (10sts)
11. This step creates the cuff and is worked around the foot opening (see photo at the end of the pattern).
Ch 1, turn. You should be working on the outside/right side of the slipper. Sc2tog, hdc2, hdc2tog, hdc 2, sc2tog. Hdc 5 sts evenly across the side of the cuff, hdc2tog (where the side meets front), *hdc in FLO, hdc in BLO*, repeat 4 more times, hdc in FLO, hdc2tog (where the front meets side), hdc 5 sts evenly across the side of the cuff. Place marker to continue working in the round. (30sts)
12. Change yarn color here if you chose to do a contrasting heel. *hdc in BLO, hdc in FLO*, repeat to end of round.
13. Keep repeating the previous round 4 more times or until cuff is desired length.
14. *FPSC around next post, BPSC around next post*, repeat to end of round, sl st to join. Finish off and weave in ends.
Teen/Women’s
- The sample slippers were made with self-striping yarn, but I did control where the color changes occurred by cutting the yarn and moving to the next color of the skein. Create any color sequence you desire.
- These are worked in continuous rounds. Do not join at the end of each round. Place a marker to keep track of the start of each round.
Make 2
1. With an I hook and worsted weight yarn, start with a magic circle of 7 sc sts (or preferred method of starting a circle of 7 sc sts), pull closed, and place a marker for working in the round. (7sts)
2. 2hdc in each st to end of round. (14sts)
NOTE
From this point on, work each st BETWEEN the posts of the previous round. This is done by inserting the hook slightly below the st, between the posts. It helps create a thicker, dense fabric. See the photo at end of the pattern for hook placement if needed.
3. *hdc, 2hdc in next st*, repeat to end of round. (21)
4. *hdc 2, 2hdc in next st*, repeat to end of round. (28sts)
5. Return to work into the stitch. *hdc in FLO, hdc in BLO*, repeat to end of round.
Repeat the previous round until the slipper is 3.5” shorter than the desired length. See size chart at end of the pattern.
6. This step starts the heel. Change yarn color for a contrasting heel if desired.
Sc in next st, sl st in next st. The stitches for steps 6-10 are worked between the posts of the previous round. (WS) Ch 1, turn, sc2tog, hdc12, sc2tog. (14sts)
7. (RS) Ch 1, turn, sc in same st, hdc 12, sc.
8. (WS) Ch 1, turn, sc2tog, hdc 10, sc2tog. (12sts)
9. (RS) Ch 1, turn, sc in same st, hdc 10, sc.
10. (WS) Ch 1, turn, sc2tog, hdc 8, sc2tog. (10sts)
11. This step creates the cuff and is worked around the foot opening (see photo at the end of the pattern).
Ch 1, turn. You should be working on the outside/right side of the slipper. Sc2tog, hdc2, hdc2tog, hdc 2, sc2tog. Hdc 5 sts evenly across the side of the cuff, hdc2tog (where the side meets front), *hdc in FLO, hdc in BLO*, repeat 4 more times, hdc in FLO, hdc2tog (where the front meets side), hdc 5 sts evenly across the side of the cuff. Place marker to continue working in the round. (30sts)
12. Change yarn color here if you chose to do a contrasting heel. *hdc in BLO, hdc in FLO*, repeat to end of round.
13. Keep repeating the previous round until cuff is desired length. The sample has 8 rounds in this section.
14. *FPSC around next post, BPSC around next post*, repeat to end of round, sl st to join. Finish off and weave in ends.
Men’s
- The sample slippers were made with self-striping yarn, but I did control where the color changes occurred by cutting the yarn and moving to the next color of the skein. Create any color sequence you desire.
- These are worked in continuous rounds. Do not join at the end of each round. Place a marker to keep track of the start of each round.
Make 2
1. With an I hook and worsted weight yarn, start with a magic circle of 8 sc sts (or preferred method of starting a circle of 8 sc sts), pull closed, and place a marker for working in the round. (8sts)
2. 2hdc in each st to end of round. (16sts)
NOTE
From this point on, work each st BETWEEN the posts of the previous round. This is done by inserting the hook slightly below the st, between the posts. It helps create a thicker, dense fabric. See the photo at end of the pattern for hook placement if needed.
3. *hdc, 2hdc in next st*, repeat to end of round. (24)
4. *hdc 3, 2hdc in next st*, repeat to end of round. (30sts)
5. Return to work into the stitch. *hdc in FLO, hdc in BLO*, repeat to end of round.
Repeat the previous round until the slipper is 4” shorter than the desired length. See size chart at end of the pattern.
6. This step starts the heel. Change yarn color for a contrasting heel if desired.
Sc in next st, sl st in next st. The stitches for steps 6-10 are worked between the posts of the previous round. (WS) Ch 1, turn, sc2tog, hdc14, sc2tog. (16sts)
7. (RS) Ch 1, turn, sc in same st, hdc 14, sc.
8. (WS) Ch 1, turn, sc2tog, hdc 12, sc2tog. (14sts)
9. (RS) Ch 1, turn, sc in same st, hdc 12, sc.
10. (WS) Ch 1, turn, sc2tog, hdc 10, sc2tog. (12sts)
11. This step creates the cuff and is worked around the foot opening (see photo at the end of the pattern).
Ch 1, turn. You should be working on the outside/right side of the slipper. Sc2tog, hdc2, hdc2tog, hdc 2, sc2tog. Hdc 6 sts evenly across the side of the cuff, hdc2tog (where the side meets front), *hdc in FLO, hdc in BLO*, repeat 4 more times, hdc in FLO, hdc2tog (where the front meets side), hdc 6 sts evenly across the side of the cuff. Place marker to continue working in the round. (32sts)
12. Change yarn color here if you chose to do a contrasting heel. *hdc in BLO, hdc in FLO*, repeat to end of round.
13. Keep repeating the previous round 8 more times or until cuff is desired length.
14. *FPSC around next post, BPSC around next post*, repeat to end of round, sl st to join. Finish off and weave in ends.
Project Photos
The sample in the photos is a women’s size 8, but the process is the same for every size.
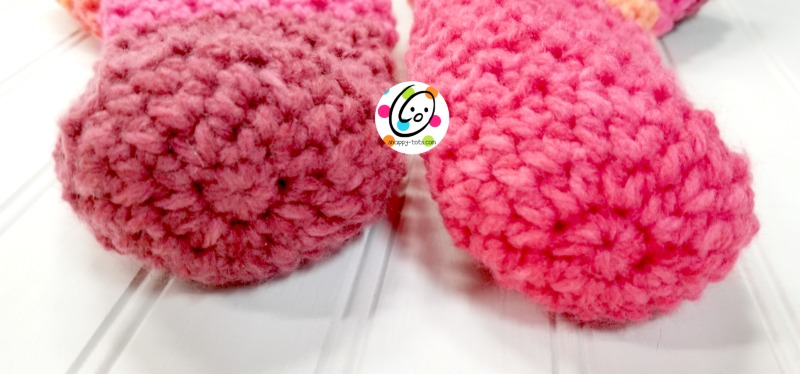
It is REALLY important to make sure the beginning circle (toes) is closed tight so there isn’t a hole. For help with a “magic circle”, check out Moogly’s tutorial.