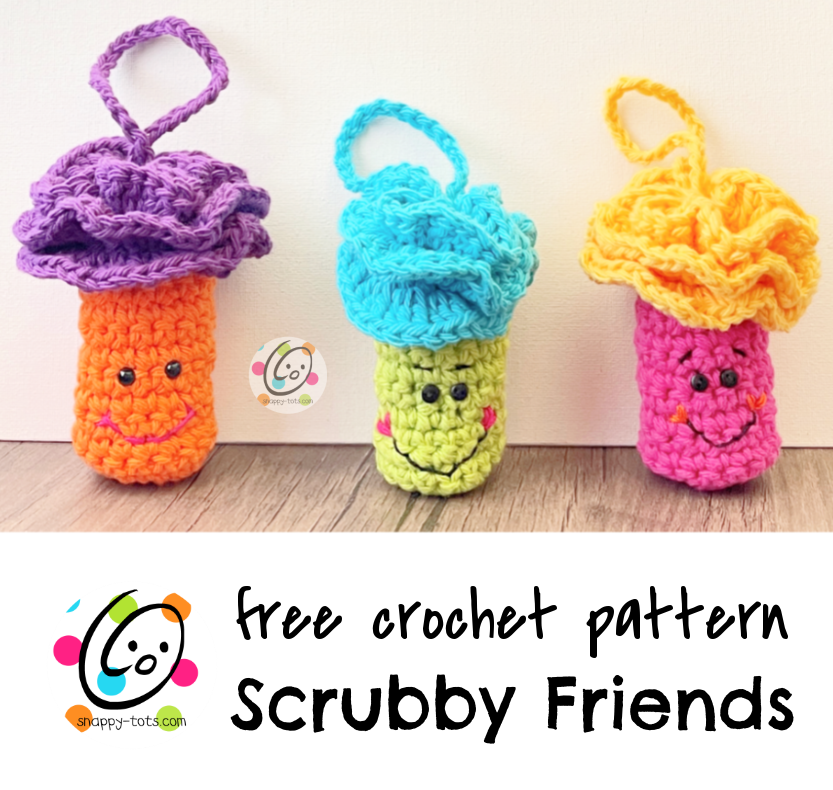
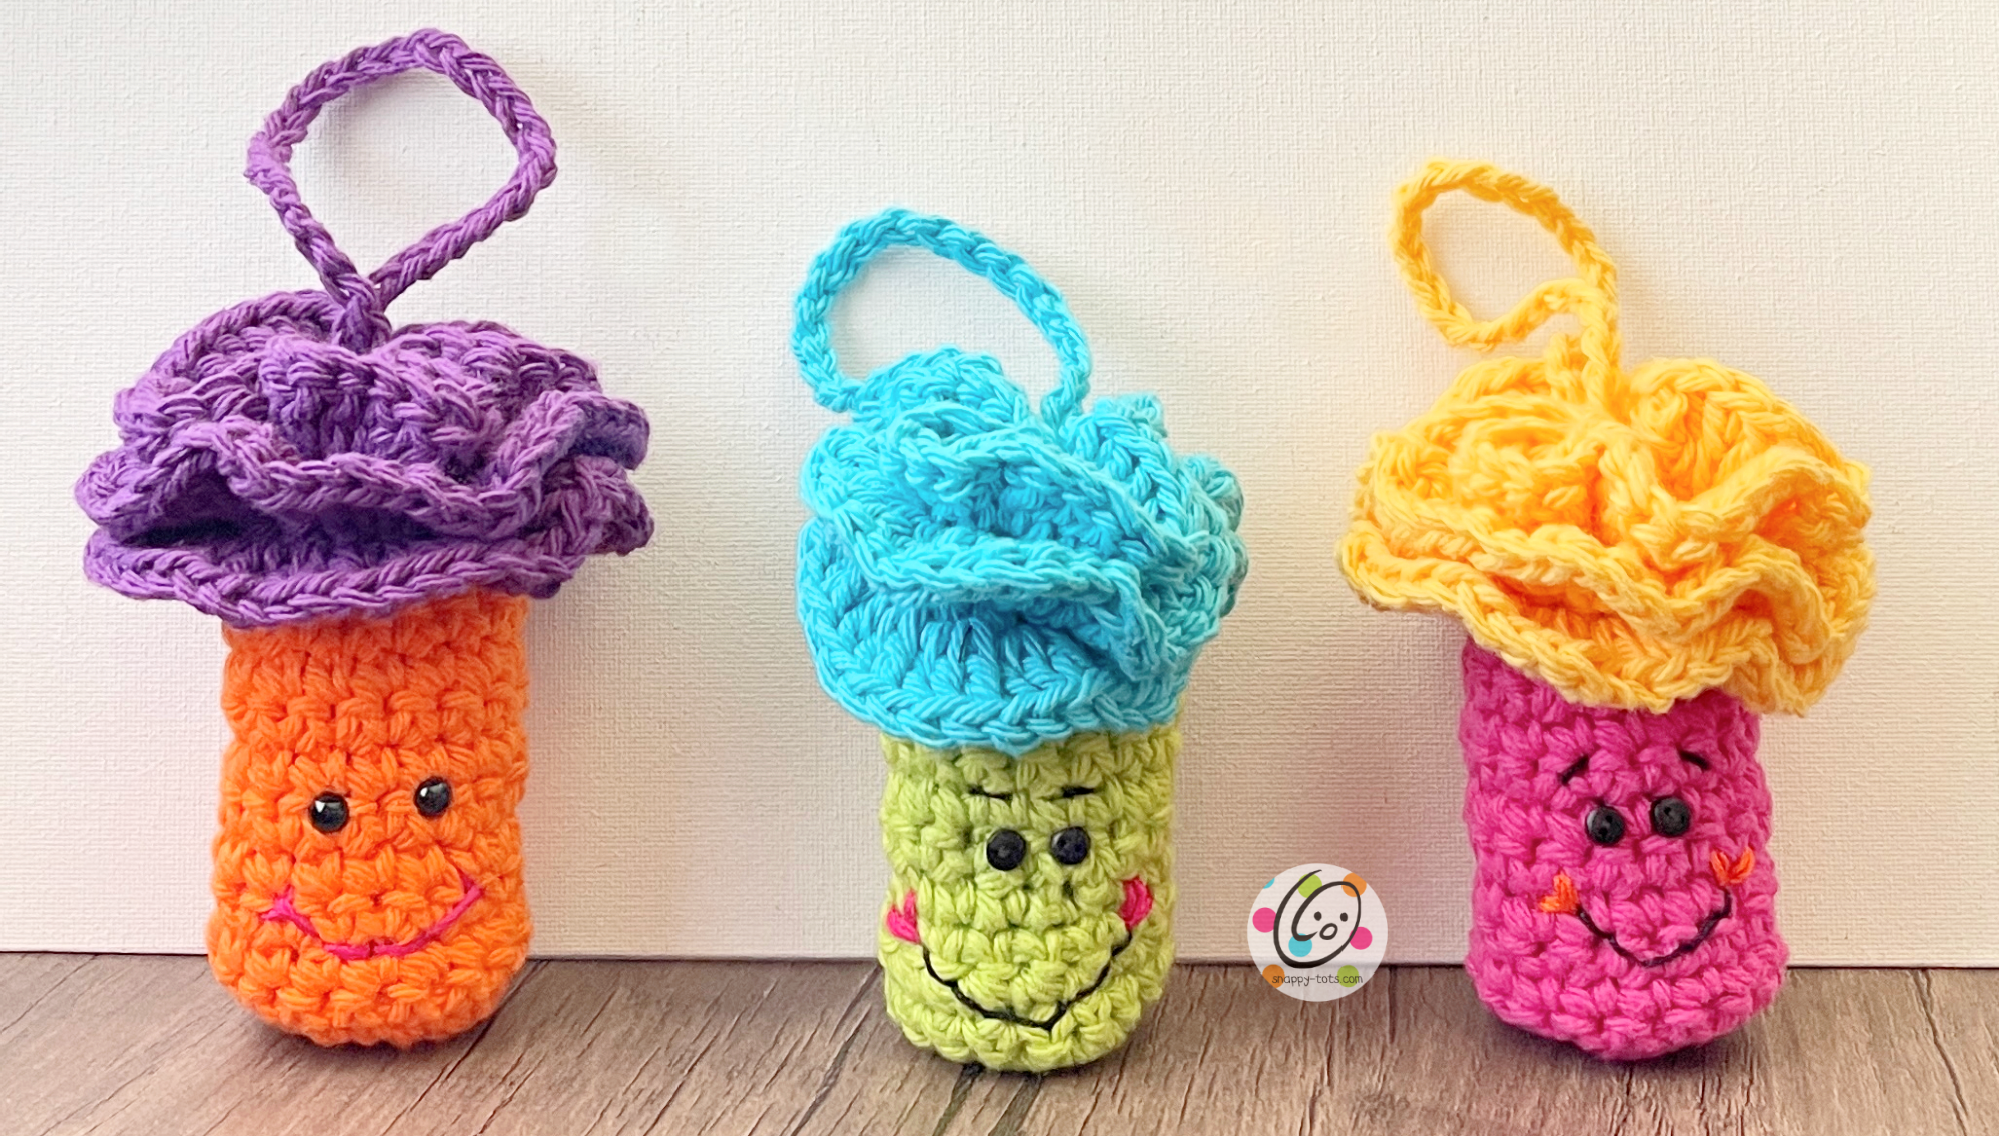
Weekly Wash #33: Scrubby Friends
I have a bunch of odds and ends of cotton yarn at the end of each summer. I whipped up some little scrubby friends to help make dishes and bath time more fun. I think these would be great for stocking stuffers, gift baskets and craft fairs too.
Scrubby Friends Crochet Pattern
The free pattern is available below.
We are aware there was a problem with the download link and we apologize for any inconvenience. It is now working. Please refresh your browser.
Weekly Wash Special: As a special thank you for visiting my blog, you can download the pdf of this pattern for free until 8/27/24: CLICK HERE to DOWNLOAD
Materials and Details
- Yarn: 100 yards ww COTTON yarn in 2 colors. Samples were made using Lily Sugar N Cream
- Crochet Hook: H (5mm)
- Miscellaneous: yarn needle, crochet cotton or embroidery floss for the mouth and cheeks, 2 small black buttons, sewing needle, black thread OR small safety eyes, netting to stuff the bottom cylinder shape (optional). Approximately 48” of 6” wide netting was used for each of these samples.
- Gauge: not needed for this project
- Measurements: 4” tall x 3” across widest part
Tips
- The number at the beginning of each line refers to the step and not the number of rows.
- Stitch counts remain the same unless noted at end of row.
Directions
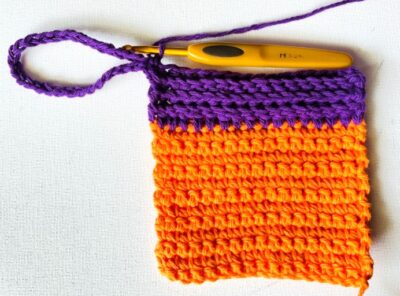
This project starts at the bottom.
1. Leave a long yarn tail in the beginning for seaming. With an H hook and ww cotton yarn, ch 17, sc in the 2nd ch from hook and in each ch across. (16sts)
2. Ch 1, turn, sc in the same st and in each st across.
3. Repeat the previous row for an additional 10 rows. There will be 12 rows total from the beginning edge when this step is complete.
4. Finish off the current yarn and change to a contrasting color for the top section. Ch 1, turn, hdc in the same st and in each st to end of row.
5. Ch 1, turn, BPHDC around each post to end of row. (16sts)
6. Ch 1, turn, FPHDC around each post to end of row.
7. Ch 1, turn, BPHDC around each post to end of row.
8. This step creates the hanger at the top of the scrubby. Ch 30, sl st in the same st.
9. Ch 2, rotate the piece counterclockwise to work into the first st of the ridge below. Sl st in the first st. Ch 2, 2dc in the same st. 3dc in each st to end of row.
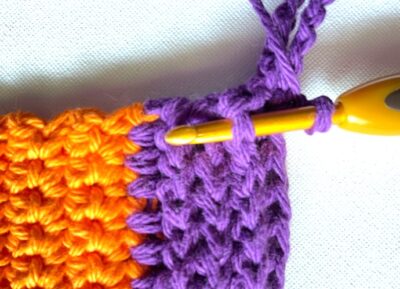
10. Ch 2, rotate the piece to work into the first st of the next ridge. Sl st in the first st. Ch 2, 2dc in the same st. 3dc in each st to end of row.
11. Repeat for the third row until one st remains, (2dc, ch 2, sl st) in the last st. Finish off and weave in ends.
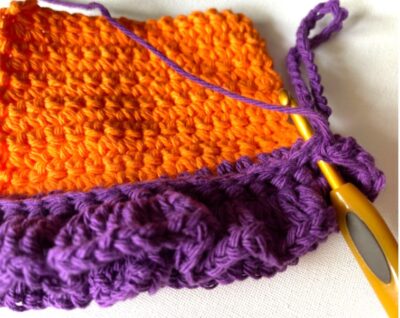
Stitch the faces in place before sewing the side seams.
Sew buttons or add safety eyes. Use a yarn needle and embroidery floss to stitch a smile, cheeks, and eyebrows in place.
Assembly
With a yarn needle and the same yarn as used for the top section, weave in and out of the remaining stitches. Make sure the hanger loop is on the outside/right side of the scrubby. Pull both ends of the yarn to cinch in the top edge. Tie a knot and weave in the ends.
Place the sides of the bottom section together. With a yarn needle, use the beginning yarn tail to sew the side seam. Weave in the end.
You can choose to leave the bottom section open or stuff it with netting and sew it closed. If you will leave it open, your scrubby is now complete.
If you will be adding the netting, insert it now. With a yarn needle and yarn to match the bottom section, weave in and out of the remaining stitches. Pull both ends of the yarn to cinch in the bottom edge. Tie a knot and weave in the ends.
Pin To Save For Later