
Free Pattern: Poppy Tot as a Cupcake
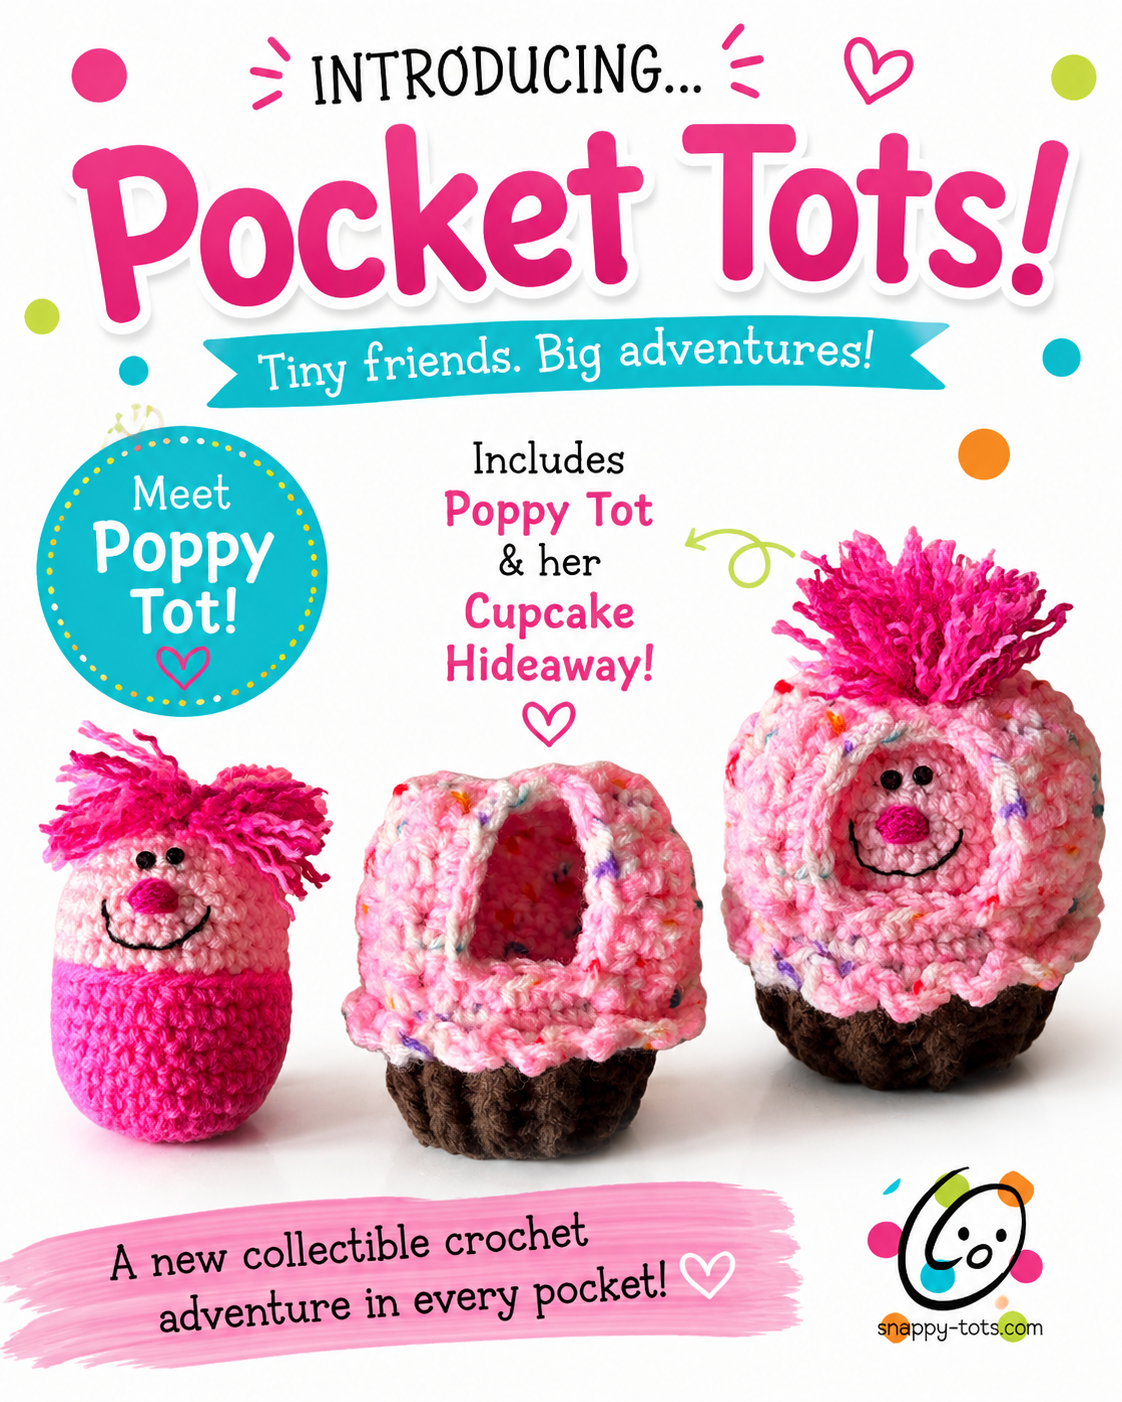
I am excited to introduce a brand-new little Snappy Tots adventure: Pocket Tots! These cheerful little friends are quick to crochet, full of personality, and ready for all kinds of creative accessories and hideaways. The very first one is Poppy Tot, a bright pink bundle of happiness with wild yarn hair and the biggest grin. For her first adventure, she comes with a sweet cupcake hideaway—and I cannot wait to see all the places this tiny new friend goes next!
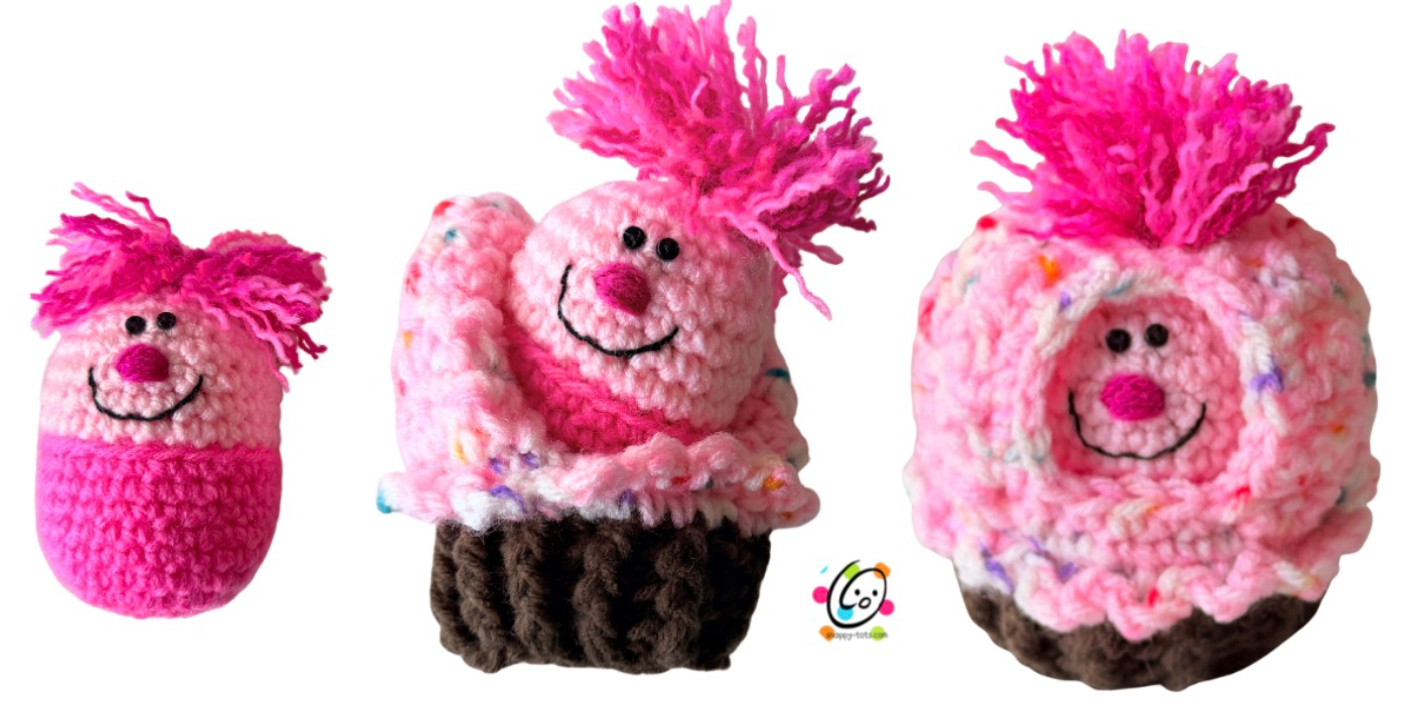
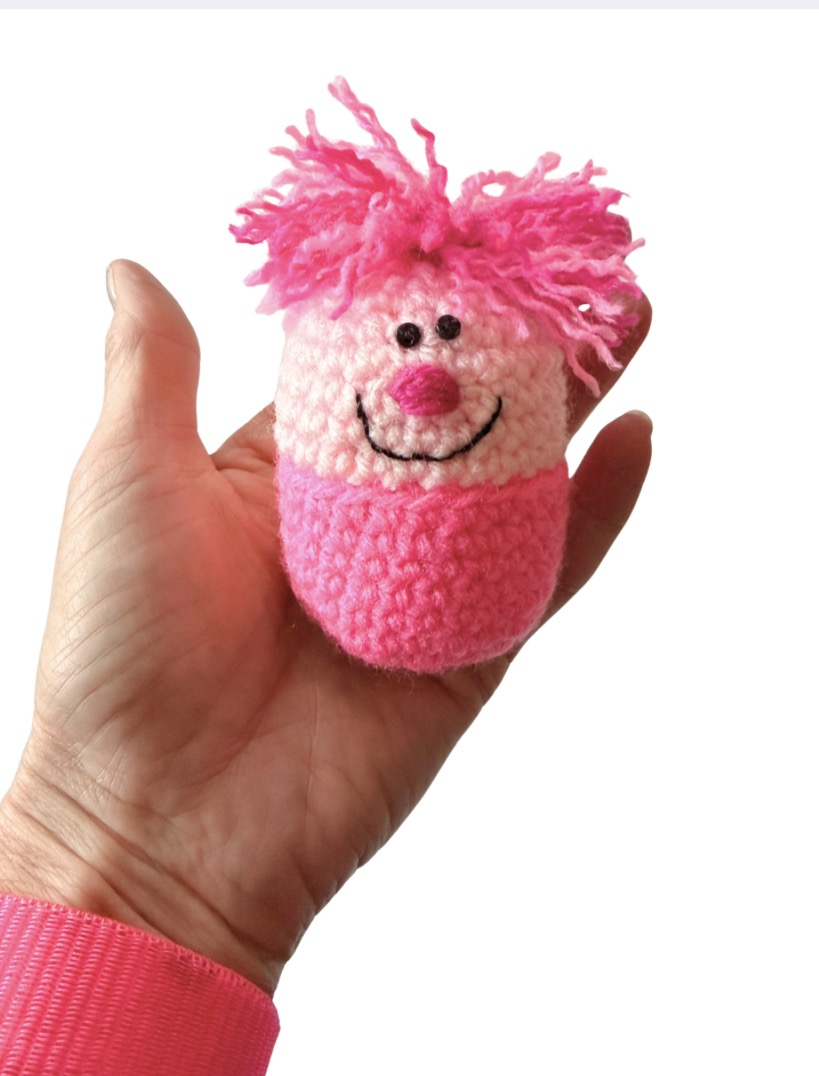
This little toy makes a great addition to this year’s Toy Box Crochet Along.
The 2026 Toy Box Crochet Along
How the 2026 Toy Box CAL Works
Every Monday from June 1 to August 3, 2026, we’ll share a free crochet pattern for a toy!
These toys can include dolls (amigurumi), plushies, and more. You can make these toys to keep, for gifts, or to donate to charity while chatting with other crocheters in our groups and sharing your projects to win giveaway prizes!
We’ve partnered with GlassEyesOnline, GMC Books, KnitPal, Knitter’s Relief Balm, LennyMudPottery, Underground Crafter, and Unicorn to bring you some great prizes in our end-of-CAL giveaway. Don’t forget to enter the giveaway in this post on Underground Crafter by Sunday, August 9, 2026 at 11:59pm Eastern.
How To Join the 2026 Toy Box CAL
- Sign up for Crochet Along updates and the Underground Crafter newsletter to get regular updates, including an email as each CAL pattern is released, or visit the main CAL page to get links to each pattern as it goes live.
- You can join in by crocheting the patterns as you have time.
- Share your progress and post pictures of your finished projects. Tag your projects and posts #CALCentralCrochet on all social media.
- If you’d like to chat with other crocheters, join the CAL Central Facebook group or visit this thread in the CAL Central Ravelry group.
- By the end of the CAL, you’ll have up to 10 awesome toys, amigurumi, and plushies to cuddle with!
Visit Underground Crafter to learn more about the prizes, enter the end-of-CAL giveaway, and to get links to each Toy Box CAL post as it is released.
Poppy Tot as a Cupcake Crochet Pattern
The pattern for this project is available to follow along below. An ad Free, downloadable PDF is available for a small fee from my shops. Etsy | Ravelry
Materials and Details
● Yarn: Less than 100 yards worsted weight yarn. Sample yarns: Red Heart Super Saver Coffee, Pretty N Pink, Baby Pink, Shocking Pink, Speckles Bubblegum (if a plain yarn will be used for the frosting section “sprinkles” can be added separately) Other yarns such as Bernat Blanket yarn could be used (with appropriate hook size)
● Crochet Hook: G (4.25-4.5mm), H (5mm)
● Notions: Yarn needle for weaving in ends, 2 small black buttons for eyes, black thread, sewing needle, stuffing, black embroidery floss, embroidery floss
● Optional: Measuring tape, scissors, 1/3 cup plastic pellets or stones for a weighted stuffie + nylon sock
● Finished Measurements: 3.75” tall (not including hair) x 3.5” across
● Gauge: not needed for this project.
Tips
● First stitch of each row is worked into the same stitch as the turning chain.
● Numbers at the beginning of each line may refer to steps and not indicate number of rows.
● Stitch count remains the same unless noted at end of row/round.
● If you have any questions about this pattern please contact [email protected].
Directions
Poppy
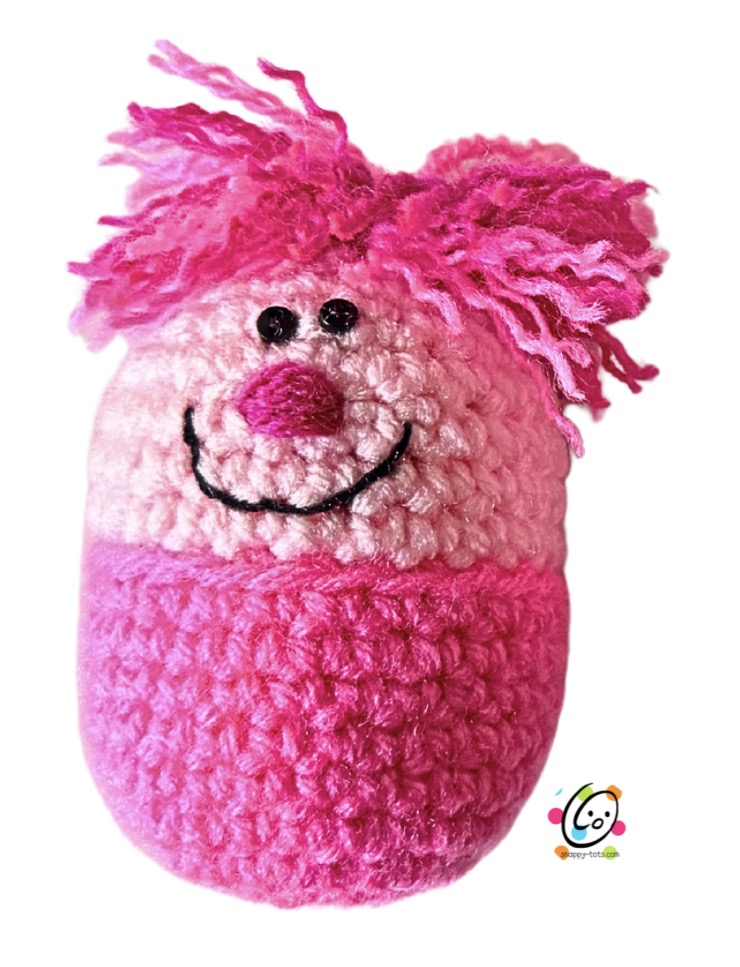
This starts at the bottom of the piece.
1. With a G hook and worsted weight yarn (Sample: Pretty N Pink), start with a magic circle of 8 sc sts (or preferred method for creating a circle of 8 sc sts), pull closed and place a marker for working in the round. (8sts)
2. 2sc in each st to end of round. (16sts)
3. *sc, 2sc in next st*, repeat to end of round. (24sts)
4. Sc in each st to end of round.
5. Repeat for an additional 4 rounds.
6. At this point, we will change to join at the end of each round so the color change will be even. Sl st in the next st. This is the new beginning of the round. Ch 1, sc in the same st and in each st to end of round, sl st to join.
7. Finish off the current yarn and change to a lighter shade for the top section (Sample: Baby Pink). Sl st in the BLO of each st to end of round. Note: Make sure to not work this round more snug than the others.
8. Ch 1, sc in each st to end of round, sl st to join.
9. Repeat for an additional 3 rounds.
10. Ch 1, *sc, sc2tog*, repeat to end of round, sl st to join. (16sts)
Stop here and add the face.
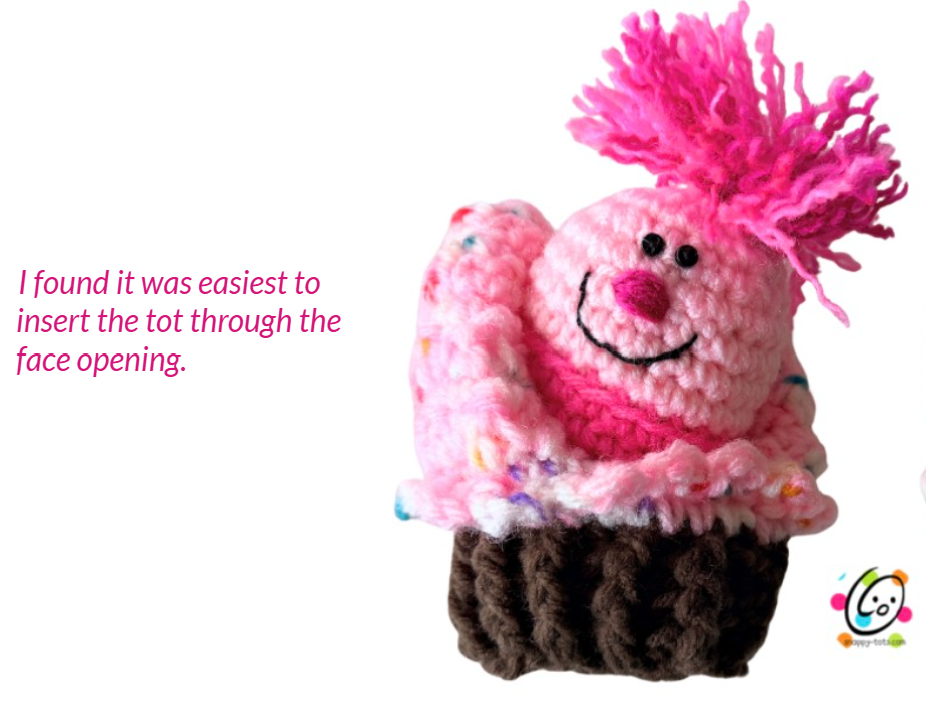
- Nose: Use a yarn needle and a long piece of yarn (Sample: Shocking Pink) to create the nose by taking small stitches in the middle of the section. See main photo for placement.
- Eyes: Use a sewing needle and black thread to sew the buttons above the nose or use safety eyes.
- Mouth: Use an embroidery needle and black embroidery floss to stitch the smile.
- Insert weight (optional, see note below) and stuff to this point.
11. Ch 1, sc in each st to end of round, sl st to join.
12. Ch 1, *sc2tog*, repeat to end of round, sl st to join. Finish off, leaving a long tail for sewing. (8sts) Insert more stuffing if needed.
Use a yarn needle and the yarn tail to weave in and out of the remaining sts. Pull to close and secure the yarn.
Weighted Body (optional)
I added weight to the body before stuffing to help it stand and be roly poly. Before stuffing, place 1 /3 up of poly pellets or similar in a nylon sock. Tie the top. This will be put in the tot body before stuffing.
Pompom “Hair”
1. Cut a piece of matching yarn 12” long. This will be used to tie around the middle of the pompom. Set aside.
2. Two pieces of yarn were used to create the hair in the sample (Shocking Pink, Pretty N Pink). Wrap 2 strands of yarn around 4 fingers approximately 6 times (or one strand 12 times).
3. Carefully slide the loops off your hand.
4. Use the 12” piece to wrap around the middle of the yarn loops and snugly tie a knot.
5. Hold onto the ends of this piece of yarn. Trim the loops and pom as desired.
6. Use the remaining yarn from the middle to sew the pompom to the top of the head.
7. Optional: Pull the yarn pieces apart for a frizzy look.
Cupcake
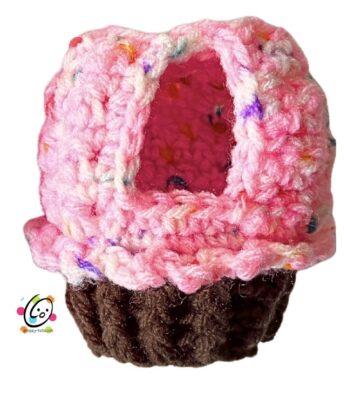
This starts at the bottom of the piece.
1. With an H hook and worsted weight yarn for the bottom section (Sample: Coffee), ch 24, sl st in the last ch from hook to join in a circle. Make sure the chain is not twisted. (24sts)
2. Ch 1, hdc in each st to end of round, sl st in the first st to join.
3. Ch 1, *FPHDC around the next post, BPHDC around the next post*, repeat to end of round, sl st to join.
4. Repeat the previous round 2 more times.
5. Finish off the current yarn and change to yarn for the top section (Sample: Speckle Bubblegum). Ch 1, *sc 3, 2sc in the next st*, repeat to end of round, sl st to join. (30sts)
6. Ch 1, sc in BLO of each st to end of round, sl st to join. The bottom round of “frosting” will be worked into the front loops of this round when cupcake is almost complete.
7. Ch 1, turn, sc in the same st, dc in the next st, *sc, dc*, repeat until 6 sts remain, sc in the next st. Leave the remaining 5 sts unworked. This will be the face opening. (25sts)
Tip: I worked each sc a little more snug, not tight, but just to make sure it wasn’t loose. This helps the dc bumps stand out more.
8. Ch 1, turn, sc 10, 2sc in the next st, sc 3, 2sc in the next st, sc 10. (27sts)
9. Ch 1, turn, sc in the same st, dc in the next st, *sc, dc*, repeat until 1 st remains, sc in the last st.
10. Ch 1, turn, sc 10, sc2tog, sc 3, sc2tog, sc 10. (25sts)
11. Ch 1, turn, sc in the same st, dc in the next st, *sc, dc*, repeat until 1 st remains, sc in the last st.
12. Ch 1, turn, *sc 2, sc2tog*, repeat until 1 st remains, sc in the last st. (19sts)
13. Ch 1, turn, sc in the same st, dc in the next st, *sc, dc*, repeat until 1 st remains, sc in the last st.
14. Ch 1, turn, sc in the same st, *sc2tog, sc*, repeat to end of row, ch 3, sl st in the first st across the face opening. Tip: Insert your hook from the outside/right side. This might seem awkward.
15. Ch 1, turn to work around the face opening. Sc evenly around the face, working sc2tog at each of the 2 bottom corners, sl st in the first st to join. Finish off and weave in ends.
Bottom frosting:
This step is worked into the front loops of step 6 (near bottom edge of cupcake top). With an H hook and matching yarn, start in any st. *ch 3, sl st in the next 2 sts on the round*, repeat to end of round. Finish off and weave in ends.
Sprinkles: if a plain yarn was used for the frosting section, “sprinkles” can be added by using a yarn needle and a long piece of yarn to add small stitches of color randomly around the cupcake section.
Your Pocket Tot Adventure Is Just Beginning!
Set Poppy on a desk, add her to a cheerful gift, or send her off on her very first adventure. I would love to see the colors and personality you give your new little friend! Share your finished project and tag it #CALCentralCrochet so we can all enjoy the fun.
Happy crocheting—and remember: tiny friends have a way of starting very big adventures. 🩷
Common Abbreviations
| Abbreviation | Meaning |
|---|---|
| beg | beginning |
| ch | chain |
| sl | slip |
| st | stitch |
| sp | space |
| sc | single crochet |
| hdc | half double crochet |
| dc | double crochet |
| tr | treble/triple crochet |
| bp | back post |
| fp | front post |
| blo | back loop only |
| flo | front loop only |
| sc2tog | single crochet 2 stitches together |
| hdc2tog | half double crochet 2 stitches together |
| dc2tog | double crochet 2 stitches together |
| * | repeat instructions |
| yo | yarn over |
Contact & Snappy Spots
Please visit Snappy Tots online for giveaways, new release announcements, events, and fun.
- Blog: snappy-tots.com
- Shop: shop.snappy-tots.com
- Facebook: facebook.com/snappytots
- Pinterest: pinterest.com/snappytots
- Instagram: instagram.com/snappytots
Questions, comments, or suggestions? Email Heidi at [email protected].
Pin To Save For Later