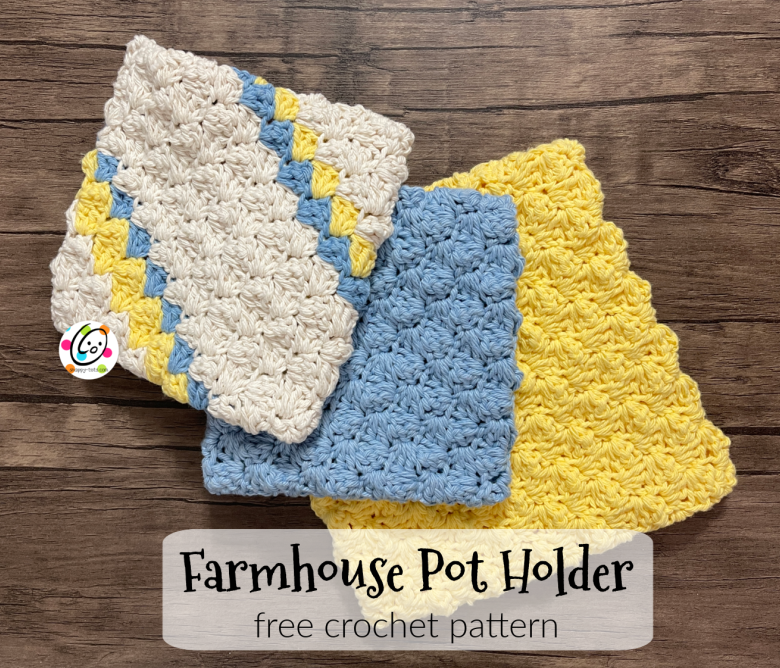
Free Pattern: Farmhouse PotHolders
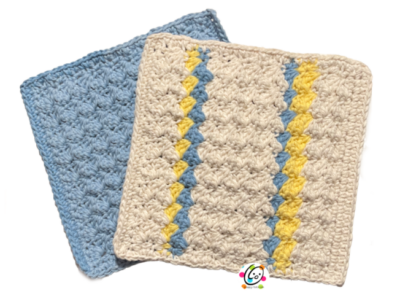
I’ve always wanted to crochet some potholders but, to be honest, the thought of using a crocheted item to take something hot out of the oven kind of freaks me out. I wanted to make sure I designed something thick enough to protect from the heat and also be fun to make. My “farmhouse cloth set” has a great texture so I made these potholders to match it.
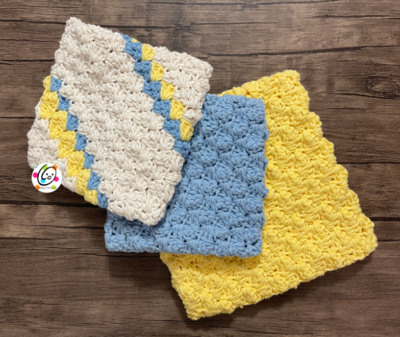
My first ones are 6″ squares and seemed a little small, especially for large pans (and large hands). So I made an 8″ version too. I hope you will like these. I suggest using cotton yarn for these because it won’t melt.
Farmhouse PotHolders Free Pattern
NOTE: a downloadable pdf of this pattern is not currently available.
Materials
- Cotton Yarn: 120-150 yards
Sample Yarns: Lily Sugar N’ Cream - Crochet Hooks: H (5mm)
- Miscellaneous: Yarn needle for weaving in ends
Details
- Finished Measurements: 6″ square, 8″ square
Tips
- First stitch of each row is worked into the same stitch as the turning chain.
- The beginning chain is not counted as a stitch unless noted in pattern.
- Numbers at the beginning of each line may refer to steps and not indicate number of rows.
Directions – 6″
1. With an H hook and cotton yarn, ch 31, sc in 2nd ch from hook and in each ch across. (30sts)
2. Ch 2, turn, hdc in same st, *(sc, 2dc) in next st, sk 2*, repeat until 2 sts remain (after last sk 2), sc in next st, hdc in last st.
3. Repeat the previous step until the cloth is square, approximately 18 more rows, changing colors as desired.
4. Ch 1, turn, sc in each st to end of row.
5. This step is worked around the outer edge. Ch 1, sc in the same st, sc 28 sts evenly across the side. (sc, ch 1, sc) in the first st of the bottom row, sc in each st across until 1 st remains, (sc, ch 1, sc) in the last st. Sc 28 sts evenly across the side. (sc, ch 1, sc) in the first st of the row, sc in each st across, sl st in first st to join. Finish off and weave in ends. Skip to “assembly” below.
Directions – 8″
1. With an H hook and cotton yarn, ch 40, sc in 2nd ch from hook and in each ch across. (39sts)
2. Ch 2, turn, hdc in same st, *(sc, 2dc) in next st, sk 2*, repeat until 2 sts remain (after last sk 2), sc in next st, hdc in last st.
3. Repeat the previous step until the cloth is square, approximately 24 more rows, changing colors as desired.
4. Ch 1, turn, sc in each st to end of row.
5. This step is worked around the outer edge. Ch 1, sc in the same st, sc 37 sts evenly across the side. (sc, ch 1, sc) in the first st of the bottom row, sc in each st across until 1 st remains, (sc, ch 1, sc) in the last st. Sc 37 sts evenly across the side. (sc, ch 1, sc) in the first st of the row, sc in each st across, sl st in first st to join. Finish off and weave in ends.
Assembly
- Fold the piece in half, lining up the eges.
- With a yarn needle, use a piece of matching yarn to sew the short sides together at each end. See the photo below. Tip: You can sew through both sts or just the inside loop of each edge (as shown in the photo below).
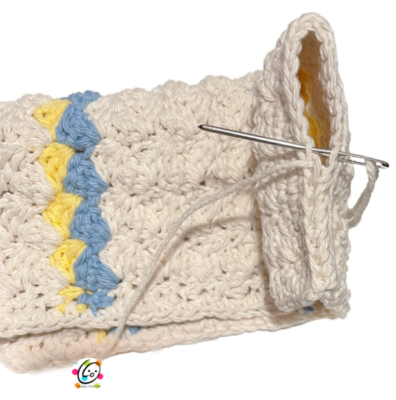
3. After the edges are sewn together, refold the piece to match the unsewn edges at a diagonal as shown in the photo below.
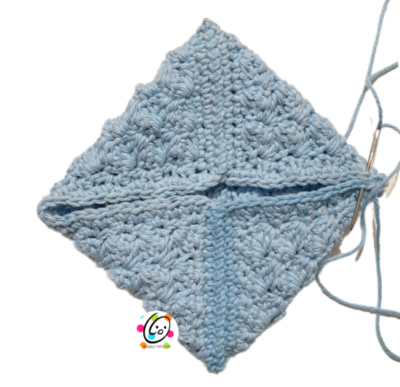
4. With a yarn needle, use a piece of matching yarn to sew the long sides together. See the photo above.
Pin To Save For Later