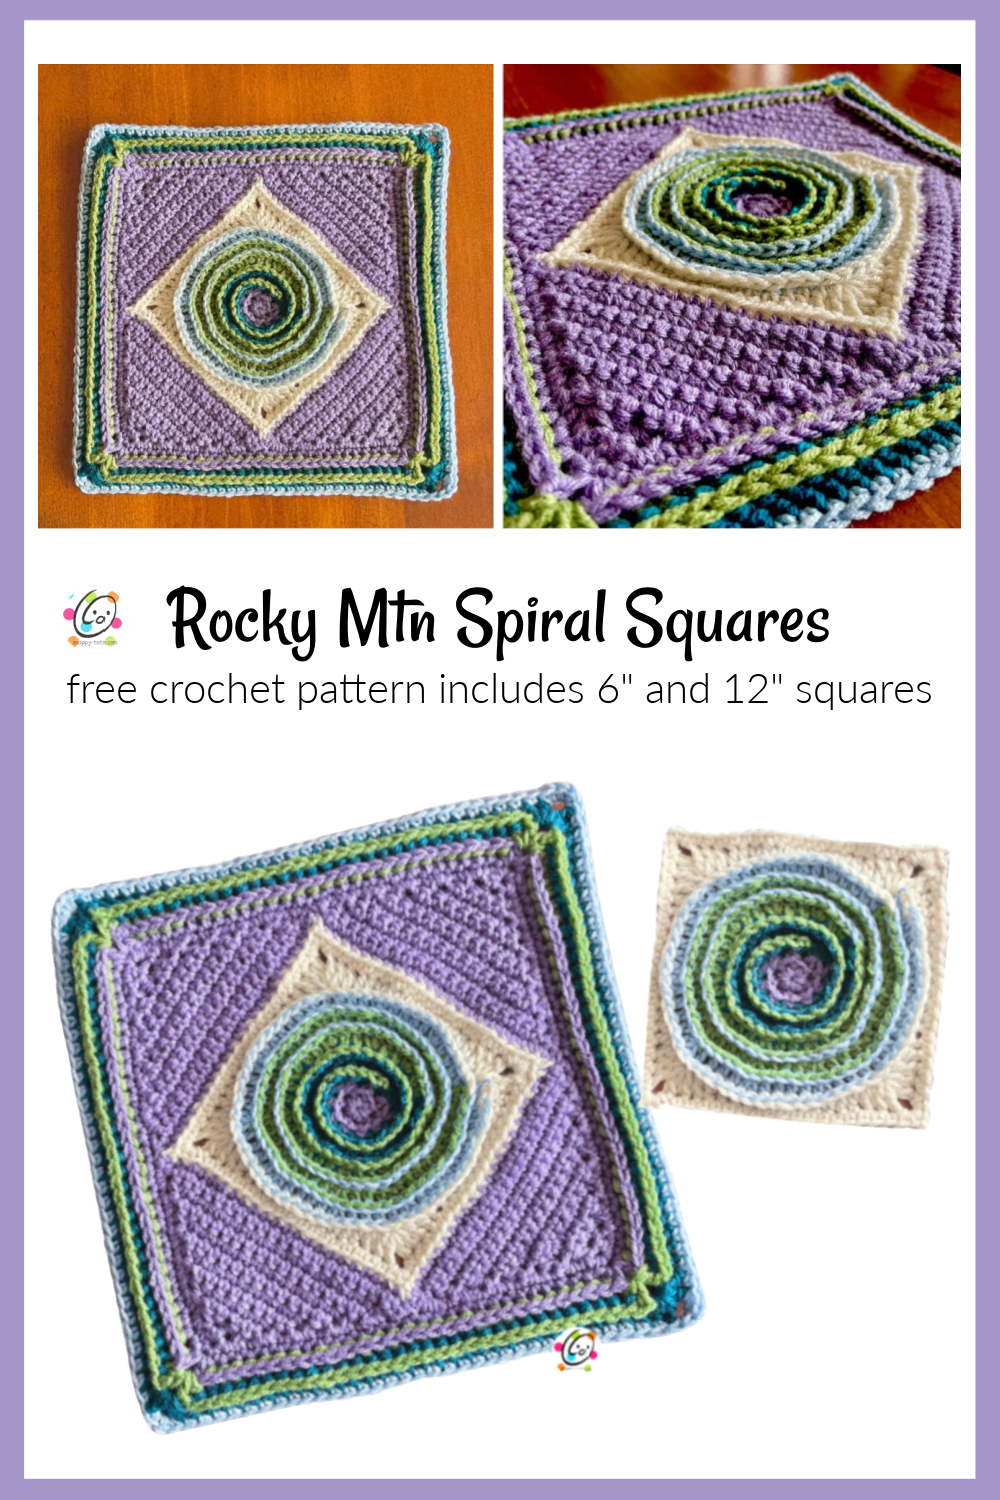
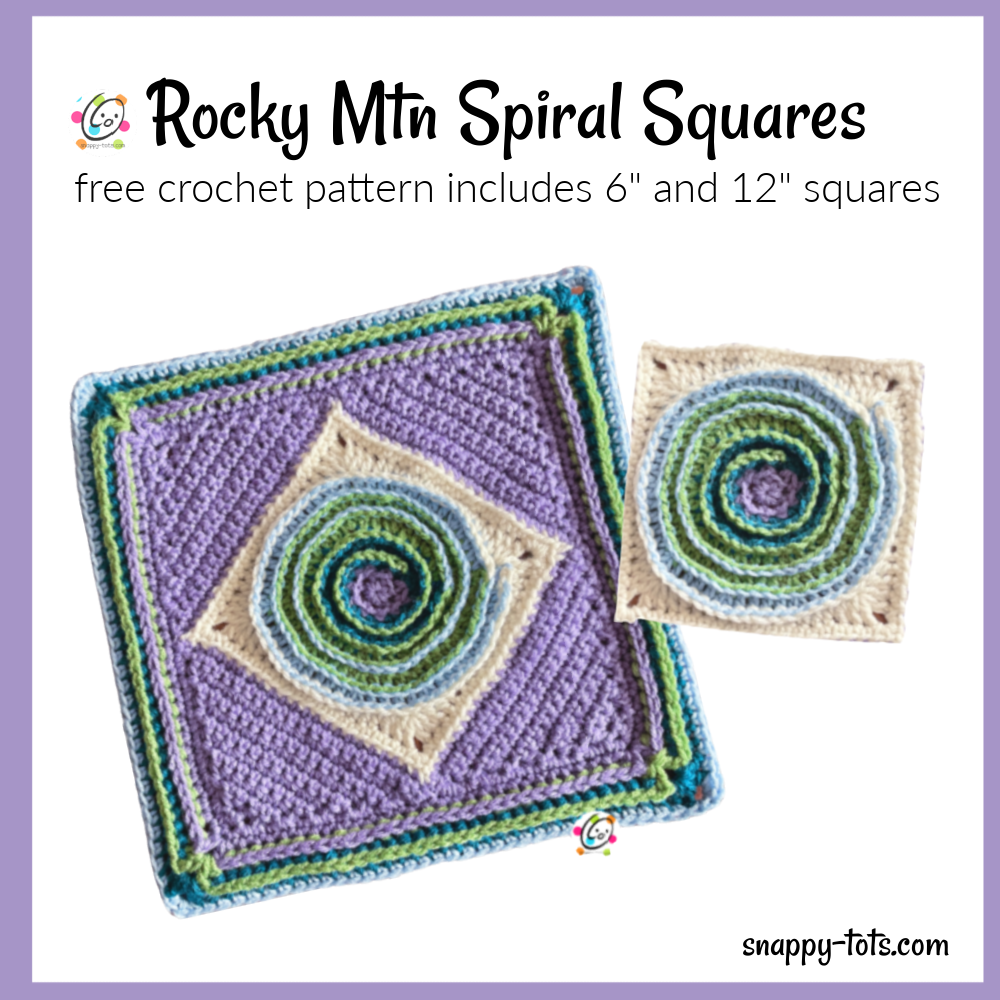
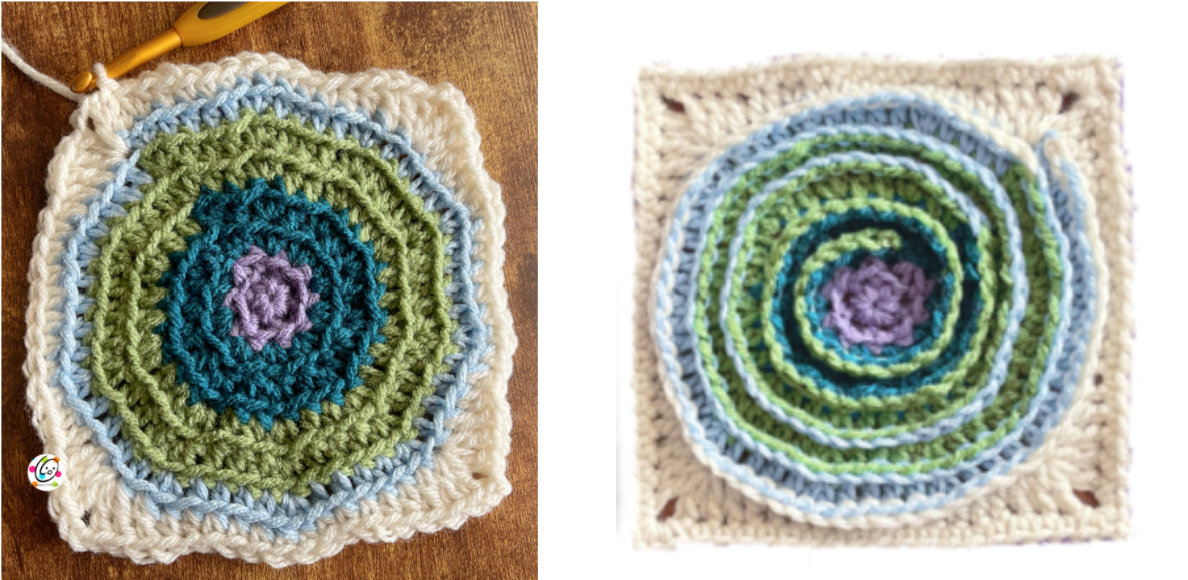
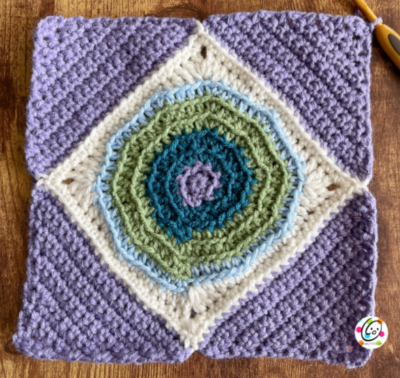
I am excited to once again design a 12″ crochet block for the annual #MooglyCal2022. It is designed to represent some of the parts from where I was born and raised (and still live) in Northern Utah: the beautiful Rocky Mountains and Spiral Jetty.
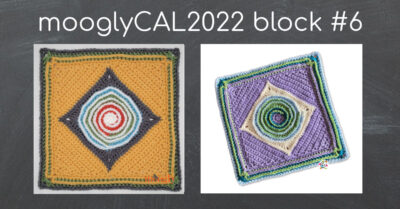
You can read about the year-long crochet along with Moogly and her experience with making this block, shown in the photo below: Moogly Cal 2022
There is a great facebook group for this event that you can join and see what others are making and share your own creations: Moogly Afghan Cal Group
About This Square
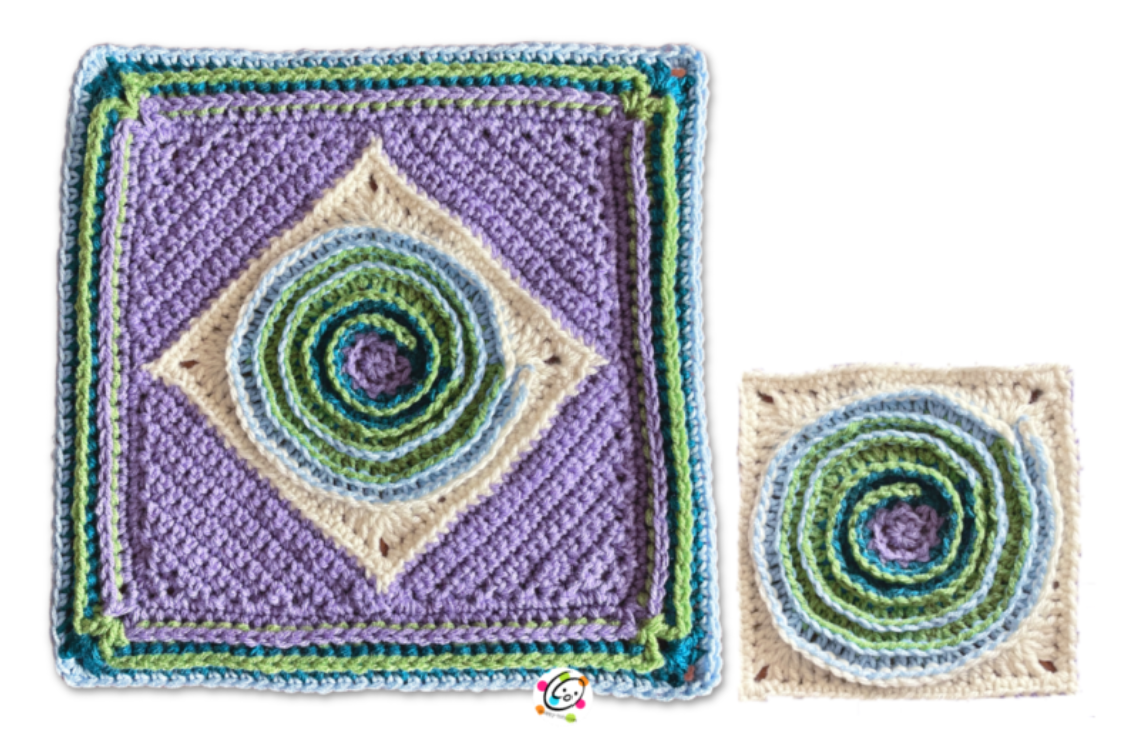
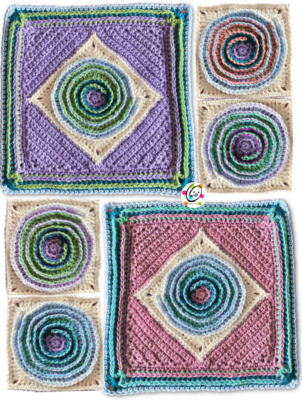
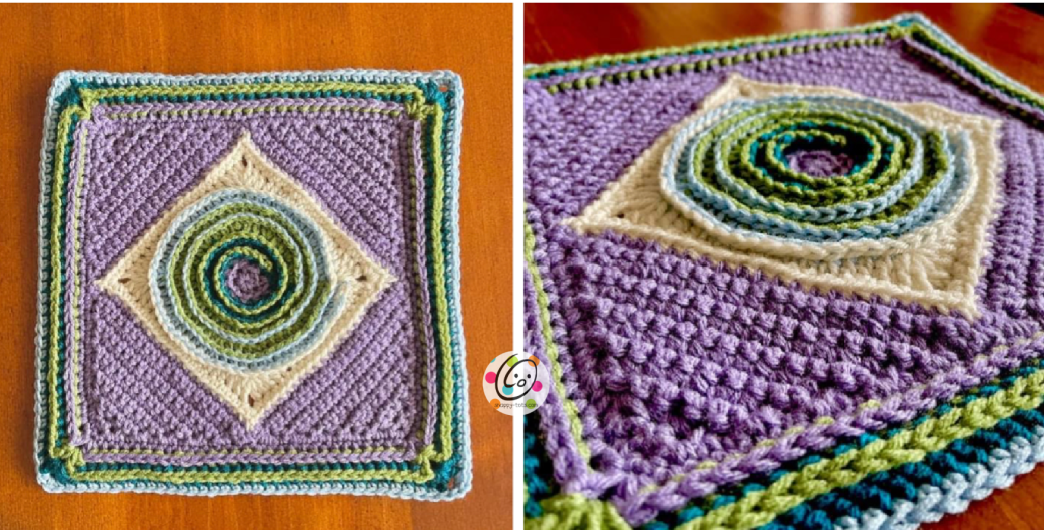
When I was working on this I was pleasantly surprised to see that I had created a 6″ square inside the 12″ one.
I like crocheters of all levels to be able to make my creations so this is made using basic crochet stitches. I also try to write my patterns with more explanation than you might usually find.
Video now available: Click here to crochet along with me.
This block starts with a circle worked in the back loops of the stitches. I chose bright colors for these first rounds. After the block is complete, we add rounds of sl sts to exaggerate the spiral. The Spiral Jetty is surrounded by the Rocky Mountains so I did the same with this block. The purple triangles represent our beautiful mountains. I feel really lucky to live on the foothills of their majesty.

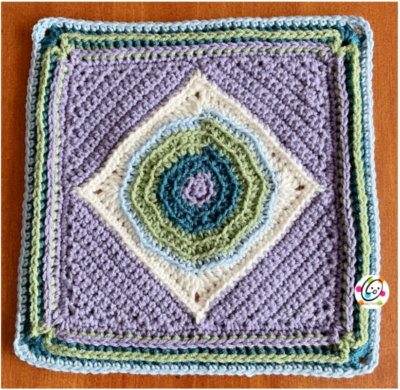
The 6” and 12” squares would be fun together for a pillow or afghan. I laid this out on my computer to give you an idea.
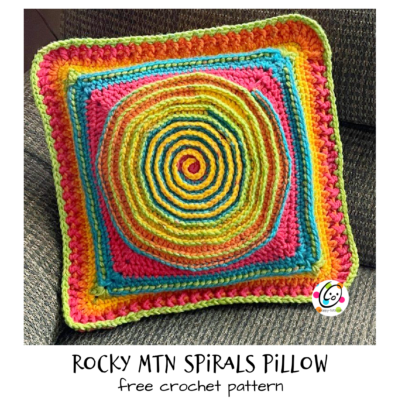
Matching Pillow Now Available
Other Snappy Patterns You Might Enjoy
- Spiral Scrubbers
- Blooming With Hope Square (Moogly Cal 2020)
- Farmhouse Squares (Moogly Cal 2019)
- Wedding Square
Rocky Mtn Spiral Squares Crochet Pattern
The instructions for the 6″ and 12″ squares are below. A downloadable ad-free pdf is available to purchase from my Shop.
Materials and Details
- Yarn: 6” square – 50 yards ww yarn; 12” square – 100-125 yards ww yarn
Yarn colors used in sample: Red Heart With Love Lilac, Mallard, Lettuce, Iced Blue, Aran - Crochet Hook: J (6mm)
- Notions: Yarn needle for weaving in ends
- Measurements: 6” and 12” squares
Tips
- Numbers at the beginning of each line may refer to steps and not indicate the number of rows.
- If you have any questions about this pattern please contact [email protected].
Directions
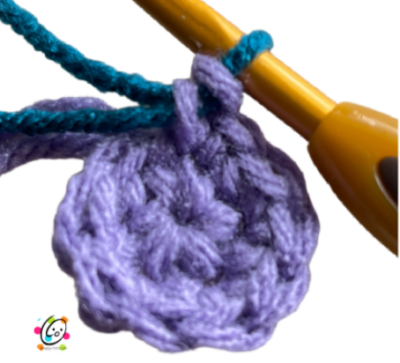
1. With a J hook and yarn color of choice (Lilac in sample), start with a magic circle of 5 sc sts (or preferred method for starting a circle of 5 sc sts), pull closed and place a marker for working in the round. (5sts)
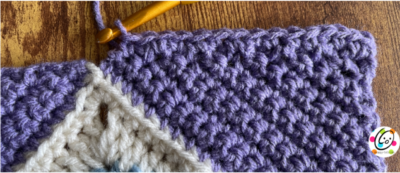
2. 2sc in each st until 1 st remains, 2sc in the next st, changing colors before the last st is complete (see photo below). (10sts)
Note: The following rounds are worked in BLO (Back Loops Only) until noted (after step #8).
3. Finish off the current yarn and change colors (Mallard in sample). (sc, hdc) in next st, 2hdc in each st to end of round. (20sts)
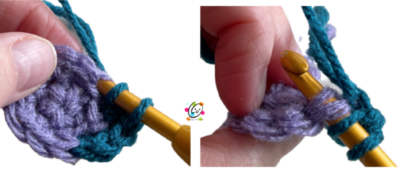
Tip: To prevent holes when working in BLO, I work into the back loop + the 3rd loop behind the st (see photos below).
4. *hdc, 2hdc in next st*, repeat to end of round. (30sts)
5. Finish off the current yarn and change colors (Lettuce in sample).*hdc 2, 2hdc in next st*, repeat to end of round. (40sts)
6. *hdc 3, 2hdc in next st*, repeat to end of round. (50sts)
7. Finish off the current yarn and change colors (Ice Blue in sample).*hdc 4, 2hdc in next st*, repeat until 5 sts remain, hdc 4, (hdc, sc) in the last st. Sl st in the next st (this is the new beginning of the round). (60sts)
8. Finish off the current yarn and change colors (Aran in sample). The beginning ch counts as a stitch. Ch 2,
(dc, ch 2, 2dc) in same space (to form the corner), *dc, hdc 2, sc 8, hdc 2, dc, (2dc, ch 2, 2dc) in next st (to
form corner)*, repeat twice, dc, hdc 2, sc 8, hdc, dc, sl st in top of beginning ch 2 to join. (72sts + 8 chs)
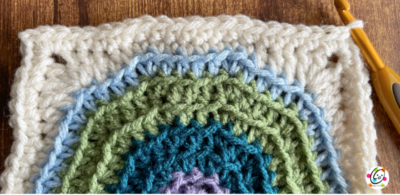
Note: Yep, this IS pretty wonky shaped at this point. It will all even out in the end (photo below, left).
9. Note: Stop working in BLO unless noted on each step.
Sl st to corner space. Ch 1, *(2sc, ch 2, 2sc) in corner space, sk 1, sc 17*, repeat to end of round, sl st in first st to join. (84sts + 8 chs) Note: The skipped st might be a little hidden under the corner cluster.
Finish off the current yarn and weave in ends (photo below, right).
END HERE FOR THE 6” SQUARE.
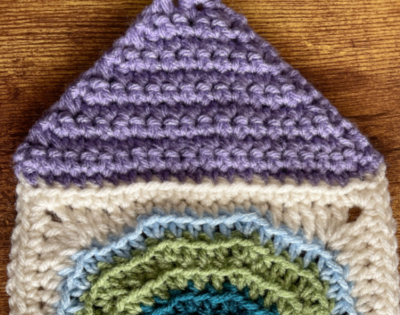
10. This step starts the first triangle on one side of the square (lilac in sample) and uses 23 sts on each side.
Attach the new color to the first ch st at the right (see photo below). Working in BLO, ch 1, sc in the same st, sc 22. (23sts) Note: Make sure to work each st into the BLO. Do not start and end in the corner spaces because that would appear to cut into the “smaller square”. We want to work into the back loops only in each st and ch across to make it appear as tho the smaller square sits on top of the bigger square.
11. Ch 1, turn, sc2tog, sc in each st across until 2 sts remain, sc2tog. (21sts)
12. Repeat the previous st until 3 sts remain.
13. Ch 1, turn, sc2tog, ch 2, sl st in the last st. Finish off and weave in ends.
14. Rotate the piece clockwise to work across the next side of the square. Find the first unused st and repeat steps 10-13.
15. Repeat the previous step for the next 2 sides of the square. After the last side, do NOT finish off the yarn.
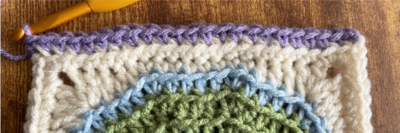
16. This step is worked around the outer edge of our new, big square. The square should be 9” across one edge at this point. I suggest using the same yarn color as the triangles for this round.
Ch 1, turn to work from the front of the block. Sl st in the corner space. Ch 1, *(sc, ch 2, sc) in the corner space, sc 13 sts evenly down the side of the triangle, sc2tog where the 2 triangles meet, picking up one st from the tip of each triangle (see photo below), sc 13 sts evenly up the side of the next triangle*, repeat around the square, sl st in the first st to join, sl st to the corner space. (116sts + 8chs) 9.5” square.

17. The beginning ch counts as a stitch. Ch 2, (hdc, ch 2, 2hdc) in the same corner space, sk 1, hdc 27, sk 1, *(2hdc, ch 2, 2hdc) in corner space, sk 1, hdc 27, sk 1*, repeat to end of round, sl st in first st to join. Sl st to corner space. (124sts + 8chs) 10.25” across
18. Finish off the current yarn and change colors (Lettuce in sample). The beginning ch counts as a stitch. Ch 2, (dc, ch 2, 2dc) in the same corner space, sk 1 post, BPDC around each post until 1 post remains before the corner (29 posts), sk 1 post, *(2dc, ch 2, 2dc) in corner space, sk 1 post, BPDC around each post until 1 post remains before the corner (29 posts), sk 1 post,* repeat to end of round, sl st in first st to join. Sl st to corner space. (132sts + 8 chs) 10.75” across
19. Finish off the current yarn and change colors (Mallard in sample). The beginning ch counts as a stitch. Ch 2, (dc, ch 2, 2dc) in the same corner space, sk 1 post, BPDC around each post until 1 post remains before the corner (31 posts), sk 1 post, *(2dc, ch 2, 2dc) in corner space, sk 1 post, BPDC around each post until 1 post remains before the corner (31 posts), sk 1 post,* repeat to end of round, sl st in first st to join. Sl st to corner space. (140sts + 8 chs) 11.25” across
20. Finish off the current yarn and change colors (Lt. Blue in sample). Ch 1, *4sc in corner, sk 1, sc 33, sk 1*, repeat to end of round, sl st in first st to join. Finish off and weave in ends. (148sts) 12” across
Extra Round (optional if needed for measurement): Ch 1, *4sc in corner, sk 1, sc 35, sk 1*, repeat to end of round, sl st in first st to join. Finish off and weave in ends. (156sts)
SPIRAL
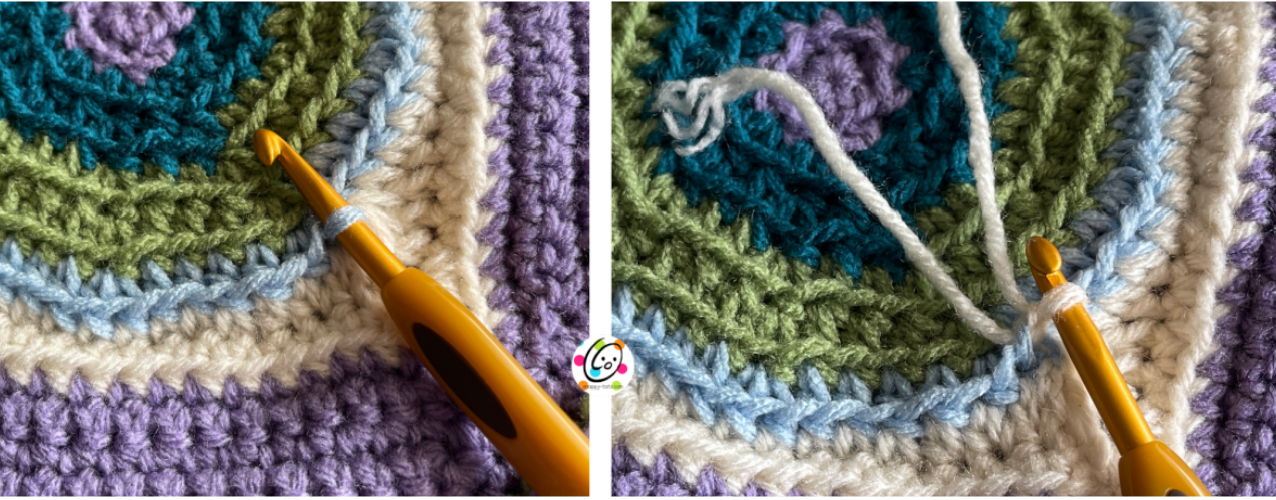
Note: For the main sample, I started with Aran yarn to match the outer edge of the spiral section. Then, as the colors of the spiral changed, I changed my yarn color, always one color behind. When it changed to the Lettuce, I changed to Iced Blue. When it changed to Mallard, I changed to Lettuce.
With the outer edge of the block towards you, attach yarn to the last front loop of the center section (see photo below, left) . Working in each of the loops (remaining loops), sl st in each stitch, spiraling around, to the center. Finish off and weave in ends.
Pin To Save For Later