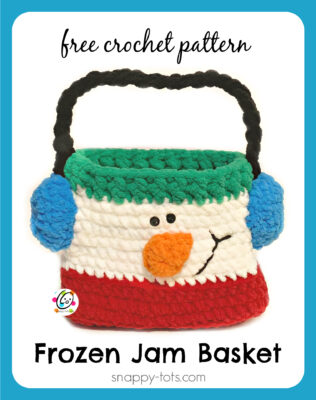
Pattern: Frozen Jam Basket
Snowmen always make me smile and are my favorite thing to crochet. Living in northern Utah, where we get a lot of snow each winter, you would think I could make an awesome snowman out of snow too. Nope. I have tried multiple times and have never been able to roll the snowballs. I think that is why I enjoy crocheting snowmen so much. See? I CAN make a snowman. *smile*
This time of year I try to design a few new snowmen to add to my collection. “Frozen Jam Basket” is a quick little basket, just the right size to whip up for multiple gifts and craft fair items. You could fill it with some candy, cute socks, a mug and cocoa mix, dish cloths and more.
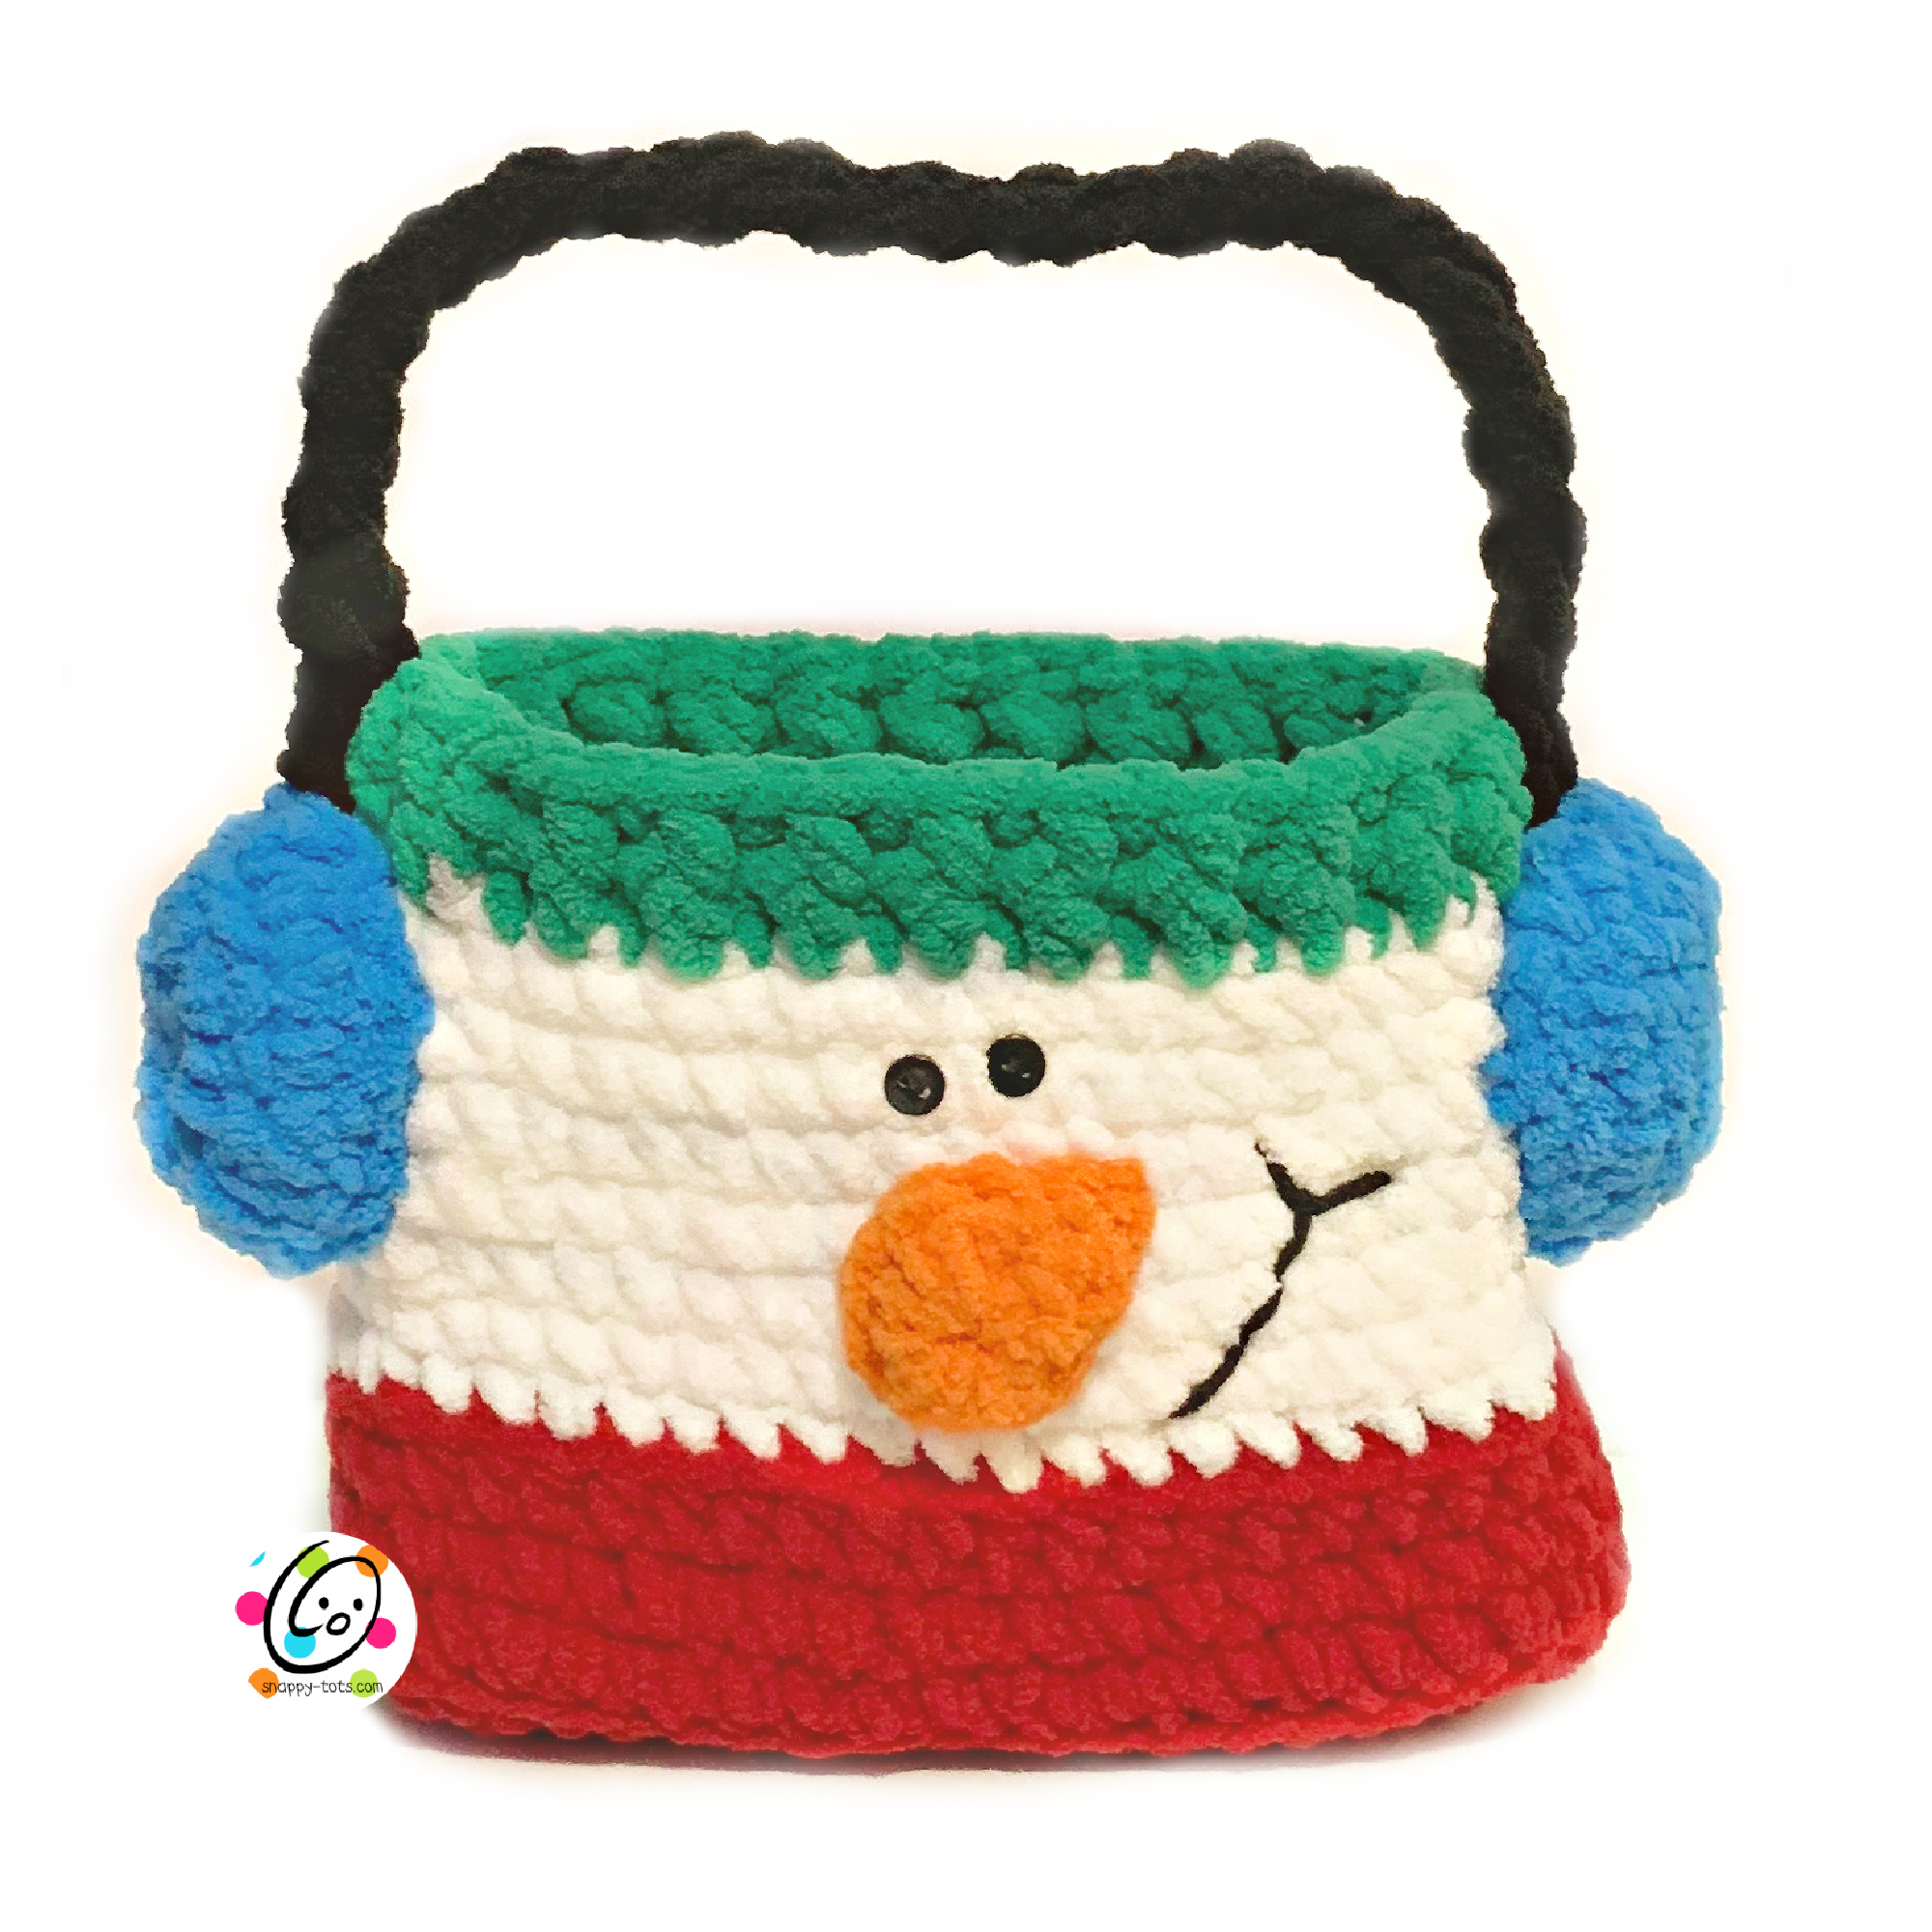
My sample is made from Bernat Blanket yarn, but could be made with other super bulky yarns, bulky/chunky yarn (use a J hook), 2 strands ww yarn (use a J hook) or even 1 strand ww yarn and an H hook for a smaller version.
I thought I was being so clever by naming this “Frozen Jam Basket” until my teenager informed me ear muffs don’t usually play music (the “jam” part). In my mind I knew they were ear muffs because that is what I designed, but I guess I secretly was making them as headphones too. lol
Frozen Jam Basket Pattern
This pattern is available for free below. A downloadable, ad-free pattern is available for a small fee from my shops: Ravelry. | Etsy
Materials & Details
- Yarn: Bernat Blanket Yarn in White, Red, Green, Blue, Orange, Black; Ww black (for smile)
- Crochet Hook: K (6.5mm)
- Notions: Yarn needle for weaving in ends, 2 small black buttons for eyes, sewing needle, black thread
- Gauge: not important for this project
- Measurement: base – 7.5” x 4”, 6” tall (not including handle)
Tips
- Numbers at the beginning of each line may refer to steps and not indicate the number of rows.
- The stitch count remains the same throughout.
- If you have any questions about this pattern please contact [email protected].
Directions
The project starts at the base.
1. With a K hook and red yarn, ch 19, sc in the 2nd ch from hook and in each ch across. (18sts)
2-7. Ch 1, turn, sc in the same st and in each st to end of row.
8. This step is worked around the outer edge of the rectangle. Ch 1, sc in the same st, sc 6 sts evenly down the side of the rectangle. 2sc in the first st of the bottom row, sc 16, 2sc in the last st. Sc 7 sts evenly up the side of the rectangle. 2sc in the first st of the top row, sc 16, 2sc in the last st. Sl st in first st to join. (54sts)
9. Work this round in BLO. Ch 1, sc in each st to end of round, sl st in first st to join.
10. Ch 1, sc 2, *sc2tog, sc 11*, repeat to end of round, sl st in first st to join. (50sts)
11. Ch 1, hdc in each st to end of round, sl st in first sto to join.
12. Change to white yarn. With this round in BLO. Ch 1, sc in each st to end of round, sl st to join.
13-18. Ch 1, hdc in each st to end of round, sl st in first st to join.
19. Change to green yarn. Ch 1, hdc in each st to end of round, sl st in first st to join.
20. Ch 1, *FPHDC around the next post, BPHDC around the next post*, repeat to end of round, sl st in first st to join. Finish off and weave in ends.
Nose
1. With a K hook and orange yarn, create a magic loop of 8 hdc sts (or preferred method for starting a circle of 8 hdc sts), pull closed and sl st to join. (8sts)
2. There is not a ch at the beginning of this step. (hdc, ch 2, sl st) in the next st. Finish off, leaving a long tail for sewing the nose in place. Place the nose in the middle of the white section, centered on one long side. With a yarn needle, use the yarn tail to sew the outer edge of the nose in place. Allow the middle of the nose to bulge. See main photo for placement.
Eyes: With a sewing needle and black thread, sew the buttons above the nose.
Smile: With a yarn needle and black ww yarn, stitch a smile in place.
Handle: Cut 9 pieces of black blanket yarn approximately 18” long. Hold all of the strands together and tie a knot in one end. Divide the strands in thirds and braid. Tie a knot in the other end. With a yarn needle and black ww yarn, sew each knot at the sides of the basket. This will be under the earmuffs so check placement in the main photo. Adjust the handle length if needed by tying one of the knots higher up on the handle piece and cutting off the extra yarn.
Earmuffs (make 2)
1. With a K hook and blue yarn, create a magic loop of 8 sc sts (or preferred method for starting a circle of 8 sc sts), pull closed and sl st to join. (8sts)
2. Ch 1, 2hdc in each st to end of round, sl st in first st to join. (16sts)
3. Ch 1, *hdc, 2hdc in the next st*, repeat to end of round, sl st in first st to join. (24sts) Finish off, leaving a long tail for sewing in place. With a yarn needle, use the yarn tail to sew each ear muff at each end of the handle, allowing the center to bulge. Lightly stuff if desired.
Pin To Save For Later