Free Pattern: Celebration Headband
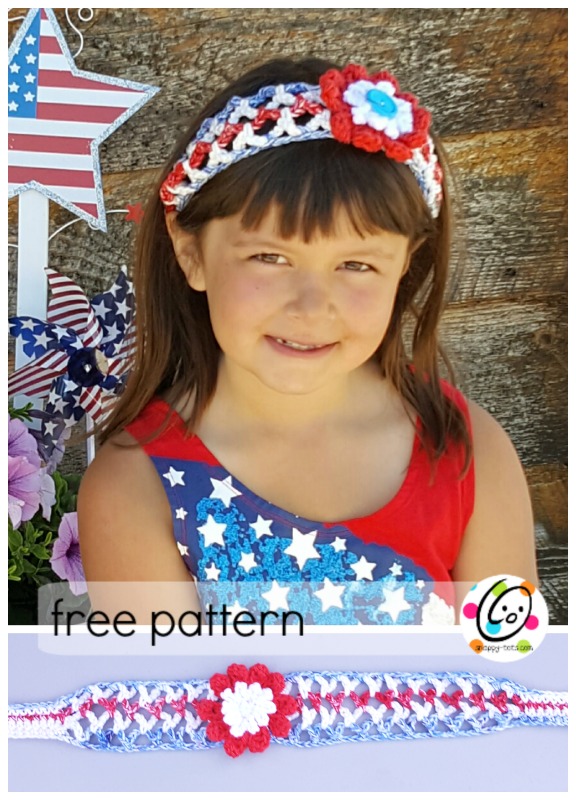
For the Fourth of July I wanted to whip up a simple headband for my niece to wear. The band is meant to tie behind the head. It is light and airy, perfect for year round. It is also fun tied around a sun hat.
Want to save this for later? CLICK HERE to add it to your favorites on Ravelry.
Celebration Headband
Project Info
- Project Description: a simple headband that ties behind the head.
- Skill Level: Basic crochet skills are needed and must be able to read a crochet pattern.
- Completion Time (how long it takes the designer to make one): 1.5 hours
Materials and Details
- Yarn: worsted weight in a variety of colors. Sample was made from Sugar and Cream Stripes in American Stripes color.
- Crochet Hook: G, H, I
- Miscellaneous: yarn needle for weaving in ends, large button for flower center (optional), sewing needle and thread.
Band Directions
Newborn-6mths (for small babies use lighter weight yarn and/or an F hook)
Using a G hook and worsted weight yarn, ch 71.
1. Turn, sc in second ch from hook and in the next 9, ch 3, sk 2, sc, ch 5, sk 2, sc, repeat until 10 sts remain, sc 10, ch 1, turn.
2. Sc 10, ch 1, sc in first loop, ch 5, sc in next loop, repeat until one loop remains, ch 3, sc in last loop, ch 1, sc in last 10 sts, ch 1, turn. Note: it is easier to count from the end to find where to start the last sts.
3. Sl st 10, ch 1, sc in loop, ch 2, sc in next loop, repeat until 10 sts remain, ch 1, sl st 10. Finish off and weave in ends.
Toddler
Using an H hook and worsted weight yarn, ch 81.
1. Turn, sc in second ch from hook and in the next 14, ch 3, sk 2, sc, ch 5, sk 2, sc, repeat until 10 sts remain, sc 10, ch 1, turn.
2. Sc 15, ch 1, sc in first loop, ch 5, sc in next loop, repeat until one loop remains, ch 3, sc in last loop, ch 1, sc in last 15 sts, ch 1, turn. Note: it is easier to count from the end to find where to start the last sts.
3. Sl st 15, ch 1, sc in loop, ch 2, sc in next loop, repeat until 15 sts remain, ch 1, sl st 15. Finish off and weave in ends.
Child
Using an H hook and worsted weight yarn, ch 101.
1. Turn, sc in second ch from hook and in the next 19, ch 3, sk 2, sc, ch 5, sk 2, sc, repeat until 20 sts remain, sc 20, ch 1, turn.
2. Sc 20, ch 1, sc in first loop, ch 5, sc in next loop, repeat until one loop remains, ch 3, sc in last loop, ch 1, sc in last 20 sts, ch 1, turn. Note: it is easier to count from the end to find where to start the last sts.
3. Repeat previous row (for wider bands, repeat this row until desired width).
4. Sl st 20, ch 1, sc in loop, ch 2, sc in next loop, repeat until 20 sts remain, ch 1, sl st 20. Finish off and weave in ends.
Teen/adult
Using an H hook and worsted weight yarn, ch 117.
1. Turn, sc in second ch from hook and in the next 27, ch 3, sk 2, sc, ch 5, sk 2, sc, repeat until 28 sts remain, sc 28, ch 1, turn.
2. Sc 28, ch 1, sc in first loop, ch 5, sc in next loop, repeat until one loop remains, ch 3, sc in last loop, ch 1, sc in last 28 sts, ch 1, turn. Note: it is easier to count from the end to find where to start the last sts.
3. Repeat previous row (for wider bands, repeat this row until desired width).
4. Sl st 28, ch 1, sc in loop, ch 2, sc in next loop, repeat until 28 sts remain, ch 1, sl st 28. Finish off and weave in ends.
When finished, give the band a slight tug as shown in the photo, to help shape.
Flower
Directions
1. With an H hook and yarn for back round of petals, create a magic circle of 9 sts (or preferred method for starting a circle of 9 sc sts), pull closed and sl st to join. (9sts)
- This round is worked in BLO. Ch 3, sc in next st, repeat until one st remains, ch 3, sl st in same st. (9 loops made)
- This round is worked into each ch 3 from previous round. Ch 3, 3 Tr, Ch 3, Sl st in each loop to end of round, making 9 petals.
- Change yarn color for front round of petals. This round is worked in remaining, front loops from round #2. Ch 8, sl st in next st, repeat to end of round. Finish off and weave in ends.
Place a large button on top of the flower center. With a sewing needle and thread, sew through the button and flower to band.
Bonus: Whirly Flower
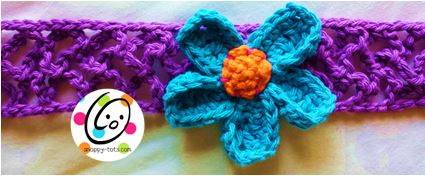
- With H hook and blue yarn, start with a magic circle of 5 sts (or preferred method for starting a circle of 5 sc sts), join and pull closed.
-
Ch 5, dc in 2nd ch from hook, ch 1, dc in same ch, hdc 2, sc, sl st in next st on circle, repeat to end of round.
-
Working up side of first pedal, sc2tog, sc 2, ch 2, sc in ch 1 space at top of petal, ch 2, sc 4, sl st in st where petals meet, repeat for each petal. Finish off, leaving a long tail for sewing flower in place.
Flower Center: With H hook and orange yarn, start with a magic circle of 5 sts (or preferred method for starting a circle of 5 sc sts), join and pull closed.
1. 2sc in each stitch around (10sts).
2. sc, 2 sc in next sc, repeat to end of round. (15sts). Finish off, leaving a long tail for attaching center to flower.
Place flower center on top of middle of flower and sew in place with yarn needle and yarn tail (from center), allowing center piece to mound.

This pattern is copyrighted to snappytots and may not be copied for resale in part or whole. It is illegal to post this pattern online or share with others without written consent from Heidi Yates. Items created from this pattern MAY be sold. Please include a link to snappy-tots.com if selling online. Visit Snappy Tots on facebook for giveaways, new release announcements, events and fun. If you enjoyed this pattern, please check out the complete line of Snappy patterns.

