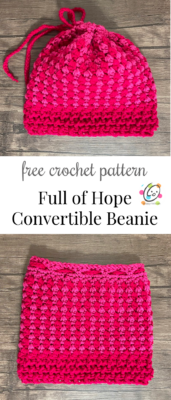
Free Crochet Pattern: Full Of Hope Convertible Beanie
Last fall I designed this convertible beanie for an annual Cancer Challenge. I really like how it turned out and thought it would be really pretty made in colors for Valentine’s Day. It turned out so cute! I like how the color changes really show off the stitches.
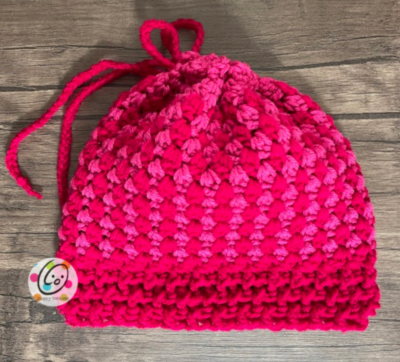
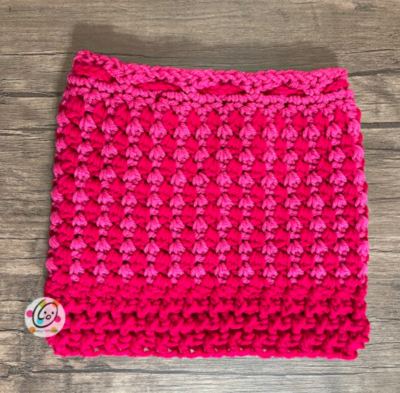
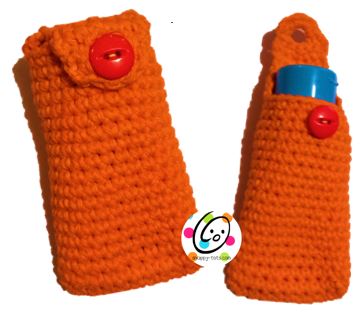
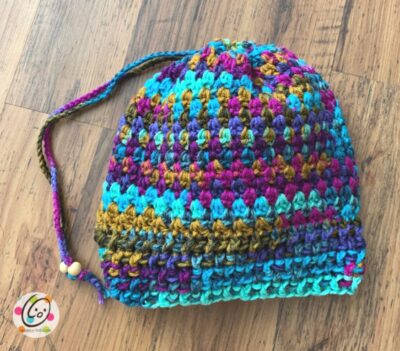
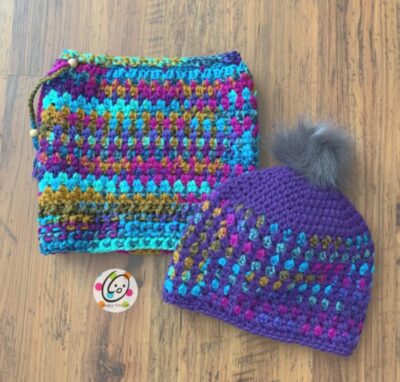
I first designed this convertible beanie to be worn in a few different ways. It can be worn as a cowl with the drawstring untied, as a messy bun beanie with the top left a little open for hair to be pulled through, or as a beanie with the drawstring pulled closed. I have used beads to hold the drawstring closed, but the ends could be tied instead.
The pattern for this convertible beanie is available for free further down in this post.
You might also like the regular beanie. The pattern is available from my pattern shop. This pattern is 60% off until 2/15/21. No coupon code needed. The discount will be applied in the cart upon checkout.
Full of Hope Convertible Beanie Pattern
The pattern for this convertible beanie is available for free below. An ad-free downloadable pdf is available to purchase from my Ravelry Shop.
Materials
- Yarn: 200 yards ww yarn
- Crochet Hook: H (5mm), J (6mm)
- Notions: Yarn needle for weaving in ends,
- Optional: Measuring tape, scissors, 3 beads for the drawstring.
Note: For the sample, I chose one bead with a ⅜” opening (the two drawstring ends need to fit through the opening and be snug). The other 2 beads are smaller and just need to fit on one drawstring end.
Measurements Gauge: 4 inches with J hook = 6.5 clusters and 13 rounds Sizes: Child Small, Child Large, Teen/Adult
Tips Numbers at the beginning of each line may refer to steps and not indicate the number of rows. The stitch count remains the same throughout. If you have any questions about this pattern please contact [email protected]. Tie the drawstring to wear as a hat or leave the drawstring loose to wear as a cowl.
Directions for Child Small
Dimensions (measured flat): 7.75” tall x 8.75” wide
- The beanie is worked from top of hat to bottom.
- This hat begins at the top with a chain and joined to work in the round. MAKE SURE the chain is not too snug. If needed, use one size larger hook for the chain, then switch to the J hook for step 2.
- You can follow the directions as written or start with a fsc (foundation single crochet) chain if preferred.
- Color changes: For stripes, change colors for each round. If using 2 colors, carry the unused color on the inside of the hat instead of ending each color each round.
1. With a J hook and ww yarn, ch 54, sl st in first ch to join for working in the round, making sure chain is not twisted. (54sts)
2. Ch 1, sc in same st and in each st to end of round, sl st to join.
3. This step creates the holes for the drawstring. Ch 1, sc in the same st, ch 2, sk 2, *sc in the next st, ch 2, sk 2*, repeat to end of round, sl st to join.
4. Ch 1, 3sc in each space to end of round, sl st to join.
5. Ch 1, (sc, dc) in the same st, sk 1, *(sc, dc) in the next st, sk 1*, repeat to end of round, sl st to join.
6. Ch 1, turn, (sc, dc) in the same st, sk 1, *(sc, dc) in the next st, sk 1*, repeat to end of round, sl st to join.
7. Repeat the previous round for an additional 14 rounds.
8. Ch 1. If needed, turn the piece to work from the outside of the piece. Hdc in each st to end of round, sl st to join.
9. Ch 2, *FPDC around the next post, BPDC around the next post*, repeat to end of round, sl st to join.
11. Ch 2, *BPDC around the next post, FPDC around the next post*, repeat to end of round, sl st to join.
12. Ch 2, *FPDC around the next post, BPDC around the next post*, repeat to end of round, sl st to join.
Finish off and weave in ends.
Drawstring: With matching yarn and H hook, create a ch approximately 32” long (inches, not chains). Finish off the end, leaving about 1” at each end. Do NOT tie a knot in the ends at this point.
Weave the drawstring in and out of the holes at the top of the hat. Pull through until ends are even.
Beads (optional): Slide both ends of the drawstrings through one bead with a big enough opening. This bead will be used as the stopper, to keep the top cinched together when worn as a hat.
Slide one bead on each end of the drawstring. These beads will keep the larger bead from falling off of the drawstring.
Tie the ends of the drawstring together.
Directions for Child Large/Preteen
Dimensions (measured flat): 8.5” wide x 9.25” tall
- The beanie is worked from top of hat to bottom.
- This hat begins at the top with a chain and joined to work in the round. MAKE SURE the chain is not too snug. If needed, use one size larger hook for the chain, then switch to the J hook for step 2.
- You can follow the directions as written or start with a fsc (foundation single crochet) chain if preferred.
- Color changes: For stripes, change colors for each round. If using 2 colors, carry the unused color on the inside of the hat instead of ending each color each round.
1. With a J hook and ww yarn, ch 60, sl st in first ch to join for working in the round, making sure chain is not twisted. (60sts)
2. Ch 1, sc in same st and in each st to end of round, sl st to join.
3. This step creates the holes for the drawstring. Ch 1, sc in the same st, ch 2, sk 2, *sc in the next st, ch 2, sk 2*, repeat to end of round, sl st to join.
4. Ch 1, 3sc in each space to end of round, sl st to join.
5. Ch 1, (sc, dc) in the same st, sk 1, *(sc, dc) in the next st, sk 1*, repeat to end of round, sl st to join.
6. Ch 1, turn, (sc, dc) in the same st, sk 1, *(sc, dc) in the next st, sk 1*, repeat to end of round, sl st to join.
7. Repeat the previous round for an additional 16 rounds.
8. Ch 1. If needed, turn the piece to work from the outside of the piece. Hdc in each st to end of round, sl st to join.
9. Ch 2, *FPDC around the next post, BPDC around the next post*, repeat to end of round, sl st to join.
11. Ch 2, *BPDC around the next post, FPDC around the next post*, repeat to end of round, sl st to join.
12. Ch 2, *FPDC around the next post, BPDC around the next post*, repeat to end of round, sl st to join.
13. Ch 2, *BPDC around the next post, FPDC around the next post*, repeat to end of round, sl st to join.
Finish off and weave in ends.
Drawstring: With matching yarn and H hook, create a ch approximately 32” long (inches, not chains). Finish off the end, leaving about 1” at each end. Do NOT tie a knot in the ends at this point.
Weave the drawstring in and out of the holes at the top of the hat. Pull through until ends are even.
Beads (optional): Slide both ends of the drawstrings through one bead with a big enough opening. This bead will be used as the stopper, to keep the top cinched together when worn as a hat.
Slide one bead on each end of the drawstring. These beads will keep the larger bead from falling off of the drawstring.Tie the ends of the drawstring together.
Directions for Teen/Adult size
- Dimensions (measured flat): 9.5” tall x 10”wide
- The beanie is worked from top of hat to bottom.
- This hat begins at the top with a chain and joined to work in the round. MAKE SURE the chain is not too snug. If needed, use one size larger hook for the chain, then switch to the J hook for step 2.
- You can follow the directions as written or start with a fsc (foundation single crochet) chain if preferred.
- Color changes: For stripes, change colors for each round. If using 2 colors, carry the unused color on the inside of the hat instead of ending each color each round.
1. With a J hook and ww yarn, ch 66, sl st in first ch to join for working in the round, making sure chain is not twisted. (66sts)
2. Ch 1, sc in same st and in each st to end of round, sl st to join.
3. This step creates the holes for the drawstring. Ch 1, sc in the same st, ch 2, sk 2, *sc in the next st, ch 2, sk 2*, repeat to end of round, sl st to join.
4. Ch 1, 3sc in each space to end of round, sl st to join.
5. Ch 1, (sc, dc) in the same st, sk 1, *(sc, dc) in the next st, sk 1*, repeat to end of round, sl st to join.
6. Ch 1, turn, (sc, dc) in the same st, sk 1, *(sc, dc) in the next st, sk 1*, repeat to end of round, sl st to join.
7. Repeat the previous round for an additional 18 rounds.
8. Ch 1. If needed, turn the piece to work from the outside of the piece. Hdc in each st to end of round, sl st to join.
9. Ch 2, *FPDC around the next post, BPDC around the next post*, repeat to end of round, sl st to join.
11. Ch 2, *BPDC around the next post, FPDC around the next post*, repeat to end of round, sl st to join.
12. Ch 2, *FPDC around the next post, BPDC around the next post*, repeat to end of round, sl st to join.
13. Ch 2, *BPDC around the next post, FPDC around the next post*, repeat to end of round, sl st to join.
14. Ch 2, *FPDC around the next post, BPDC around the next post*, repeat to end of round, sl st to join. Finish off and weave in ends.
Drawstring: With matching yarn and H hook, create a ch approximately 36” long (inches, not chains). Finish off the end, leaving about 1” at each end. Do NOT tie a knot in the ends at this point.
Weave the drawstring in and out of the holes at the top of the hat. Pull through until ends are even.
Beads (optional): Slide both ends of the drawstrings through one bead with a big enough opening. This bead will be used as the stopper, to keep the top cinched together when worn as a hat.
Slide one bead on each end of the drawstring. These beads will keep the larger bead from falling off of the drawstring. Tie the ends of the drawstring together.
Pin To Save For Later