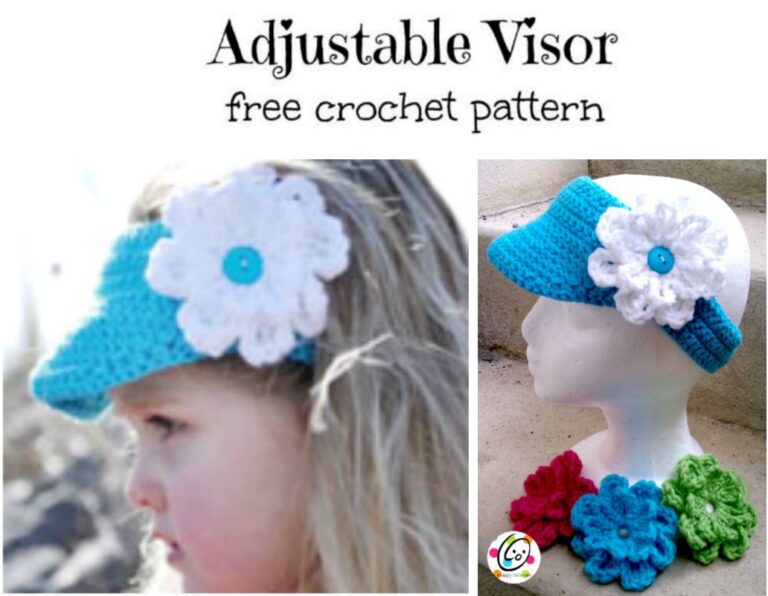
Free Pattern: Jakes Sunhat
My only grandson came to visit from North Carolina. He LOVES wearing hats and is so dang cute in them. It is really warm where he lives and since he is a red head I wanted him to have a new sunhat.
Based on my “Jake’s Beanie“, this sunhat is super easy and quick to whip up. I used Red Heart Super Saver yarns because I wanted vibrant red, white and blue.
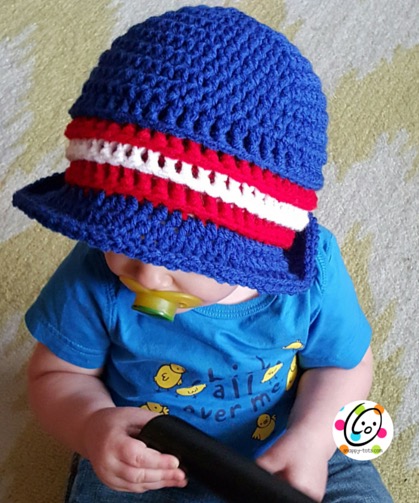
Jake’s Patriotic Sunhat
Instructions are written for the patriotic (blue with red and white stripes) version. Substitute colors if desired.
Materials and Details
Yarn: Red Heart Super Saver Cherry Red, Blue and white yarn or choice of colors in worsted weight
Crochet Hook: I, J
Miscellaneous: yarn needle
Gauge 4” with I hook = 13 hdc and 9 rounds
Sizes: 6 months to adult
Amount of striped rounds will vary, depending on size of hat.
~~~~~~~~~~~~~~~~~~~~~~~~~~~~~~
Special Stitches
FPDC – Front post double crochet; Click HERE for how to video from Red Heart yarns.
BPHDC – Back post half double crochet; Click HERE for how to video from Bob Wilson 123.
Note: these videos demonstrate both front and back post stitches. We will only be using one (front OR back) per round.
Help Tips:
• Rounds start with 8 increases each to form a flatter top, and then switch to 6 increases each starting on round #3.
• Number of layered rounds (stripes in main photo) will vary depending on the size hat you make.
Directions:
Note: All sizes start the same, and then skip to “body” section when increase round for desired size has been completed.
With I hook and blue yarn (or choice of color), start with a magic circle of 8 sts (or preferred method for starting a circle of 8 sc sts). Place marker to keep track of beginning of round.
1. 2sc in each stitch to end of round. (16sts)
2. hdc, 2 hdc in next st, repeat to end of round. (24sts)
3. hdc 3, 2 hdc in next st, repeat to end of round. (30sts)
Is your stitch count off? Did you read the “help tips” in the box above?
4. hdc 4, 2 hdc in next st, repeat to end of round. (36sts)
5. hdc 5, 2 hdc in next st, repeat to end of round. (42sts) 6-12 mths, 4.25” across
6. hdc 6, 2 hdc in next st, repeat to end of round. (48sts) 12-24 mths, 5” across
7. hdc 7, 2 hdc in next st, repeat to end of round. (54sts) Child-preteen, 5.75” across
8. hdc 8, 2 hdc in next st, repeat to end of round. (60sts) Teen/Adult, 6.5” across
Body:
Hdc in each st around until hat measures 3” for up to 24 mths, 4” for child/preteen and 4.5” for teen-large adult sizes. Note: to measure, place hat on a flat surface and measure from starting point (top) to current edge.
Layered Rounds – all sizes
1. Up until this point, the hat has been worked in continuous rounds to avoid a “seam”. Now we need to start joining at the end of each round for the color changes. Hdc in next st, sc in next st, sl st in next st. This is our new starting point. Continue with blue yarn. Ch 2, FPDC in each st to end of round, sl st to join. (stitch count remains the same)
2. Ch 2, BPHDC around each post to end of round, sl st to join.
3. Change to red yarn (or choice of color). Ch 2, FPDC around each post to end of round, sl st to join.
4. Ch 2, BPHDC around each post to end of round, sl st to join.
5. Change to white yarn (or choice of color). Ch 2, FPDC around each post to end of round, sl st to join.
6. Ch 2, BPHDC around each post to end of round, sl st to join.
7. Change to J hook and red yarn (or choice of color). Ch 2, FPDC around each post to end of round, sl st to join.
8. Ch 2, BPHDC around each post to end of round, sl st to join.
Measure hat. Continue repeating steps 7-8, changing color every other round (on step 7), until hat measures the following amount for desired size:
6-12 mths: 5.5″
12-24 mths: 6″
Child (2-5 years): 6.5″
Child Large-Preteen: 7″
Teen/Adult: 7.5″
Tip for measuring: Place hat on a flat surface. Measure from top, starting point of hat, to current round.
Finish with a BPHDC round (step #8).
Continue with brim for desired size.
Tip: On first round of brim, hold the base of each stitch while working in the FLO to keep it from stretching the stitch. You can also work the increase stitches into both loops (instead of FLO) to prevent holes.
6-12mths Brim
1. Work in FLO this round. Ch 2, hdc 2, hdc 3, 2hdc in next st, repeat to end of round, sl st to join. (52sts)
2. Ch 2, hdc 2, hdc 4, 2hdc in next st, repeat to end of round, sl st to join. (62sts)
3. Sl st in each st to end of round, sl st to join. Finish off and weave in ends. Gently tug the last rounds of the brim to create a smooth edge.
12-24 mths Brim
1. Work in FLO this round. Ch 2, hdc 4, hdc 3, 2hdc in next st, repeat until 4 sts remain, hdc 4,
sl st to join. (58sts)
2. Ch 2, hdc 4, hdc 4, 2hdc in next st, repeat until 4 sts remain, hdc 4, sl st to join. (68sts)
3. Ch 2, hdc 4, hdc 5, 2hdc in next st, repeat until 4 sts remain, hdc 4, sl st to join. (78sts)
4. Sl st in each st to end of round, sl st to join. Finish off and weave in ends. Gently tug the last rounds of the brim to create a smooth edge.
Child-Preteen Brim
1. Work in FLO this round. Ch 2, hdc 2, hdc 4, 2hdc in next st, repeat until 2 sts remain, hdc 2, sl st to join. (64sts)
2. Ch 2, hdc 2, hdc 5, 2hdc in next st, repeat until 2 sts remain, hdc 2, sl st to join. (74sts)
3. Ch 2, hdc 2, hdc 6, 2hdc in next st, repeat until 2 sts remain, hdc 2, sl st to join. (84sts)
4. Ch 2, hdc 2, hdc 7, 2hdc in next st, repeat until 2 sts remain, hdc 2, sl st to join. (94sts)
5. Sl st in each st to end of round, sl st to join. Finish off and weave in ends. Gently tug the last rounds of the brim to create a smooth edge.
Teen/Adult
1. Work in FLO this round. Ch 2, hdc 5, 2hdc in next st, repeat to end of round, sl st to join. (70sts)
2. Ch 2, hdc 6, 2hdc in next st, repeat to end of round, sl st to join. (80sts)
3. Ch 2, hdc 7, 2hdc in next st, repeat to end of round, sl st to join. (90sts)
4. Ch 2, hdc 8, 2hdc in next st, repeat to end of round, sl st to join. (100sts)
5. Ch 2, hdc 9, 2hdc in next st, repeat to end of round, sl st to join. (110sts)
6. Sl st in each st to end of round, sl st to join. Finish off and weave in ends. Gently tug the last rounds of the brim to create a smooth edge.
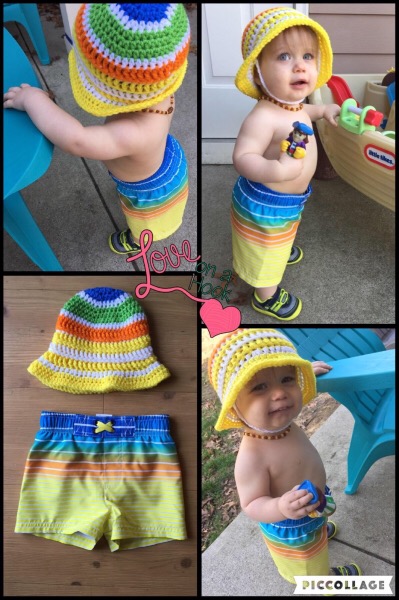
Thanks to Chelsea of Love On A Hook for sharing pix of her son and the cute striped hat she made.
~ ~ ~ ~ ~ Helpful Tips & Info~ ~ ~ ~ ~
Common Crochet Abbreviations
Ch – chain Dc – double crochet
St – stitch Fphdc – front post half double crochet
Sp – space; sps – spaces Bphdc – back post half double crochet
Sc – single crochet
Hdc – half double crochet ** – repeat instructions between, as many times as indicated
If you have any questions, comments or suggestions please email
[email protected].
Items made from Snappy Tots’ patterns MAY be sold. Please include a link to snappy-tots.com if selling online.
Please do not use any photos or text from this pattern online or elsewhere without written consent from Heidi Yates. This pattern is copyrighted to snappytots and may not be copied for resale in part or whole. It is illegal to post this pattern online or share with others without written consent from Heidi Yates.
Visit Snappy Tots online for giveaways, new release announcements, events and fun.
Facebook: https://www.facebook.com/snappytots
Pinterest: https://www.pinterest.com/snappytots
Blog: https://snappy-tots.com
Instagram: https://www.instagram.com/snappytots
Twitter: https://www.twitter.com/snappytots
Shop: https://shop.snappy-tots.com