
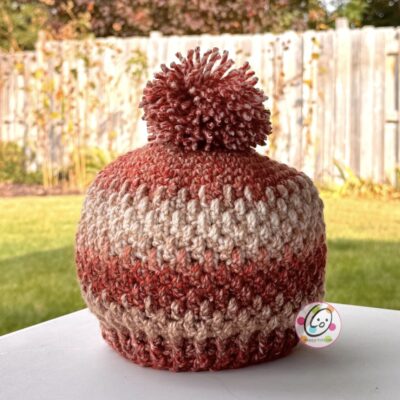
Free Pattern: Fall in love beanie
Several years ago, when my daughter got engaged, I made her and her fiance matching beanies. These “BF Beanies” have been super popular over the years. I think people really enjoy having a pattern that works great for men and women.
I recently designed a scarf for this year’s “Scarf of the month CAL” with The Stitchin Mommy and Oombawka Design Crochet that is great for men and women. My “Fall in Love Scarf” is fun and easy to make. This beanie is designed to match it.
The Supplies I Used
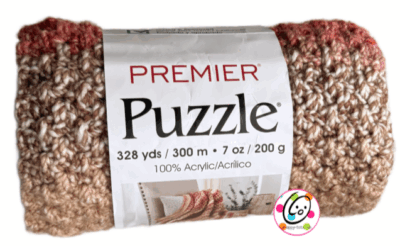
The Yarn: Premier Puzzle. Each skein has 328 yards. I LOVE all of the available colors. I chose “Kickball” because it was very “fall-ish”. All of the puzzle yarns have fun names of different games. The photo below is of my scarf wrapped in the yarn label.
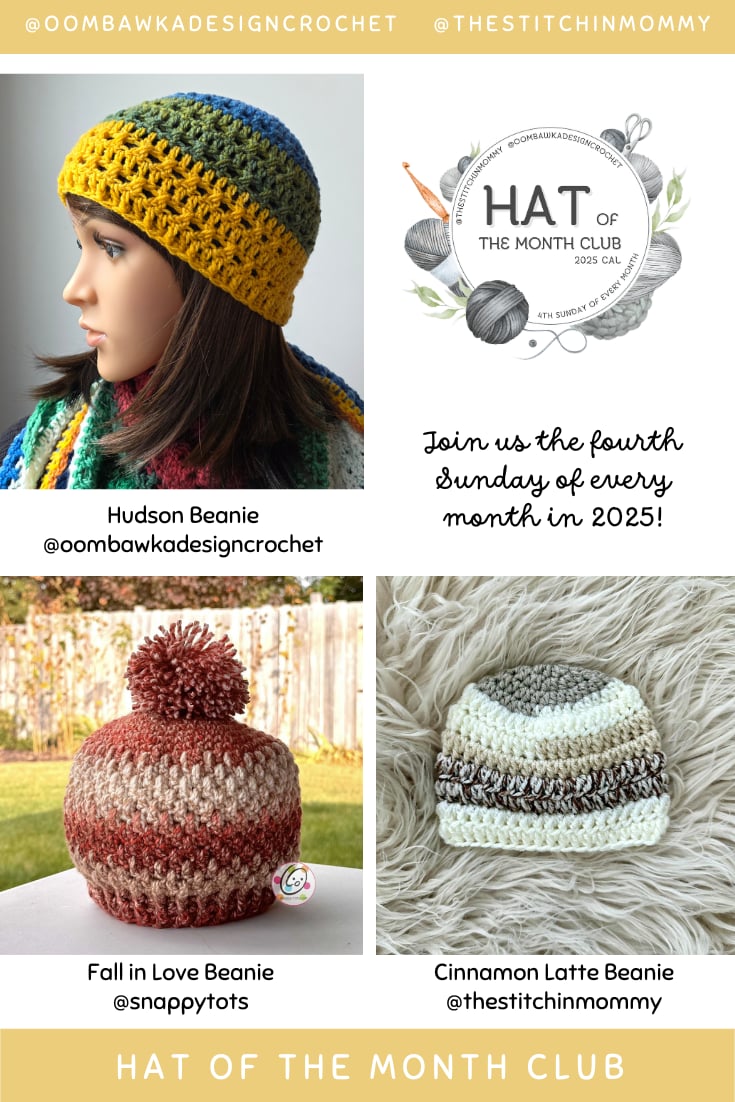
Hat of the Month
This pattern is part of the 2025 Scarf and Hat of the Month cal with The Stitchin Mommy and Oombawka Design Crochet.
About this ongoing event:
Crocheted scarves, pocket scarves, hooded scarves and cowls make great gifts and they are perfect for donating to people in need in the colder, winter months.
- Each month in 2025, three brand new scarf patterns will be shared as part of The Scarf of the Month Club CAL. You can download a Premium PDF copy of the pattern for FREE, but only for the first 24 hours.
- After this time has expired, each of the Premium Patterns will return to their regular prices in our shops.
- You will also be able to find a free version of each pattern will be viewable on our websites.
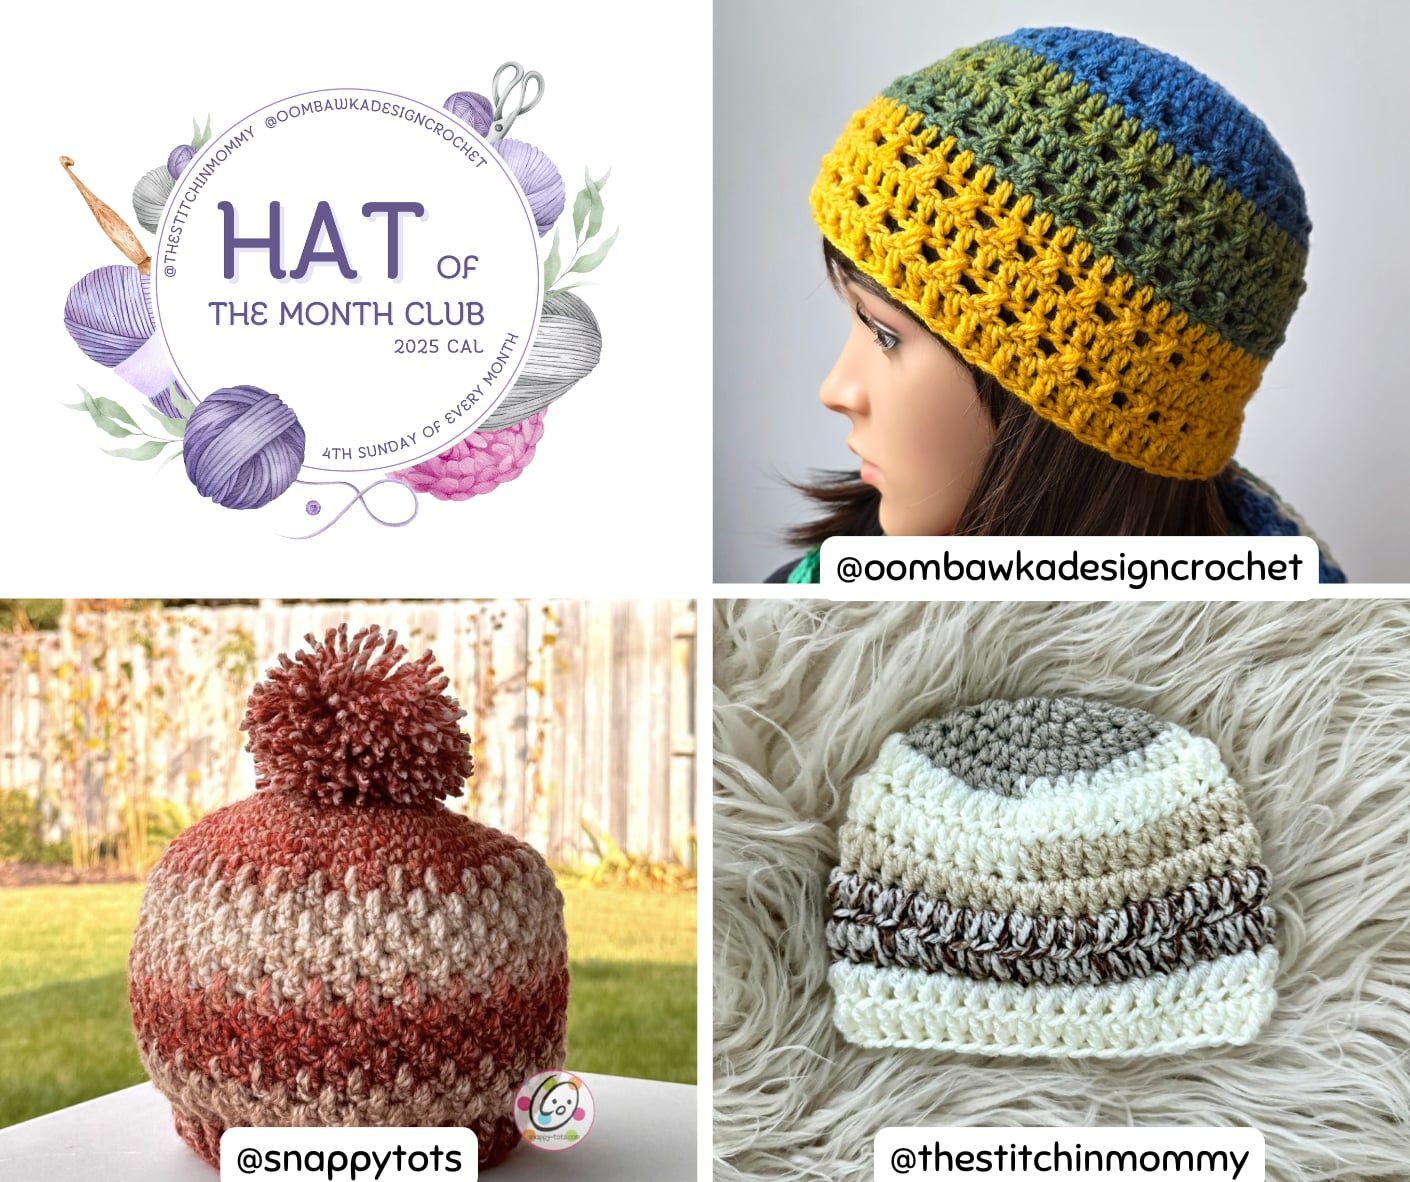
The pattern for my hat is available for free below and you can get the other two hat patterns at the following links:
https://oombawkadesigncrochet.com/hudson-beanie-free-crochet-pattern
https://www.thestitchinmommy.com/cinnamon-latte-beanie-free-crochet-pattern
Fall in Love Beanie Crochet Pattern
The pattern is available for free below, plus a downloadable, ad free pdf is available from my pattern shops.
SPECIAL FREE DOWNLOAD: Free for a limited time as part of the “Hat of the Month Crochet Along”.
– CLICK HERE, put the pattern in your cart.
– Enter coupon code: hatcal2025 (no spaces)
Make sure the code is applied and the total changes to free. Offer ends 10/1/25.
Materials and Details
- Yarn: 150 yards bulky weight yarn in color(s) of choice.
This sample was created Premier Puzzle Kickball - Crochet Hook: J (6mm)
- Miscellaneous: yarn needle
- Sizes: 2-4 yrs, 5- Preteen, Teen-Adult
- Gauge: 4″ with a J hook = 11 sts (in pattern repeat of dc, sc) x 11 rows
Tips
- The number at the beginning of each line refers to the step and not the number of rows.
- The first stitch of each row is worked into the same st as the turning chain.
- Stitch counts remain the same unless noted at end of row.
Directions
Child: 2-4 Years
Tip: Rounds start with 8 increases each to form a flatter top, and then switch to 6 increases each starting on round #3.
1. With a J hook and bulky weight yarn, start with a magic circle of 8 sc sts (or preferred method for starting
a circle of 8 sc sts). Place marker to keep track of beginning of round. (8sts)
2. 2sc in each stitch to end of round. (16sts)
3. *sc, 2sc in next st*, repeat to end of round. (24sts)
4. *sc 3, 2sc in next st*, repeat to end of round. (30sts) 3”
5. *sc 4, 2sc in next st*, repeat to end of round. (36sts) 3.5”
6. *sc 5, 2sc in next st*, repeat to end of round. (42sts) 4”
7. Sc 2, *2sc in next st, sc 4*, repeat to end of round. (50sts) 4.5”
8. Sc in the next st, sl st in the next st. This is the new start of the round. Ch 1, sc in the same st, dc in the next st, *sc in the next st, dc in the next st*, repeat to end of round, sl st to join. Stitch count remains the same.
9. Ch 1, sc in same st, *dc in the st one row below, sc in the next st (on current row)*, repeat until 1 st remains, dc in the st one row below, sl st to join.
10. Ch 1, *dc in the st one row below, sc in the next st (on current row)*, repeat to end of round, sl st to join.
11. Ch 1, sc in same st, *dc in the st one row below, sc in the next st (on current row)*, repeat until 1 st remains, dc in the st one row below, sl st to join.
12. Ch 1, *dc in the st one row below, sc in the next st (on current row)*, repeat to end of round, sl st to join.
13. Ch 1, sc in same st, *dc in the st one row below, sc in the next st (on current row)*, repeat until 1 st remains, dc in the st one row below, sl st to join.
14. Ch 1, *dc in the st one row below, sc in the next st (on current row)*, repeat to end of round, sl st to join.
15. Ch 1, sc in same st, *dc in the st one row below, sc in the next st (on current row)*, repeat until 1 st remains, dc in the st one row below, sl st to join.
16. Ch 1, sc in the same st, FPHDC around the post, *sc in the next st, FPHDC around the post*, repeat to end of round, sl st to join.
17. Ch 1, *BPHDC around the next post, FPHDC around the next post*, repeat to end of round, sl st to join.
If additional length is neede, repeat step 17.
Finish off and weave in ends. See the end of this pattern for instructions on making and adding a pompom.
Child: 5 Years to Preteen
Tip: Rounds start with 8 increases each to form a flatter top, and then switch to 6 increases each starting on round #3.
1. With a J hook and bulky weight yarn, start with a magic circle of 8 sc sts (or preferred method for starting
a circle of 8 sc sts). Place marker to keep track of beginning of round. (8sts)
2. 2sc in each stitch to end of round. (16sts)
3. *sc, 2sc in next st*, repeat to end of round. (24sts)
4. *sc 3, 2sc in next st*, repeat to end of round. (30sts) 3”
5. *sc 4, 2sc in next st*, repeat to end of round. (36sts) 3.5”
6. *sc 5, 2sc in next st*, repeat to end of round. (42sts) 4”
7. *sc 6, 2sc in next st,*, repeat to end of round. (48sts) 4.5”
8. *sc 7, 2sc in next st*, repeat to end of round. (54sts) 5”
9. Sc in the next st, sl st in the next st. This is the new start of the round. Ch 1, sc in the same st, dc in the next st, *sc in the next st, dc in the next st*, repeat to end of round, sl st to join. Stitch count remains the same.
10. Ch 1, sc in same st, *dc in the st one row below, sc in the next st (on current row)*, repeat until 1 st remains, dc in the st one row below, sl st to join.
11. Ch 1, *dc in the st one row below, sc in the next st (on current row)*, repeat to end of round, sl st to join.
12. Ch 1, sc in same st, *dc in the st one row below, sc in the next st (on current row)*, repeat until 1 st remains, dc in the st one row below, sl st to join.
13. Ch 1, *dc in the st one row below, sc in the next st (on current row)*, repeat to end of round, sl st to join.
14. Ch 1, sc in same st, *dc in the st one row below, sc in the next st (on current row)*, repeat until 1 st remains, dc in the st one row below, sl st to join.
15. Ch 1, *dc in the st one row below, sc in the next st (on current row)*, repeat to end of round, sl st to join.
16. Ch 1, sc in same st, *dc in the st one row below, sc in the next st (on current row)*, repeat until 1 st remains, dc in the st one row below, sl st to join.
17. Ch 1, *dc in the st one row below, sc in the next st (on current row)*, repeat to end of round, sl st to join.
18. Ch 1, sc in same st, *dc in the st one row below, sc in the next st (on current row)*, repeat until 1 st remains, dc in the st one row below, sl st to join.
19. Ch 1, sc in the same st, FPHDC around the post, *sc in the next st, FPHDC around the post*, repeat to end of round, sl st to join.
20. Ch 1, *BPHDC around the next post, FPHDC around the next post*, repeat to end of round, sl st to join.
If additional length is neede, repeat step 20.
Finish off and weave in ends. See the end of this pattern for instructions on making and adding a pompom.
Teen to Adult
Tip: Rounds start with 8 increases each to form a flatter top, and then switch to 6 increases each starting on round #3.
1. With a J hook and bulky weight yarn, start with a magic circle of 8 sc sts (or preferred method for starting
a circle of 8 sc sts). Place marker to keep track of beginning of round. (8sts)
2. 2sc in each stitch to end of round. (16sts)
3. *sc, 2sc in next st*, repeat to end of round. (24sts)
4. *sc 3, 2sc in next st*, repeat to end of round. (30sts) 3”
5. *sc 4, 2sc in next st*, repeat to end of round. (36sts) 3.5”
6. *sc 5, 2sc in next st*, repeat to end of round. (42sts) 4”
7. *sc 6, 2sc in next st,*, repeat to end of round. (48sts) 4.5”
8. *sc 7, 2sc in next st*, repeat to end of round. (54sts) 5”
9. *sc 8, 2sc in next st*, repeat to end of round. (60sts) 5.5”
10. Sc in the next st, sl st in the next st. This is the new start of the round. Ch 1, sc in the same st, dc in the next st, *sc in the next st, dc in the next st*, repeat to end of round, sl st to join. Stitch count remains the same.
11. Ch 1, sc in same st, *dc in the st one row below, sc in the next st (on current row)*, repeat until 1 st remains, dc in the st one row below, sl st to join.
12. Ch 1, *dc in the st one row below, sc in the next st (on current row)*, repeat to end of round, sl st to join.
13. Ch 1, sc in same st, *dc in the st one row below, sc in the next st (on current row)*, repeat until 1 st remains, dc in the st one row below, sl st to join.
14. Ch 1, *dc in the st one row below, sc in the next st (on current row)*, repeat to end of round, sl st to join.
15. Ch 1, sc in same st, *dc in the st one row below, sc in the next st (on current row)*, repeat until 1 st remains, dc in the st one row below, sl st to join.
16. Ch 1, *dc in the st one row below, sc in the next st (on current row)*, repeat to end of round, sl st to join.
17. Ch 1, sc in same st, *dc in the st one row below, sc in the next st (on current row)*, repeat until 1 st remains, dc in the st one row below, sl st to join.
18. Ch 1, *dc in the st one row below, sc in the next st (on current row)*, repeat to end of round, sl st to join.
19. Ch 1, sc in same st, *dc in the st one row below, sc in the next st (on current row)*, repeat until 1 st remains, dc in the st one row below, sl st to join.
20. Ch 1, *dc in the st one row below, sc in the next st (on current row)*, repeat to end of round, sl st to join.
21. Ch 1, sc in same st, *dc in the st one row below, sc in the next st (on current row)*, repeat until 1 st remains, dc in the st one row below, sl st to join.
22-23. Ch 1, sc in the same st, FPHDC around the post, *sc in the next st, FPHDC around the post*, repeat to end of round, sl st to join.
24-25. Ch 1, *BPHDC around the next post, FPHDC around the next post*, repeat to end of round, sl st to join.
If additional length is neede, repeat step 25.
Finish off and weave in ends. Follow instructions below for adding a pompom if desired.
Pompom (optional):
Cut a piece of matching yarn 12” long and set aside. This will be used to wrap around the middle of the pompom and sew the pompom to the hat.
Spread your fingers apart and wrap the yarn around your fingers approximately 80 times. Carefully slide the loops off of your hand. Use the 12” piece of yarn to tie around the middle of the loops. Make sure this is as tight as possible. Cut the loops and trim the pompom as desired, making sure you do not cut the yarn you used to tie around the middle.
With a crochet hook, pull the yarn tails through 2 different sts next to each other at the top center of the hat. From the inside of the hat, pull the yarn tails and tie a secure knot.
Please visit Snappy Tots online for giveaways, new release announcements, events and fun.
- Blog: http://snappy-tots.com
- Shop: http://shop.snappy-tots.com
- Facebook: http://www.facebook.com/snappytots
- Pinterest: http://www.pinterest.com/snappytots
- Instagram: http://www.instagram.com/snappytots
If you have any questions, comments or suggestions please email [email protected].
I hope you will enjoy this pattern and I would love to see what you make. Please share pix as a Ravelry project or tag me in social media posts by adding #snappytots.
I hope you have a wonderful day!
Pin To Save For Later

Pizza Zustellung Nacht war super! Selbst um Mitternacht kam die Pizza schnell und hei?.