Free Pattern: Tic Tac Toe Cloths
I love creating squishy soft things and the waffle stitch is one of my favorites because it does just that! Last year while designing my “Snowtime Beanie” I wondered what a waffle cloth worked in the round would be like. Well I gave it a try and…

I love it! And so did my testers. I hope you will too.
Let’s Crochet it Together
A video of this pattern will be available this week!
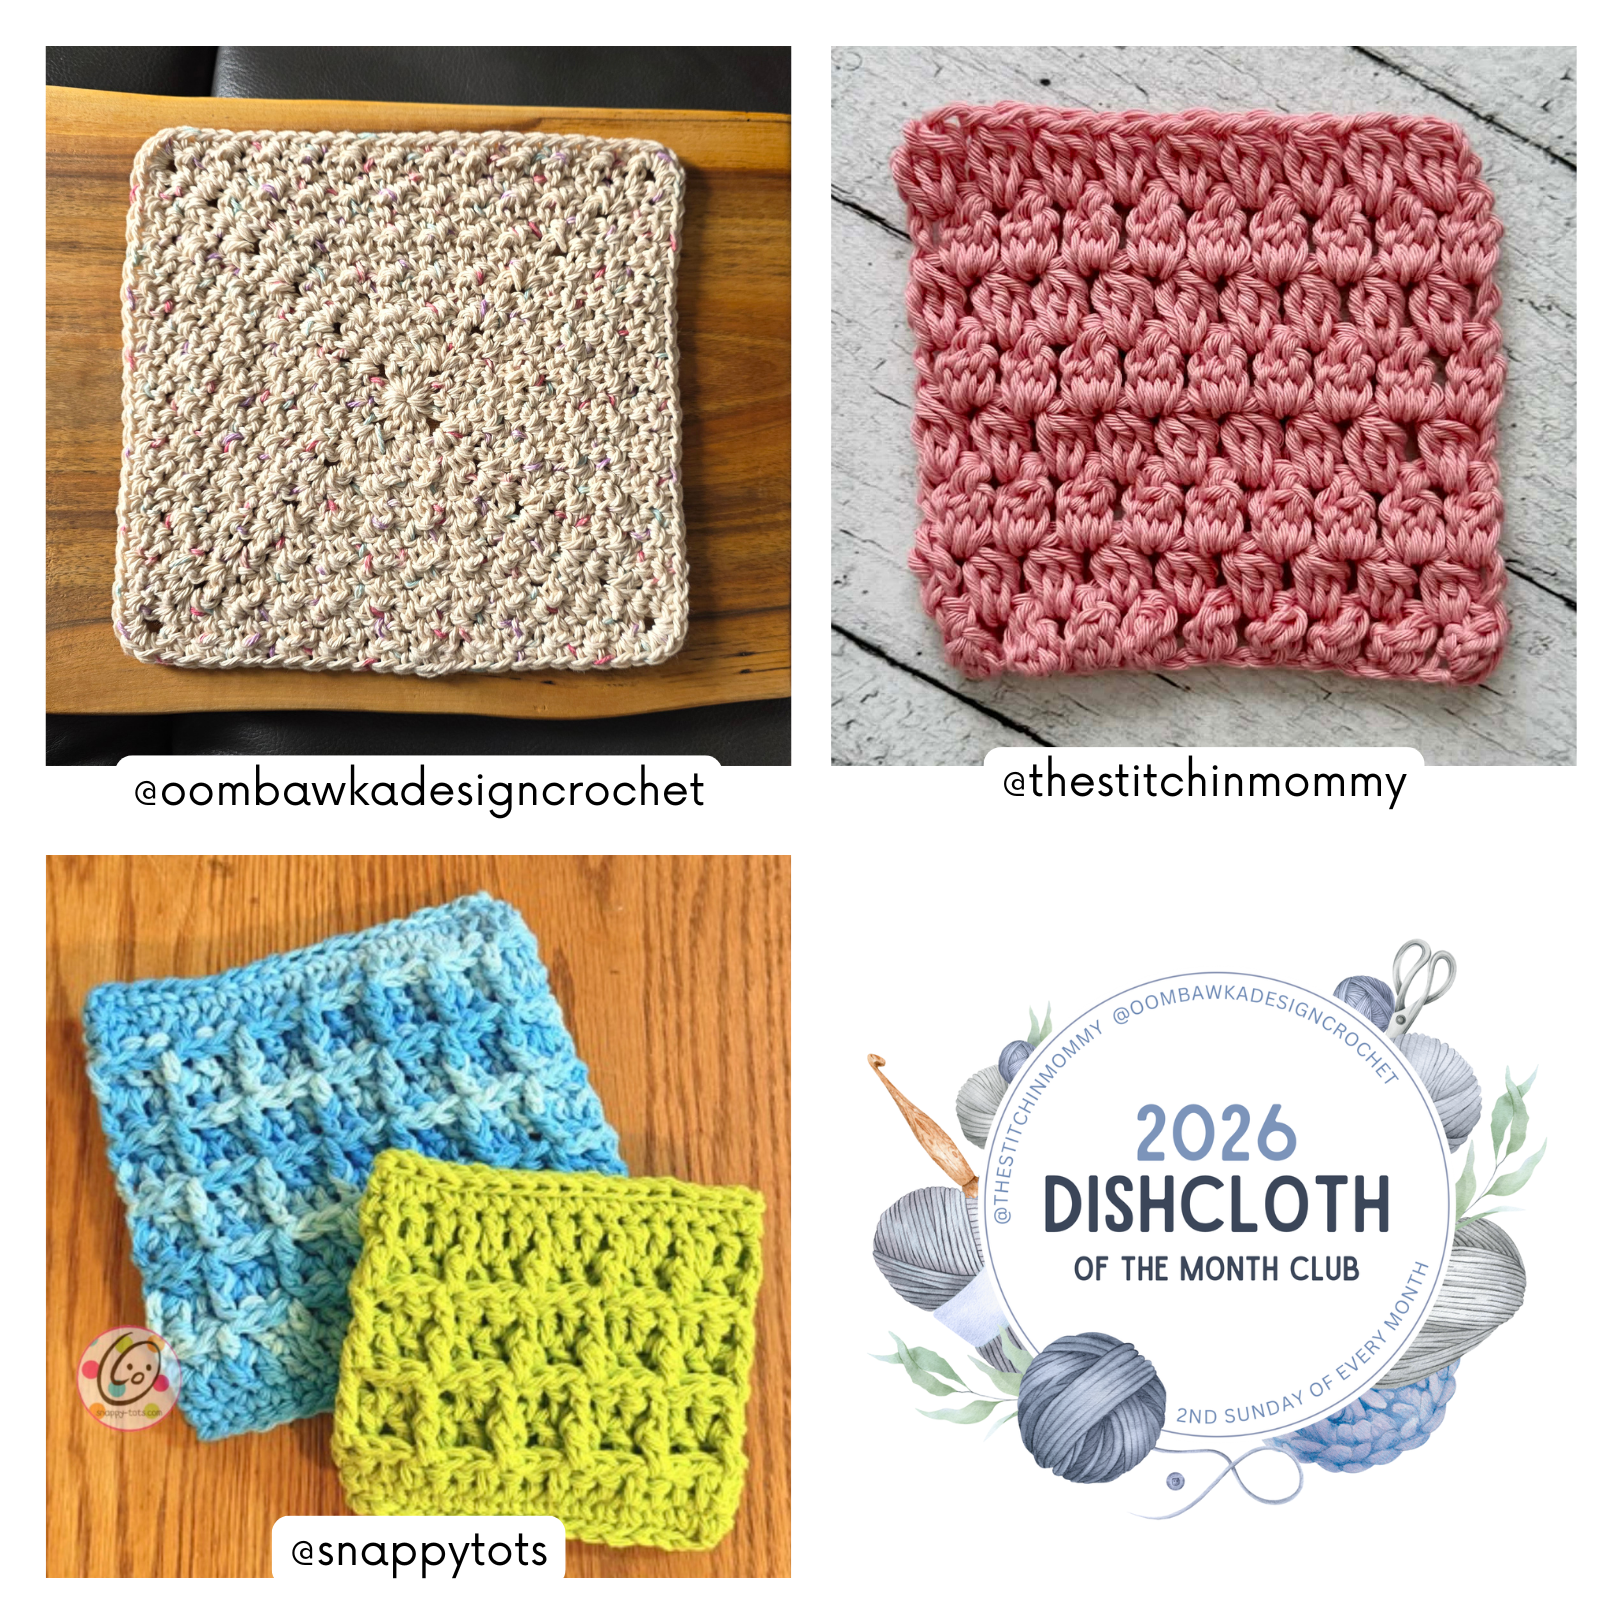
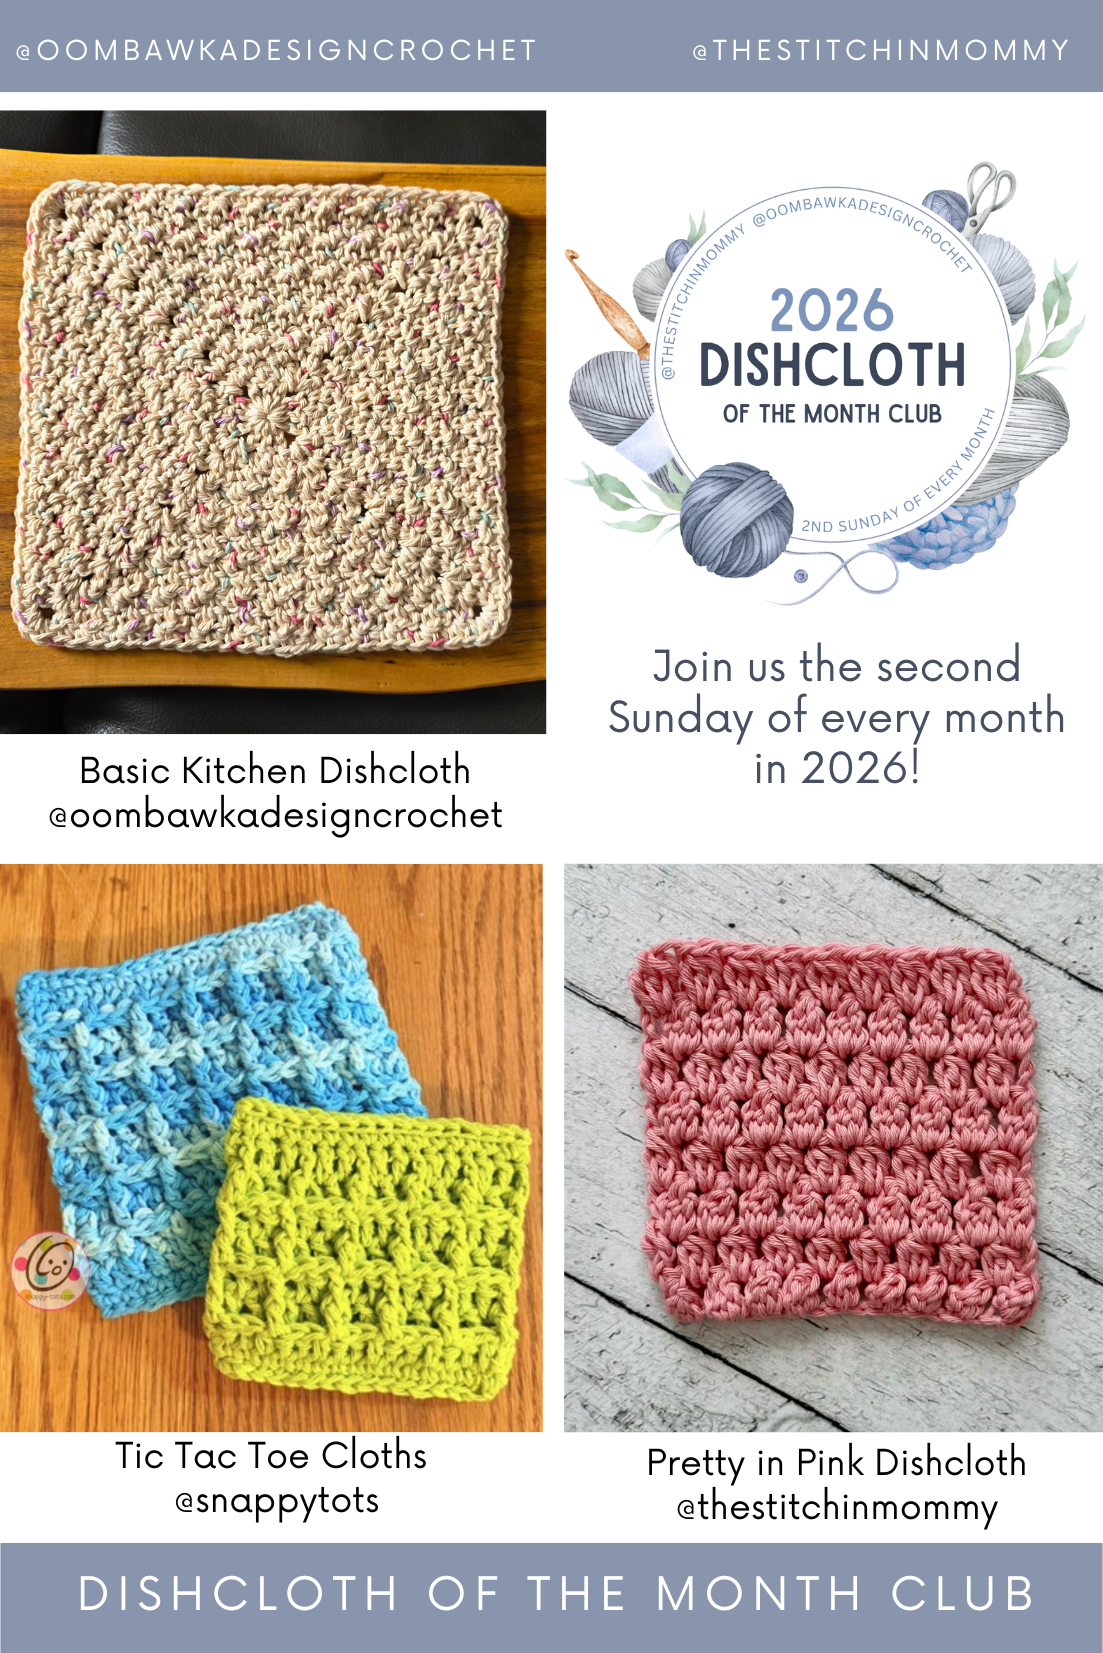
Dishcloth of the Month CAL
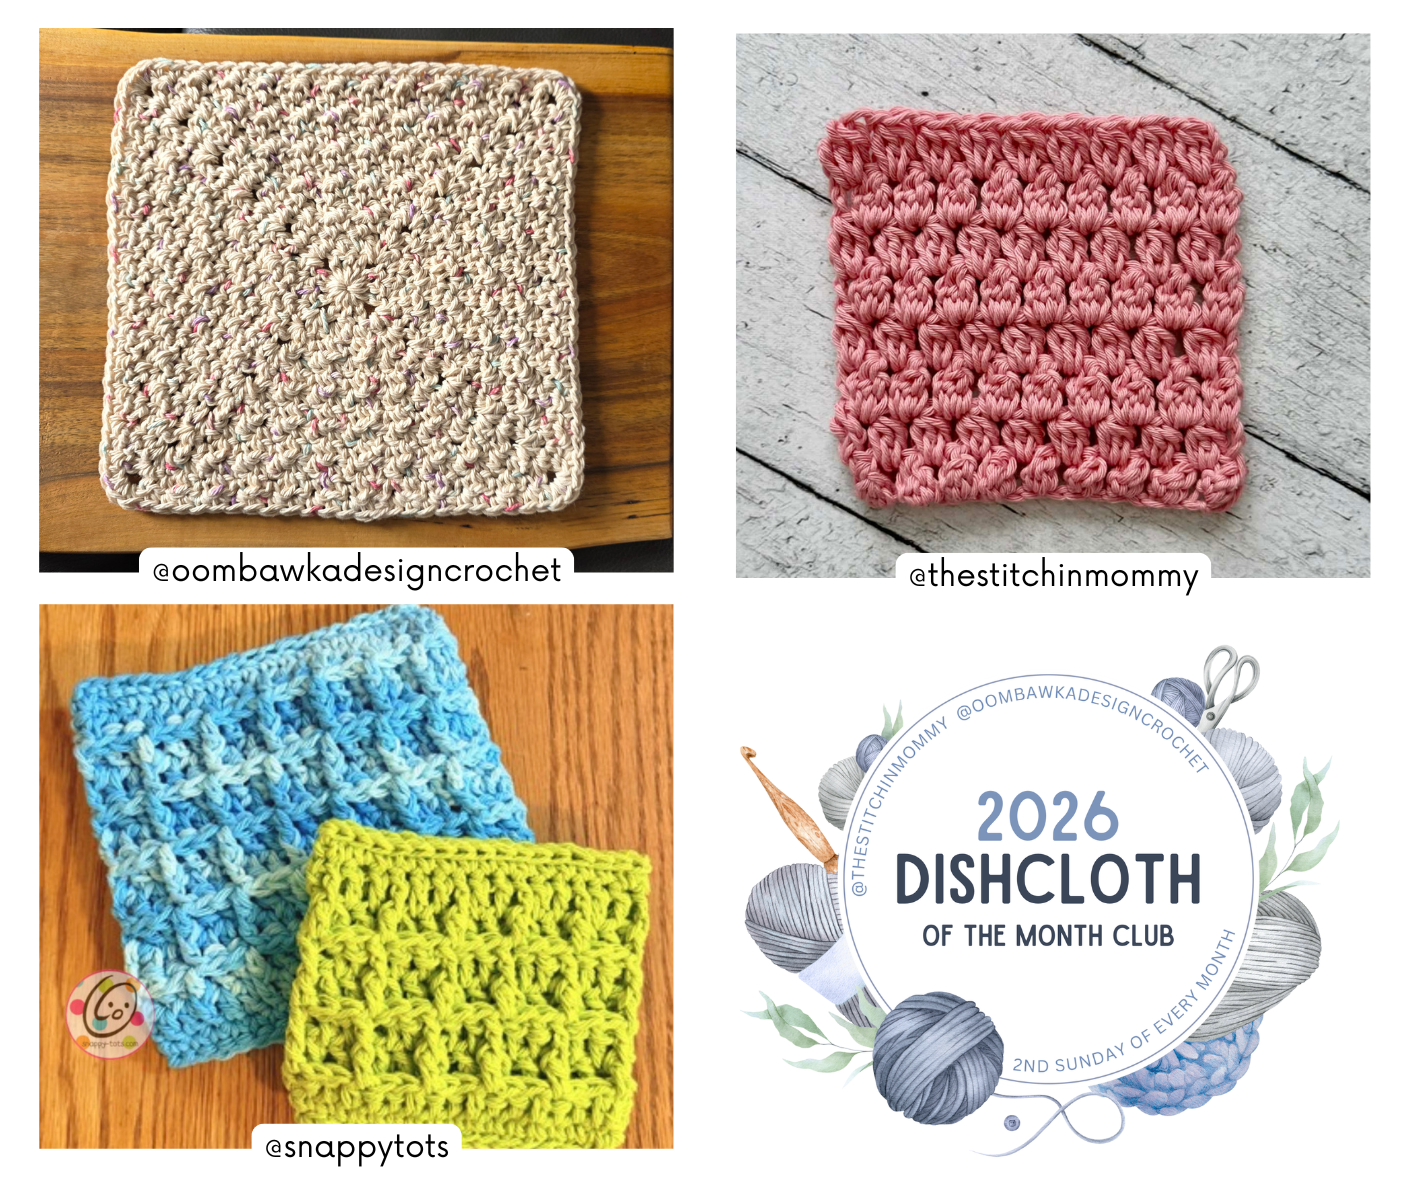
Each month in 2026, three cloth patterns will be shared as part of The Dishcloth of the Month CAL. You can download a PDF copy of the pattern for FREE, but only for the first 24 hours.
FLASH FREEBIES: Click the links below to get the pdf for each pattern before the offer ends Monday February 9th at 11:59 pm ET.
- Oombawka Design Crochet (above top left)
- The Stitchin Mommy (above right)
- Snappy Tots (my pattern, above bottom left)
To get more information about the CAL, follow along for monthly freebies, and subscribe for reminders, visit The Stitchin Mommy and Oombawka Design Crochet. Please use the hashtag #DishclothCAL to share your progress with us.
Tic Tac Toe Cloths Crochet Pattern
This pattern is available for free below.
Materials & Details
- Yarn: 75-100 yards 100% cotton yarn. Sample yarns: Sugar N Cream Hot Cream, Swimming Pool
- Crochet Hook: I (5.5mm)
- Notions: Yarn needle for weaving in ends
- Measurements Large (blue): 5.5” square Small (green): 4” tall x 4.75” wide
Tips
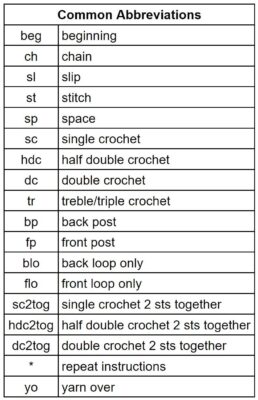
- First stitch of each row is worked into the same stitch as the turning chain.
- Numbers at the beginning of each line may refer to steps and not indicate number of rows.
- Stitch count remains the same unless noted at end of row/round.
- If you have any questions about this pattern please contact [email protected].
Directions – Large (blue)
These are worked in the round, creating a double thick/layered cloth.
1. With an I hook and worsted weight yarn (Sample: Swimming Pool), ch 42, sl st in first ch to join for working in the round, making sure chain is not twisted. (42sts)
Note: this is different from most dishcloths. You are probably used to working cloths back and forth in rows. This is worked in the round. Please make sure you read step one correctly.
2. Ch 1, sc in the same ch and in each ch to end of round, sl t to join.
3. Ch 1, hdc in same st and in each st to end of round, sl st to join.
4. Ch 1, dc in same st, *BPDC around each of the next 2 posts, DC in the next st*, repeat until 2 sts, BPDC around each of the next 2 posts, sl st to join.
5. Ch 1, *FPDC around the next post, DC 2*, repeat to end of round, sl st to join.
6. Repeat steps 4-5 four more times (or until cloth is desired length).
7. Ch 1, sc in each st to end of round, sl st to join.
8. Flatten the piece, making sure each side edge has a straight line of post st ribs. We will be sewing the top and bottom layers together to finish off the cloth.
Tips: This step is worked into both layers, at the same time, seaming them together.
- This is NOT worked “around” the top as if creating a round.
- Do not ch at the beginning of this step.
Working through both layers at once, sl st in each st to end of row. (21sts) Finish off and weave in ends.
Attach yarn to the opposite edge and repeat to seam together the layers.
Directions – Small (green)
These are worked in the round, creating a double thick/layered cloth.
1. With an I hook and worsted weight yarn (Sample: Hot Green), ch 33, sl st in first ch to join for working in the round, making sure chain is not twisted. (33sts)
Note: this is different from most dishcloths. You are probably used to working cloths back and forth in rows. This is worked in the round. Please make sure you read step one correctly.
2. Ch 1, sc in the same ch and in each ch to end of round, sl t to join.
3. Ch 1, hdc in same st and in each st to end of round, sl st to join.
4. Ch 1, dc in same st, *BPDC around each of the next 2 posts, DC in the next st*, repeat until 2 sts, BPDC around each of the next 2 posts, sl st to join.
5. Ch 1, *FPDC around the next post, DC 2*, repeat to end of round, sl st to join.
6. Repeat steps 4-5 two more times (or until cloth is desired length).
7. Ch 1, sc in each st to end of round, sl st to join.
8. Flatten the piece, making sure each side edge has a straight line of post st ribs. We will be sewing the top and bottom layers together to finish off the cloth.
Tips: This step is worked into both layers, at the same time, seaming them together.
- This is NOT worked “around” the top as if creating a round.
- Do not ch at the beginning of this step.
Working through both layers at once, sl st in each st to end of row. (16sts – since the round starts with an odd number of sts one st will be skipped) Finish off and weave in ends.
Attach yarn to the opposite edge and repeat to seam together the layers.
Custom Size
Create any size cloth by starting with any length chain that is a multiple of 3.
Follow directions as written, repeating steps 4-5 until desired length.
Lots of snappiness…
- Weekly Newsletter and Freebie Files:https://snappy-tots.com/birthdays
- Blog:https://snappy-tots.com
- Ravelry Shop:https://shop.snappy-tots.com
- Etsy Shop: https://heidiyatespatterns.etsy.com
- Facebook:https://www.facebook.com/snappytots
- Pinterest:https://www.pinterest.com/snappytots
- Instagram:https://www.instagram.com/snappytots
- Youtube: http://www.youtube.com/@TotallySnappyTots
- Contact: [email protected]
I would love to see what you make from my designs. Please tag me in your social media posts by adding #snappytots.
If you ever have a question or need help in any way I hope you will send me an email. I want to make sure you enjoy my projects.
Pin To Save For Later