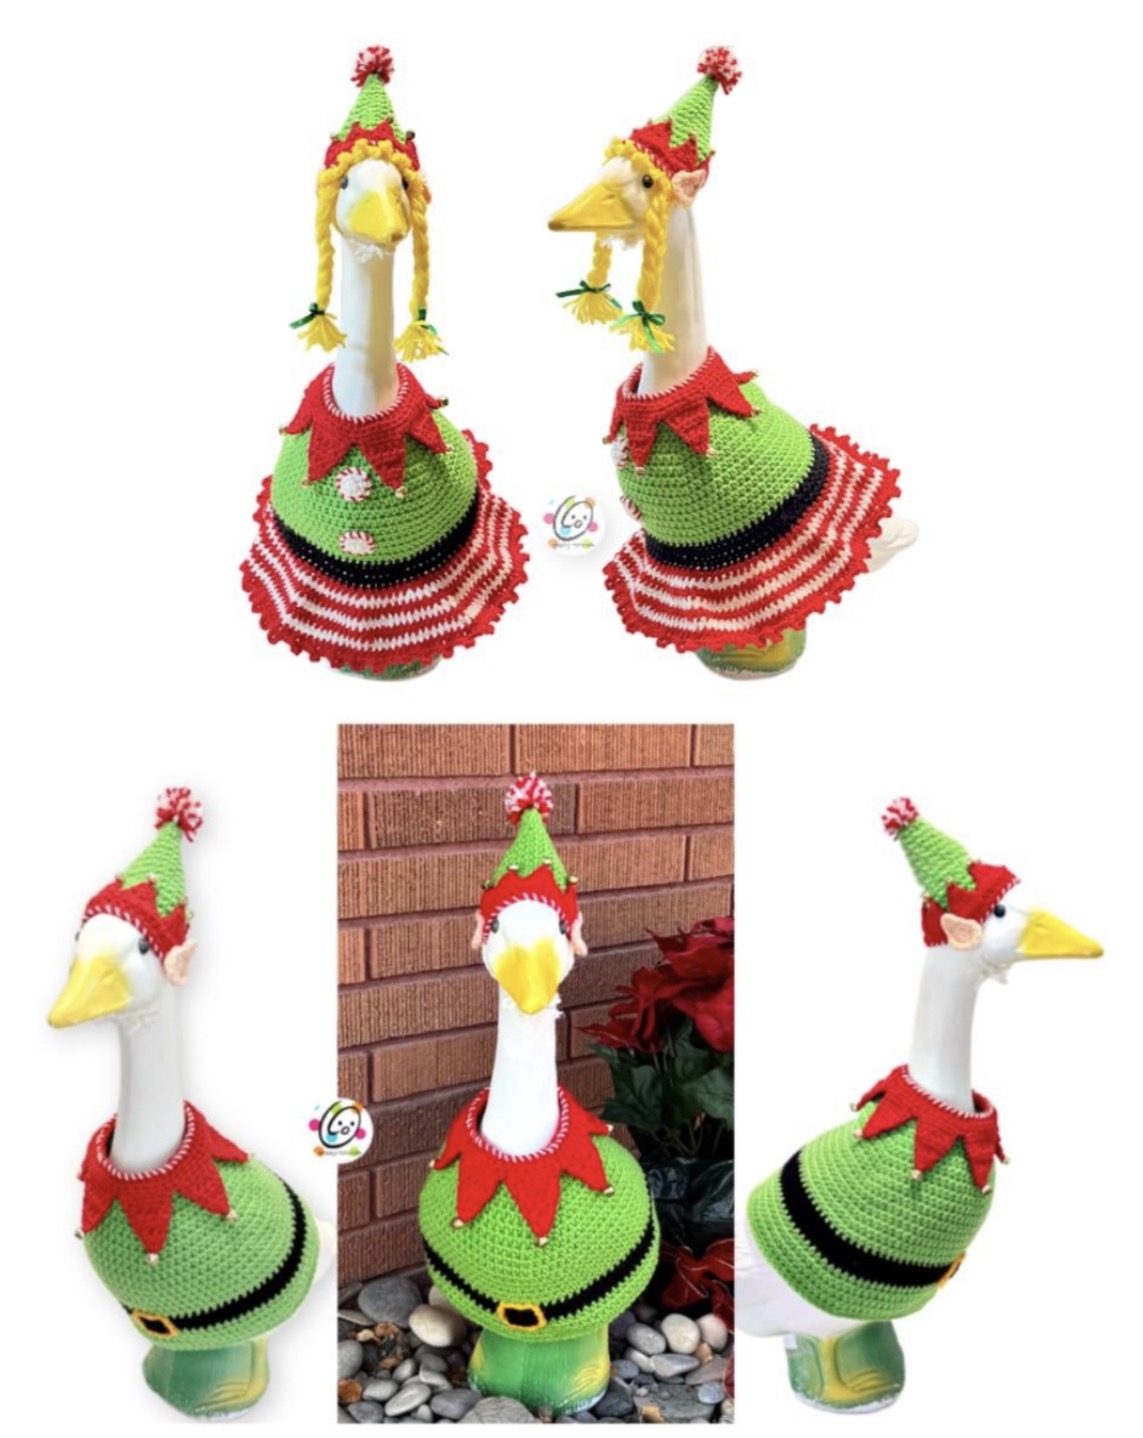
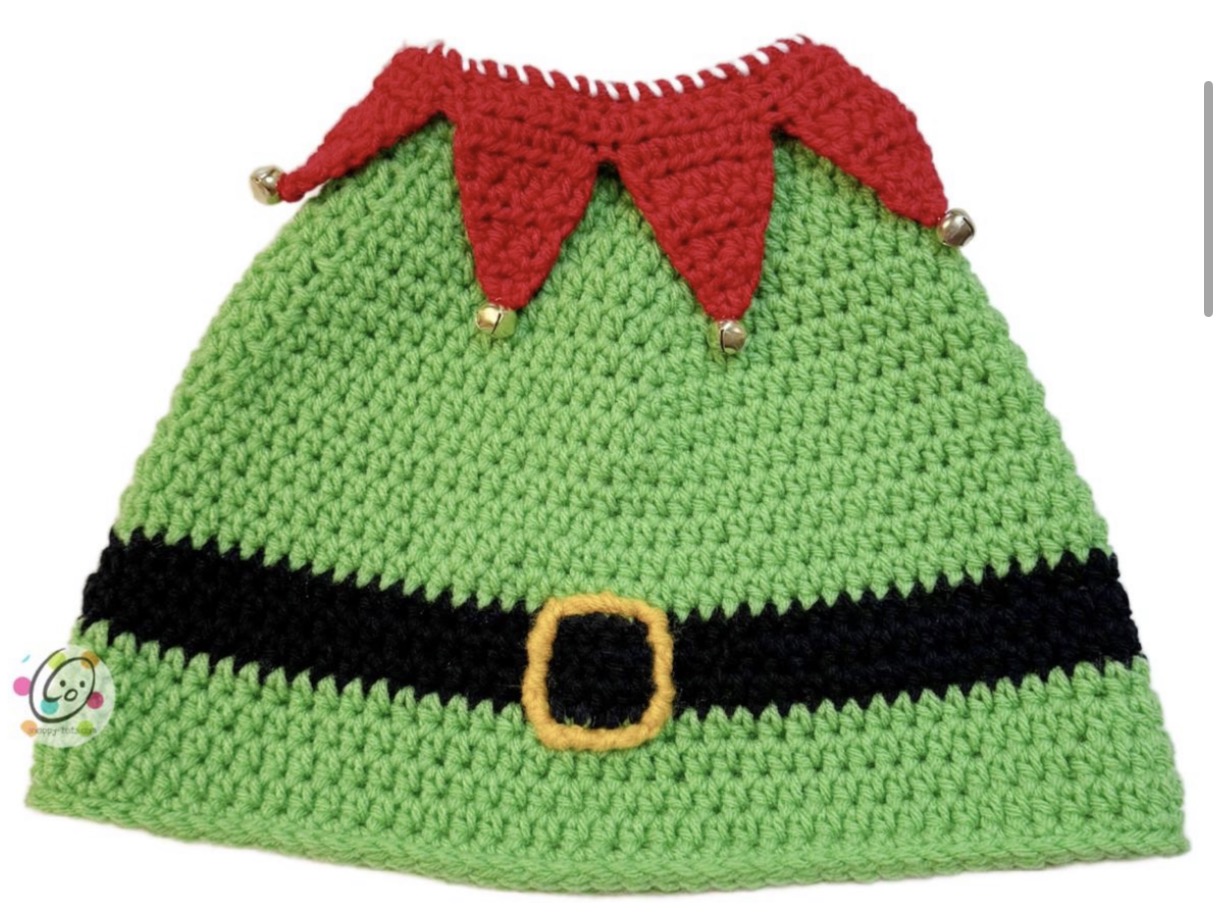
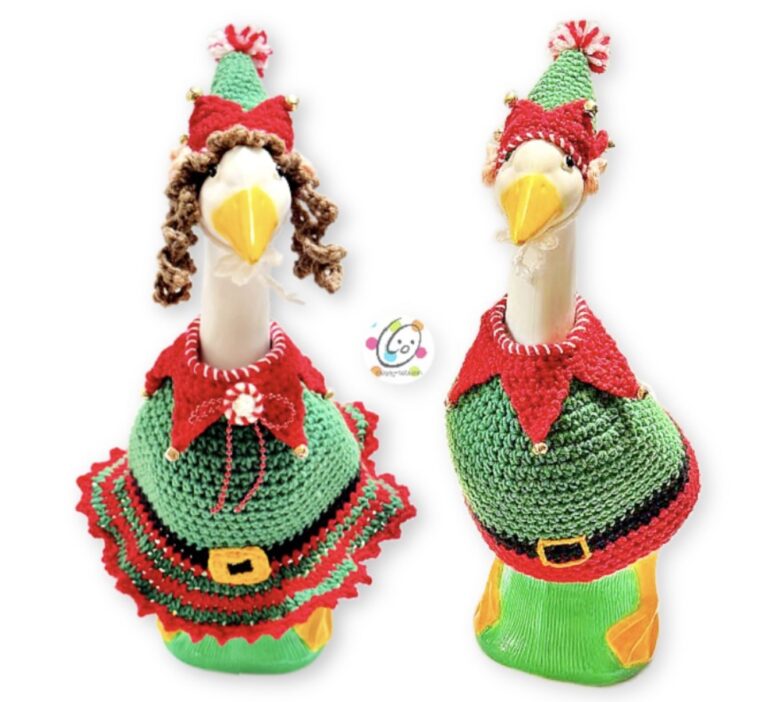
The elves have arrived in Snappyland, and this time they’re dressing the big geese! These festive crochet outfits include a pointed elf collar, black belt, and matching Christmas hat.
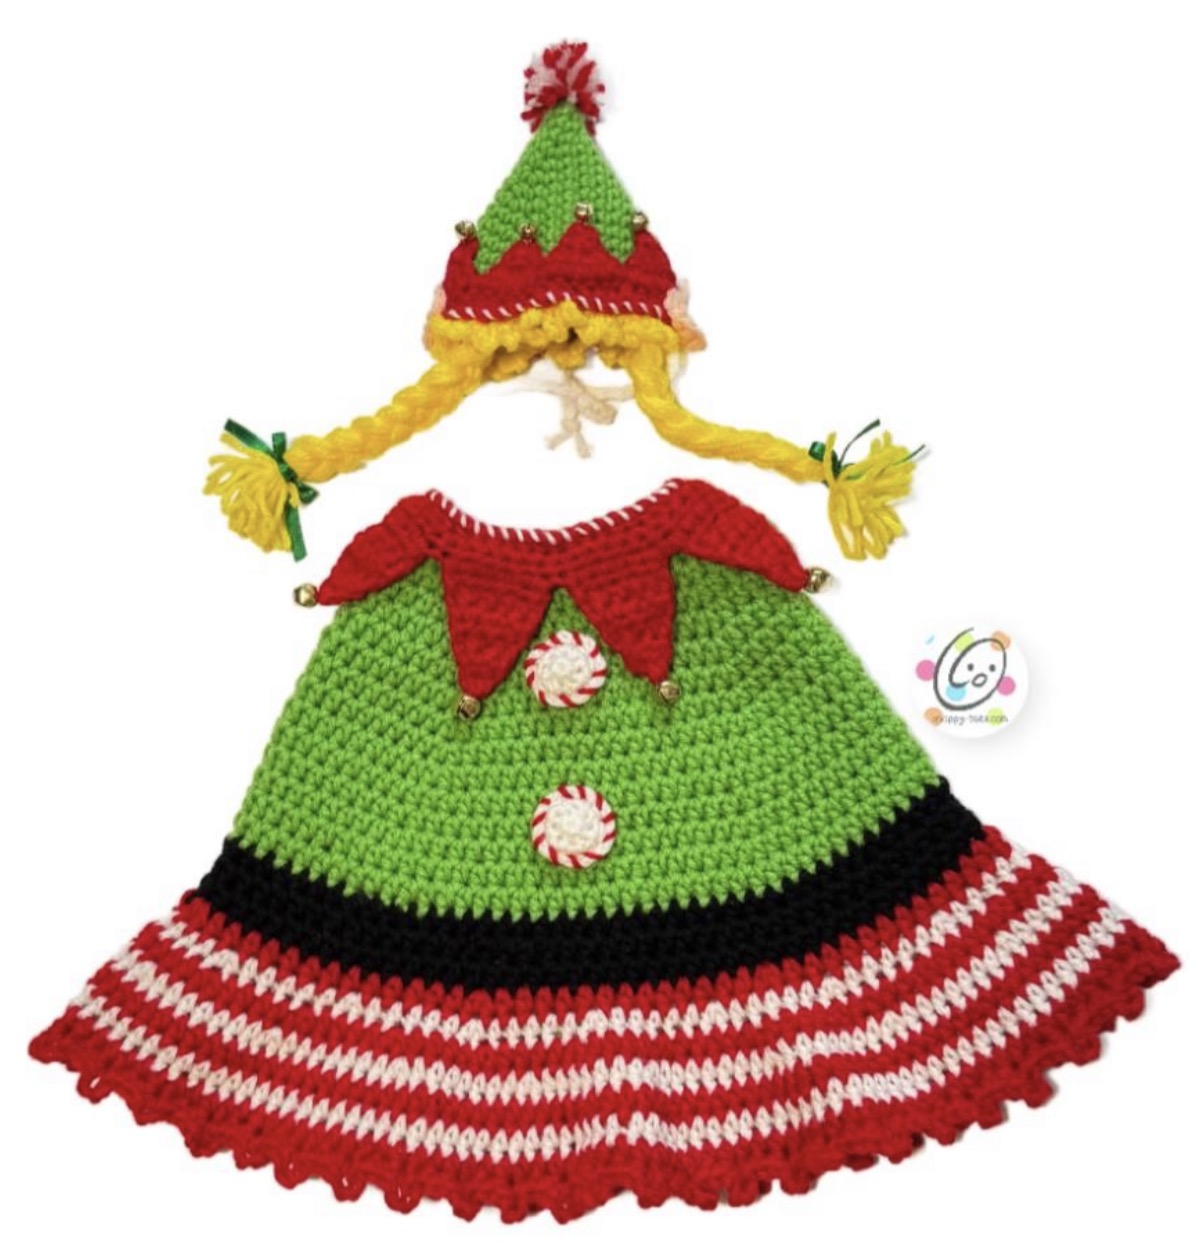
Choose the straight sweater for a classic boy elf or the flared striped skirt for a girl elf. Add optional braids, ringlets, ears, jingle bells, and candy decorations to give your goose its own Christmas personality!
Prefer a Printable PDF?
Enjoy the free crochet instructions below, or purchase the convenient downloadable pattern to print and keep.
Choose Option A for the straight sweater. Add the black belt, golden buckle, pointed collar, and elf hat.
Girl Elf
Choose Option B for the flared red and white striped skirt. Add optional hair, braids, ringlets, and elf ears.
Size note: The original pattern was designed for a 23-inch goose statue. Check the finished measurements and gauge when adapting the outfit for another size.
Materials
● Yarn: worsted weight in the following colors – 150 yards bright green, 40 yards black, 50 yards red, 10 yards gold, 10 yards white, 10 yards lt peach
Sample yarns: Red Heart Super Saver Spring Green, Cherry, Saffron, White, Black; I Love This Yarn Lt Peach
● Crochet Hook: H (5mm), I (5.5mm)
● Supplies: Yarn needle for weaving in ends
● Optional: Measuring tape, scissors, 7 small jingle bells (¼”); 7 medium jingle bells (½”), 24” thin ribbon for bows at ends of braids.
Measurements
● Finished Measurements:
Suit – 10” from top to bottom, 14” across bottom edge
● Gauge – 4” with an I hook = 14 hdc sts and 9.5 hdc rounds
Tips
● The first stitch of each row is worked into the same stitch as the turning chain unless noted.
● Numbers at the beginning of each line may refer to steps and not indicate number of rows.
● Stitch count remains the same unless noted at end of row/round.
● If you have any questions about this pattern please contact [email protected].
This is designed for a 23” goose statue like the one sold by Miles Kimball.
Sweater – Both Options
This starts at the neck edge and is worked in rounds to the bottom edge. The collar is added after suit is complete.
Instructions are written for color changes as shown in the sample. Substitute colors as desired.
1. With an I hook and worsted weight yarn (Sample: bright green), ch 44, sl st in the last ch from hook to form a circle. Make sure the chain is not twisted. (44sts)
2. Ch 1, *hdc 10, 2hdc in the next st*, repeat to end of round, sl st to join. (48sts)
3. Ch 1, *hdc 11, 2hdc in the next st*, repeat to end of round, sl st to join. (52sts)
4. Ch 1, *hdc 12, 2hdc in the next st*, repeat to end of round, sl st to join. (56sts)
5. Ch 1, *hdc 13, 2hdc in the next st*, repeat to end of round, sl st to join. (60sts)
6. Ch 1, *hdc 14, 2hdc in the next st*, repeat to end of round, sl st to join. (64sts)
7. Ch 1, *hdc 15, 2hdc in the next st*, repeat to end of round, sl st to join. (68sts)
8. Ch 1, *hdc 16, 2hdc in the next st*, repeat to end of round, sl st to join. (72sts)
9. Ch 1, *hdc 17, 2hdc in the next st*, repeat to end of round, sl st to join. (76sts)
10-11. Ch 1, hdc in the same st and in each st to end of round, sl st to join.
12. Ch 1, *hdc 18, 2hdc in the next st*, repeat to end of round, sl st to join. (80sts)
13. Ch 1, *hdc 39, 2hdc in the next st*, repeat once, sl st to join. (82sts)
14. Ch 1, hdc in the same st and in each st to end of round, sl st to join.
15. Finish off the current yarn and change to black yarn for the belt. Ch 1, hdc in the same st and in each st to end of round, sl st to join.
16. Ch 1, *hdc 40, 2hdc in the next st*, repeat once, sl st to join. (84sts)
17. Ch 1, hdc in the same st and in each st to end of round, sl st to join.
Choose Your Sweater Finish
At this point, choose one of the following options for finishing the sweater:
Option A: straight
18. Finish off the current yarn and change to main color (Sample: bright green). Ch 1, hdc in the same st and in each st to end of round, sl st to join.
19. Ch 1, *hdc 41, 2hdc in the next st*, repeat once, sl st to join. (86sts)
20-22. Ch 1, hdc in the same st and in each st to end of round, sl st to join.
23. Sl st in each st to end of round, finish off and weave in ends.
Option B: skirt (see photo on last page)
18. Change to worsted weight yarn for the first stripe after the belt (Sample: Red). Ch 1, *hdc 13, 2hdc in the next st*, repeat to end of round, sl st to join. (90sts)
19. Change to worsted weight yarn for the next stripe (Sample: White). Ch 1, *hdc 5, 2hdc in the next st*, repeat to end of round, sl st to join. (105sts)
20. Change back to the first color (Sample: Red). Ch 1, hdc 5, *2hdc in the next st, hdc 4*, repeat to end of round, sl st to join. (125sts)
21. Change back to the second color (Sample: White). Ch 1, hdc 5, *2hdc in the next st, hdc 7*, repeat to end of round, sl st to join. (140sts)
22. Change back to the first color (Sample: Red). Ch 1, hdc in each st to end of round, sl st to join.
23. Change back to the second color (Sample: White). Ch 1, hdc in each st to end of round, sl st to join.
24. Change back to the first color (Sample: Red). Ch 1, hdc in each st to end of round, sl st to join.
Finish off the current yarn and change to the first color.
24. Ch 1, *sc 3, ch 4, sl st in the same st*, repeat to end of round, sl st to join. Finish off and weave in ends.
Buckle
Buckle: Choose from one of the following
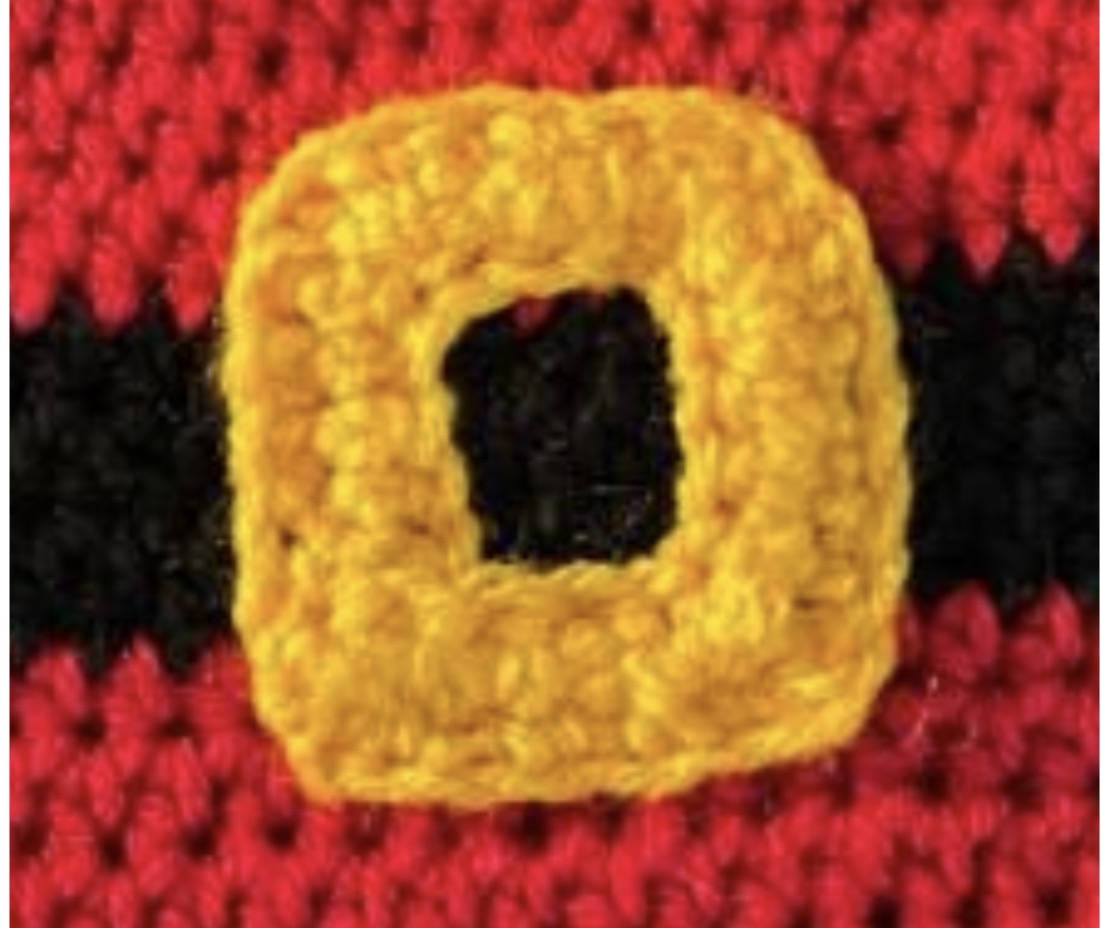
Crocheted version: photo at right
1. With an H hook and worsted weight yarn (Sample: golden yellow), ch 29, sc in 2nd ch from hook and in each ch across. (28sts)
2. Ch 1, turn, *sc 3, sc2tog, sc2tog*, repeat to end of row. (20sts) Finish off, leaving a long yarn tail for sewing in place.
Finger shape the buckle piece into a square, overlapping the short ends and centered over the belt section.
With a yarn needle, use the yarn tail to sew the buckle in place.
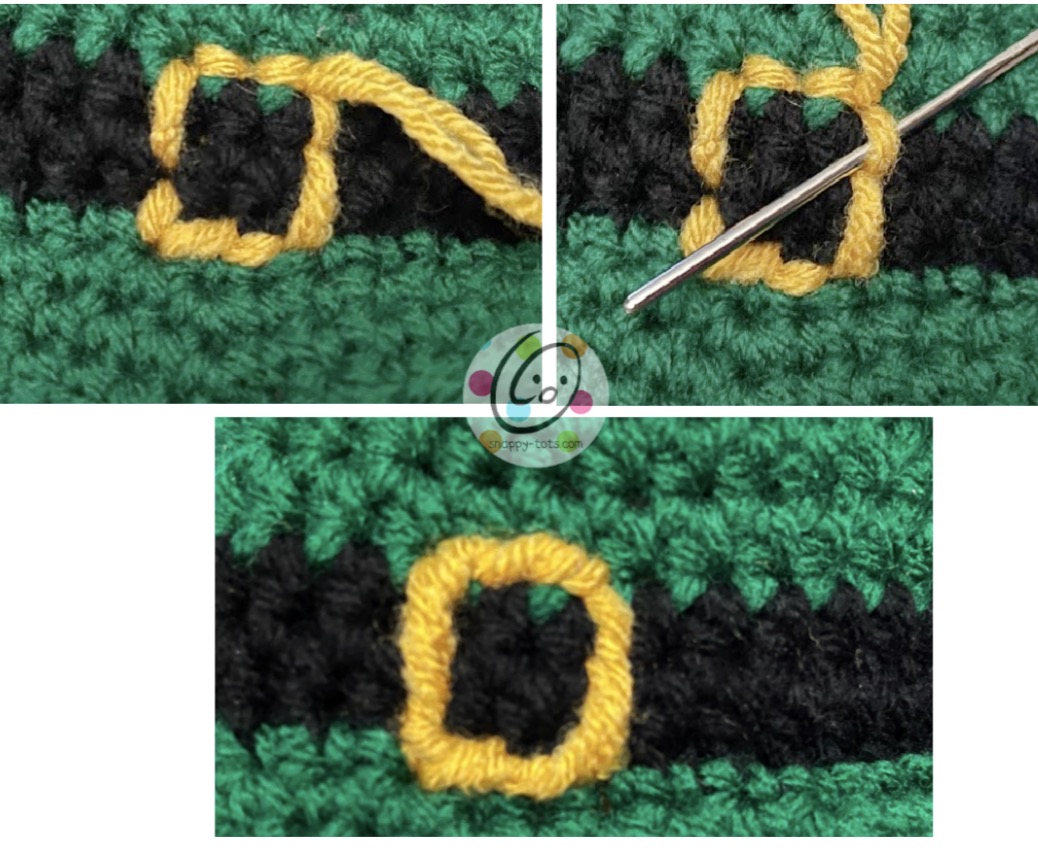
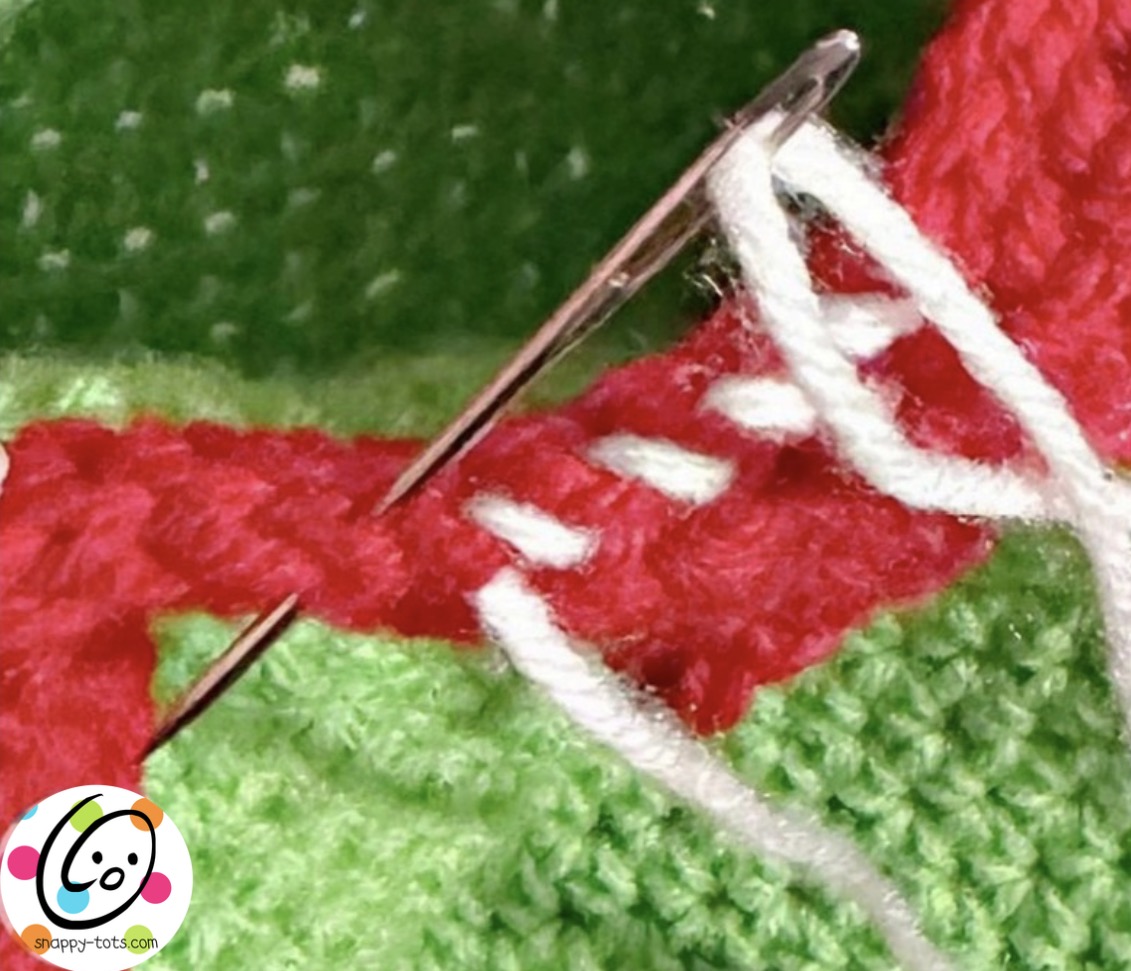
Stitched version: photo at right
Pull a long piece of worsted weight yarn (Sample: golden yellow) through a yarn needle until the ends match up. Tie a knot.
● Stitch a square around the stripe to create the buckle with this double strand of yarn. Photo top left.
● After the square is complete, work on TOP of the suit(not up and down to the inside of the suit), slide the yarn needle under the next st. Photo top right.
● Pull the needle through until the yarn is snug. Repeat for each st working around the square. Photo below, bottom.
Collar
1. With an I hook, attach worsted weight yarn (Sample: red) to a stitch on the top edge (beginning round) of the suit. Ch 1, *sc 20, sc2tog*, repeat once, sl st to join. (42sts)
2. Ch 1, FPSC around each post to end of round, sl st to join. Note: yes I know there isn’t much of a post with an sc st, but this works really well to create the peaks and have the collar lay flat.
3. Ch 1, hdc in the same st and in each st to end of round, sl st to join.
4. Ch 1, hdc in the same st, hdc 5. (6sts) Leave remaining sts unworked.
5. Ch 1, turn, hdc2tog, hdc 4. (5sts)
6. Ch 1, turn, hdc2tog, hdc 3. (4sts)
7. Ch 1, turn, hdc2tog, hdc 2. (3sts)
8. Ch 1, turn, hdc2tog, hdc. (2sts)
9. Ch 1, turn, hdc2tog. Finish off and weave in ends.
10. Start in the next unused st on the collar left empty from step 4.
11. Repeat steps 4-9 six more times.
Finishing: This step is worked around the top/neck edge. With an I hook and yarn to match the collar sl st in each st to end of round. Finish off and weave in ends.
Trim: With a yarn needle and a long piece of worsted weight yarn (Sample: White), wrap around the sts on the top edge of the neck.
Bells: Use a sewing needle and matching thread to sew a small bell at the end of each poin.
Hat
1. With an I hook and worsted weight yarn (Sample: green), start with a magic circle of 6 sc sts (or preferred method of starting a circle of 6 sc sts), pull closed and place a marker for working in the round. (6sts)
2. Sc in each st to end of round.
3. *2sc in the next st, sc 2*, repeat once. (8sts)
4. *2sc in the next st, sc 3*, repeat once. (10sts)
5. *2sc in the next st, sc 4*, repeat once. (12sts)
6. *2sc in the next st, sc 5*, repeat once. (14sts)
7. *2sc in the next st, sc 6*, repeat once. (16sts)
8. *2sc in the next st, sc 7*, repeat once. (18sts)
9. *2sc in the next st, sc 8*, repeat once. (20sts)
10. *2sc in the next st, sc 9*, repeat once. (22sts)
11. *2sc in the next st, sc 10*, repeat once. (24sts)
12. *2sc in the next st, sc 11*, repeat once. (26sts)
13. *2sc in the next st, sc 12*, repeat once. (28sts)
14. *2sc in the next st, sc 13*, repeat once. (30sts)
15. *2sc in the next st, sc 5*, repeat once. (35sts)
16. Sl st in the next st. Finish off the current yarn and change to worsted weight yarn (Sample: Red). This is the new start of the round. Ch 1, sc in the same st and in each st to end of round, sl st to join.
17. Ch 1, FPSC around each post to end of round, sl st to join.
18. Ch 1, sc in the same st, sc 4. (5sts) Leave remaining sts unworked.
19. Ch 1, turn, sc2tog, sc, sc2tog. (3sts)
20. Ch 1, turn, sc2tog, sc. (2sts)
21. Ch 1, turn, sc2tog. Finish off and weave in ends.
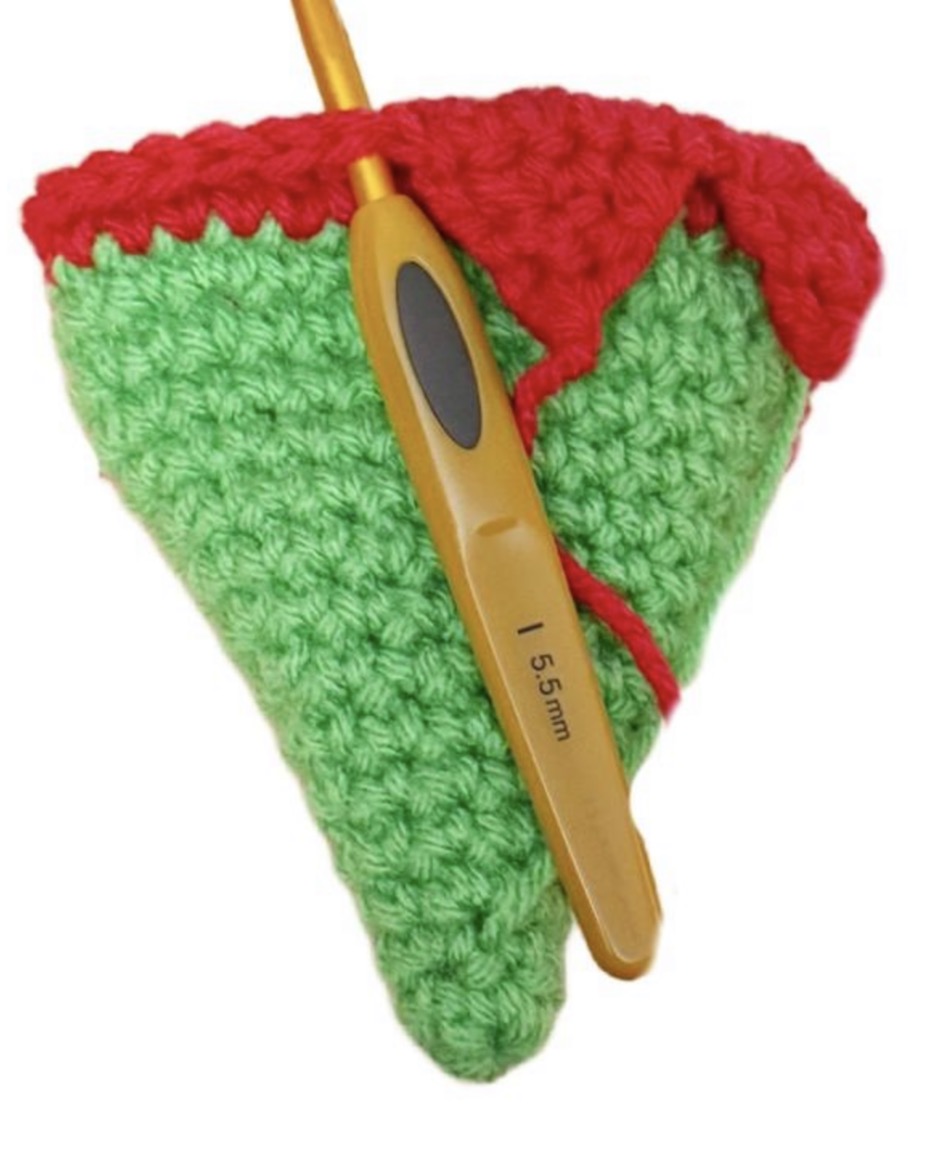
22. This step starts the next point. Start in the next unused st on the collar left empty from step 18. See photo at right.
23. Repeat steps 18-21 six more times.
Hat Finishing and Pompom
Finishing: This step is worked around the bottom edge of the hat. With an I hook and yarn to match the bottom edge, ch 1, sc in the same st and in each st to end of round, sl st to join. Finish off and weave in ends.
Trim: With a yarn needle and a long piece of worsted weight yarn (Sample: White), wrap around the sts on the bottom edge of the hat.
Bells: Use a sewing needle and matching thread to sew a small bell at the end of each poin.
Pompom: Cut a piece of matching yarn 8” long. This will be used to tie around the middle of the pompom. Set aside.
1. Wrap 1-2 strands of yarn (Sample: Red, White) around 4 fingers of your hand 8-12 times.
2. Carefully slide the loops off your hand.
3. Use the 8” piece to wrap around the middle of the yarn loops and snugly tie a knot.
4. Hold onto the ends of this piece of yarn.
5. Trim the loops and pom as desired.
6. Use the yarn tails to tie the pompom to the tip of the hat.
Hair (optional)
This is a separate piece that is crocheted and then sewn to the inside of the hat. This could be used with other hats as well.
1. With an H hook and yarn color for the hair (Sample: Yellow), ch 29, sc in the 2nd ch from hook and in each ch across. (28sts)
2. Turn, *ch 4, sl st in next st*, repeat to end of row. Finish off and weave in ends.
Use a yarn needle and yarn that matches the hat to sew the straight edge of the hair inside the bottom edge of the hat. Only the loop part should stick out from under the hat edge.
Optional – extra hair. Choose one of the following:
Ringlets:
With an H hook and worsted weight yarn for the hair, ch 40, 2sc in the 2nd ch from hook, *sk 1, 3sc in the next ch*, repeat to end of chain. Finish off, leaving yarn tails at each end.
Fold the ringlets in half and use the yarn tails to tie the end in the same spot as the chin strap.
Braids (make 2)
Cut 12 strands of yarn (same color as hair) 20” long and one piece 6” long (to wrap around bottom of braid). Pull strands through sts at the side of the headband, next to the hair section. Divide in thirds and braid hair strands. Wrap small strand around bottom of braid and tie a knot.
Optional: Tie a small piece of ribbon around the bottom of the braid.
Repeat for second braid.
Chin Strap
Fold the hat in half to find the placement for the ties. With an I hook and ww yarn (white to match the goose), attach the yarn to an inside loop (so it doesn’t show on the outside of the hat).
Ch 30. Finish off and tie a knot in the end of the chain. Repeat for the opposite side. When ready, place the hat on the head and use the ties to tie a bow under the chin.
TIP: When crocheting the chin strap, I start with a long tail and work over the yarn tail. This way I don’t have a yarn tail to weave in at the end.
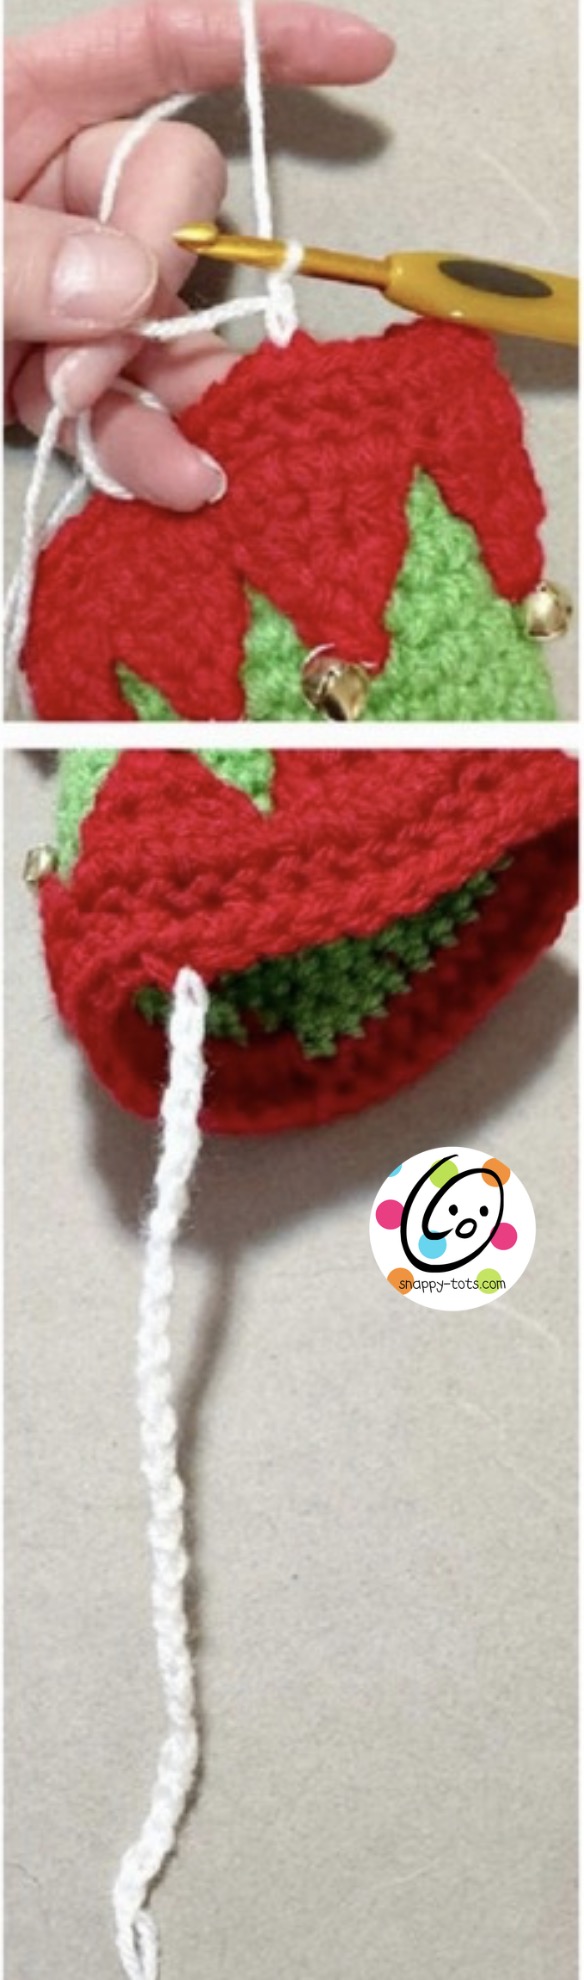
Pull up a loop in the designated st. *ch 1, place yarn tail in front of main yarn, ch 1, move yarn tail out of the way, ch 1*, repeat for 30 chains. See middle photo at right.
When chain is complete, tie the 2 yarn ends in a knot. Tie a knot in the end of the braid. I pull the yarn tails apart so the yarn ends aren’t so separate.
Candy (optional)
1. With an H hook and worsted weight yarn (Sample: white), start with a magic circle of 8 hdc sts (or preferred method of starting a circle of 8 hdc sts), pull closed and place a marker for working in the round. (8sts) Finish off, leaving a long tail for sewing in place.
2. Sl st in each st to end of round.
Use a yarn needle and red yarn to wrap around the outer edge of the circle.
Bow (optional): cut a piece of ribbon 12” long. Tie in a bow and place under the spot for the candy.
Use the yarn tail to sew the candy to the collar or make multiple and sew down the front for buttons.
Optional – Ears
Make 1 each so the ears both slant backwards when right side is up.
First Ear
1. With an H hook and flesh color yarn, create a magic circle of 8 sc sts (or preferred method for starting a circle of 8 sc sts), pull closed and sl st to join. (8sts)
2. Ch 1, *sc, 2sc in the next st*, repeat to end of round, sl st to join. (12sts)
3. Do not ch 1. (hdc, dc) in next st. Ch 1, sl st in side of the previous post, sl st in next st on circle and in each st around, sl st in tip of ear. Finish off, leaving a long tail for sewing ear to hat.
Second Ear
1. With an H hook and flesh color yarn, create a magic circle of 8 sc sts (or preferred method for starting a circle of 8 sc sts), pull closed and sl st to join. (8sts)
2. Ch 1, *sc, 2sc in the next st*, repeat to end of round, sl st to join. (12sts)
3. Do not ch 1. (hdc, dc) in next st. Ch 1, TURN, sl st in side of dc post, sl st in next st on circle and in each st around, sl st in tip of ear. Finish off, leaving a long tail for sewing ear to hat.
With a yarn needle, use each yarn tail to sew the ears to the bottom edge of the hat, at the same spots as the chin straps.
Contact & Snappy Spots
Please visit Snappy Tots online for giveaways, new release announcements, events and fun.
If you have any questions, comments or suggestions please email [email protected].
I hope you will enjoy this pattern and I would love to see what you make. Please share pix as a ravelry project or tag me in social media posts by adding #snappytots.
I hope you have a wonderful day!
Pattern copyright Snappy Tots 2024. This pattern cannot be shared, copied or reproduced in part or whole. Items made from this pattern may be sold for profit.
CHRISTMAS IN SNAPPYLAND Small Goose Christmas Elves! Free Christmas Elf Goose Costume Crochet Pattern Boy & Girl • 17-inch sample • 17/19-inch collection Boy and girl Christmas elf goose costumes. Give your smaller goose a Christmas makeover! This pattern includes the sweater, pointed collar, elf hat, and plenty of optional details for making your own…
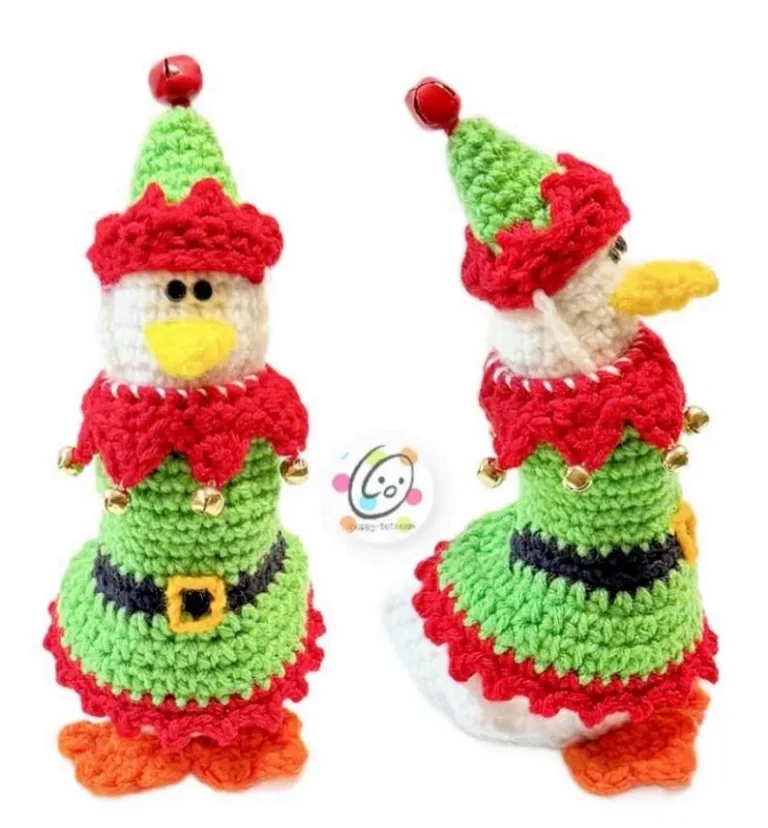
Christmas in Snappyland The Littlest Christmas Elves! Free Mini Goose Elf Crochet Pattern Boy or girl, these tiny Christmas helpers are ready to spread some holiday cheer! Designed by Snappy Tots The elves have arrived in Snappyland! These little Christmas outfits are designed for my 7-inch Mini Dress Up Goose. With a few simple color…
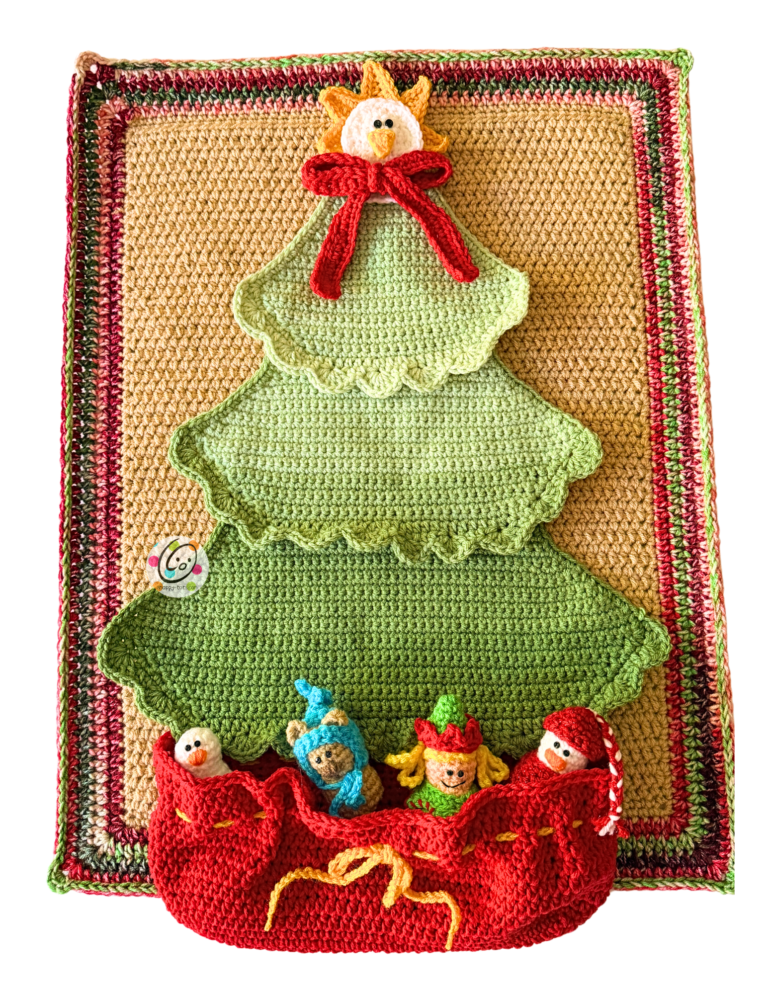
Christmas Tree Wall Hanging — Part 2 A festive home for your Snappy Beans! In this part of our Celebration Countdown, we’re crocheting the wall hanging base and the three layered tree pieces. So many things still to come, including a Santa sack, toppers, and final assembly! Welcome back to Christmas in Snappyland! This is…
🫘❤️🪿 Meet the Snappy Beans! A little Bean, a whole lot of possibilities! Tiny crocheted friends with BIG personalities! Make a few little friends, then have fun dressing them up for your next celebration. Oh my goodness, you guys! I have been having SO much fun with these little characters! When I started designing my…
I’ve made several hanging towels and my favorite ones are the simple ones that flip over a bar or around a handle and don’t need any extra hardware like buttons. I hope you will enjoy creating this simple texture and want to create a matching set. Similar patterns you might enjoy: Stitch Placement Help Video…
Snappy Tots Free Crochet Pattern Tuck Away Scarf A cozy little scarf with a clever keyhole, an optional storage tie, and a whole lot of gift-giving possibilities! A little note about sizing: This scarf was designed as a cozy winter accessory for women and teens, with a shorter length that’s just right for tucking inside…