

Free Pattern: Sunshine Hanging Towel
Summer for us is all about traveling. We try to get away as much as possible, preferably north where it isn’t as hot. We do love the sunshine, just not the heat. It seems like we go through a ton of towels during the summer as more hands are around. I love having towels close by and hanging ones stay put the best.
I have made lots of hanging towels throughout the year and decided it would be fun to have a sunny one to brighten up the kitchen and trailer.
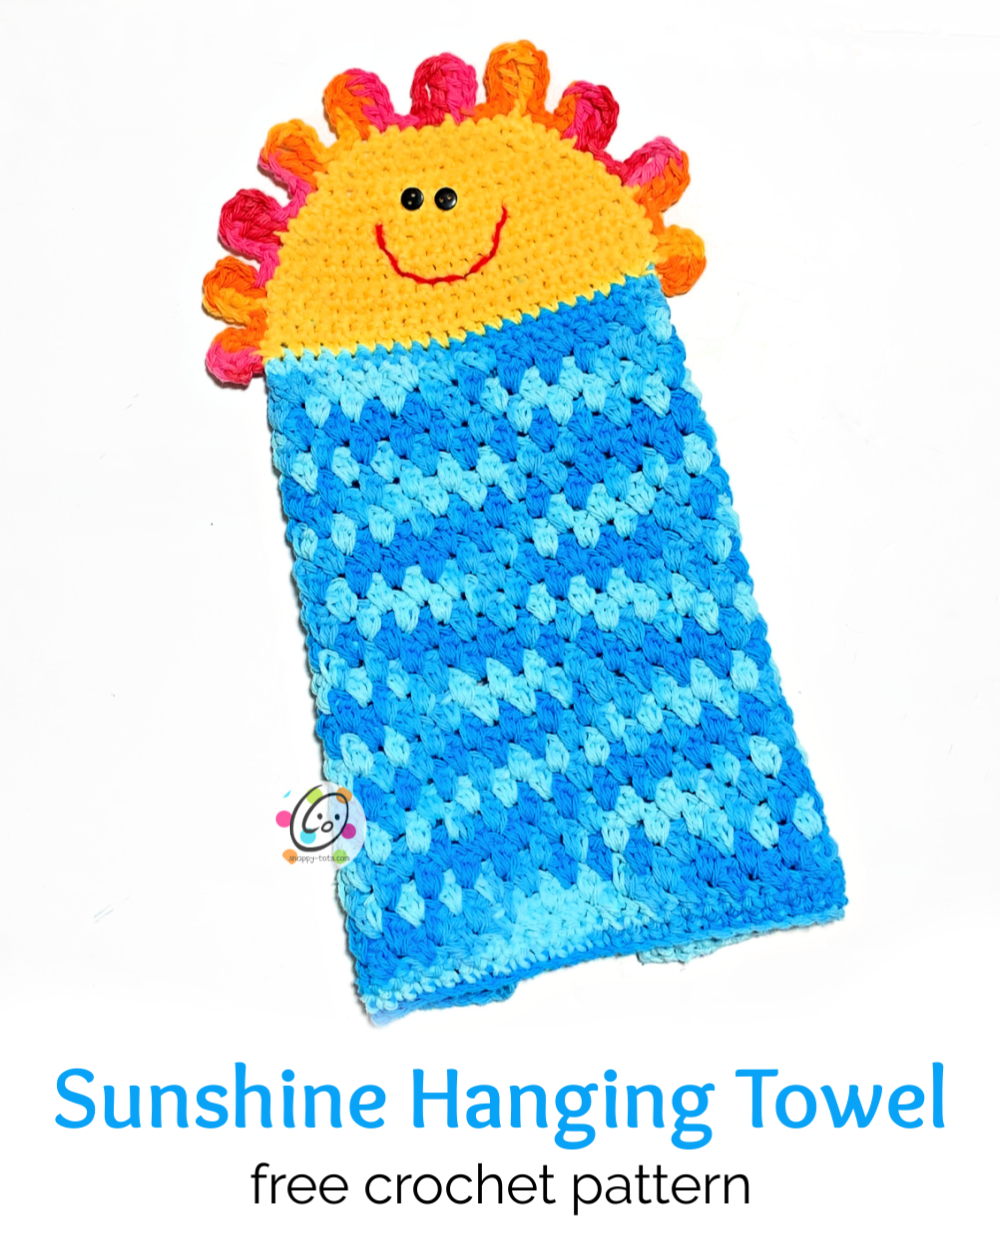
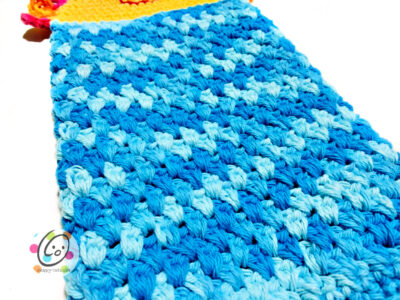
I especially like the texture of the towel section and will be adding a few different cloths to make a matching set. It is quick and easy, looks great, plus strong enough to handle summer messes.
It could easily be a little girl with nubby hair or a flower (both were things my family guessed when I asked what they thought I was making).
Sunshine Hanging Towel Pattern
Materials ● Yarn: Cotton Yarn Sample colors: Red Heart Smoothie Zesty for “rays” (20 yds), Sugar N Cream Swimming Pool for towel section (150 yds), Yellow (40 yds) Note: The towel could be made longer. I kept going until one skein of variegated had been used. If you would like a longer towel you will need more of the variegated yarn.
● Crochet Hooks: H (5mm), I (5.5mm) ● Miscellaneous: Yarn needle for weaving in ends, one ¾” button for closure ● Optional: 2 small black buttons for eyes, sewing needle and thread, embroidery floss or crochet cotton for smile
Details ● Finished Measurements: 14” long x 7” wide (when folded)
Directions begin at bottom edge of towel and work towards top of sun.
1. With an I hook and yarn for bottom section, ch 45, sc in 2nd ch from hook and in each ch across. (44sts)
2-3. Ch 1, turn, sc in each st to end of row.
4. Ch 1, turn, hdc in same st, *sk 1, (sc, dc) in next st*, repeat until 1 st remains, hdc in last st.
- From this point on, sts are worked in the skipped spaces from the previous row. Ch 1, turn, hdc between posts from previous row (before next post), *(sc,dc) in next skipped space*, repeat until 1 st remains, hdc between last two posts.
- Repeat step 5 until cloth is 9” from starting edge, or longer if desired.
- Ch 1, turn, sc in each st to end of row.
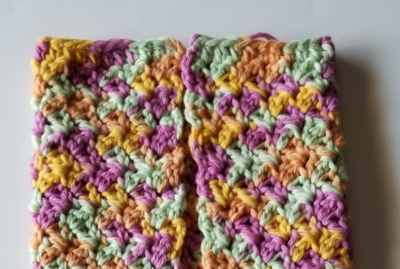
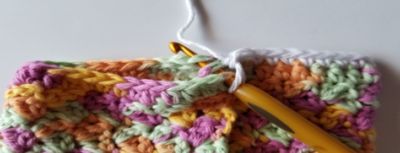
- Lay towel on a flat surface, right side down. Check your beginning edge for the “right side”. Fold in the sides, overlapping 11sts at the right edge. See photo.
Note: Towel in photos below is made from a different pattern, but layout is the same.
- With an I hook, attach yarn for top of towel (yellow) in the first sts at the right. For this step we will work through the stitches on both layers of the towel.
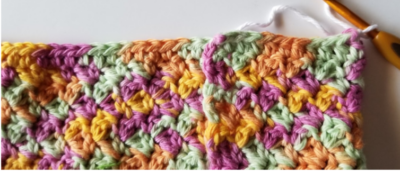
Ch 1, sc in each st until 1 st remains before the center opening.
Insert the hook in the first st of the second half, in the last st of the current half and in the next st on the back layer. See photo below.
Sc in each st to end of row. (21sts)
10. Ch 1, turn, 2sc in same st, sc in each st to end of row. (22sts).
11. Ch 1, turn, sc in each st to end of row.
12. Ch 1, turn, sc in each st to end of row.
13. Ch 1, turn, sc in each st to end of row.
14. Ch 1, turn, sc2tog, sc 18, sc2tog. (20sts)
15. Ch 1, turn, sc in each st to end of row.
16, Ch 1, turn, sc2tog, sc 16, sc2tog. (18sts)
17. Ch 1, turn, sc in each st to end of row.
18, Ch 1, turn, sc2tog, sc 14, sc2tog. (16sts)
19. Ch 1, turn, sc2tog, sc 12, sc2tog. (14sts)
20, Ch 1, turn, sc2tog, sc 10, sc2tog. (12sts)
21. Ch 1, turn, sc2tog, sc, hdc 6, sc, sc2tog. (10sts) Finish off and weave in ends.
22. Hold the towel so the back (folded side) is towards you. With an H hook, attach yellow yarn to the sun’s edge where the sun meets the blue at the right. Ch 1, sc 36 sts evenly across the outer edge of the sun, ending at the opposite point, where the sun meets the blue at the left.
23. Change yarn to create the “rays”. Ch 2, turn, (dc, tr) in the same st, (dc, ch 2, sl st) in the next st, sl st 3, *ch 3, tr in same st, (tr, ch 3, sl st) in the next st, sl st 3*, repeat until 1 st remains, (dc, tr) in the same st, (dc, ch 2, sl st) in the next st. Finish off and weave in ends. (10 “rays)
Face (optional)
With a yarn needle and yarn color choice, stitch the smile in place.
With a sewing needle and thread, sew the small buttons in place for eyes.
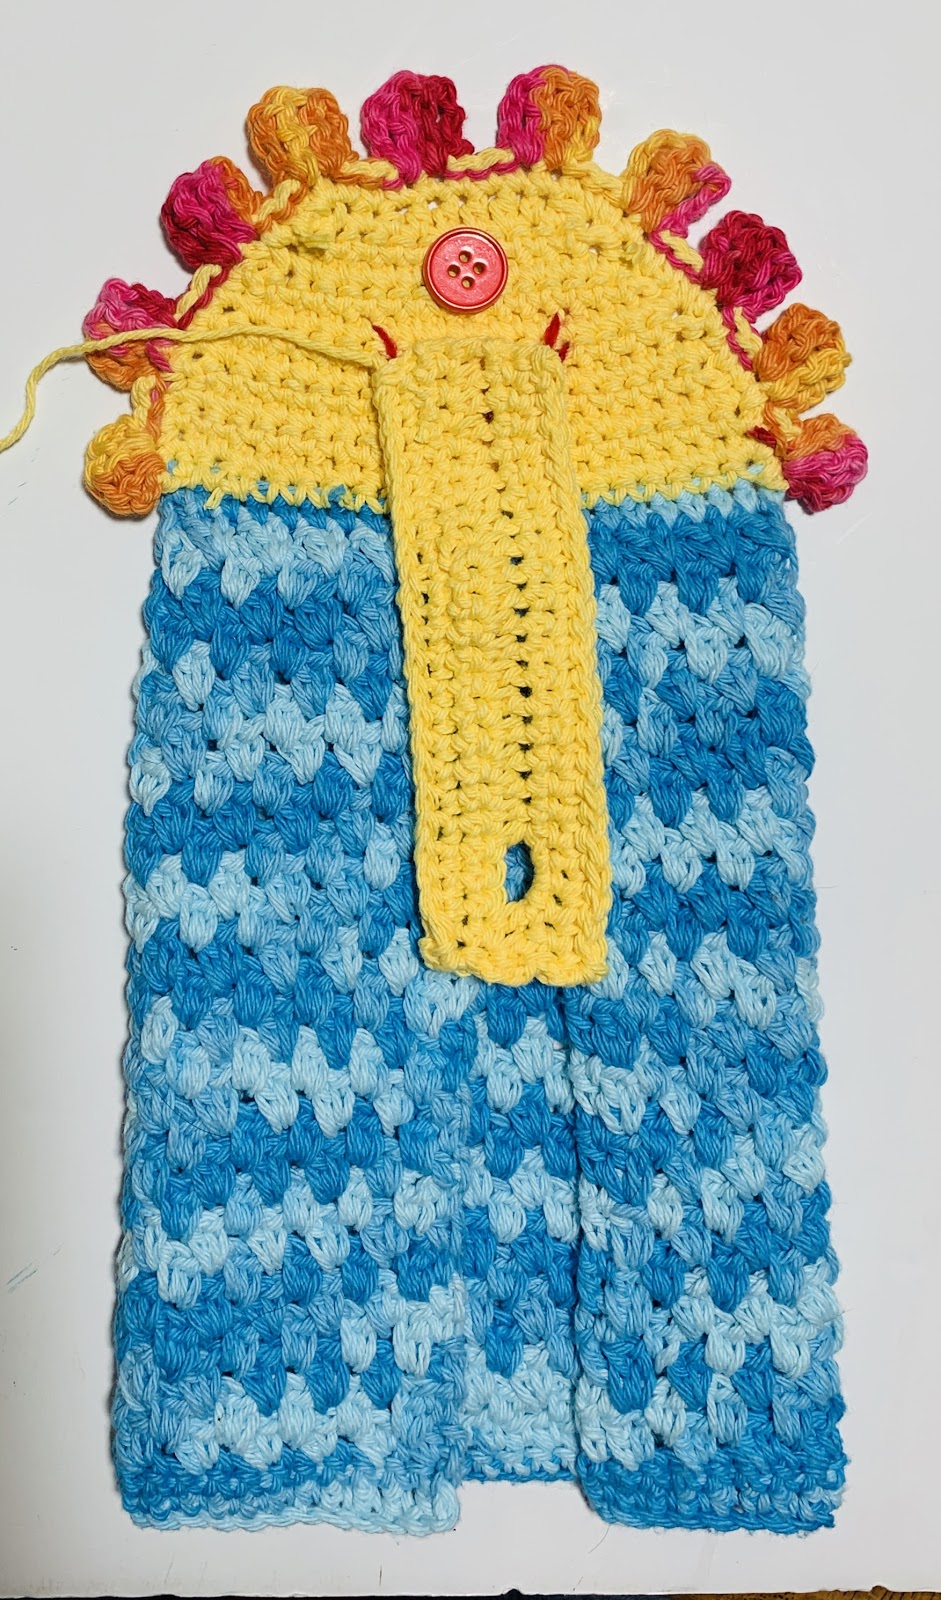
Hanger
1. Leave a tail in the beginning for sewing to the back of the sun. With an H hook and yellow yarn, ch 25, sc in 2nd ch from hook and in each across. (24sts)
2. Ch 1, turn, sc in each st across.
3. This step creates a button hole. Ch 2, turn, hdc in same st and in next st, ch 2, sk 2, hdc in each st to end of row.
4. Ch 1, turn, sc in same st and in each st until ch 2 from previous row, work 3 sc sts around chain, sc 2.
5. Ch 1, turn, sc in each st to end of row.
6. Ch 1, turn, sk first st. Loosely slip st around outer edge of hanger, working (sl st, ch 2, sl st) in each corner. Finish off and weave in end.
Place hanger on the back of the sun and sew non-buttonhole edge near the top of the sun as shown in the photos below. With a sewing needle and thread, sew a button to the back of the sun. See photos for placement.


