Free Pattern: Tree Ornament
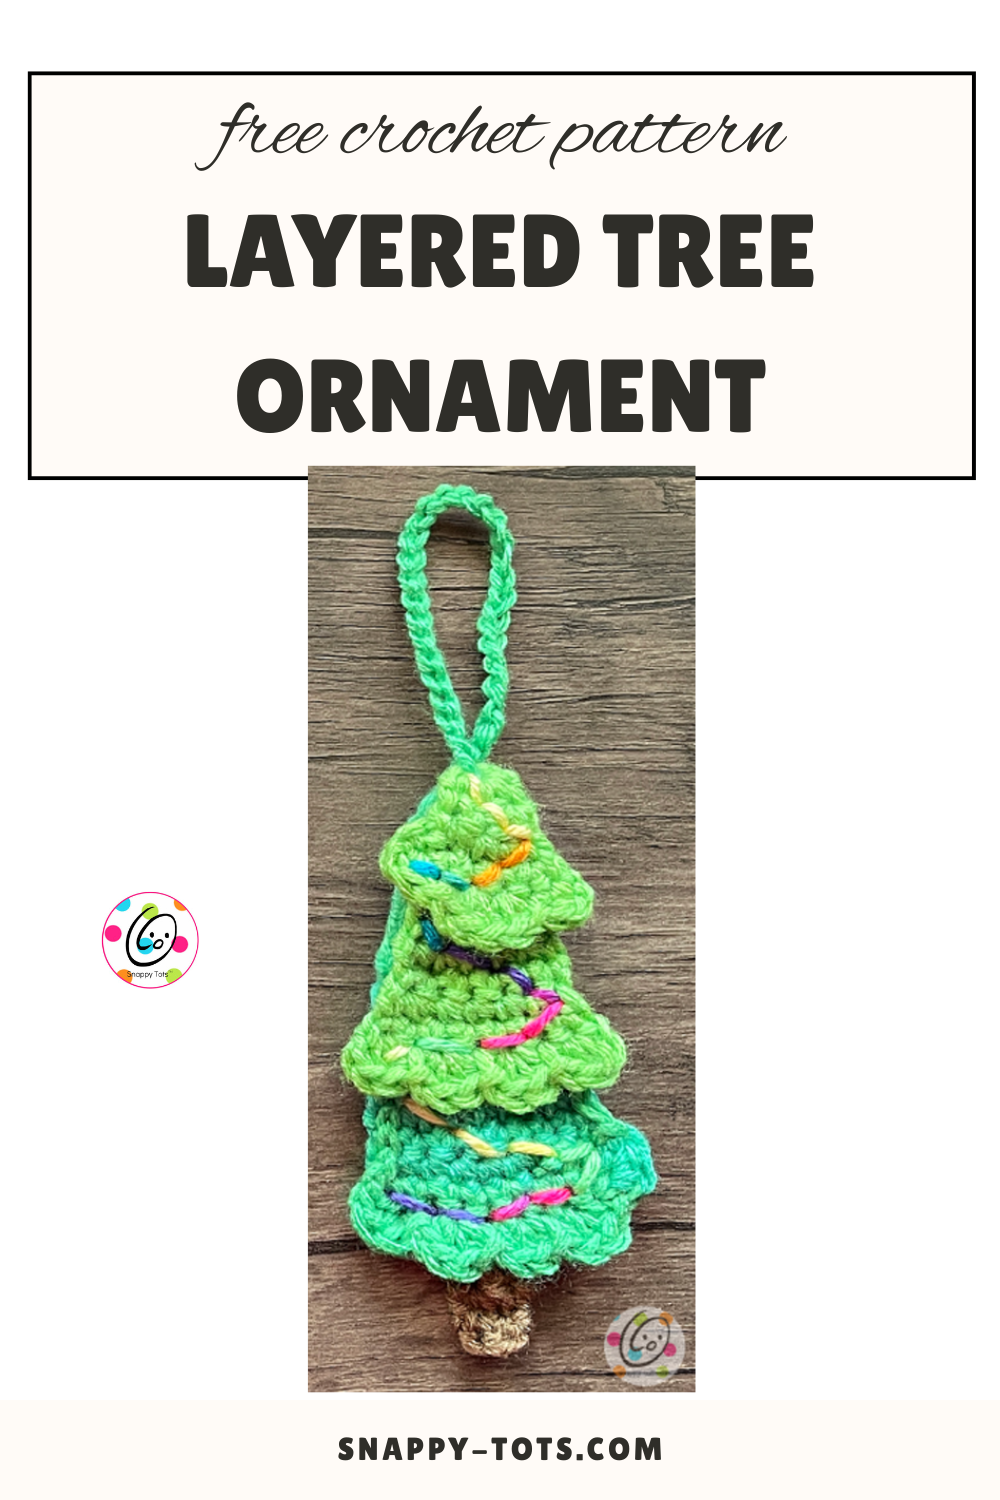
Ornaments make a great gift by themselves or tied onto a package for a special handmade touch. This layered tree ornament is super quick, easy, and takes a small amount of yarn.
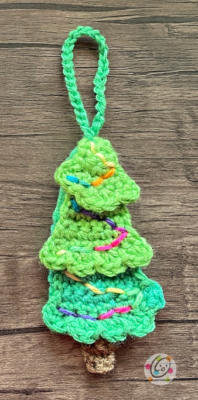
Layered Tree Ornament Crochet Pattern
The crochet pattern is available to view here on my blog for free below.
Directions for Layered Tree Ornament
Materials and Details
- Worsted weight yarn. Less than 40 yards of shades of green (or choice of colors), small amount of brown yarn and a variegated yarn
- Crochet Hook: H (5mm)
- Miscellaneous: Yarn needle for weaving in ends
- Gauge: Not needed for this project
- The first stitch of each row is worked into the same stitch as the turning chain.
- Measurements: 5” long (not including hanger) x 2.5” across (widest point)
Directions
This ornament is made in three sections. I used a self striping yarn which created the different shades of green.
Top/Small Section
1. With an H hook and green yarn, ch 2, 2sc in the 2nd ch from hook. (2sts)
2. Ch 1, turn, 2sc in the same st, sc. (3sts)
3. Ch 1, turn, 2sc in the same st, sc 2. (4sts)
4. Ch 1, turn, sc in the same st and in each st across.
5. Ch 1, turn, 2sc in the same st, sc 2, 2sc in the last st. (6sts)
6. Ch 1, turn, 2hdc in the same st, sl st in the next st, 2hdc in the next st, 2hdc in the next st, sl st in the next st. (hdc, ch 2, sl st) in the last st. Finish off and weave in ends. Set aside.
Middle Section
1. With an H hook and green yarn, ch 2, 2sc in the 2nd ch from hook. (2sts)
2. Ch 1, turn, 2sc in the same st, sc. (3sts)
3. Ch 1, turn, 2sc in the same st, sc 2. (4sts)
4-5. Ch 1, turn, sc in the same st and in each st across.
6. Ch 1, turn, 2sc in the same st, sc 3. (5sts)
7. Ch 1, turn, 2sc in the same st, sc 4. (6sts)
8-9. Ch 1, turn, sc in the same st and in each st across.
10. Ch 1, turn, 2sc in the same st, sc 5. (7sts)
11. Ch 1, turn, sc in the same st and in each st across.
12. Ch 1, turn, 3hdc in the same st, sl st in the next st, *3hdc in the next st, sl st in the next st*, repeat until 1 st remains, (2hdc, ch
2, sl st) in the last st. Finish off and weave in ends. Set aside.
Bottom Section
1. With an H hook and green yarn, ch 2, 2sc in the 2nd ch from hook. (2sts)
2. Ch 1, turn, 2sc in the same st, sc. (3sts)
3. Ch 1, turn, 2sc in the same st, sc 2. (4sts)
4-5. Ch 1, turn, sc in the same st and in each st across.
6. Ch 1, turn, 2sc in the same st, sc 3. (5sts)
7. Ch 1, turn, 2sc in the same st, sc 4. (6sts)
8-11. Ch 1, turn, sc in the same st and in each st across.
12. Ch 1, turn, 2sc in the same st, sc 5. (7sts)
13. Ch 1, turn, 2sc in the same st, sc 6. (8sts)
14-16. Ch 1, turn, sc in the same st and in each st across.
17. Ch 1, turn, 2sc in the same st, sc 7. (9sts)
18. Work this row in FLO. Ch 1, turn, 3hdc in the same st, sl st in the next st, *3hdc in the next st, sl st in the next st*, repeat until 1 st remains, (2hdc, ch 2, sl st) in the last st. Finish off and weave in ends. Set aside.
Tree Trimming: With a yarn needle and bright colored yarn (variegated in sample), stitch lines in a zigzag pattern across each tree section. See main photo for placement suggestions.
Additional items could be added, such as buttons, a star or pompom on top.
Stack the tree section on top of each other. With a yarn needle and matching yarn, sew the layers together at the top of the tree.
Hanger: With an H hook and matching yarn, sl st into the top of the tree. Ch 30, sl st in the same spot on the tree. Finish off and weave in ends.
Trunk
1. With an H hook and brown yarn, ch 4, sc in the 2nd ch from hook, sc 2. (3sts)
2-4. Ch 1, turn, sc in the same st, sc 2.
Finish off, leaving a yarn tail for sewing the last row to the bottom section of the tree.
With a yarn needle, use the yarn tail from the trunk to sew the trunk to the back/remaining loops at the middle of the bottom of the tree.
Pin To Save For Later