Free Pattern: Mini Frost
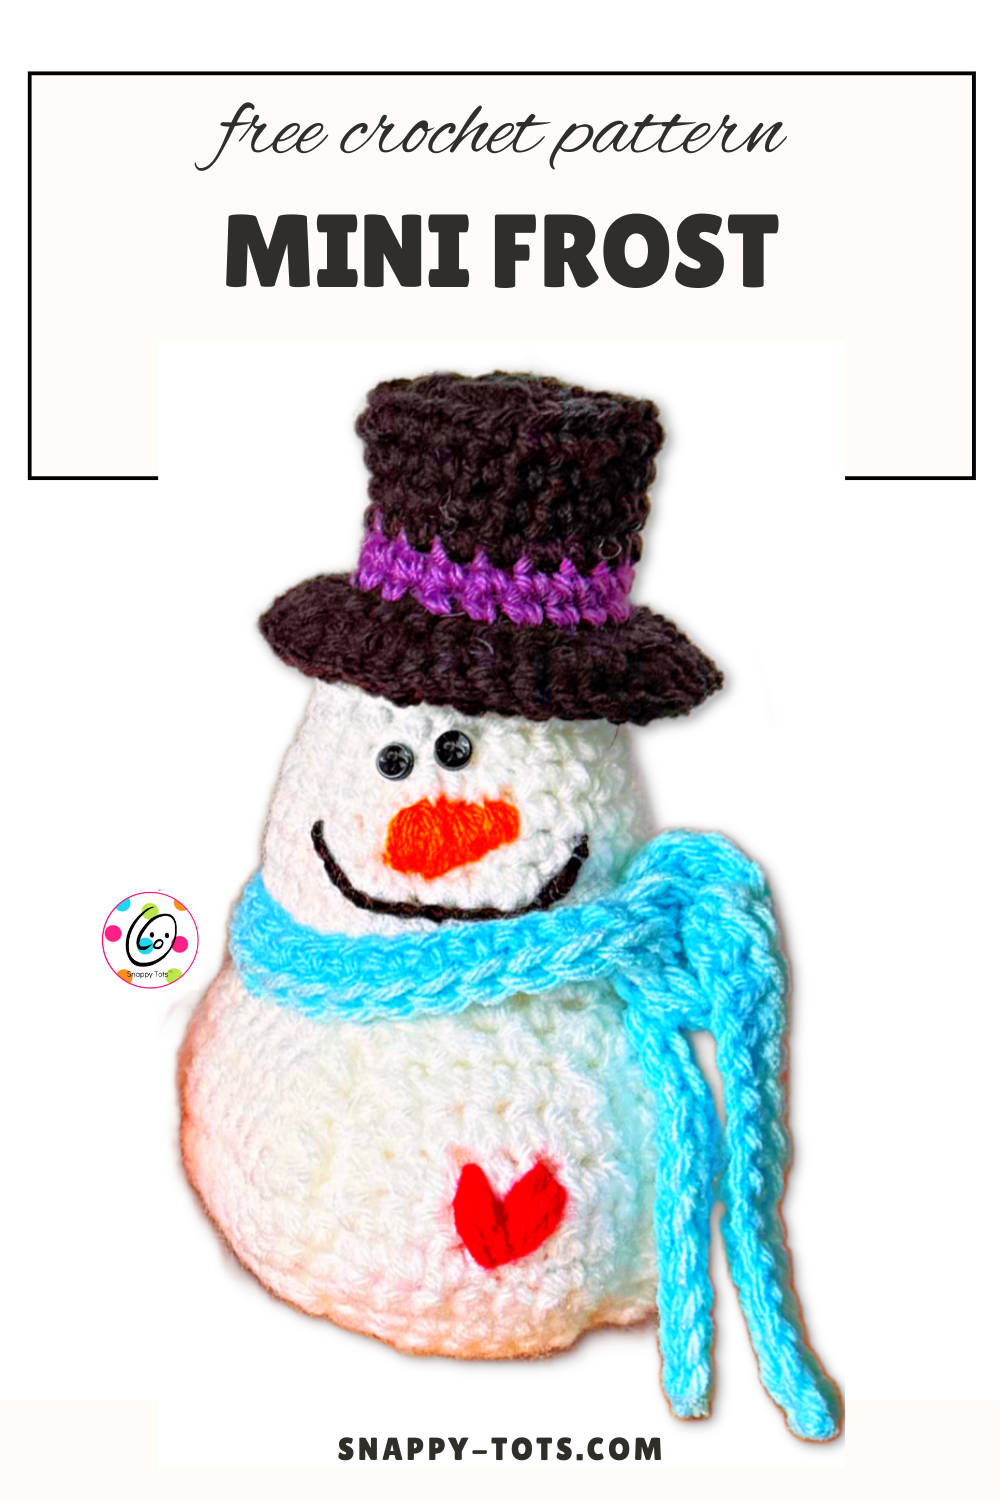
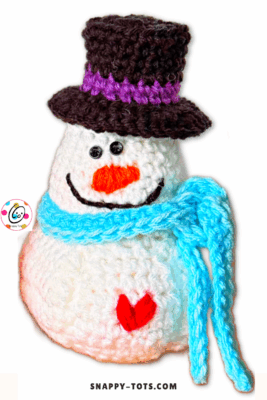
Snowmen are one of my most favorite things to make. I always try to make a few new ones each year. Welcome to “mini frost”, a 7″ tall, weighted stuffie.
How he came to be: Often, while making other things, I see a snowman variation. That is what happened when I was designing my “Pumpkin Party”.


I thought a mini snowman version would be fun. Of course I had to make a pumpkin version too.

Mini Frost Crochet Pattern
The crochet pattern for the snowman is available to view here on my blog for free below.
A downloadable, ad-free pdf of this pattern “Mini Jack Frost”, which also includes a pumpkin variation, will be available to purchase from my shops soon.
Directions for Mini Frost Snowman
Materials
- Yarn: 100 yards worsted weight
Sample yarns: Red Heart Super Saver, Black, White, Cherry, Black, Medium Purple; Bernat Super Value Cool Blue - Crochet Hook: H (5mm)
- Notions: Yarn needle for weaving in ends, 2 small black buttons, black thread, sewing needle, stuffing, black embroidery floss
- Optional: Measuring tape, scissors, 1 cups popcorn or rice for a weighted stuffie + nylon sock
Measurements
- Finished Measurements: 7” tall x 4” across base.
- Gauge: not needed for this project.
Tips
- First stitch of each row is worked into the same stitch as the turning chain.
- Numbers at the beginning of each line may refer to steps and not indicate number of rows.
- Stitch count remains the same unless noted at end of row/round.
- If you have any questions about this pattern please contact [email protected].
Directions
1. With an H hook and worsted weight yarn (Sample: White), start with a magic circle of 8 sc sts (or preferred method of starting a circle of 8 sc sts), pull closed and sl st to join. (8sts)
2. Ch 1, 2sc in each st to end of round, sl st to join. (16sts)
3. Ch 1, *sc, 2sc in the next st*, repeat to end of round, sl st to join. (24sts)
4. Ch 1, *sc 3, 2sc in the next st*, repeat to end of round, sl st to join. (30sts) Finish off the current yarn.
5. This step starts the “wedges”. The sample has 6 wedges. I designed this with an even number of wedges so you could alternate between two colors for this or other variations, such as red, white, red.. and so on if desired.
With an H hook and the same worsted weight yarn, work this row in BLO. Ch 1, sc in the same st, sc 4. Leave remaining sts unworked for now. (5sts)
6. Ch 1, turn, 2sc in the same st, sc 3, 2sc in the last st. (7sts)
7. Ch 1, turn, sc in the same st and in each st across.
8. Ch 1, turn, 2sc in the same st, sc 5, 2sc in the last st. (9sts)
9-10. Ch 1, turn, sc in each st to end of row.
11. Ch 1, turn, sc2tog, sc 5, sc2tog. (7sts)
12. Ch 1, turn, sc in the same st and in each st across.
13. Ch 1, turn, sc2tog, sc 3, sc2tog. (5sts)
14. Ch 1, turn, sc2tog, sc, sc2tog. (3sts) Finish off and weave in ends.
15. Starting in the next unused st on the main circle, repeat steps 5-14 until all 6 wedges are complete.
Bottom Section Assembly
For this part, pay attention to the beginning circle to determine the “right side”. The ridge from the BLO row of the wedges should end up on the outside/right side of the finished piece.
The seams: You can choose to have the seams on the outside to create ridges or hidden on the inside/wrong side as shown in the sample. Choose one of the following options:
Seams on outside: Place two of the wedges on top of each other, wrong sides together.
With an H hook, attach matching yarn to the bottom of the wedge piece, next to the beginning circle.
Working through the edges of both wedge layers, sl st across the sides. Make sure these are evenly spaced, not too tight, and do not cause the edge to ripple. Sl st in the first/top st of both layers. Finish off and tie a knot in the ends. These ends can be placed inside the pumpkin or woven in if preferred.
Repeat around until all wedges are sewn.
Hidden seams: this version is very similar. The only difference is instead of slip stitching the layers together with a hook, use a yarn needle and matching yarn to sew the layers together. Make sure to turn the body right side out before continuing.
Optional: Add “weight”, such as stones or popcorn kernels, to the bottom ¼” of the gnome. Then stuff firmly.
Top Section
1. With an H hook and matching worsted weight yarn, attach matching yarn to the first st of any wedge section on the top edge. Ch 1, *sc, 2sc in the next st, sc*, repeat for the top of each wedge section. Sl st in the first st to join. (24sts)
2. Ch 1, *sc 2, 2sc in the next st*, repeat to end of round, sl st to join. (32sts)
3-4. Ch 1, sc in the same st and in each st to end of round, sl st to join.
5. Ch 1, sc 4, *sc2tog, sc 2*, repeat to end of round, sl st to join. (25sts)
6. Ch 1, sc in the same st and in each st to end of round, sl st to join.
7. Ch 1, *sc2tog, sc 3*, repeat to end of round, sl st to join. (20sts)
8-9. Ch 1, sc in the same st and in each st to end of round, sl st to join.
10. Finish off the current yarn and change to yarn for the hat (Sample: Black). With an H hook, ch 1, sc in the same st and in each st to end of round, sl st to join.
11. Ch 1, BPSC around each post to end of round, sl st to join.
12. Do not finish off the current yarn. Change to yarn for the hatband (Sample: Medium Purple). Ch 1, *sc 8, sc2tog*, repeat once, sl st to join. (18sts)
13. Ch 1, sc in the same st and in each st to end of round, sl st to join.
14. Finish off the current yarn and change back to the yarn for the hat. Ch 1, sc in the same st and in each st to end of round, sl st to join.
15. Ch 1, sc in the same st and in each st to end of round, sl st to join.
16. Ch 1, *sc 5, 2sc in the next st*, repeat to end of round, sl st to join. (21sts)
17. Ch 1, *sc 6, 2sc in the next st*, repeat to end of round, sl st to join. (24sts)
18. Work this round in BLO and a little more snug than usual. Ch 1, *sc 2, sc2tog*, repeat to end of round, sl st to join. (18sts)
19. Ch 1, *sc, sc2tog*, repeat to end of round, sl st to join. (12sts)
20. Ch 1, *sc2tog*, repeat to end of round, sl st to join. (6sts) Finish off, leaving a long tail for closing the hole.
21. With a yarn needle, weave the yarn tail in and out of the remaining stitches. Pull to close, secure yarn, and weave in ends.
22. Brim: With the bottom of the snowman towards you, use an H hook and matching yarn to start in any st on the ridge at the bottom of the hat (created by working post sts on step 11). Ch 1, *sc, 2sc in the next st*, repeat to end of round, sl st to join. (30sts)
23. Ch 1, *sc 2, 2sc in the next st*, repeat to end of round, sl st to join. (40sts)
24. Sl st in each st to end of round. Make sure to not work these sts more snug than usual. Finish off and weave in ends.
Scarf
1. With an H hook and worsted weight yarn (Sample: Cool Blue) ch 75, sc in the 2nd ch from hook and in each ch across. (74sts)
2. Ch 1, turn, sl st in each st to end of row. Finish off and weave in ends.
3. Wrap the scarf around the middle (between body and head) and tie in a loose knot.
Features: refer to photo for placement
- Heart: With a yarn needle and worsted weight yarn (Sample: Red), stitch a V shape to create the heart.
- Nose: With a yarn needle and worsted weight yarn (Sample: Pumpkin), stitch a carrot shape.
- Eyes: With a sewing needle and thread, sew 2 small buttons above the nose for eyes.
- Mouth: With a yarn needle and black embroidery floss, stitch a smile under the nose.
Pin To Save For Later