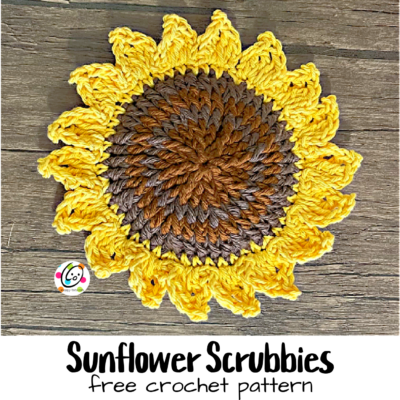
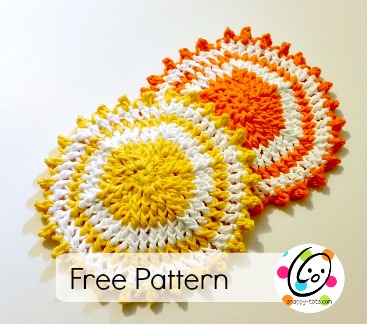
Free Pattern: Sunflower Scrubbies
One of my favorite cloths sets I have designed is a set of sunflower items for the kitchen as part of one of my gift events and then we made a few of them during our year long “weekly wash“. I love sunflowers and plant a bunch along my fence each spring. I have always been amazed at how they turn towards the sun. My quest for the past two years is to fill this fence line with them (as you can tell below I have a long way to go before I meet that quest). The birds LOVE the seeds so I usually don’t get many, but this year my father in law started a bunch of sunflower plants for me! My hedge-quest did WAY BETTER!
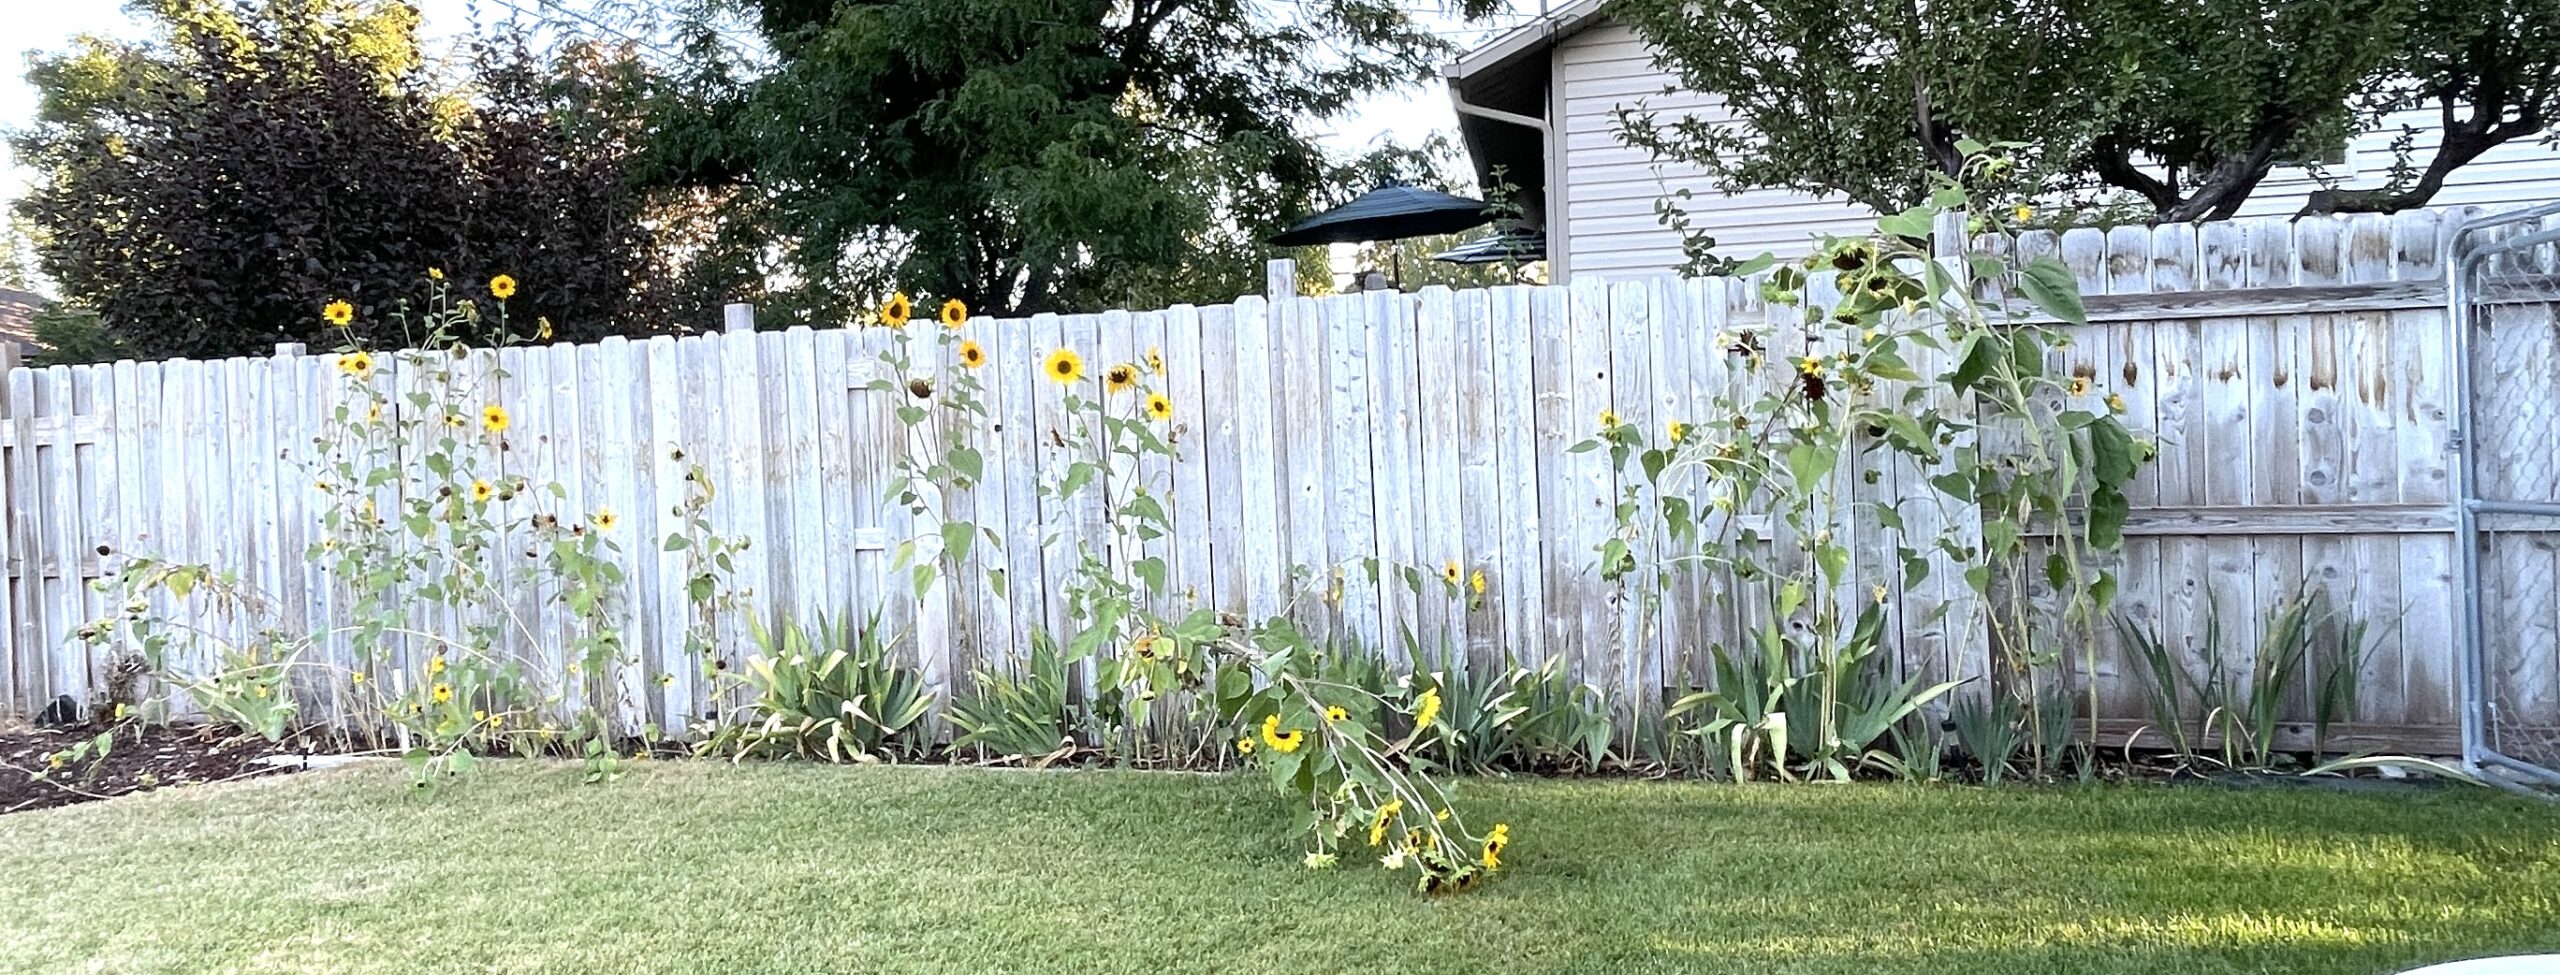
Each year I learn and hopefully improve. It is still looking pretty scraggly. The birds got some of the plants, and I have had to tie some of the bunches to the fence (looks like I need to do that again), but they still bring me a lot of joy. Plus, they will be a great background for some fun fall pictures.
About This Pattern
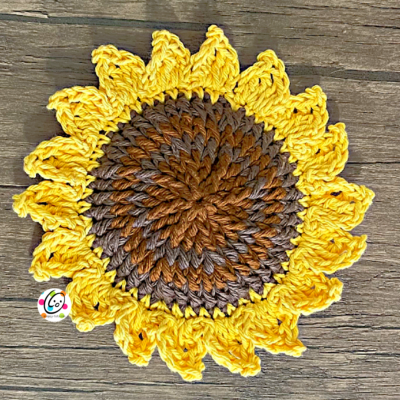
The “Kitchen Sunflowers” set includes a hanging towel, dishcloths, and a matching trivet (free patterns listed below). It needed a matching scrubby and I absolutely love how it turned out with the striped, thick center.
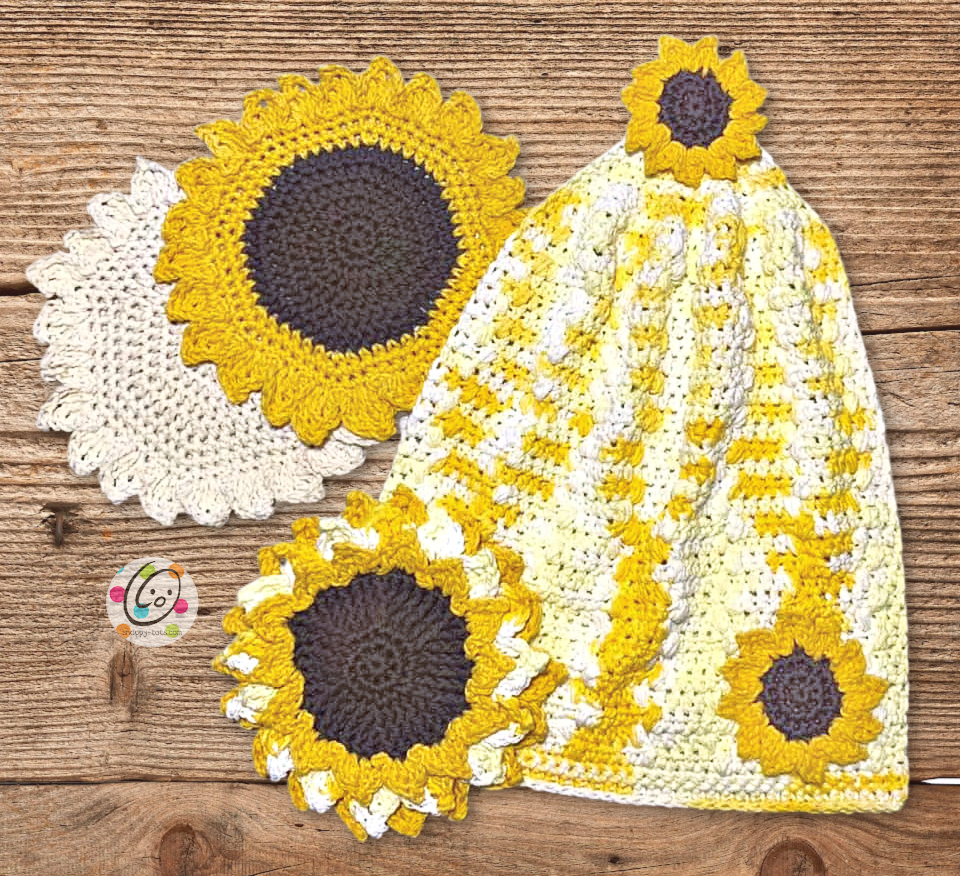
Kitchen Sunflowers Free Patterns:
Sunflower Scrubbies Crochet Pattern
This pattern is available to view here on the blog. An ad-free, downloadable pdf is also available to purchase: Ravelry
Materials and Details
- Yarn: Sugar N Cream Cotton Yarn – 100 yards brown cotton (1-2 shades), 100 yards yellow cotton
- Crochet Hook: J (6mm)
- Notions: Yarn needle for weaving in ends
- Size: 6.5-7” across
- Gauge: not needed for this project
- If you have any questions about this pattern please contact [email protected].
Directions
Centers (make 2)
1. With a J hook and medium brown yarn, start with a magic circle of 8 hdc sts (or preferred method for starting a circle of 8 hdc sts), pull closed and sl st to join. (8sts)
2. Ch 1, work 2 FPHDC around each post from the previous round, sl st to join. (16sts)
3. Ch 1, *FPHDC around next post, 2 FPHDC around next post*, repeat to end of round. (24sts)
4. Change to dark brown yarn if desired. Ch 1, *FPHDC 2, 2 FPHDC around next post*, repeat to end of round, sl st to join. (32sts)
5. Change to medium brown yarn. Ch 1, *FPHDC 3, 2 FPHDC around next post, repeat to end of round, sl st to join. (40sts)
6. Change to dark brown yarn. Ch 1, * FPHDC 4, 2 FPHDC around next post*, repeat to end of round, sl st to join. (48sts)
Finish off and pull all yarn tails to the ridged /back side of the piece.
Petals
1. After two center pieces have been made, stack one on top of the other, ridged/back sides together and yarn tails tucked between the layers. With a J hook, attach yellow yarn to a st of the last round.
Ch 1. Working through stitches of BOTH layers, ch 1, *sc 7, 2sc in the next st*, repeat to end of round, sl st to join. (54sts)
2. This step creates the petals. Ch 2, (dc, tr) in the same st, ch 3, sl st in the 3rd ch from hook, (tr, dc, ch 2, sl st) in the next st, sl st 2, (one petal complete). *ch 2, (dc, tr) in the same st, ch 3, sl st in the 3rd ch from hook, (tr, dc, ch 2, sl st) in the next st, sl st 2*, repeat to end of round, ending with just one sl st after the last petal.
Finish off and weave in ends.
Pin To Save For Later