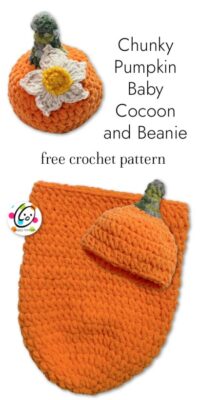
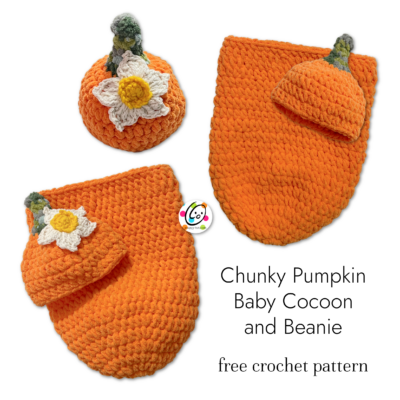
Free Pattern: Chunky Pumpkin Baby Set
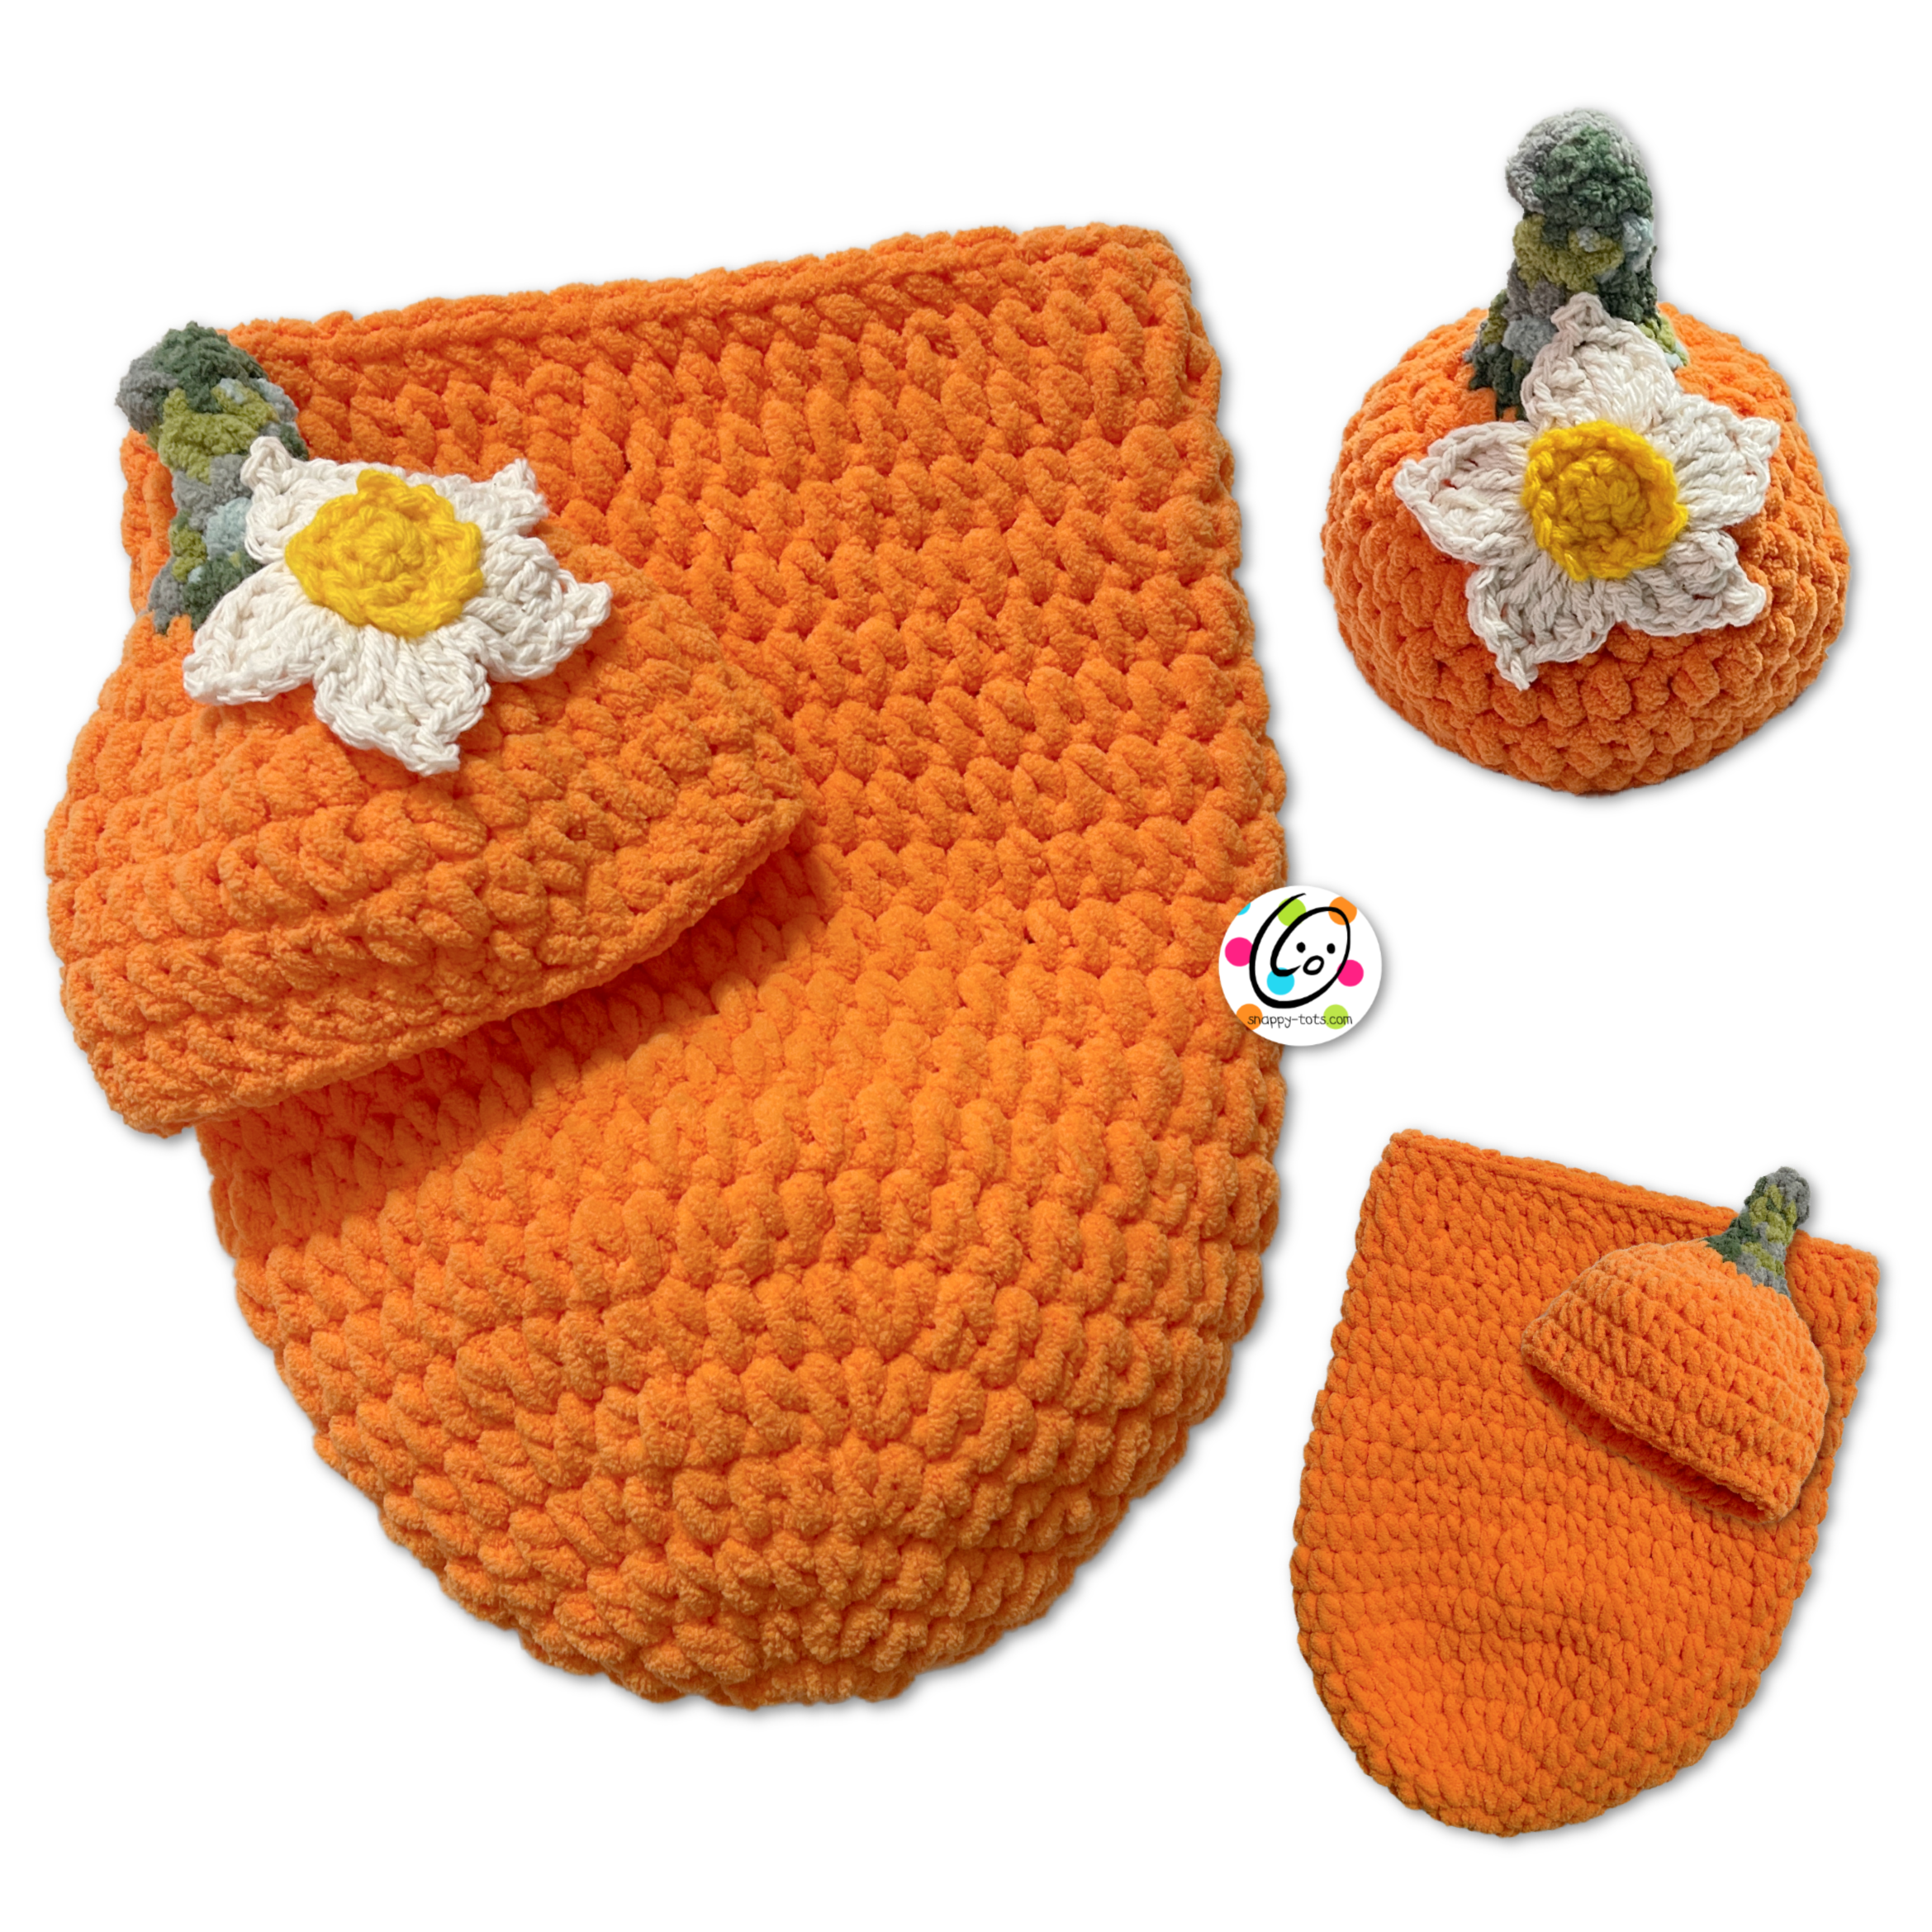
Chunky Pumpkin Baby Set Crochet Pattern
The pattern is available to view here on the blog. An ad-free, downloadable pdf is available to purchase for a small fee from Ravelry. (coming really soon)
Materials and Details
- Super Bulky weight yarn.
Sample Yarns: Bernat Blanket Yarn – Brights Carrot Orange (150 yards); Forest Sage – 20 yards
Flower: Small amounts of worsted weight cream and yellow cotton yarns - Crochet Hook: H (5mm), K hook (6.5mm), M/N (9mm)
- Miscellaneous: Yarn needle for weaving in ends
- Gauge: 4” with M/N hook = 8.5 hdc sts, 6 rounds
- Size and Measurements: Newborn Hat – 6.5” from base of stem to bottom of hat ; Newborn Cocoon – 10.5” wide (measured flat) x 13” long or desired length.
Tips
- Numbers at the beginning of each line may refer to steps and not indicate number of rows.
- Stitch count remains the same unless noted at end of row/round.
- If you have any questions about this pattern please contact [email protected].
Directions – Beanie
1. With a K hook and super bulky green or brown yarn, start with a magic loop of 5 sc sts (or preferred method for starting a circle of 5 sc sts), pull closed and sl st to join. (5sts)
2. Work this round in BLO. Ch 1, sc in BLO of each st to end of round, sl st to join.
3-4. Ch 1, sc in the same st and in each st to end of round, sl st to join.
5. Ch 1, sc in the same st, 2sc in the next st, sc, 2sc in the next st, sc, sl st to join. (7sts)
6. Ch 1, sc in the same st, sc, 2sc in the next st, sc, 2sc in the next st, sc, 2sc in the next st, sl st to join. (10sts)
7. Ch 1, *sc, 2sc in the next st*, repeat to end of round, sl st to join. (15sts)
8. Finish off the current yarn and change to orange yarn. Ch 1, sc in the same st, sc, 2sc in the next st, *sc 2, 2sc in the next st*, repeat to end of round, sl st to join. (20sts)
9. Place a marker for working in the round from this point on. Do not ch at the beginning or end with a sl st.
Sc in the next st, 2sc in the next st, *sc 2, 2sc in the next st*, repeat to end of round. (30sts)
10. Change to an M/N hook. Hdc in each st to end of round.
11. *hdc 9, 2hdc in the next st*, repeat to end of round. (33sts)
12-14. Hdc in each st to end of round.
At this point the beanie should measure approximately 6.5” from the base of the stem. Add more rounds for additional length if needed.
Directions – Cocoon
1. With an M/N hook and super bulky orange yarn, start with a magic loop of 8 sc sts (or preferred method for starting a circle of 8 sc sts), pull closed and place a marker for working in the round. (8sts)
2. 2sc in each stitch to end of round. (16sts)
3. *hdc, 2hdc in next st*, repeat to end of round. (24sts)
4. *hdc 3, 2hdc in next st*, repeat to end of round. (30sts)
5. *hdc 4, 2hdc in next st*, repeat to end of round. (36sts)
6. *hdc 5, 2hdc in next st*, repeat to end of round. (42sts)
7. *hdc 6, 2hdc in next st*, repeat to end of round. (48sts)
8. Hdc in each st to end of round.
9. Repeat the previous round until cocoon measures 13” or desired length.
10. When desired length has been reached, sc in next st, sl st. Ch 1, sc in each stitch to end of round, sl st to join.
Finish off and weave in ends.
Flower (optional)
1. With an H hook and cream or white worsted weight yarn, start with a magic circle of 5 sc sts (or preferred method for starting a circle of 5 sc sts. Pull closed and sl st to join. (5sts)
2. Ch 1, 2sc in each st to end of round, sl st to join. (10sts)
3. (sc, hdc, dc, 2tr) in the same st, ch 3, sl st in the 3rd ch from the hook, (2tr, dc, hdc, sc) in the next st, *(sc, hdc, dc, 2tr) in the same st, ch 3, sl st in the 3rd ch from the hook, (2tr, dc, hdc, sc) in the next st,* repeat to end of round. Finish off and weave in ends.
Center
1. With an H hook and yellow worsted weight yarn, start with a magic circle of 5 sts (or preferred method for starting a circle of 5 sc sts. Pull closed and sl st to join. (5sts)
2. Ch 1, 2sc in each st to end of round, sl st to join. (10sts)
3. *ch 2, sl st in the next st*, repeat to end of round. Finish off, leaving a long tail for sewing to the flower.
With a yarn needle, use the yarn tail to sew the flower center to the flower base and to the beanie.
Pin To Save For Later