
Free Pattern: Ribbitz the Frog Hat
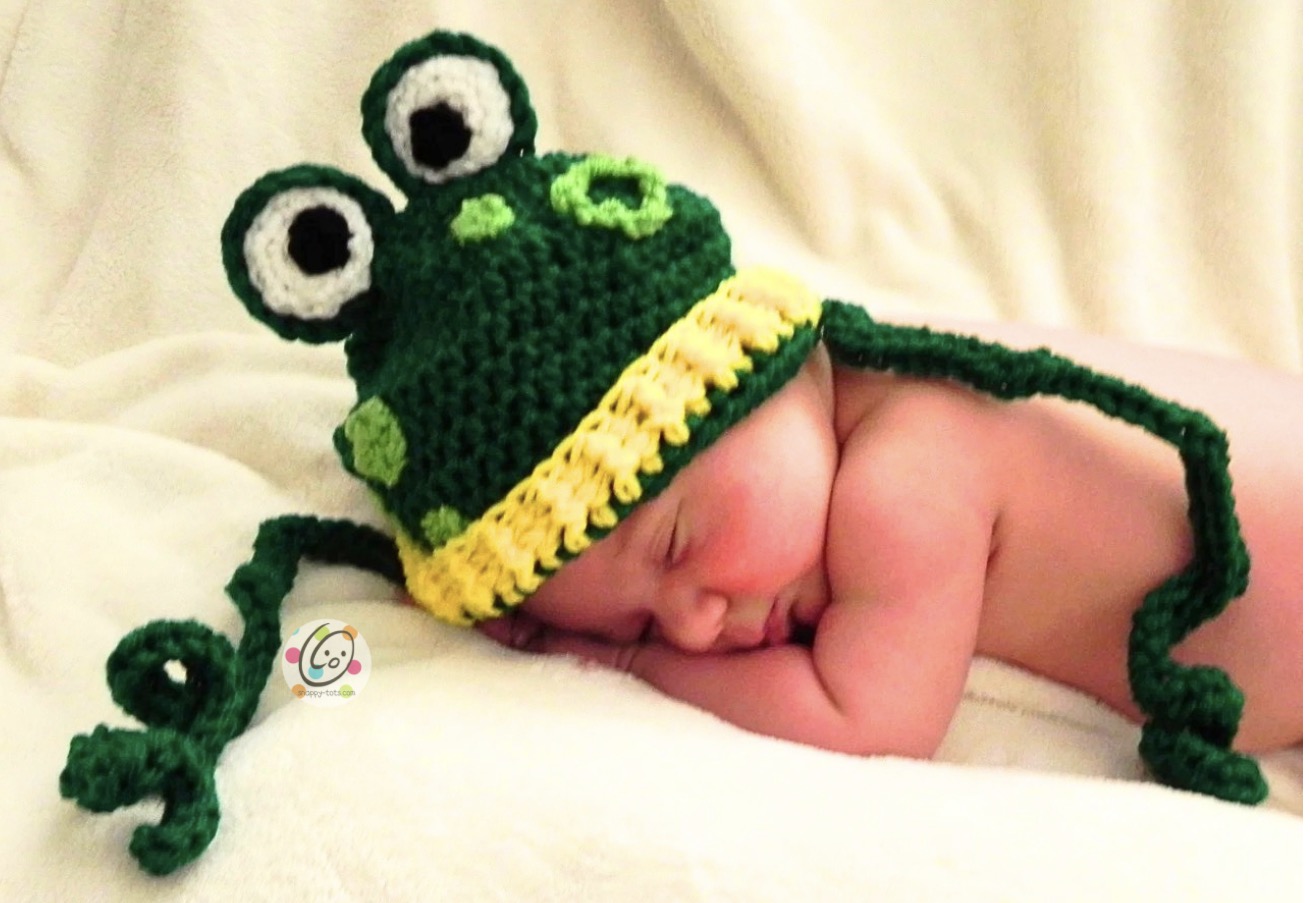
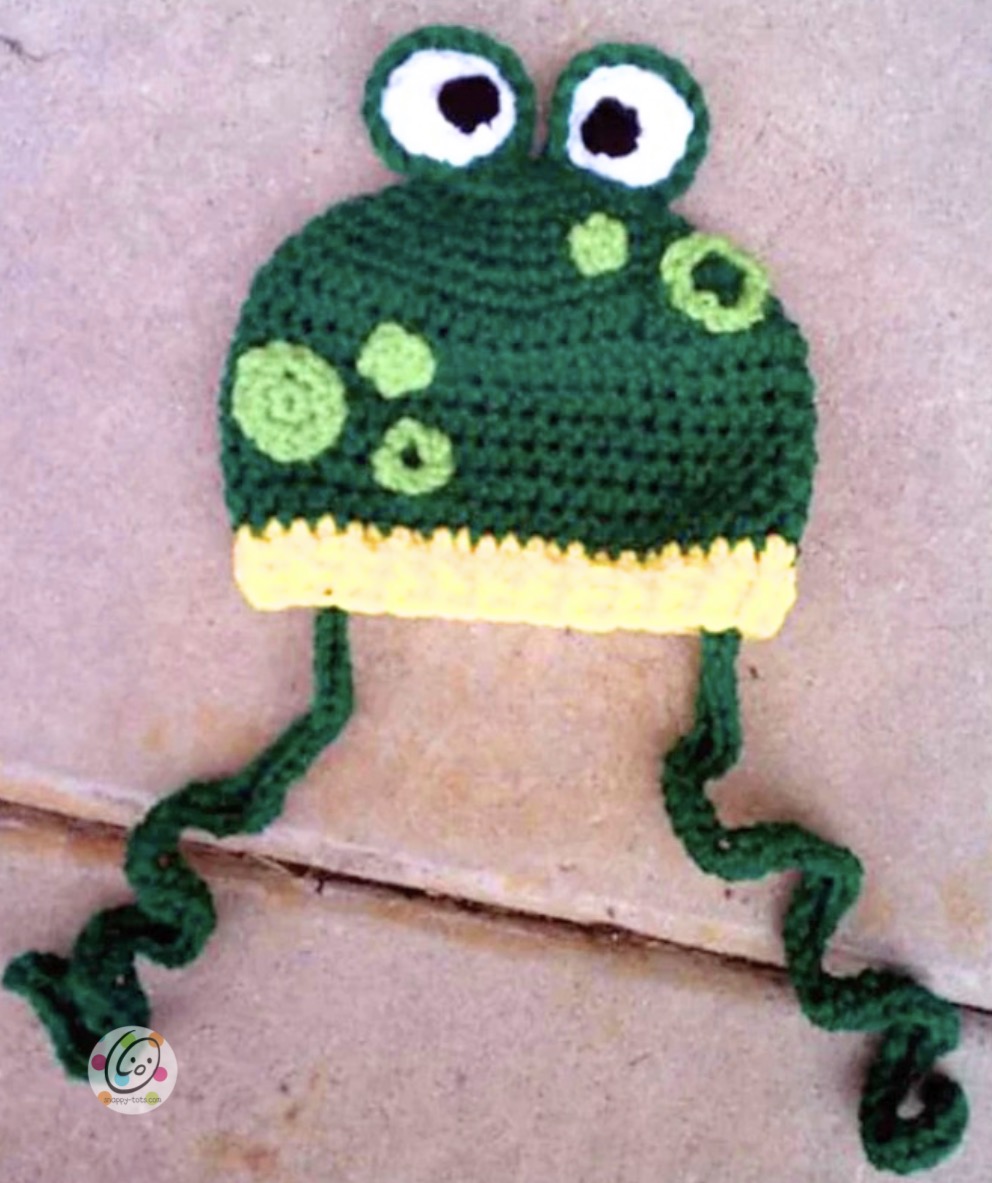
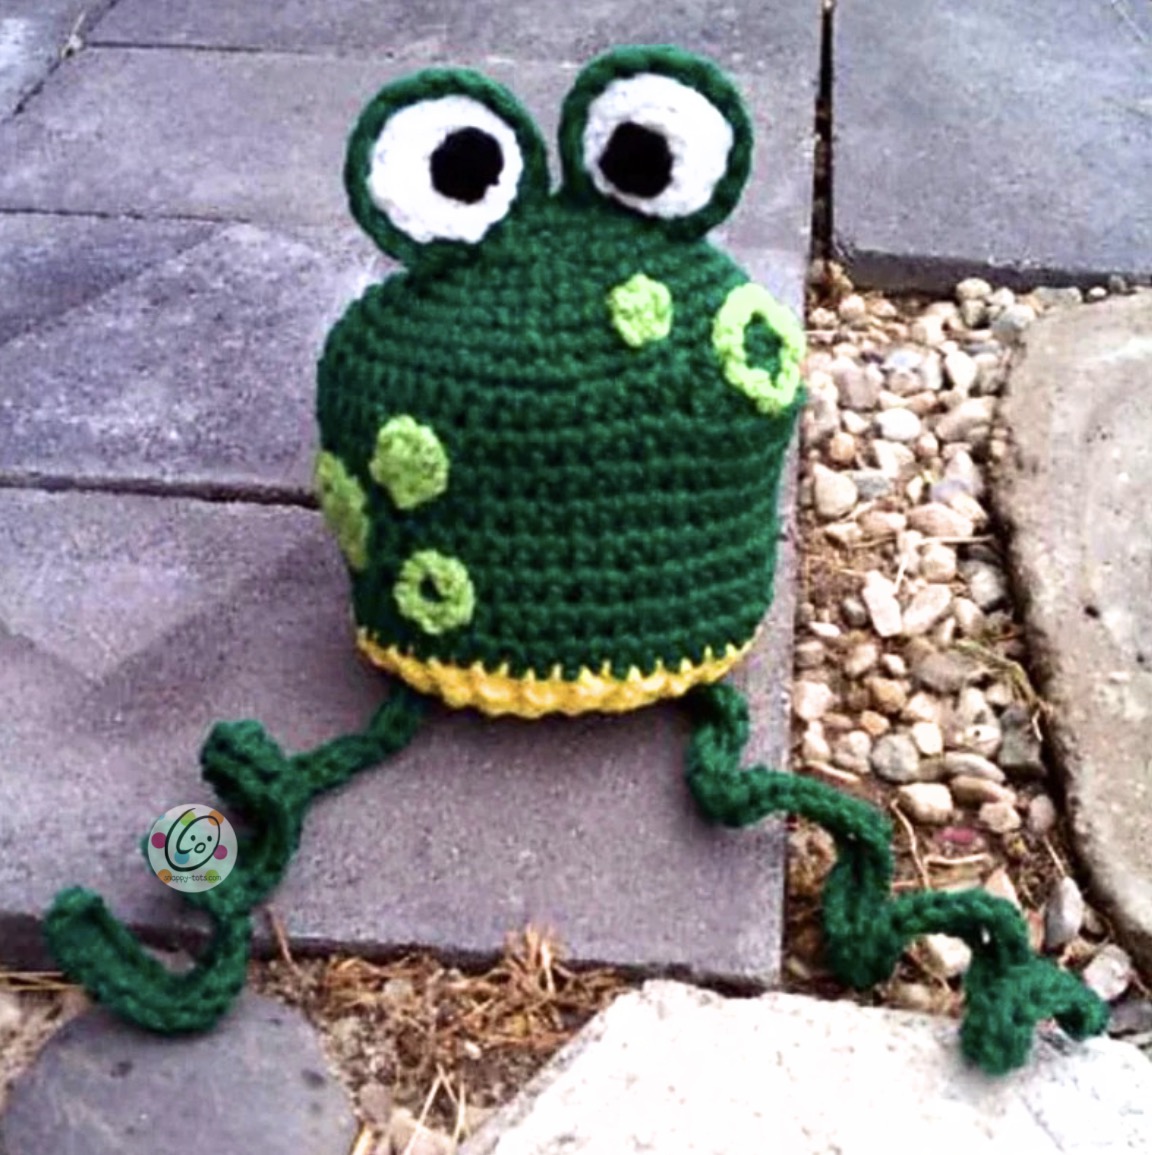
Ribbitz was one of my very first animal hats, and I still love his spots and those crazy curly legs. He has been hanging around the Snappy Tots pattern archives since 2011, so it was definitely time to bring this old favorite back out for another hop around the pond.
The basic frog is pretty cute on his own, but you can make him even sillier by adding the optional tongue and tiny bug. There are also instructions for an optional bow, so have fun making your Ribbitz as simple or as goofy as you want.
Free on the Blog or Printable PDF
Keep scrolling to use the complete free pattern below, or purchase the convenient printable PDF for a small fee.
Materials & Details
Yarn: Worsted weight yarn in two shades of green, yellow, white, black and optional red
Hooks: G (4-4.25mm), H (5mm), I (5.5mm)
Optional: F hook for polka dots on smaller sizes
Miscellaneous: Yarn needle, stitch marker
Finished hat length:
- Newborn: 5–5.5″
- 3–6 months: 6.5″
- 6–12 months: 7″
- 12–24 months: 7.5″
- Child/Preteen: 7.5″
- Adult: 8.5″ or longer if desired
Follow the increases until you reach the size listed at the end of the appropriate round, then skip ahead to the instructions for all sizes.
Unless specifically stated, do not join at the end of each round. The hat is worked continuously to avoid a visible seam. A stitch marker will help you keep track of the beginning of each round.
Hat
With I hook and green yarn, start with a magic loop of 6 sts (or preferred method for starting a circle of 6 sc sts), join and place a marker for working in the round.
1. 2sc in each stitch around. (12 sts)
2. *Sc 1, 2sc in next sc*, repeat to end of round. (18 sts)
3. *Sc 2, 2sc in next sc*, repeat to end of round. (24 sts)
4. *Sc 3, 2sc in next sc*, repeat to end of round. (30 sts) Newborn
5. *Sc 4, 2sc in next sc*, repeat to end of round. (36 sts) 3–6 months
6. *Sc 5, 2sc in next sc*, repeat to end of round. (42 sts) 6–12 months
7. *Sc 6, 2sc in next sc*, repeat to end of round. (48 sts) 12–24 months
8. *Sc 7, 2sc in next sc*, repeat to end of round. (54 sts) Child/Preteen
9. *Sc 8, 2sc in next sc*, repeat to end of round. (60 sts) Teen/Adult
10. *Sc 9, 2sc in next sc*, repeat to end of round. (66 sts) Large Adult
Once you have completed the increase round for your desired size, stop increasing. Do not join. Remove the marker and continue with the instructions below.
For All Sizes
Hdc in each stitch until the hat measures the following length from the top to the current round:
- Newborn: 4″
- 3–6 months: 5″
- 6–12 months: 6″
- 12–24 months: 6.5″
- Child/Preteen: 7″
- Adult: 7.5–8″
These measurements are the length before adding the ribbed band.
Ribbed Band
With yellow or color of choice: Ch 2, *FPDC around next st, BPDC around next st*, repeat to end of round.
Repeat previous round for a total of 2–3 rounds.
Fasten off and weave in all ends.
Eyes
Back of Eyes — Make 2
With I hook and darker green, start with a magic loop of 6 sts (or preferred method for starting a circle of 6 sc sts), join and place a marker for working in the round.
1. Ch 1, 2sc in each stitch around. (12 sts)
2. Ch 1, *sc 1, 2sc in next st*, repeat to end of round. (18 sts)
3. Ch 1, sc in each stitch around.
4. Sl st 3, sc in next 3 sts, sc2tog, sc in next 2, sc2tog, sc in next 3, sl st to end.
Finish off, leaving a long tail for sewing in place.
White Part of Eyes — Make 2
With H hook and white, start with a magic loop of 5 sts (or preferred method for starting a circle of 5 sc sts), join and place a marker for working in the round.
1. Ch 1, 2sc in each stitch around. (10 sts)
2. Ch 1, *sc 1, 2sc in next st*, repeat to end of round. (15 sts)
3. Ch 1, sc in each stitch around.
4. Sl st 3, sc in next 3 sts, sc2tog, sc in next 2, sc2tog, sc in next 2, sl st to end.
Finish off, leaving a long tail for sewing in place.
Pupils — Make 2
With G hook and black, leave a 3″ tail and ch 3 (or magic loop), join and pull closed. Finish off, leaving a 3″ tail for attaching.
Place the pupil in the middle of the white eye. Pull the strands down through the middle, with each yarn end slightly apart from the other so the pupil does not pull through.
Slip the white insert, with pupil sewn in place, into the green back eye piece and sew into place. Refer to the photos for placement and securely sew the finished eyes to either side of the top of the cap.
Frog Spots
Small Polka Dots — Make 2 or More
With G hook and lighter shade of green yarn, ch 4 (or magic loop), join and pull closed. Finish off, leaving a long tail for attaching to hat.
Large Polka Dots — Make 1 or More
With H hook and lighter shade of green yarn, ch 6 (or magic loop), join and pull closed. Finish off, leaving a long tail for attaching to hat.
Open Dots — Make as Many as Desired
With H hook and lighter shade of green yarn, ch 4–6, join to make a circle. Finish off, leaving a long tail for attaching to hat.
With a yarn needle and long tail from the dots, sew each dot into place with a few stitches. There is no need to sew all the way around the outside edge because the dots are so small.
Mix the sizes and styles of the spots and place them wherever you like. For smaller hats, an F hook can be used to make smaller polka dots.
Curly Frog Legs
With I hook and darker shade of green yarn, ch 48. Turn and hdc in second chain from hook and in next 4 chs. *3hdc in next ch, hdc in next 5 chs*, repeat to end of chain.
Finish off, leaving tails long enough to tie to the hat. From the outside of the hat, pull both yarn tails through and tie securely. Pull the ends back through to the inside of the hat and weave in.
Repeat for the second leg.
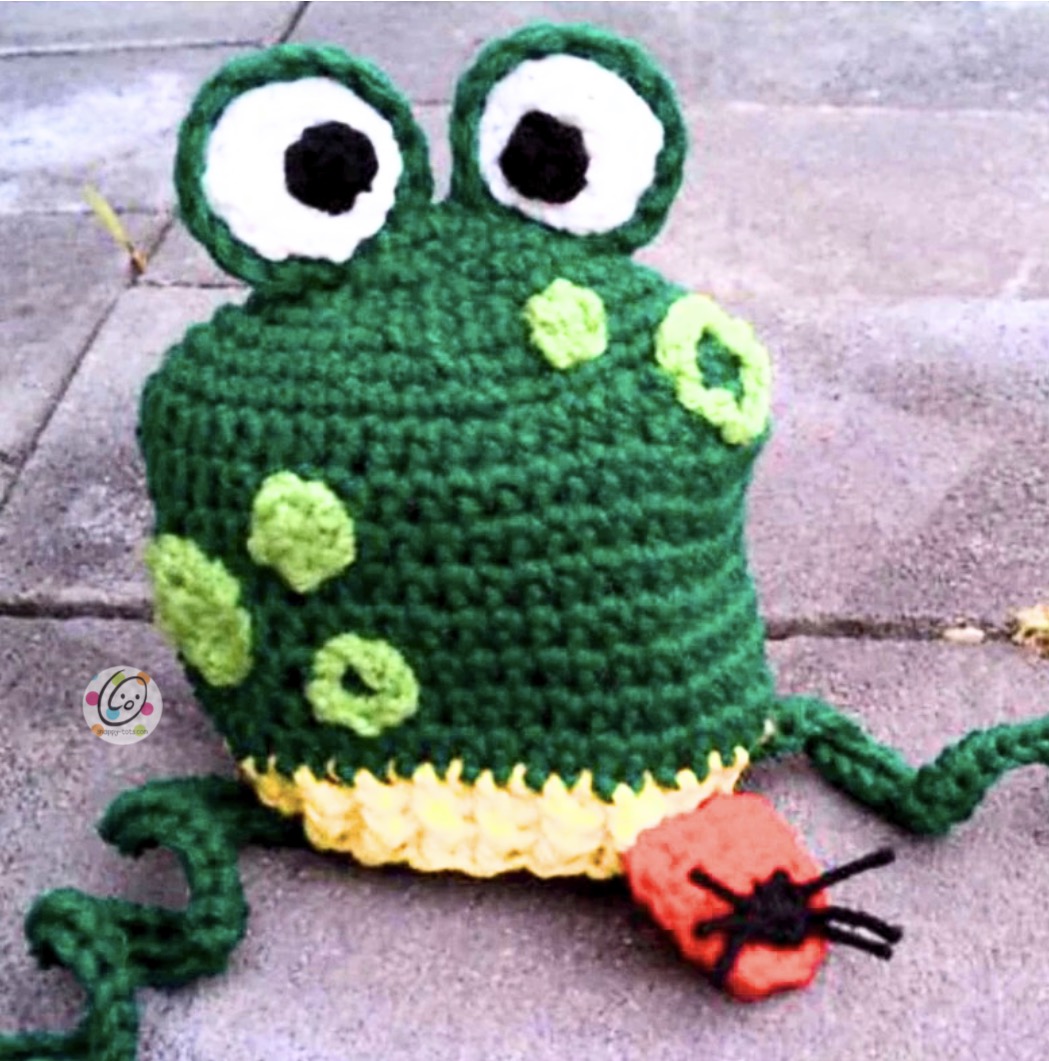
Optional Tongue & Bug
Tongue
With H hook and red yarn, ch 4. Turn and hdc in each stitch across.
Turn, ch 2, hdc in each stitch across.
Turn, hdc2tog, sl st in last stitch. Finish off.
Bug
With G hook and black yarn, ch 3, join and pull closed. Finish off, leaving a 3″ tail for attaching.
Cut 3 pieces of black yarn approximately 2″ long and place them on the tongue. Place the bug body on top of the yarn pieces. With a yarn needle and the bug’s yarn tail, sew the body in place, making sure to sew over the legs so they stay secure.
With a yarn needle and the red yarn tail, sew the tongue into place on the yellow band.
Optional Bow
Using an H hook and worsted weight yarn, ch 15.
*Dc in 3rd ch from hook and across. Ch 2, turn*, repeat for a total of 7 rows. Finish off.
Center Strip
Ch 5. *Sc in 2nd ch from hook and across. Ch 1, turn*, repeat until the strip is long enough to barely wrap around the center of the bow.
Fasten off, leaving an 8″ tail. Wrap the strip around the center of the bow and, using the tail and yarn needle, sew the short ends of the strip together. Finish off.
For a larger bow, use an I or J hook. Attach the bow behind the eyes if desired.
Want the convenient printable version? The Ribbitz the Frog PDF is available on Ravelry for a small fee.
Get the Printable PDFI love seeing what you make from my patterns! Share your finished project on social media and tag #snappytots so I can see your creation.
Stay Connected With Snappy Tots
Come hang out with Snappy Tots for new patterns, giveaways, events, goose nonsense and lots of crochet fun.
Thank you for crocheting with Snappy Tots. I hope you have a wonderful day!