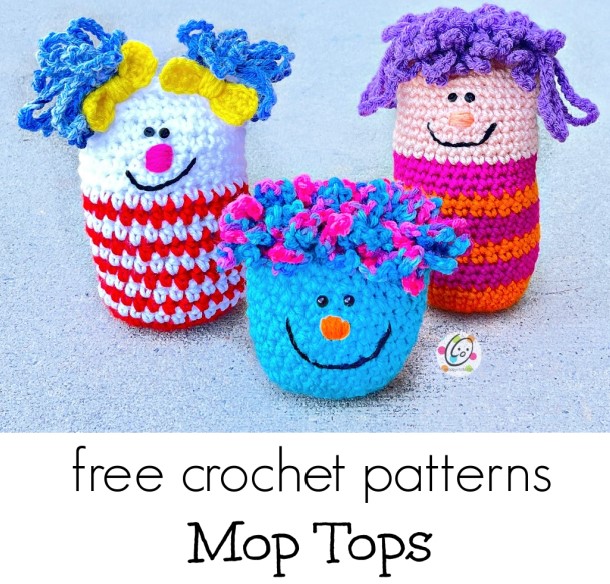
Free Pattern: Mop Tops Stuffies
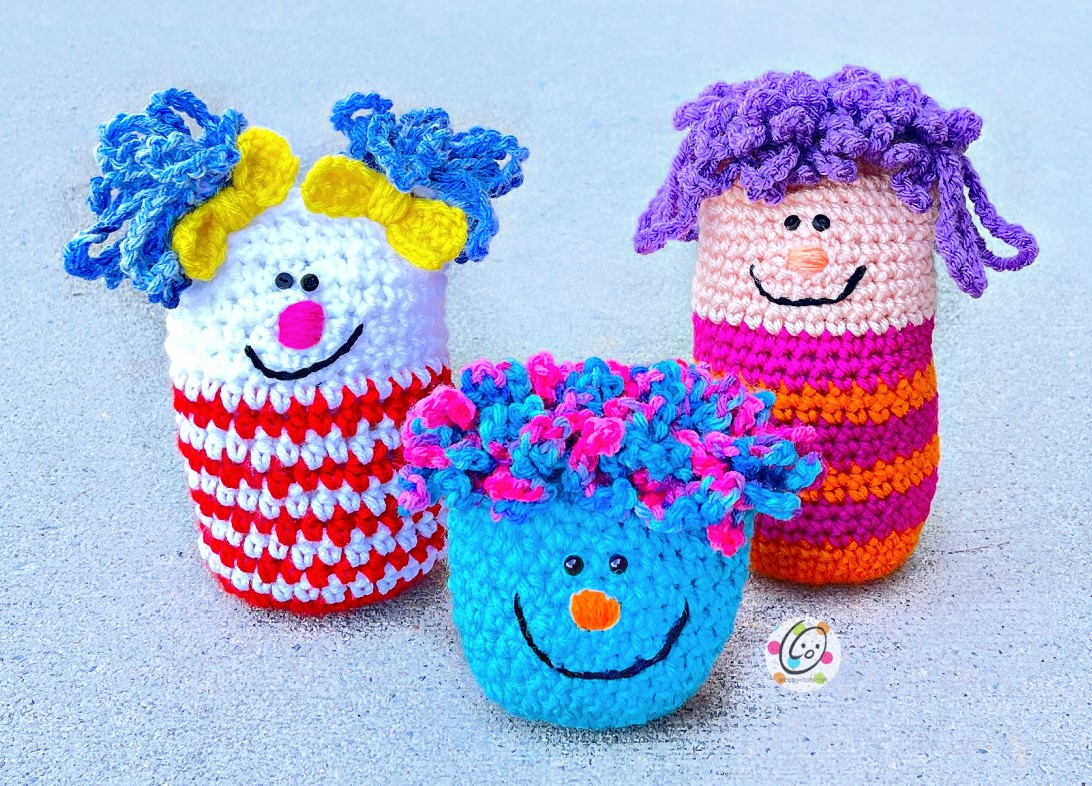
I love little stuffies that can be used in many ways. These little mop tops would be great for bean bags, cuddle buddies, and even decorations.
2023 Softie Crochet Along
This pattern was designed to be part of the 2023 Softie Crochet Along.
| The CAL invites crocheters to make fun softie projects for gifts or to donate to charity while chatting with others in our groups and sharing projects for the chance to win giveaway prizes. This is our sixth annual Softie CAL and we had great response in the past. We hope you will enjoy this year too! | ||||
| Facebook group: https://www.facebook.com/groups/CALCentral/ | ||||
| Ravelry group: http://www.ravelry.com/groups/cal-central-crochet | ||||
| Check out the Pinterest board too: https://www.pinterest.com/ucrafter/crochet-a-long-with-cal-central/ | ||||
How To Join the 2023 Softie CAL
- You can join in by crocheting the patterns as you have time.
- Share your progress and post pictures of your finished projects. Tag your projects and posts #CALCentralCrochet on all social media.
- If you’d like to chat with other crocheters, join the CAL Central Facebook group or visit this thread in the CAL Central Ravelry group.
- By the end of the CAL, you’ll have up to 15 awesome softies to cuddle with!
Mop Tops Crochet Pattern
The pattern is available for free below.
Materials
- Yarn: worsted weight. Samples were made from Red Heart Super Saver yarn in a variety of colors. Less than 50 yards per color.
- Crochet Hooks: H (5mm)
- Notions: Yarn needle for weaving in ends, 2 small black buttons or safety eyes per mop top, black thread, sewing needle, stuffing. Note: If this will be used with small children, use small safety eyes instead of buttons.
- Optional: Measuring tape, scissors, approximately ⅛ cup of stones or beads for weight, sock/nylon to hold beads.
Measurements
- Finished Measurement: 4” across x 4.5-6.5” (or desired height)
- Gauge: not needed for this project.
Tips
- The first stitch of each row is worked into the same stitch as the turning chain unless worked in the round.
- Numbers at the beginning of each line may refer to steps and not indicate number of rows.
- Stitch count remains the same unless noted at end of row/round.
- If you have any questions about this pattern please contact [email protected].
- Finger shape the pieces for a smooth edge.
Note: These are created with a stitch combination that is a little open. Since the items aren’t firmly stuffed it works fine. I love the texture it creates.
If you would like a more solid stitch, as shown in the orange and pink striped version, please use the “SC Version”.
Little Blue Guy
This starts at the bottom of the stuffie.
1. With an H hook and worsted weight yarn (Red Heart Super Saver Turqua in sample), start with a magic circle of 8 sc sts (or preferred method for creating a circle of 8 sc sts), pull closed and place a marker for working in the round. (8sts)
2. 2sc in each st to end of round. (16sts)
3. *sc, 2sc in the next st*, repeat to end of round. (24sts)
4. *sc 2, 2sc in the next st*, repeat until 3 sts remain, sc 3. (31sts)
5. *sc in the next st, hdc in the next st*, repeat until 1 st remains, sc in the last st.
6. *hdc in the next st, sc in the next st*, repeat until 1 st remains, hdc in the last st.
7-14. Repeat steps 5-6. There should be 10 rounds from step 5. For a taller stuffie, add more rounds to this section.
15. Sl st in the next st. This is the new start of the round. Ch 1, sc in the same st and in each st until 2 sts remain, sc2tog, sl st to join. (30sts)
16. Ch 1, *sc 3, sc2tog*, repeat to end of round, sl st to join. (24sts)
17. Ch 1, FPSC around each post to end of round, sl st to join. Note: I know an sc st doesn’t have much of a post, but be patient. This helps create a place to work the hair. Finish off, leaving a long tail for sewing.
Skip to “Face and Hair”.
Patriotic Girl
This starts at the bottom of the stuffie.
1. With an H hook and worsted weight yarn (Red Heart Super Saver Cherry in sample), start with a magic circle of 8 sc sts (or preferred method for creating a circle of 8 sc sts), pull closed and place a marker for working in the round. (8sts)
2. 2sc in each st to end of round. (16sts)
3. *sc, 2sc in the next st*, repeat to end of round. (24sts)
4. *sc 2, 2sc in the next st*, repeat until 3 sts remain, sc 3. (31sts)
5. Change to white yarn. Do not finish off each color when changing for the stripes. *sc in the next st, hdc in the next st*, repeat until 1 st remains, sc in the last st.
6. Change to red yarn, *hdc in the next st, sc in the next st*, repeat until 1 st remains, hdc in the last st.
7-14. Repeat steps 5-6. There should be 10 rounds from step 5. For a taller stuffie, add more rounds to this section.
15. Finish off the red yarn. Change to white yarn. *sc in the next st, hdc in the next st*, repeat until 1 st remains, sc in the last st.
16. *hdc in the next st, sc in the next st*, repeat until 1 st remains, hdc in the last st.
17-18. Repeat steps 15-16.
19. Sl st in the next st. This is the new start of the round. Ch 1, sc in the same st and in each st until 2 sts remain, sc2tog, sl st to join. (30sts)
20. Ch 1, *sc 3, sc2tog*, repeat to end of round, sl st to join. (24sts)
21. Ch 1, FPSC around each post to end of round, sl st to join. Note: I know an sc st doesn’t have much of a post, but be patient. This helps create a place to work the hair. Finish off, leaving a long tail for sewing.
Skip to “Face and Hair”.
SC Version – Wide Striped Girl
This starts at the bottom of the stuffie.
1. With an H hook and worsted weight yarn (Red Heart Super Saver Pumpkin in sample), start with a magic circle of 8 sc sts (or preferred method for creating a circle of 8 sc sts), pull closed and place a marker for working in the round. (8sts)
2. 2sc in each st to end of round. (16sts)
3. *sc, 2sc in the next st*, repeat to end of round. (24sts)
4. *sc 2, 2sc in the next st*, repeat until 3 sts remain, sc 3. (31sts)
5. Sl st in the next st. This is the new start of the round. Ch 1, sc in the same st and in each st to end of round, sl st to join.
6-7. Ch 1, sc in the same st and in each st to end of round, sl st to join.
8. Change to pink yarn. Do not finish off each color when changing for the stripes. Ch 1, sc in the same st and in each st to end of round, sl st to join.
9-10. Ch 1, sc in the same st and in each st to end of round, sl st to join.
11. Change to orange yarn. Ch 1, sc in the same st and in each st to end of round, sl st to join.
12. Ch 1, sc in the same st and in each st to end of round, sl st to join.
13. Repeat steps 8-12 once.
14. Finish off the orange yarn. Change to pink yarn. Ch 1, sc in the same st and in each st to end of round, sl st to join.
15-16 Ch 1, sc in the same st and in each st to end of round, sl st to join.
17. Finish off the pink yarn and change to yarn for the face section (Red Heart Super Saver Peach in sample). Ch 1, sc in the same st and in each st to end of round, sl st to join.
18. Ch 1, sc in the same st and in each st to end of round, sl st to join.
19. Repeat the previous round for an additional 7 rounds.
20. Ch 1, sc in the same st and in each st until 2 sts remain, sc2tog, sl st to join. (30sts)
21. Ch 1, *sc 3, sc2tog*, repeat to end of round, sl st to join. (24sts)
22. Ch 1, FPSC around each post to end of round, sl st to join. Note: I know an sc st doesn’t have much of a post, but be patient. This helps create a place to work the hair. Finish off, leaving a long tail for sewing.
Continue to “Face and Hair”.
Face
Nose: With a yarn needle, use a long piece of yarn to create an oval shape.
Mouth: With a yarn needle, use a long piece of black yarn to create the smile. Tip: I like to pull yarn apart and only use 2 strands for a lighter smile.
Eyes: With a sewing needle and black thread, sew two buttons above the nose OR add safety eyes.
Stuffing
Insert weight into the bottom of the stuffie if desired. Stuff the body. Note: I leave the top 1-2” unstuffed.
Hair
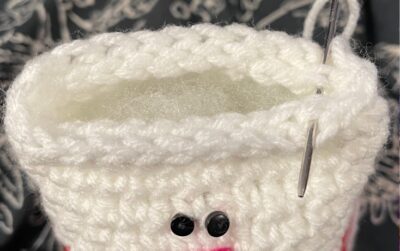
Sewing the top (all versions): Flatten the top round, lining up the st in two layers. Make sure the face is centered. Sew the inner sts together, NOT the last round. See photo below.
Full Hair – Short (little blue guy)
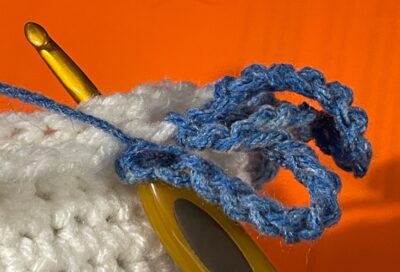
1. With an H hook, sl st into a st on the top edge at one side. *ch 12, sl st in the next st, ch 10, sl st in the next st,* repeat to end of round.
2. Working on the inside of the previous round of loops, *ch 8, FPSC around the post at the bottom of the next loop* (see photo at right), repeat to end of round.
3. *ch 8, sl st around the next st on the seam in the middle*, repeat to end of seam. Finish off and weave in ends.
Ponytail Girl
1. With an H hook, sl st into a st on the top edge at one side. *ch 15, sl st in the next st,* repeat 4 more times, ch 15, sl st through both layers (see photo below). Turn the piece to work from the opposite side, *ch 15, sl st in the next st*, repeat to end of round (back to the first loop).
2. Working on the inside of the previous round of loops, *ch 15, FPSC around the post at the bottom of the next loop*, repeat to end of round.
(Approximately 14-16 loops total)
Repeat for opposite edge.
Bows (make 2)
1. With an H hook and worsted weight yarn (Red Heart Super Saver Bright Yellow in sample), ch 9, sc in the 2nd ch from hook and in each ch across. (8sts)
2-3. Ch 1, turn, sc in the same st and in each st to end of row.
Finish off and weave in ends. Attach a long piece of matching yarn to the center back of the bow. Wrap the yarn around the middle of the bow several times, cinching it in and creating a nice center. Secure the yarn to the back of the bow.
Use the remaining yarn to sew the bow to the front of a ponytail.
Repeat for the second bow.
Long Hair With Bangs
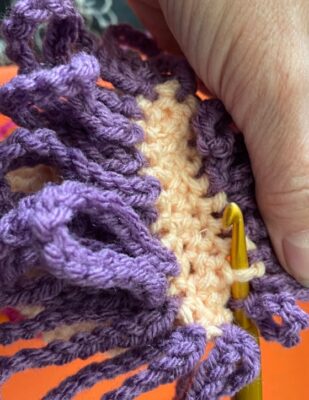
Start at one edge of the face. With an H hook and worsted weight yarn (Red Heart Super Saver Medium Purple in sample), *ch 8, sl st in the next st*, repeat across face section (approximately six), ch 10, sl st in the next st, *ch 20, sl st in the next st*, repeat until 1 st remains before the bangs section, ch 10, sl st in the next st. Finish off and weave in ends.
Pin To Save For Later