

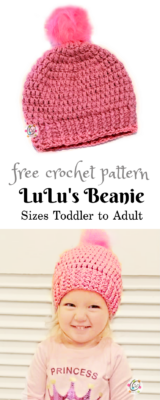
Free Pattern: Lulu’s Beanie
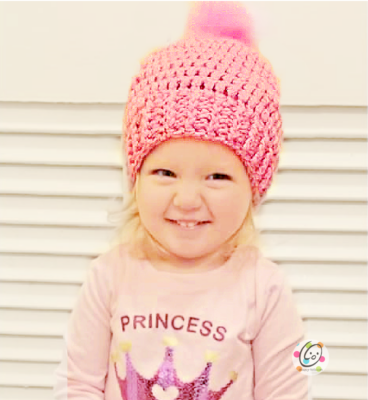
Several years ago I designed a “Club Snappy Beanie” made from bulky weight yarn and a cluster stitch. I have always wanted to make a worsted weight version. So when I wanted to make a beanie for my granddaughter with Red Heart With Love Metallic yarn it seemed a perfect time. I LOVE how it turned out and she still wears this cute hat. Her name is Lucy and my youngest son (her uncle) calls her Lucy Loo… so we named this pattern LuLu.
If you haven’t tried this yarn I HIGHLY suggest it! It is a good, thick worsted weight yarn that is soft and colorful.

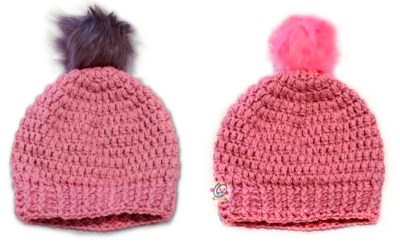
I let her choose the pompom color for the top and she liked the pink one. I kept looking for pompoms to buy and ended up buying keychains and cutting off the chains.
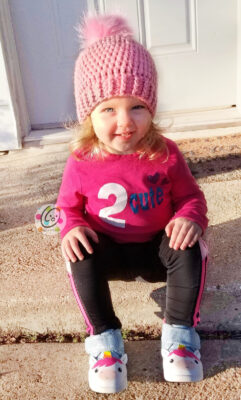
This beanie pattern is a good one to keep on hand because it can be made for both boys and girls, toddler to adult.
Lulu’s Beanie Pattern
The pattern for this beanie is available for free below. An ad-free, downloadable pdf is available for a small free. Ravelry | Etsy
Materials & Details
- Yarn: 200 yards worsted weight yarn Sample: Red Heart With Love Metallic
- Crochet Hook: I (5.5mm)
- Misc: Yarn needle, pompom
- Gauge: 4 inches = 5 cluster stitches
- Sizes: Toddler, Child, Teen/Adult
Tips
- Numbers at the beginning of each line may refer to steps and not indicate the number of rows.
- All sizes start the same.
- Clusters need to be worked in the stitch, not between stitches.
- The stitch count remains the same unless noted otherwise.
- If you have any questions about this pattern please contact [email protected].
Special Stitch Cluster stitch: YO, insert hook in next st, pull up a loop, YO, insert hook in same st, pull up another loop (5 loops on hook), YO, pull hook through 4 loops, YO, pull through remaining 2 loops. Cluster made.
Directions For All Sizes
1. With an I hook and ww yarn, start with a magic circle of 8 hdc sts (or preferred method for starting a circle of 8 hdc sts). Place marker to keep track of beginning of round. (8sts)
2. Work 2 cluster stitches (see “special stitch”) in each stitch to end of round. (16sts)
3. *1 cluster stitch in next st, 2 clusters sts in next*, repeat to end of round. (24sts) 3.5” across
4. *1 cluster stitch in each of the next 2 sts, 2 cluster stitches in next st*, repeat to end of round. (32sts) 4.75” across
5. *1 cluster stitch in each of the next 3 sts, 2 cluster stitches in next st*, repeat to end of round. (40sts) 5.5” across
6. *1 cluster stitch in each of the next 4 sts, 2 cluster stitches in next st*, repeat to end of round. (48sts) 6.25” across. For toddler size, skip to step 9.
7. *1 cluster stitch in each of the next 5 sts, 2 cluster stitches in next st*, repeat to end of round. (54sts) 7” across. For child size, skip to step 9.
8. *1 cluster stitch in each of the next 6 sts, 2 cluster stitches in next st*, repeat to end of round. (60sts) 7.75” across. For teen/adult size, continue to the next step.
9. Work 1 cluster in each st to end of round.
10. Repeat round 9 until hat measures 6” (toddler), 7-7.5” (child), 8-8.5” (teen/adult) from top edge of beanie to bottom edge. To find this measurement, place the beanie on a flat surface and measure from the beginning circle to current edge.
11. Hdc in next st, sc, sl st. This lowers the height of the round and is the new beginning point. Ch 1, FPHDC around each post (top) of each cluster to the end of the round, sl st in the first st to join. (48, 54, 60)
12. Ch 1, *FPDC around the next post, BPDC around the next post*, repeat to the end of the round, sl st in the first st to join.
13. Repeat previous round for an additional 3 rounds (toddler), 4 rounds (child), 5 rounds (teen/adult).
Finish off and weave in ends.
Pompom (optional): Sew a pompom to the top of the beanie.
Pin To Save For Later
Please Share Your Creations
I would LOVE to see what you make from my patterns. Please include #snappytots when sharing pix online so I can see too. I would also love for you to join us in my Facebook Group, Totally Snappy and share pix there.


