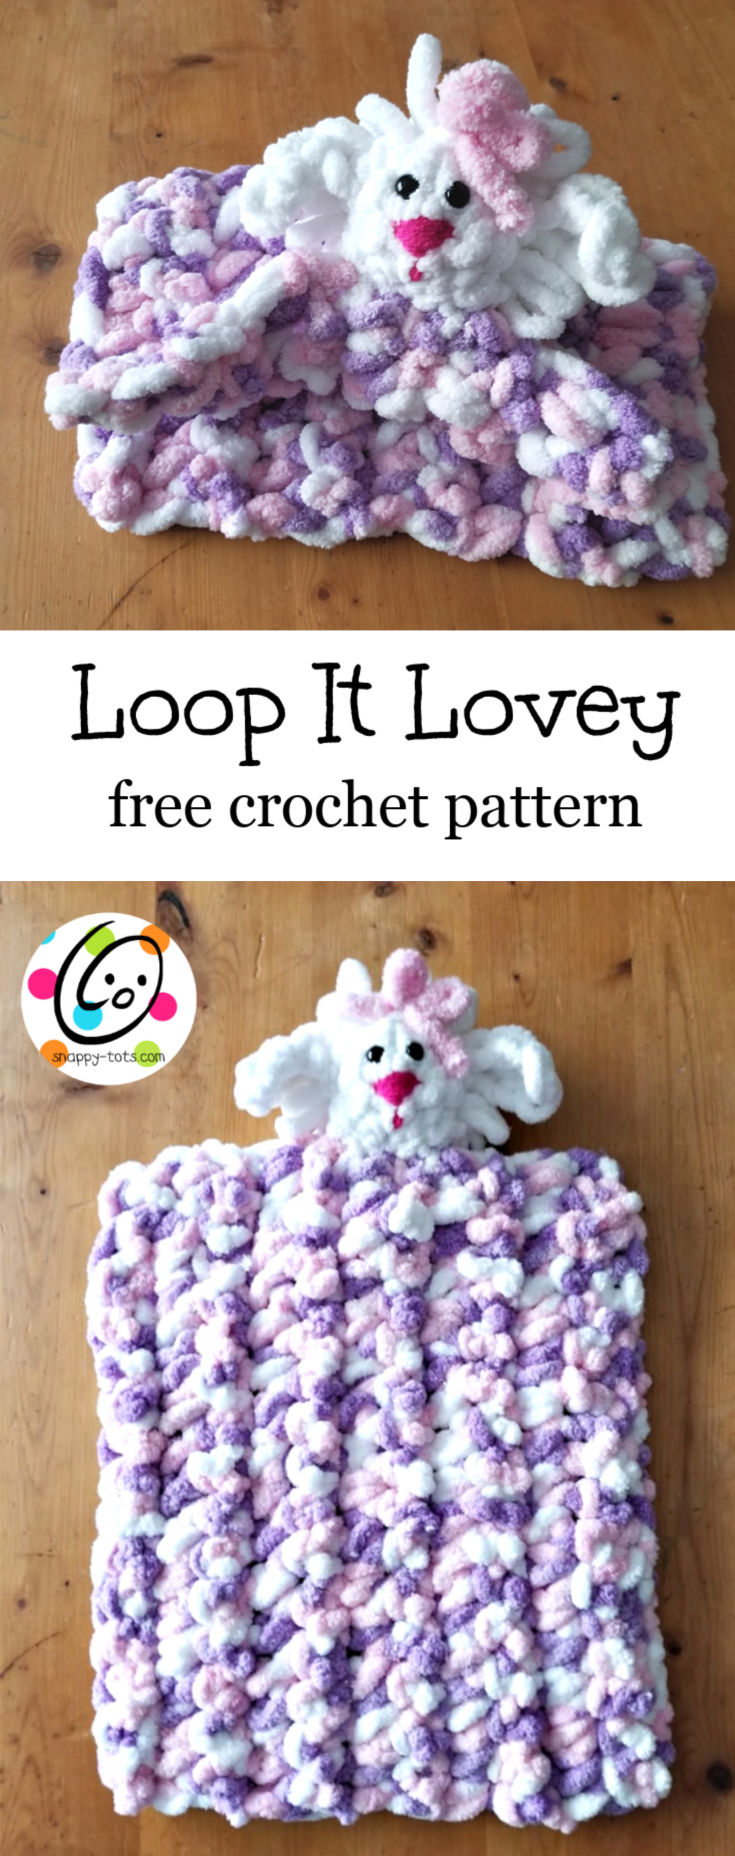
Free Pattern: Loop-It Lovey
A couple of weeks ago Red Heart sent me two skeins of their Loop-It Yarn. I have to admit, I was intimidated to give it a try. I had seen lots of fun projects popping up made with this finger looping technique and decided to finally give it a try.
I started by watching some videos on the different stitches you can do with this yarn. You can find lots of how-to videos for this yarn by Marly Bird: CLICK HERE.
If you would like to try the finger looping method, there are lots of great projects online. Here are some wonderful ones:
Fun Finger Looping Projects
Alright, now that I have listed lots of ways to use the yarn as it is intended, I am going to share my experience with it.
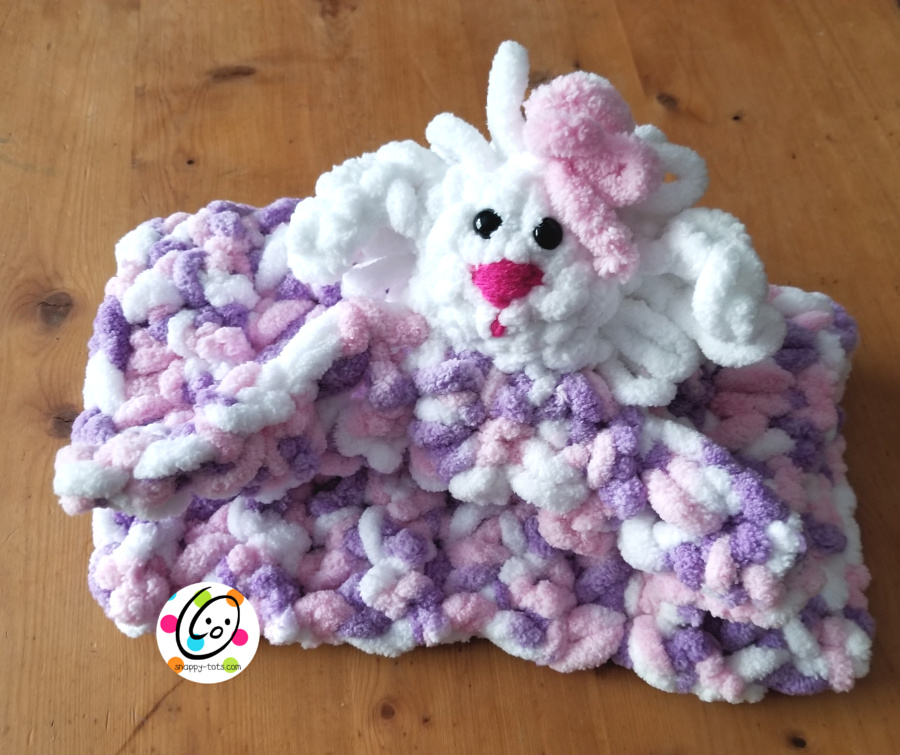
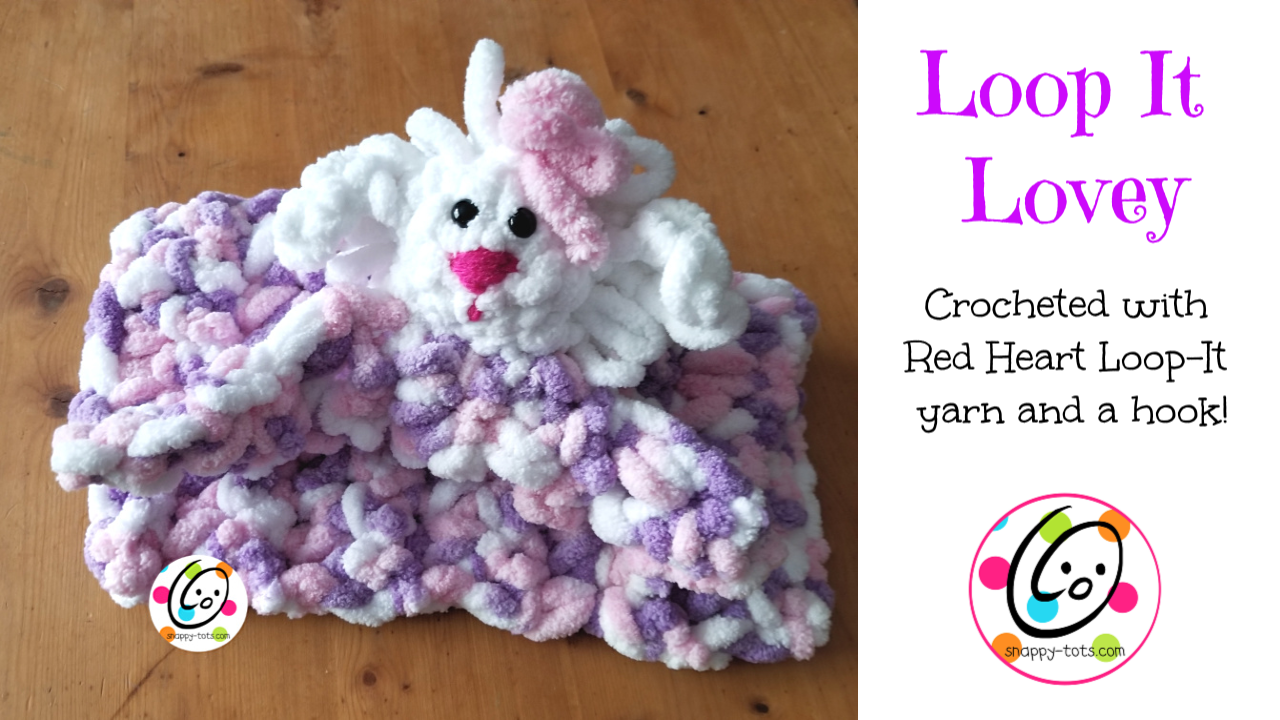
Well, it is very fluffy! I knew right off that I wanted to make a lovey for my granddaughter, Lucy. She is almost one. All of those loops yelled LAMB at me. BUT with the finger looping method the loops are hidden. So I started with the lovey first and would figure out a way to make the loops stick out later for the head.
Maybe it was because I was giving it a try at 2am or maybe it is because I am an impatient perfectionist, but the yarn and I were not best friends right off the bat. After trial and a bit of unkind words (on the yarn’s part, not mine), I decided to pull out my crochet hook and see if I could go against the norm and crochet.
It WORKED! …and I LOVE how it turned out. Plus, since I crocheted my little lovey, I could make some of those loops stick out for the lamb head. YAY!
I hope you will enjoy my project plus give the finger looping part a try.
Directions
Materials and Details
- Yarn: Red Heart Yarns Loop-It – One skein Tickled Pink and Purple, 1/2 skein White; RHSS Shocking Pink (1 yard)
- Crochet Hook: P (11mm)
- Notions: Yarn needle, 2 small safety eyes
Note: This yarn is intended to be used with your fingers, interlocking the loops instead of a hook and crochet stitches. Since I DID use a hook and crocheted this lovey I have created a video to show how I did this. This video is intended to show the yarn and how I used the yarn with a hook. It does not include the pattern.
Please use the instructions below.
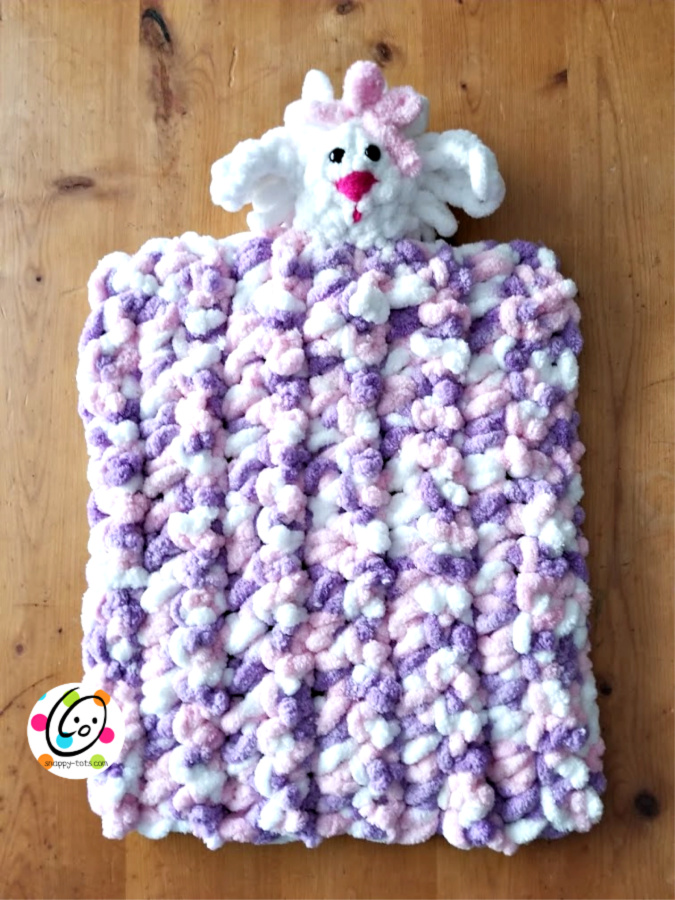
Lovey Rectangle
- Cut the bottom of the first loop to make the beginning yarn tail a little longer (this is shown at the point in the video). With a P hook and the variegated yarn, ch 17.
- Pull the last loop on the hook a little longer. This will be in place of a usual ch 1 when turning a row. Turn the piece. Insert hook in 2nd ch from hook and into the next loop on the strand. Pull the loop up through the st. Insert hook in next loop on the strand and pull the loop through all loops on the hook. One SC st complete. Sc in each st to the end of the row. Make sure there are 17 sts.
- Pull the last loop on the hook a little longer. Turn the piece. Insert hook in first st and into the next loop on the strand. Pull the loop up through the st. Insert hook in next loop on the strand and pull the loop through all loops on the hook. One SC st complete. Sc in each st to the end of the row.
- Repeat step 3 until yarn is almost gone. Cut the bottom of the next 2 loops, making a longer tail. Cut the yarn tail before the next loop. Use a yarn needle to weave in the end.
Lamb Head
- The head is created from the white loop-it yarn, allowing some of the loops to stick out. Cut the bottom of the first loop to make the beginning yarn tail longer. Cut the bottom of every other loop, creating a long strand between loops. Attach the same hook (P/11mm) to the beginning of the strand and ch 1. *Push the loop back and ch 2 with the strand between loops*. Keep repeating until there are 10 chains.
- Pull the loop on the hook a little longer and turn the piece. Insert hook in the first st. Use the strand between loops to sc in each st across.
- Repeat for two more rows.
- Finish off, leaving a yarn tail for sewing the ends together. Use the hook to pull all loops to one side. Fold the piece in half, with loops on the inside and match the two edges. With a yarn needle, use the yarn tail to sew the sides together.
- Flip the piece right side out. Choose one “end” to be the face. I pulled a few of the loops to the inside to make a smooth place for the face. Insert the safety eyes. Use a yarn needle and pink worsted weight yarn to stitch the nose and mouth line in place. Push the loops at the top of the head back and tie a bow with an 8″ piece of the loop it yarn OR ribbon.
- With a yarn needle and matching yarn, sew the bottom of the head to the center of one edge of the lovey.
Lamb Ears (make 2): Cut the bottom of several loops to create a smooth, loopless strand. Ch 5, sc in 2nd ch from hook, hdc 2, sc. Finish off and leave a yarn tail for sewing to head. With a yarn needle, use the yarn tail to sew each ear to the side of the lamb head.

Project complete 🙂
Pin To Save For Later