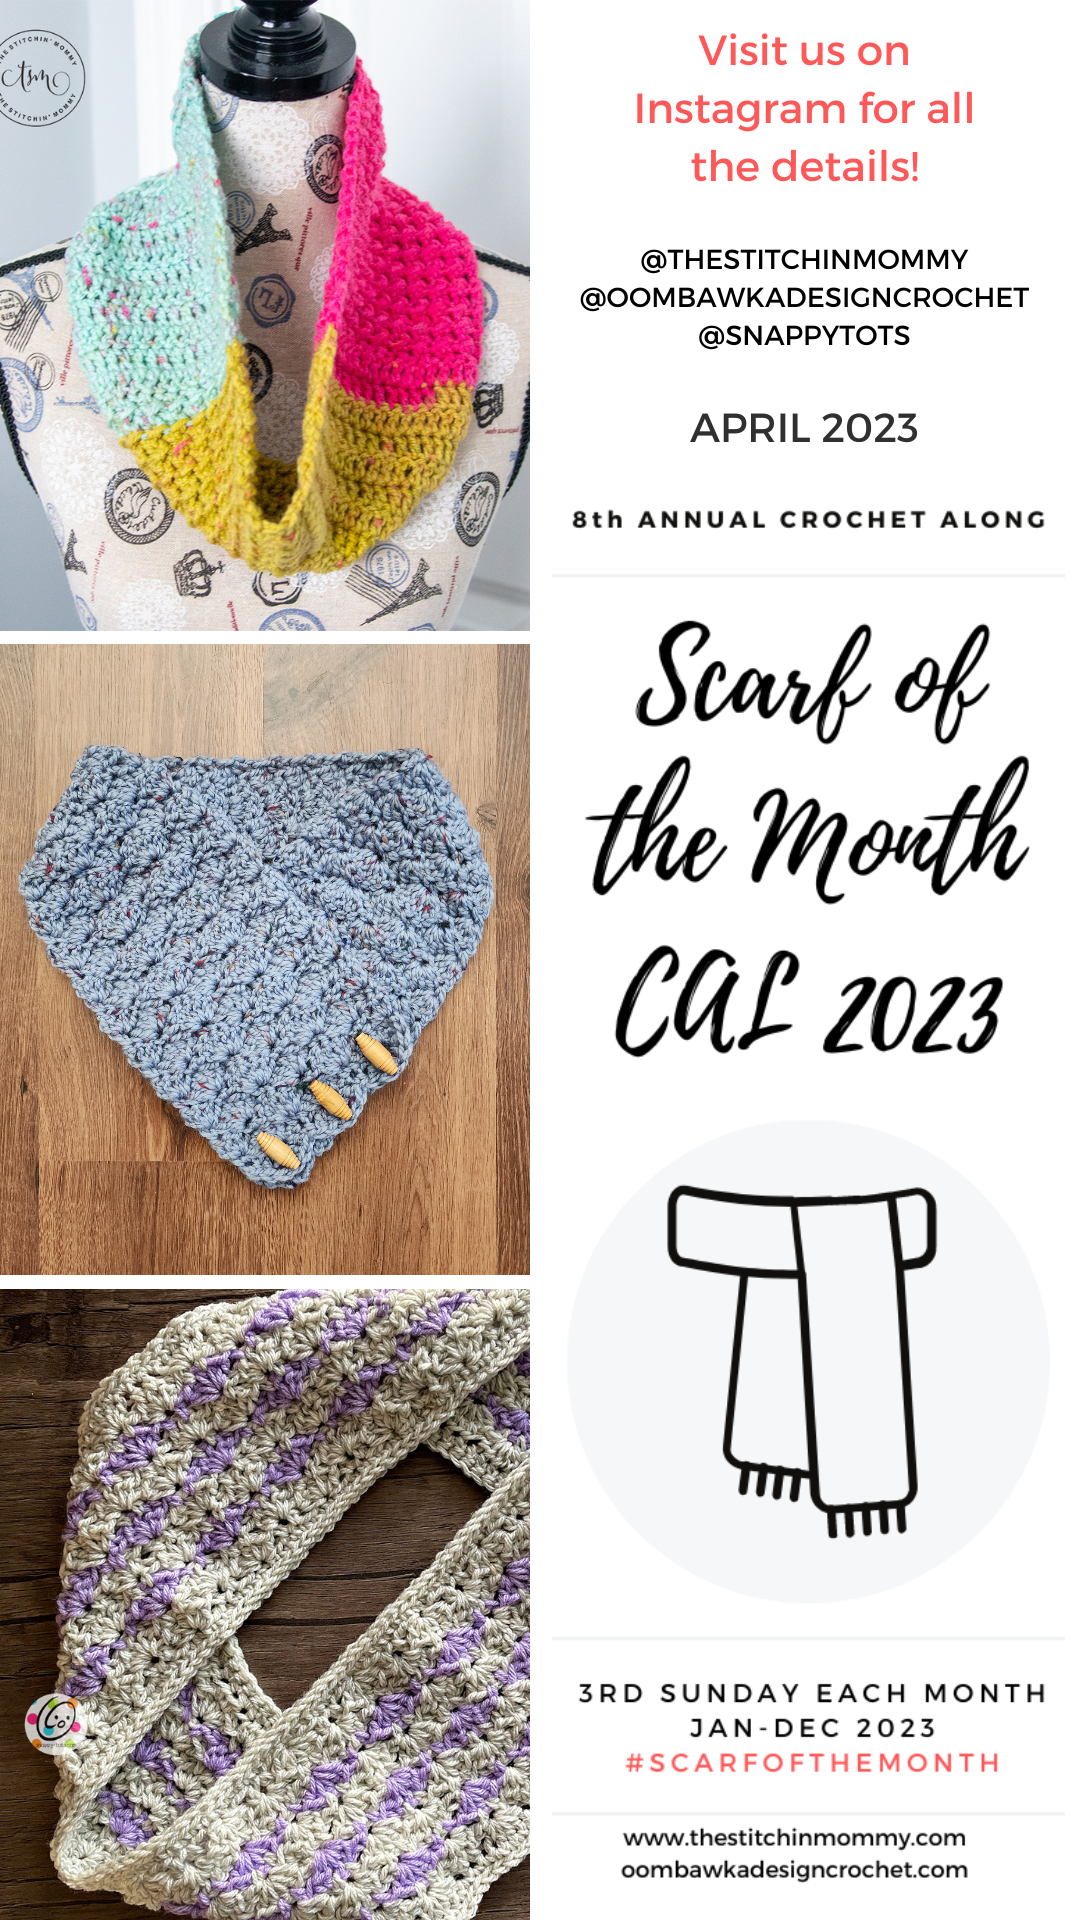
Free Pattern: Kate’s Cowl
“Spring” is arriving late in northern Utah this year. We keep flashing back to tons of snow. It has been crazy running the snowblower in April! I wanted to make something I could wear with my coat but also will work for actual spring-type weather. This cowl uses a stitch combo from a headband I made a few years ago that I have always wanted to do again. It makes a nice texture, is fun to do, but easy enough to work during distractions (a much-appreciated feature around my house lol).
Is this named after someone? Actually, I couldn’t come up with a name… sometimes designs are shy and won’t tell me their names… so I asked my 16-year-old (who was sitting outside with me) for a girl’s name and voila! Project named.
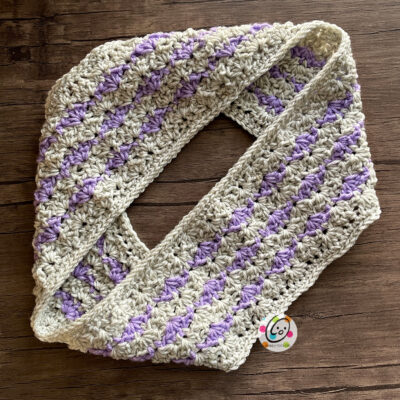
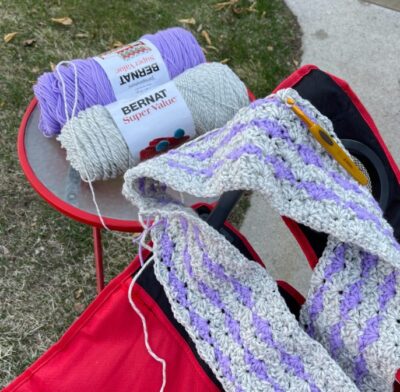
As written, the scarf used less than half of each skein. This was the first time using Bernat Super Value yarn and I really enjoy working with it. I chose it because I really liked the colors, especially the “Grey Ragg”.
It was finally nice enough to sit outside for a few days (after TONS of snow clear into April). This is a simple pattern repeat to remember so it was a nice, relaxing break.
This pattern is part of the 2023 Scarf and Hat of the Month cal with The Stitchin Mommy and Oombawka Design Crochet. Each month three scarf patterns are released and you get can get the downloadable patterns for free for a limited time (the instructions will continue to be free to follow along ON the blog after that as well).

The pattern for my scarf is available free below and you can get the other two scarf patterns at the following links:
- Clara Cowl by The Stitchin Mommy
- Bonny Neck Scarf by Oombawka Design Crochet
Matching Patterns
- By the Lake Headband
- Kate’s Beanie – Available 4/23/23
Kate’s Cowl Free Crochet Pattern
The pattern for this cowl is available to view for free below.
Download the ad-free pdf this pattern for free until 5/31/23. CLICK HERE to add it to your cart and check out. No coupon code needed.
Materials
- Yarn: 300 yds worsted weight yarn (200 yds main color, 100 yds contrasting color)
Sample Yarns: Bernat Super Value (200 yds Grey Ragg, 100 yds Lilac) - Miscellaneous: Yarn needle, measuring tape
- Crochet Hook: J (6mm)
Details
- Measurements: 20” x 5.5” (measured flat)
- Gauge: 4” from outer edge of one cluster to the next (see photo below)

Tips
- First stitch of each row is worked into the same stitch as the turning chain unless noted.
- Numbers at the beginning of each line may refer to steps and not indicate number of rows.
- Remember “hdc 2” means to work one hdc in each of the next 2 sts. 2hdc is an increase and means to work 2hdc sts in ONE st.
Variations
- This is designed as a single-loop cowl (as shown).
- This could be made in anything length. See the “custom” options at the end of the pattern.
Directions
1. Leave a tail in the beginning. This will be used to sew a small seam closed. With a J hook and worsted weight yarn (grey in sample), ch 134, sc in 2nd ch from hook and in each ch across. (133sts)
2. Ch 1, sc in the same st and n each st to end of row, sl st in the first st to join. The gap from the beginning row will be sewn closed later.
3. From this point on, the beginning chain counts as a st. Ch 2, hdc in the next st (not the same st as the turning ch), *sk 2, 5hdc in next st, sk 2, hdc 2*, repeat until 5 sts remain, sk 2, 5hdc in next st, sk 2, sl st in top of ch 2 to join.
(133sts) Stitch count remains the same for the full cowl.
4. Ch 2, TURN, *hdc in between posts of 2nd and 3rd hdc of 5hdc cluster from previous round and in between posts of 3rd and 4th hdc, 5hdc in space between 2 hdc from previous round*, repeat until 1 cluster remains, hdc in between posts of 2nd and 3rd hdc of 5hdc cluster from previous round and in between posts of 3rd and 4th hdc, 4hdc in between last 2hdc, sl st in top of ch 2 to join.
Note: the last cluster is made up of only 4hdc because the beginning ch 2 creates the 5th post. When starting the next round, count the ch as the first post.
5. Change to a contrasting color (lavender in sample) and repeat step #4.
6-7. Change back to the main color (grey in sample) and repeat step #4.
8. Change to a contrasting color (lavender in sample) and repeat step #4.
9-10. Change back to the main color (grey in sample) and repeat step #4.
11. Change to a contrasting color (lavender in sample) and repeat step #4.
12-13. Change back to the main color (grey in sample) and repeat step #4.
14. From this point on, the beginning ch does not count as a stitch. Ch 1, turn, sc in the same st and in each st to end of round, sl st to join. (133sts)
15. Loosely sl st in each st to end of round. Finish off and weave in ends.
16. Use the beginning yarn tail and a yarn needle to sew the beginning gap together. Attach the main color to the beginning edge and loosely sl st in each st to end of round. Finish off and weave in ends.
Custom Cowl and Scarf Directions
This could be made any length, even as a straight (non circle) scarf.
Start with a chain divisible by 7, plus one for the turning chain. If you want it to be a straight scarf do not join at the end of step 2.
Pin To Save For Later