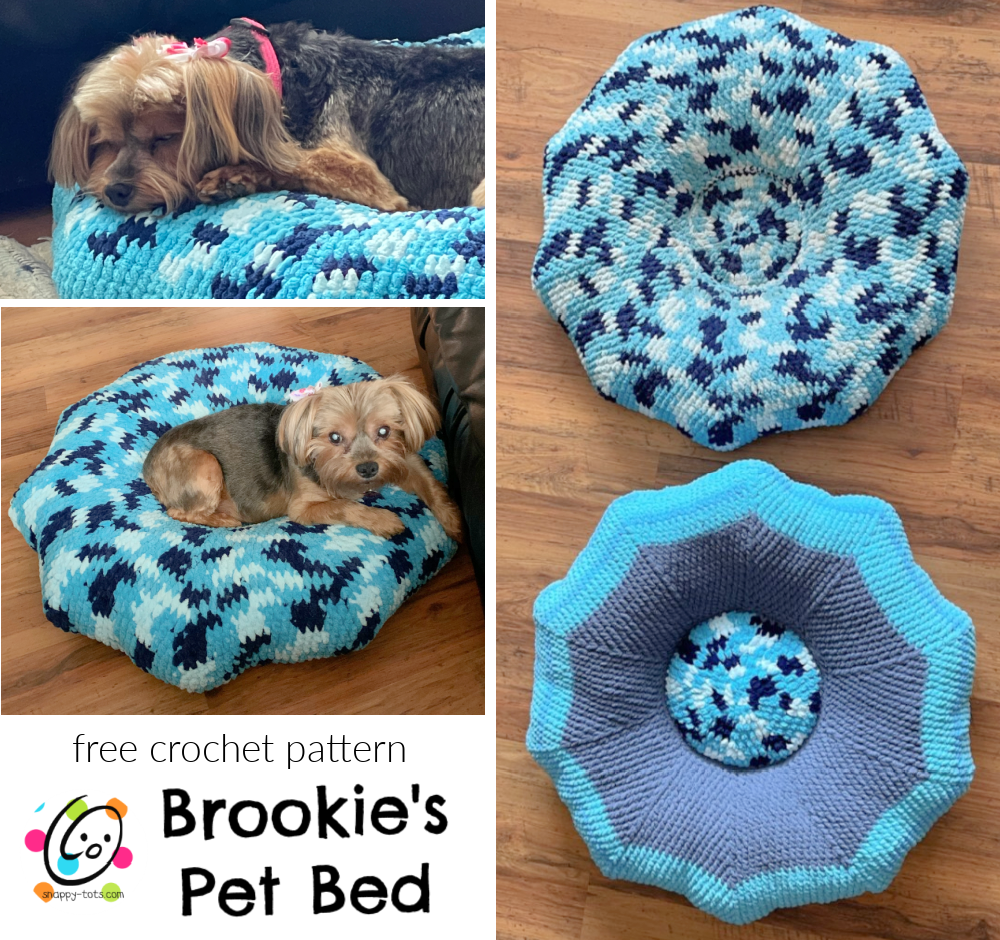
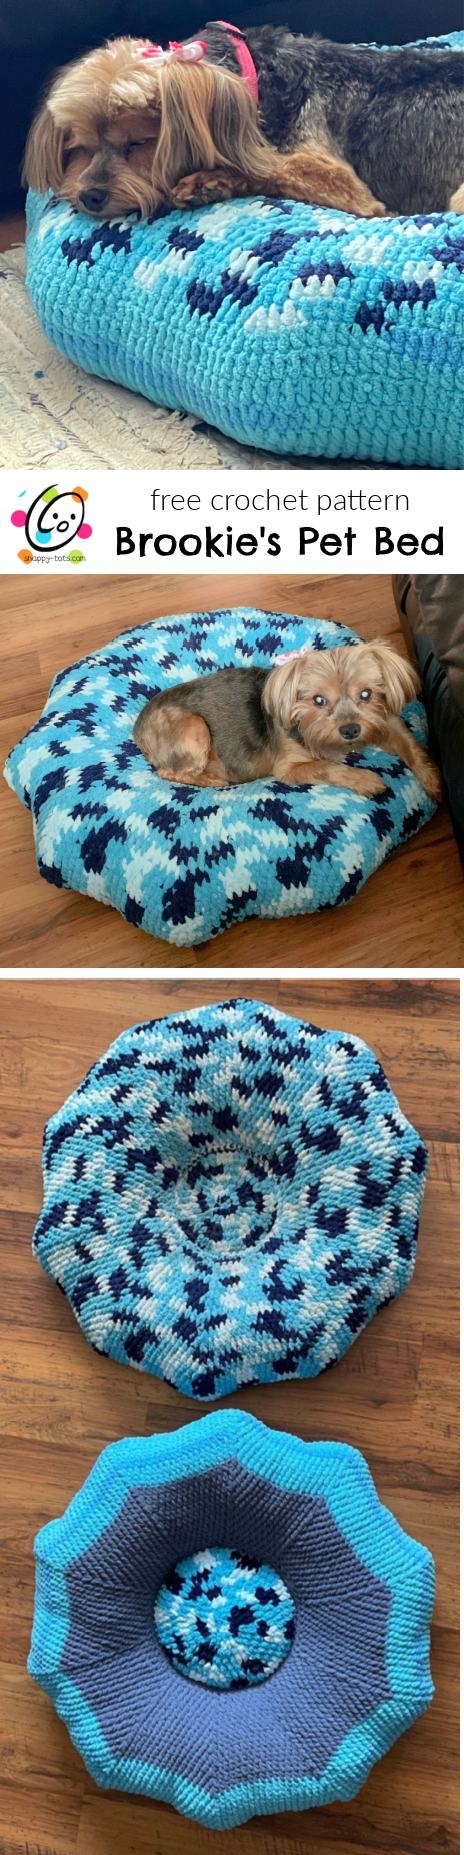
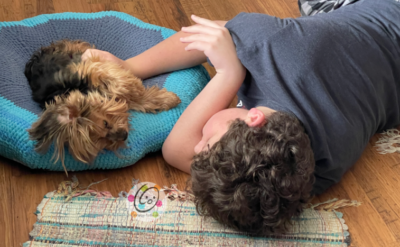
Nine years ago I got a new assistant and she means the world to me. This furry little human, “Brooklyn the New Yorkie” (my husband thinks he is super clever for coming up with that name) has been by my side or on my lap while almost every snappy design has been created.
After creating a tree skirt, I decided to make one into a large cushion. Brookie quickly claimed it as her own.
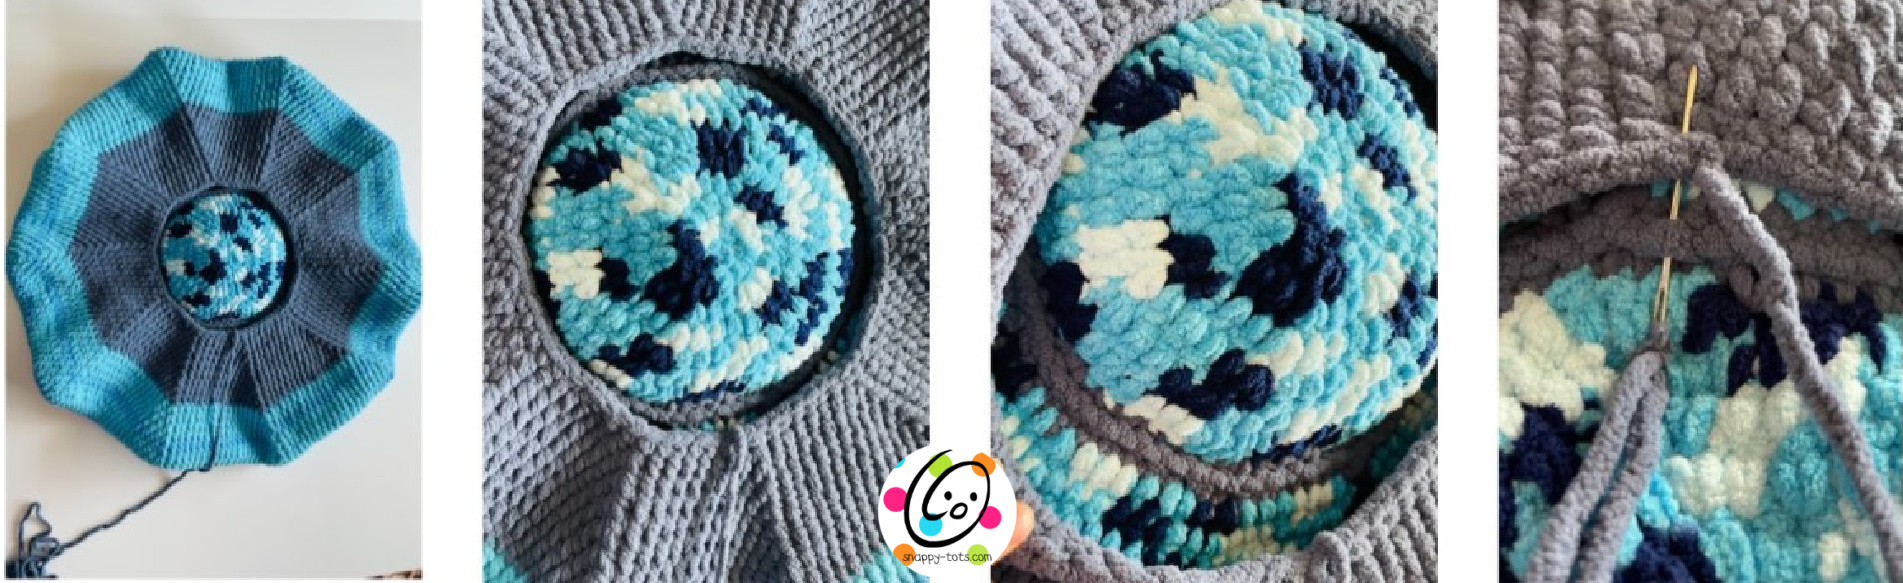
Brookie’s Tuffet Is Born
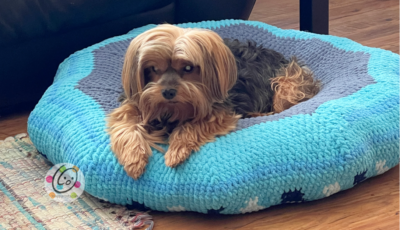
This gave me the idea to create a special bed for her that would be more durable and with a center for her to curl up in. I used Red Heart Sweet Home yarn (similar to Bernat Blanket yarn) and I LOVE IT!!! This yarn is durable, fluffy and stays much cleaner than my experience with blanket yarn. The bed has been a HUGE hit! She sleeps on it every day.
We found that we were always carrying this bed up and down the stairs for her to be where we were at the time. It was time for a second bed. This time I made the center a little bigger to give her room to curl up in. I think these would be great for cats too.
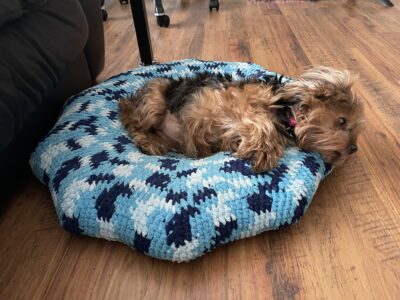
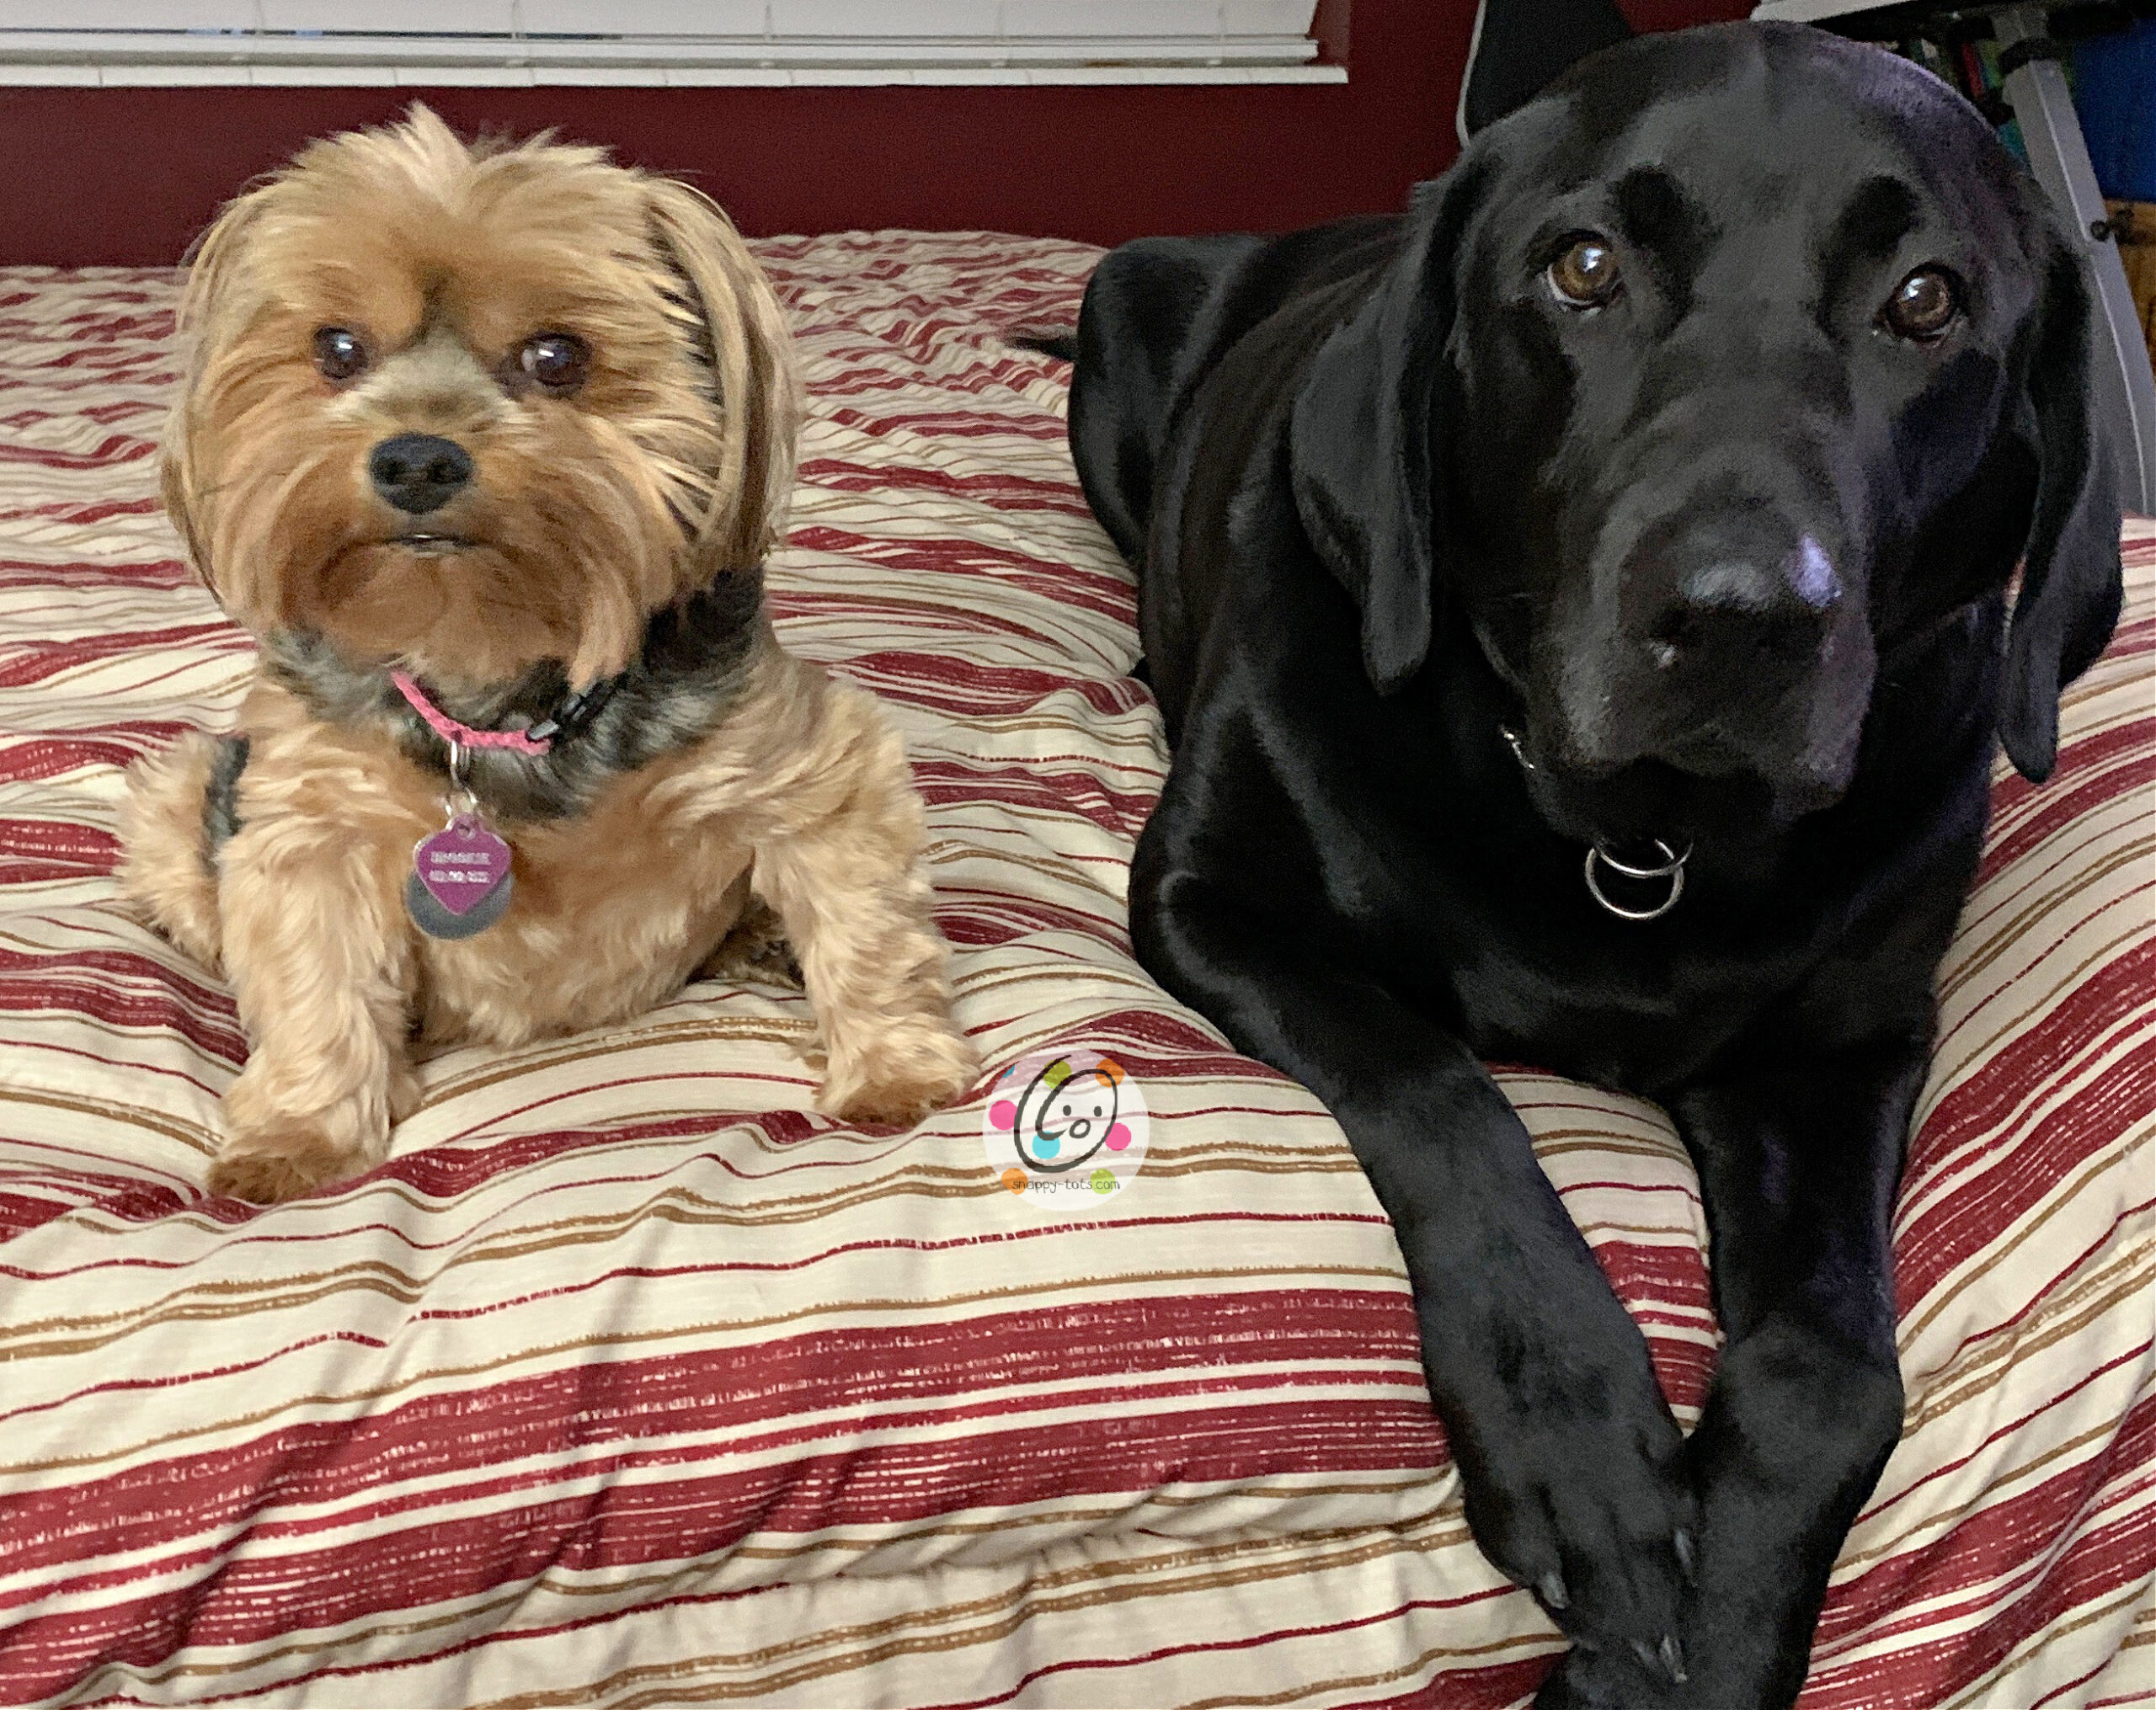
Wondering if this will fit your pet? Brookie is a 9 year old, 7lb Yorkie. Our 4 year old, 110 lb lab does NOT fit on this bed.
Brookie’s Pet Bed Crochet Pattern
Description
This project starts by creating the two center circles. Those will be stacked and crocheted together. From that point on, the piece is worked in continuous round to increase in size, then decrease back to the size of the center circle. The bed will be stuffed while sewing the final edge to the beginning circles.
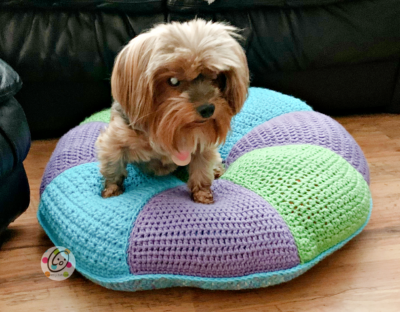
After creating the first bed for my dog I decided to make one a little larger so medium sized dogs could have a cozy place too. My Brookie loves them both. Now her sister, a 110 lb black lab named Oila (Oy-lah), thinks she needs one too.
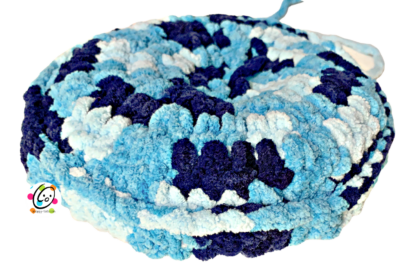
The bed at the top of the photo above has been used daily for three months. It has held up extremely well and other than some dirt it looks exactly like it did the first day.
Materials
- Yarn: 600-660 yards super bulky weight yarn
- Yarn used in samples: Red Heart Sweet Home (variegated yarn) and Bernat Blanket
- I used both RH Sweet Home and Bernat Blanket yarns in the bottom bed. The yarns were of equal thickness. If mixing yarns, make sure to choose equal yarns.
- Other yarns could be used, either super bulky weight or a combination of thinner yarns equal to super bulky weight. For example, if using worsted weight yarn I would suggest trying four strands held together.
- Crochet Hook: K (6.5mm)
- Notions: Yarn needle for weaving in ends, 40 oz stuffing
Measurements
- Finished Measurements
The “large” size is only a little bigger. The biggest difference is it has a bigger center circle. It also has a couple more increase rounds and is slightly thicker/taller.
Measurements were taken after the bed was stuffed.
“Total diameter” was measured from increase point across to increase point.- Regular: center circle – 6.75” across, total diameter – 24”, height – 3”
- Large: center circle – 9” across, total diameter – 25”, height – 4”
- Gauge: 4” with a K hook and worked between the posts of the previous round = 10 hdc sts and 6.25 rounds
Tips
- Numbers at the beginning of each line may refer to steps and not indicate number of rows.
- Stitch count remains the same unless noted at end of row/round.
- If you have any questions about this pattern please contact [email protected].
Regular Size
Measurements:
Center Circle (make 2)
1. With a K hook and yarn color of choice, start with a magic circle of 8 sc sts (or preferred method for creating a circle of 8 sc sts), pull closed and place a marker for working in the round. (8sts)
2. 2sc in each st to end of round. (16sts)
3. *hdc in the next st, 2hdc in the next st*, repeat to the end of the round. (24sts)
4. For steps 4-6, work each st between the posts of the previous round. This is done by inserting the hook right between the posts instead of IN the stitch. When working with blanket yarn this is actually easier to see the placement. This creates a fabric that is more dense and will help keep the stuffing inside.
*hdc 2, 2hdc in the next st*, repeat to the end of the round. (32sts) 4” across
5. *hdc 3, 2hdc in the next st*, repeat to the end of the round. (40sts) “5.25” across
6. *hdc 4, 2hdc in the next st*, repeat to the end of the round. (48sts) “6.25” across
7. First circle: Sc in the next st, sl st in the next st. Finish off and weave in the end of the first circle.
Second circle: Repeat steps 1-6.
- After step 6, sc in the next st, sl st in the next st. Do NOT finish off.
- Place the first circle under the current circle.
- At this point, on my first bed, I did not add stuffing between these circles. However, on my second one I did add just a bit. It is optional and up to you. The reason I added the stuffing was because the center seemed really flat. If your dog is really small I would suggest adding a little stuffing just to cushion it.
8. This step is worked into the sts of both circles. Try to match up the increase points of each circle.
Ch 1, sc in the same st, sc 4, 2sc in the next st, *sc 5, 2sc in the next st*, repeat to the end of the round, sl st in the first st to join. (56sts)
9. Ch 1, *FPHDC around each of the next 6 posts from the previous round, 2FPHDC around the next post*, repeat to the end of the round, sl st to join. (64sts)
Note: yes, I know there isn’t much of a post on the previous sc round. Just take your time.
10. Change colors if desired. From this point on we will be working in the round. Place a marker for working in the round. Sc in the next st, hdc 6, 2hdc in the next st, *hdc 7, 2hdc in the next st*, repeat to the end of the round, working the last hdc a little more snug than the other sts. This will help decrease the gap between sts as we continue in the round. (72sts)
11. From this point on, work each st between the posts of the previous round. The instructions may mention “st”, but should be worked between the posts.
*hdc 8, 2hdc in the next st*, repeat to the end of the round. (80sts)
12. Note: Pay attention to the amount of sts worked in the repeat. This changes to increase each round by 10 instead of 8.
*hdc 7, 2hdc in the next st*, repeat to the end of the round. (90sts)
13. *hdc 8, 2hdc in the next st*, repeat to the end of the round. (100sts)
14. *hdc 9, 2hdc in the next st*, repeat to the end of the round. (110sts)
15. *hdc 10, 2hdc in the next st*, repeat to the end of the round. (120sts)
16. *hdc 11, 2hdc in the next st*, repeat to the end of the round. (130sts)
17. *hdc 12, 2hdc in the next st*, repeat to the end of the round. (140sts)
18. *hdc 13, 2hdc in the next st*, repeat to the end of the round. (150sts)
19. *hdc 14, 2hdc in the next st*, repeat to the end of the round. (160sts)
20. *hdc 15, 2hdc in the next st*, repeat to the end of the round. (170sts)
21. *hdc 16, 2hdc in the next st*, repeat to the end of the round. (180sts)
22. *hdc 17, 2hdc in the next st*, repeat to the end of the round. (190sts)
23. *hdc 18, 2hdc in the next st*, repeat to the end of the round. (200sts)
24. *hdc 19, 2hdc in the next st*, repeat to the end of the round. (210sts)
25. Hdc in each st to end of round.
26. *hdc 19, hdc2tog*, repeat to the end of the round. (200sts)
27. *hdc 18, hdc2tog*, repeat to the end of the round. (190sts)
28. *hdc 17, hdc2tog*, repeat to the end of the round. (180sts)
29. *hdc 16, hdc2tog*, repeat to the end of the round. (170sts)
30. *hdc 15, hdc2tog*, repeat to the end of the round. (160sts)
31. *hdc 14, hdc2tog*, repeat to the end of the round. (150sts)
32. *hdc 13, hdc2tog*, repeat to the end of the round. (140sts)
33. *hdc 12, hdc2tog*, repeat to the end of the round. (130sts)
34. *hdc 11, hdc2tog*, repeat to the end of the round. (120sts)
35. *hdc 10, hdc2tog*, repeat to the end of the round. (110sts)
36. *hdc 9, hdc2tog*, repeat to the end of the round. (100sts)
37. *hdc 8, hdc2tog*, repeat to the end of the round. (90sts)
38. *hdc 7, hdc2tog*, repeat to the end of the round. (80sts)
39. *hdc 6, hdc2tog*, repeat to the end of the round. (70sts)
40. *hdc 5, hdc2tog*, repeat to the end of the round. (60sts)
41. *sc 13, sc2tog*, repeat to the end of the round. (56sts) Finish off, leaving at least 24” yarn tail for seaming at the end.
Stuffing and Final Seam
Line up the end round with the outer edge of the center circle. The sts of the end round will be sewn to the ridge that was created from the FPHDC round after the center circles were sewn together. If your end round does not end up on the same side as this ridge, turn your bed inside out.
In an attempt to sew the sts together at similar points, I tried to line up the increases of the ridge round with the descreases of the final round.
With a yarn needle, use the yarn tail to sew the sts of the two rounds together, stuffing as you go.
- I made sure to stuff the increase “points” to make the rippled edge more pronounced.
- I suggest sewing ⅓ of the rounds together and then stuffing this section. If you sew too big of a section it is hard to get the stuffing where it needs to be.
- I stuffed the bed firm, but was careful I didn’t overstuff it. You want the dog to be able to comfortably lay in the middle and have a nice slope to the outer edge.
Larger Size
Measurements:
Center Circle (make 2)
1. With a K hook and yarn color of choice, start with a magic circle of 8 sc sts (or preferred method for creating a circle of 8 sc sts), pull closed and place a marker for working in the round. (8sts)
2. 2sc in each st to end of round. (16sts)
3. *hdc in the next st, 2hdc in the next st*, repeat to the end of the round. (24sts)
4. For steps 4-8, work each st between the posts of the previous round. This is done by inserting the hook right between the posts instead of IN the stitch. When working with blanket yarn this is actually easier to see the placement. This creates a fabric that is more dense and will help keep the stuffing inside.
*hdc 2, 2hdc in the next st*, repeat to the end of the round. (32sts) 4” across
5. *hdc 3, 2hdc in the next st*, repeat to the end of the round. (40sts) “5.25” across
6. *hdc 4, 2hdc in the next st*, repeat to the end of the round. (48sts) “6.25” across
7. *hdc 5, 2hdc in the next st*, repeat to the end of the round. (56sts) “7.25” across
8. *hdc 6, 2hdc in the next st*, repeat to the end of the round. (64sts) “8.5” across
9. First circle: Sc in the next st, sl st in the next st. Finish off and weave in the end of the first circle.
Second circle: Repeat steps 1-8.
- After step 8, sc in the next st, sl st in the next st. Do NOT finish off.
- Place the first circle under the current circle.
- At this point, on my first bed, I did not add stuffing between these circles. However, on my second one I did add just a bit. It is optional and up to you. The reason I added the stuffing was because the center seemed really flat. If your dog is really small I would suggest adding a little stuffing just to cushion it.
10. This step is worked into the sts of both circles. Try to match up the increase points of each circle.
Ch 1, sc in the same st, sc 6, 2sc in the next st, *sc 7, 2sc in the next st*, repeat to the end of the round, sl st in the first st to join. (72sts)

11. Ch 1, *FPHDC around each of the next 8 posts from the previous round, 2FPHDC around the next post*, repeat to the end of the round, sl st to join. (80sts)
Note: yes, I know there isn’t much of a post on the previous sc round. Just take your time.
12. Change colors if desired. From this point on we will be working in the round. Place a marker for working in the round. Sc in the next st, hdc 6, 2hdc in the next st, *hdc 7, 2hdc in the next st*, repeat to the end of the round, working the last hdc a little more snug than the other sts. This will help decrease the gap between sts as we continue in the round. (90sts)
13. From this point on, work each st between the posts of the previous round. The instructions may mention “st”, but should be worked between the posts.
*hdc 8, 2hdc in the next st*, repeat to the end of the round. (100sts)
14. *hdc 9, 2hdc in the next st*, repeat to the end of the round. (110sts)
15. *hdc 10, 2hdc in the next st*, repeat to the end of the round. (120sts)
16. *hdc 11, 2hdc in the next st*, repeat to the end of the round. (130sts)
17. *hdc 12, 2hdc in the next st*, repeat to the end of the round. (140sts)
18. *hdc 13, 2hdc in the next st*, repeat to the end of the round. (150sts)
19. *hdc 14, 2hdc in the next st*, repeat to the end of the round. (160sts)
20. *hdc 15, 2hdc in the next st*, repeat to the end of the round. (170sts)
21. *hdc 16, 2hdc in the next st*, repeat to the end of the round. (180sts)
22. *hdc 17, 2hdc in the next st*, repeat to the end of the round. (190sts)
23. *hdc 18, 2hdc in the next st*, repeat to the end of the round. (200sts)
24. *hdc 19, 2hdc in the next st*, repeat to the end of the round. (210sts)
25. *hdc 20, 2hdc in the next st*, repeat to the end of the round. (220sts)
26. *hdc 21, 2hdc in the next st*, repeat to the end of the round. (230sts)
27-28. Hdc in each st to end of round.
29. *hdc 21, hdc2tog*, repeat to the end of the round. (220sts)
30. *hdc 20, hdc2tog*, repeat to the end of the round. (210sts)
31. *hdc 19, hdc2tog*, repeat to the end of the round. (200sts)
32. *hdc 18, hdc2tog*, repeat to the end of the round. (190sts)
33. *hdc 17, hdc2tog*, repeat to the end of the round. (180sts)
34. *hdc 16, hdc2tog*, repeat to the end of the round. (170sts)
35. *hdc 15, hdc2tog*, repeat to the end of the round. (160sts)
36. *hdc 14, hdc2tog*, repeat to the end of the round. (150sts)
37. *hdc 13, hdc2tog*, repeat to the end of the round. (140sts)
38. *hdc 12, hdc2tog*, repeat to the end of the round. (130sts)
39. *hdc 11, hdc2tog*, repeat to the end of the round. (120sts)
40. *hdc 10, hdc2tog*, repeat to the end of the round. (110sts)
41. *hdc 9, hdc2tog*, repeat to the end of the round. (100sts)
42. *hdc 8, hdc2tog*, repeat to the end of the round. (90sts)
43. *hdc 7, hdc2tog*, repeat to the end of the round. (80sts)
44. *sc 8, sc2tog*, repeat to the end of the round. (72sts) Finish off, leaving at least 24” yarn tail for seaming at the end.
Stuffing and final seam: follow the instructions from the “regular size”.
Pin To Save For Later