

I have been FREEZING! It reminds me of years of coaching soccer and standing on the sidelines during late fall and early spring. We were always cold and looking for ways to keep warm, while showing our team spirit. I wish I had one of these then. I am sure it will come in handy!
My husband buys hand warmers by the case (from years of being a patrol officer) so luckily we always have them on hand. I wanted a way to keep them by my neck without being tucked in my shirt.
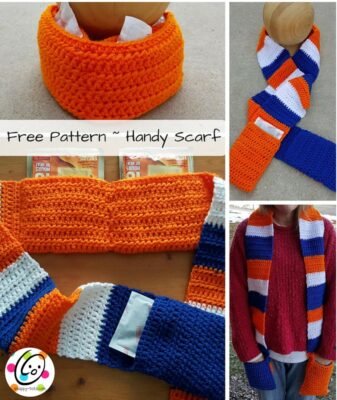
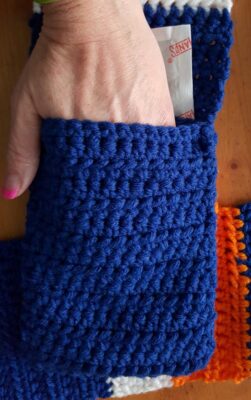
This scarf holds two hand warmers pack at the neck and one in each scarf end in an inner pocket. The pocket is perfect for cell phones too. It keeps things close, but not where your hands are.
This makes a great neck warmer for around the house too.
Handy Scarf
An ad-free, downloadable PDF of this pattern with all of the photos is available to purchase for a small fee from my shop.
Project Info
- Project Description: Instructions are included for making a scarf with pockets for your hands and at your neck to hold heat packs. Also, for a neck wrap in case you want to keep warm, but don’t wish to have a scarf.
- Skill Level: Easy. Basic crochet skills are needed and must be able to read a crochet pattern.
- Completion Time (how long it takes the designer to make one): 1.5 hours. Of course, this time will vary, but hopefully gives an idea. I always like to know approximately how long to plan for a project.
Materials and Details
- Yarn: worsted weight in choice of colors.
Sample used for measurements in this pattern were made from Red Heart Super Saver yarn. Using different yarns may affect finished size. Please check measurements and adjust as needed. - Crochet Hook: I
- Miscellaneous: Yarn needle for weaving in ends, hand warmer packs (4)
- Size: One Size – 76” long x 5” wide (length can be adjusted)
- Skill level: Easy with basic crochet skills and able to read a pattern.
Directions
The pattern begins at the neck pocket section and is written for colors in main sample. Substitute colors as desired.
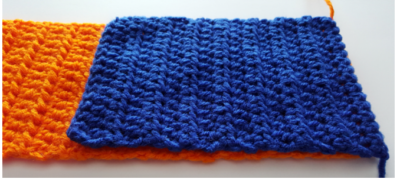
1. With I hook and orange yarn (or color of choice), ch 37, hdc in 2nd ch from hook and in each ch across. (36sts)
2-20. Ch 2, turn, hdc in same st, chunky hdc (see “special stitches” on page 1) in each st until 1 st remains, hdc in last st.
21. Ch 2, turn, hdc in same st and in each st to end of row.
22. Ch 1, do not turn. Fold piece in half, matching short ends together. Working through both layers, sc 15 sts evenly across. This creates the first long scarf tail.
23. Ch 1, turn, hdc in same st and in each st to end of row. (15sts)
24. Ch 2, turn, hdc in same st, chunky hdc 13, hdc in last st. (15sts)
Repeat step 24 until scarf is approximately 32” from beginning of scarf tail (step 22). Change colors as desired. The sample has sections with 4-9 rows for random stripes.
At this point, decide if you want hand pockets or not and continue with one of the options below.
Option A: Pockets (as shown in sample)
Place a marker at the current row. This is where the scarf will fold to create the pocket. Continue to repeat step 24 for 13 rows. Ch 1, turn, sc in each st to end of row. Finish off, leaving a long tail for sewing side seams. We will finish the pockets later so do not sew the seams just yet. Skip to “2nd scarf tail” section below.
Option B: No pockets
Finish off yarn and weave in ends. Continue with pattern.
2nd Scarf Tail
Let’s go back to the neck section and add to the opposite edge, creating the 2nd scarf tail. Attach matching yarn to one corner of the unworked neckpiece. Repeat step #22 (above) and continue until the scarf is finished same as the first tail.
Finishing Touches
Pockets
If you chose to finish your scarf tails with Option A (pockets) we are going to sew those together. I added an extra pocket for the hand warmer. This helps keep the warmer hot and out of the way. This step is optional and can be left out if desired.
1. With I hook and yarn color of choice, ch 16, sc in 2nd ch from hook and in each ch to end of row. (15sts)
2-14. Ch 2, turn, hdc in same st and in each st to end of row.
15. Ch 1, turn, sc in same st and in each st to end of row. Finish off, leaving a long tail for sewing the inner pocket in place.
Note: if the inner pocket piece (just completed) is a different color than the end of the scarf tail, use yarn to match the SCARF TAIL to sew the pieces together. This will help hide the stitches.
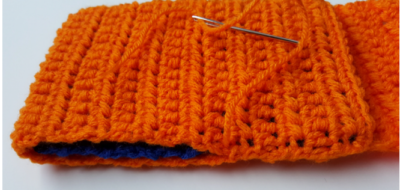
Place the inner pocket piece on top of the scarf tail as shown in the photo below.
This next step is optional. Either attach the inner pocket now or just sew all layers together on the next step. With yarn needle and yarn tail, sew sides and bottom edge to scarf piece, leaving the bottom edge open.
Fold the end of the scarf back onto itself as shown in the photo below.
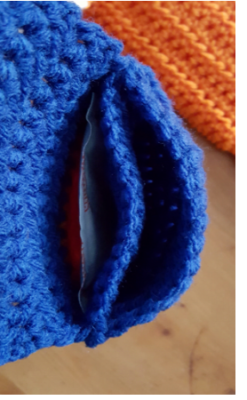
With yarn needle and yarn tail, sew side seams together. One scarf tail is now complete.
For the 2nd scarf tail repeat the same steps BUT make sure you double-check which side of the scarf tail you will attach the inner pocket to before sewing any seams. I would suggest putting the scarf around your neck to see which way you want the pockets to hang (both towards the middle or both out).
Fringe (optional)
Add to the bottom of the pocket version or plain scarf if desired. Cut several strands of yarn, 8” long. Fold 2 strands in half at a time and pull the center loops through a st at the bottom edge of the scarf. Pull the cut ends through the loops and pull snug against scarf. Repeat across both scarf ends.
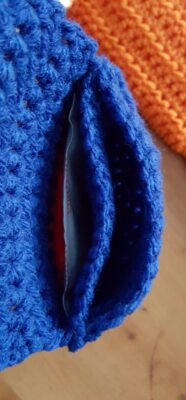
Neck Pockets
I divided the neck section into 2 pockets. Fold the neck section in half to find the middle. With matching yarn and a yarn needle, sew through both layers to create 2 sections.
Slip hand warmers in the neck section and inner pockets at each scarf end.
Variation
This could be made as a neck buddy instead of a scarf. These are great to use while watching tv, laying in bed of tucked in the back of your coat to keep warm and sooth pain. Cool packs work great in these too!
Start scarf directions and work through step #24. Continue as follows:
- Ch 2, turn, hdc in each st to end of row. (15sts)
- Ch 2, turn, hdc2tog, hdc 11, hdc2tog. (13sts)
- Ch 2, turn, hdc in each st to end of row. (11sts)
- Ch 2, turn, hdc2tog, hdc 9, hdc2tog. (9sts)
- Ch 2, turn, hdc in each st to end of row.
Repeat step 29 until scarf is approximately 12” from beginning of scarf tail (step 22) or longer if desired.

Pin To Save For Later